
When the project is created and selected, proceed with the creation of an OAuth application as follows:
⚐ Note: When creating an application, it is not possible to configure two applications using the same URL.
How to create an app on Google
1. In the Google Cloud Console section APIs and services Select the option OAuth Consent Screen and the type of user
- Select Internal if you’re using a GSuite admin tenant and you’re creating the app exclusively for your organization.
- Select External if you’re trying a separate Gmail account.
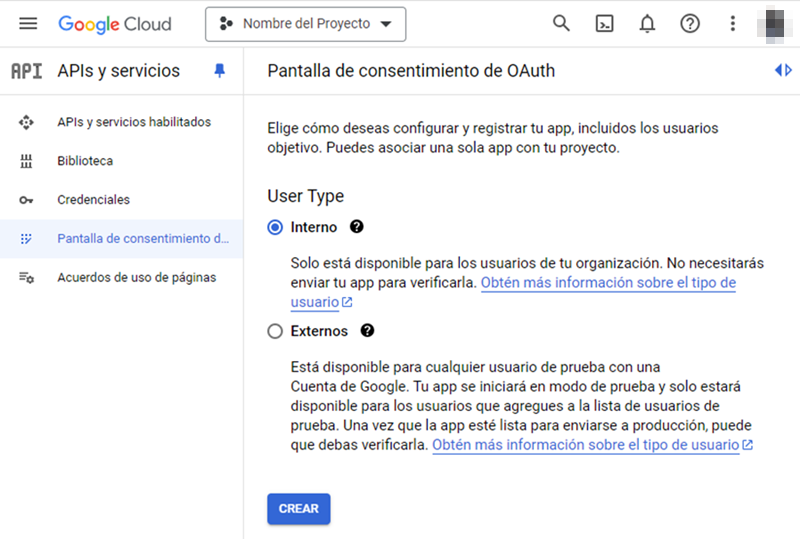
2. Click the CREATE.
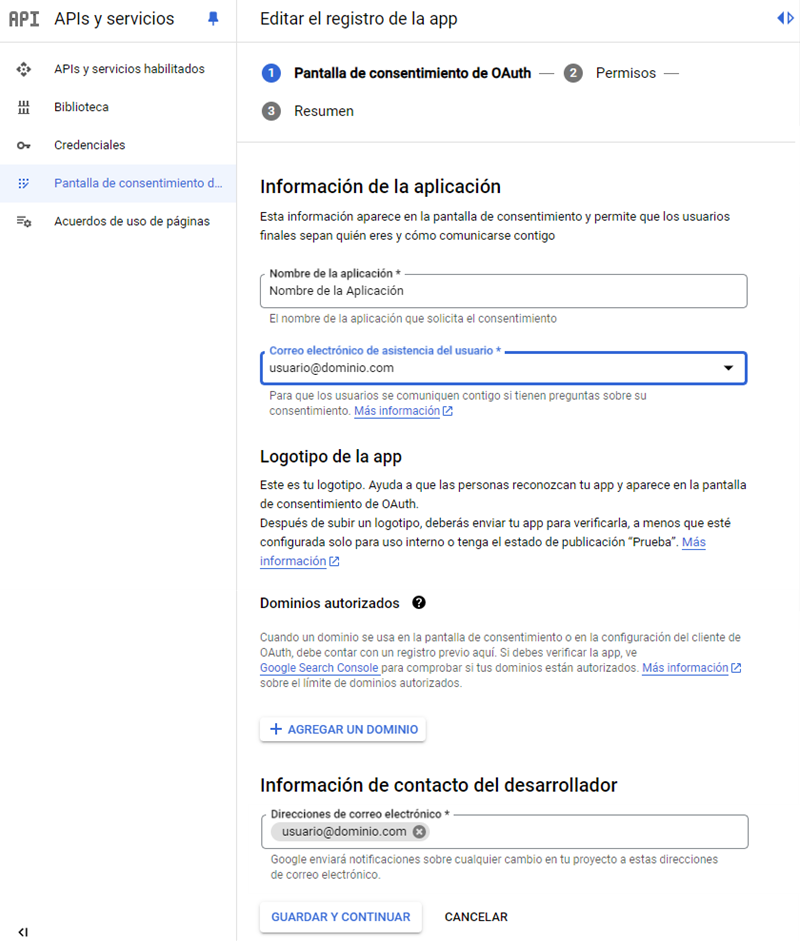
3. In the window OAuth Consent Screen Enter the fields App Name, User Support Email in the Application Information and Email addresses in the Developer Contact Information according to the recommendations of each field (the other fields are optional). Then, click the SAVE & CONTINUE.
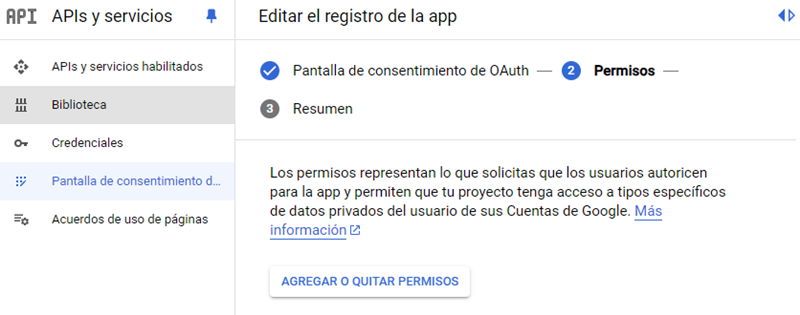
4. In the window Permissions Click the ADD OR REMOVE PERMISSIONS.
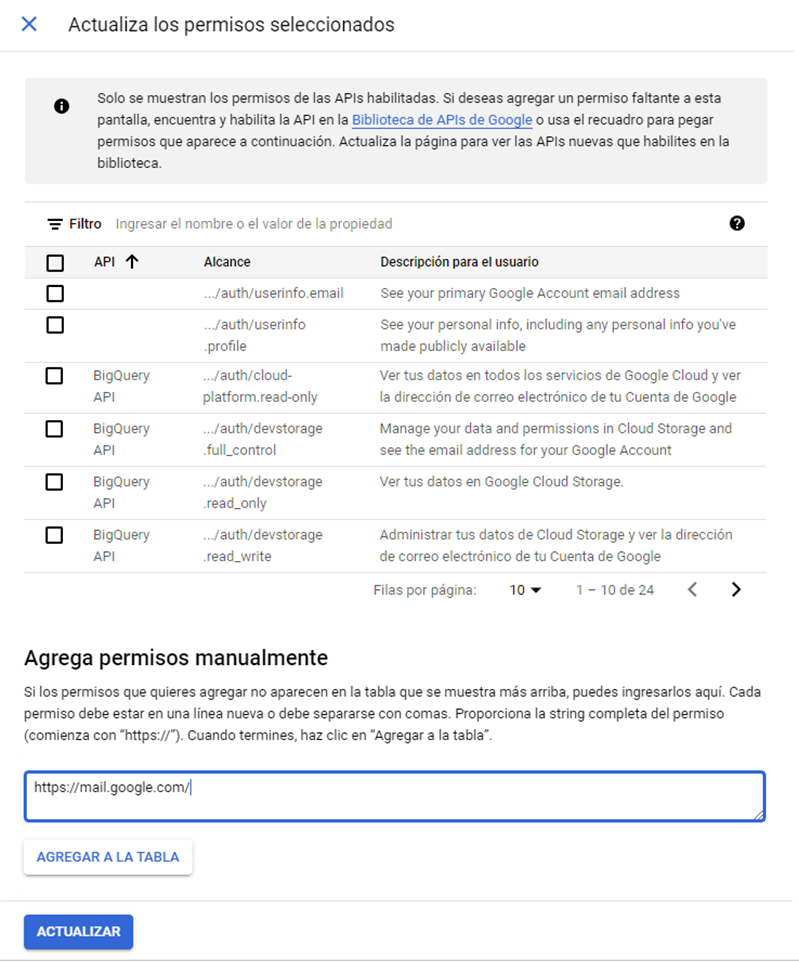
5. In the window Update selected permissions in the Add permissions manually Enter the value https://mail.google.com/ and click the ADD TO TABLE. Then in UPDATE.
6. In the window Permissions Verify that the permission has been added in the Your restricted permissions and click the SAVE & CONTINUE to advance to the window Summary where you can view the data from the new application.
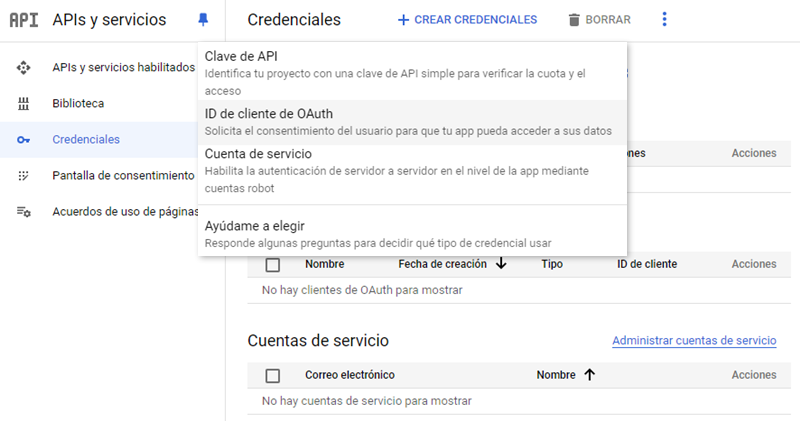
7. Select the option Credentials, click the CREATE CREDENTIALS and select the OAuth Client ID.
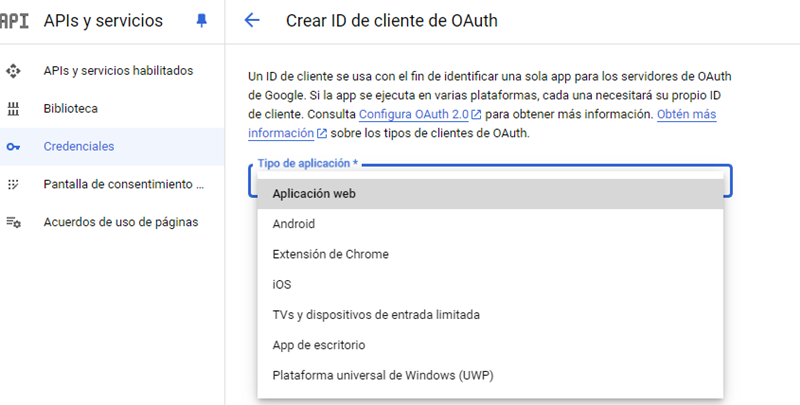
8. In the window Create OAuth Client ID In the field Application Type, select the Web application.
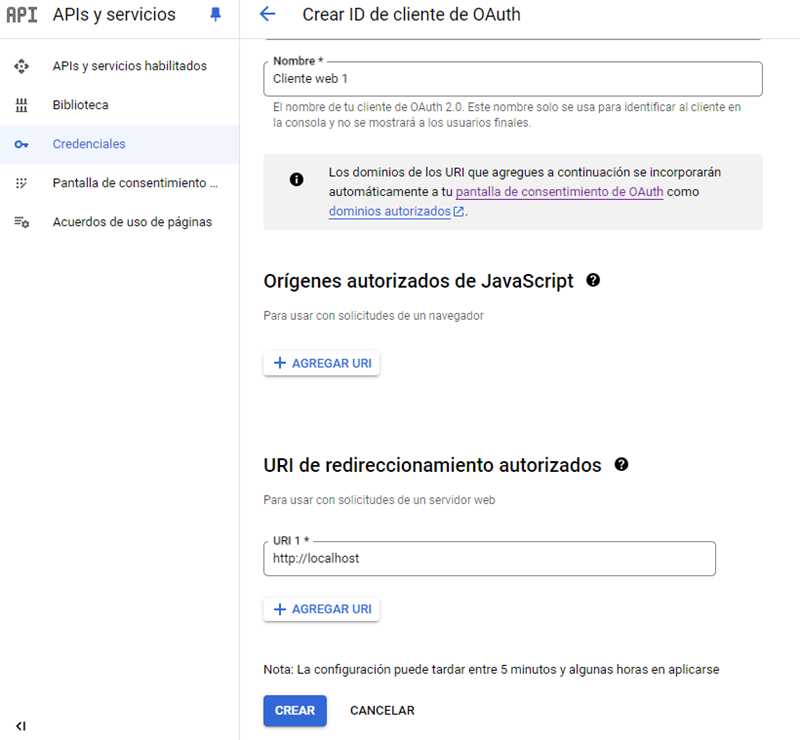
9. In the window Create OAuth Client ID in the Authorized redirect URIs add the URI http://localhost and click the CREATE.
10. In the window The OAuth client was created save the following data that is required for configuration in Aranda applications and in the generation of the Refresh Token.
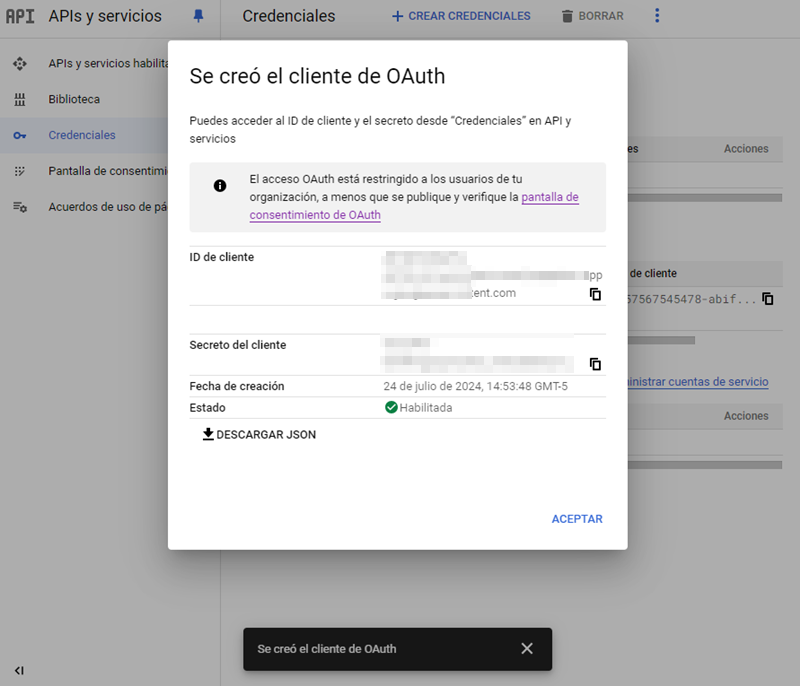
- Application ID (Client) -> Client ID.
- Client Secret Value -> Client Secret.
- OAuth 2.0 (v2) token endpoint ->
https://oauth2.googleapis.com/token.