
To make the integration between AFLS and ASMS bilateral, configure the integration from AFLS at the project level. The setup process will be explained below.
1. Log in to the AFLS console as an Administrator user. In the heading menu select the Configuration and Administrator.
2. In the Integration from the main menu, select the Service Desk and in the Detail View you can configure the following parameters taking into account the integration scheme:
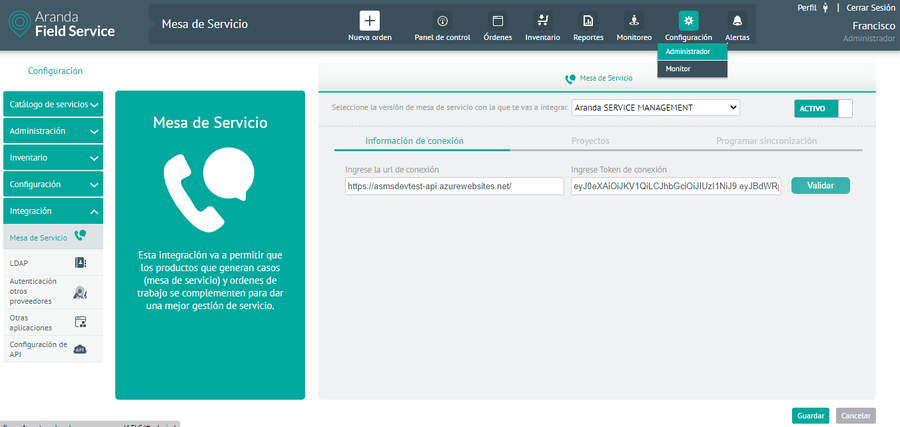
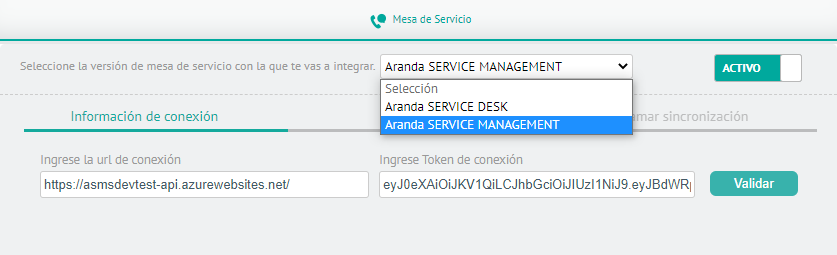
3. In the Service Desk Detail view, select the service desk version Aranda SERVICE MANAGEMENT. and click the Active To enable the integration configuration fields:
4. On the Connection Information, enter the respective information:
| Field | Description |
|---|---|
| Connection URL | Aranda Service Management API URL. For example: https://url-de-asms/API/. |
| Connection Token | JWT token generated by Aranda Service Management in the option Integration tokens . |
5. To confirm that the integration is working, click the Validate. This button tests if the connection to the ASMS API is successful, if so, a message will be displayed informing you that the connection is successful.
⚐ Note: If the data is new or updated, save the settings to enable the project and schedule sync tabs.
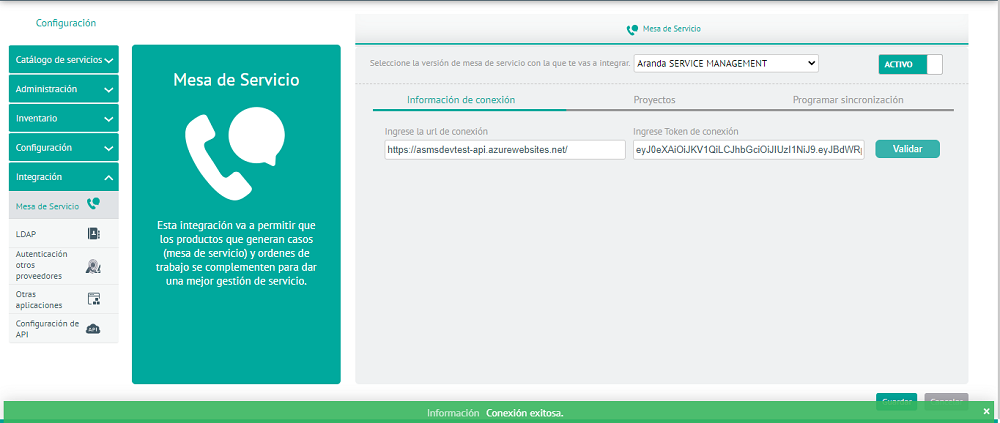
6. Click the Save to confirm the changes made.
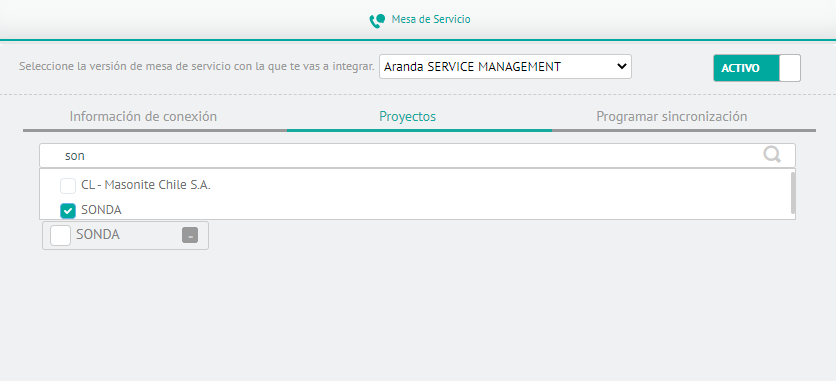
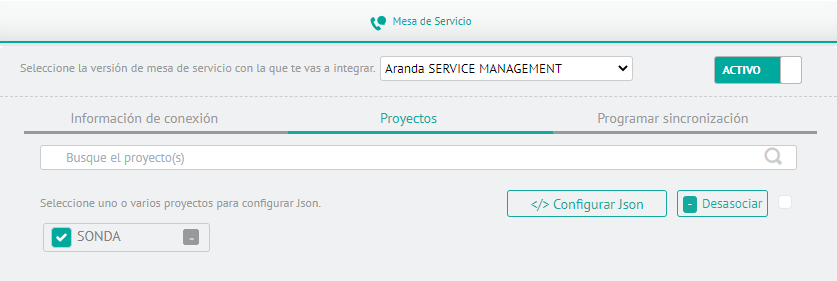
7. In the Service Desk Integration Detail View in the AFLS Configuration Console, select the Projects to carry out the parameterization of the project to be integrated.
In the query field, you can search for the required project and select it from the list.
8. Select the added project and click the Configure JSON.
9. In the text editor that is enabled, add the parameterization of the models, statuses to be homologated and the additional fields per project that will be required. The JSON configuration format is detailed below:
{
//Lista de modelos a parametrizar
  "Models": [
    {
  //Nombre del campo adicional para ingresar resultados al finalizar el flujo de un modelo
      "AdditionalFieldSolution": ""
	//Lista de estado a homologar, se debe ingresar el código de estado de AFLS y su código homólogo en ASMS
      "HomologateStates": [
        {
          "IdAFLSState": 0,
          "IdASMSState": 0
        },
        {
          "IdAFLSState": 0,
          "IdASMSState": 0
        }
      ],
	//ID del modelo en AFLS y de ASMS
      "IdModelAFLS": 0,
      "IdModelASMS": 0,
    }
  ],
// Nombre y código del proyecto, estos datos se cargan automaticamente
  "Project": "CL - Acepta.Com S.A.",
  "ProjectId": 406,
//Campos adicionales por proyecto, se debe ingresar el indentificador de los campos adicionales tanto de AFLS como de ASMS
  "Workordersadditionalfields": [
    {
      "AflsfieldUniqueName": "",
      "AsmsfieldUniqueName": ""
    }
  ]
}
To get the values to be configured in the JSON, consider the following:
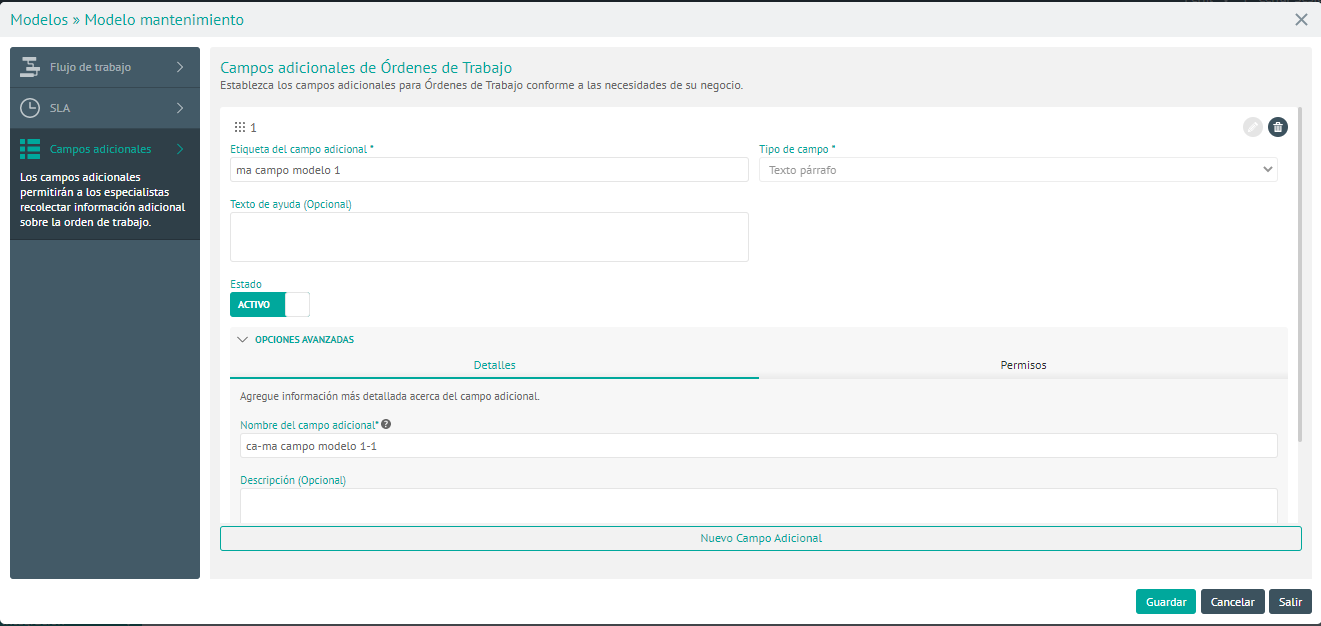
AdditionalFieldSolution
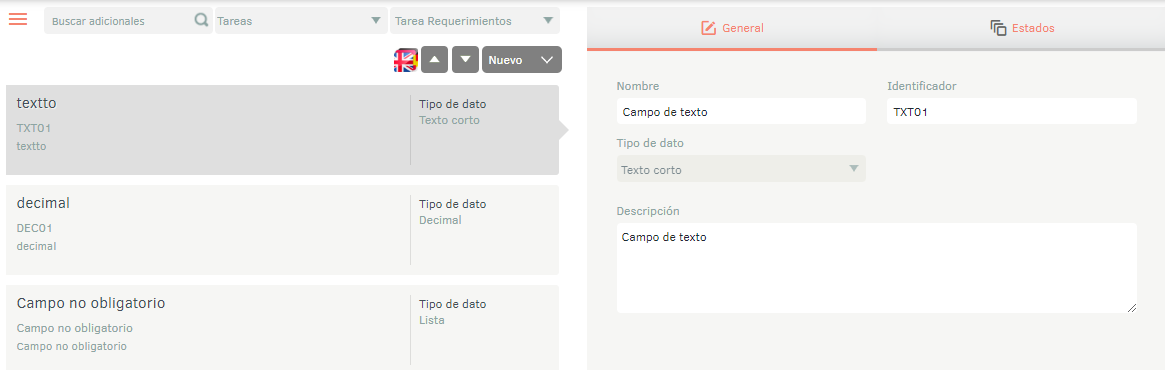
Additional field created in the model. To get the name of the additional field, go to the AFLS Configuration Console in the Service Catalog from the main menu, select the Models. In the information view, select the model to use in the integration; In the Model Detail view, click the Edit Model.
In the Model Editor, select the Additional fields, click the Edit icon and expand the Advanced Options; copy the value of the field Field Name Additional.
For more information, see the model configuration in the AFLS manual Setting up additional fields in a model .
IdModelAFLS
ID of the AFLS model to be used in the integration, the field must be queried in the database wf_id in the table AFLS_WORKFLOWS, taking into account the model name and that the wf_deleted is equal to 0.
⚐ Example: select wf_id, wfcom_id, wf_deleted, wf_name from AFLS_WORKFLOWS where wf_deleted = 0.
IdModelASMS
ID of the ASMS model to be used in the integration, query the database field Id in the table asms_model, taking into account the model name and that the Active is equal to 1.
⚐ Example: select id, name from asms_model where active = 1 and item_type_id = 6.
IdAFLSState
ID of the AFLS states of the model to be used in the integration, as a first step, in the AFLS console select the model and see the states you want to map taking into account the existing flow:
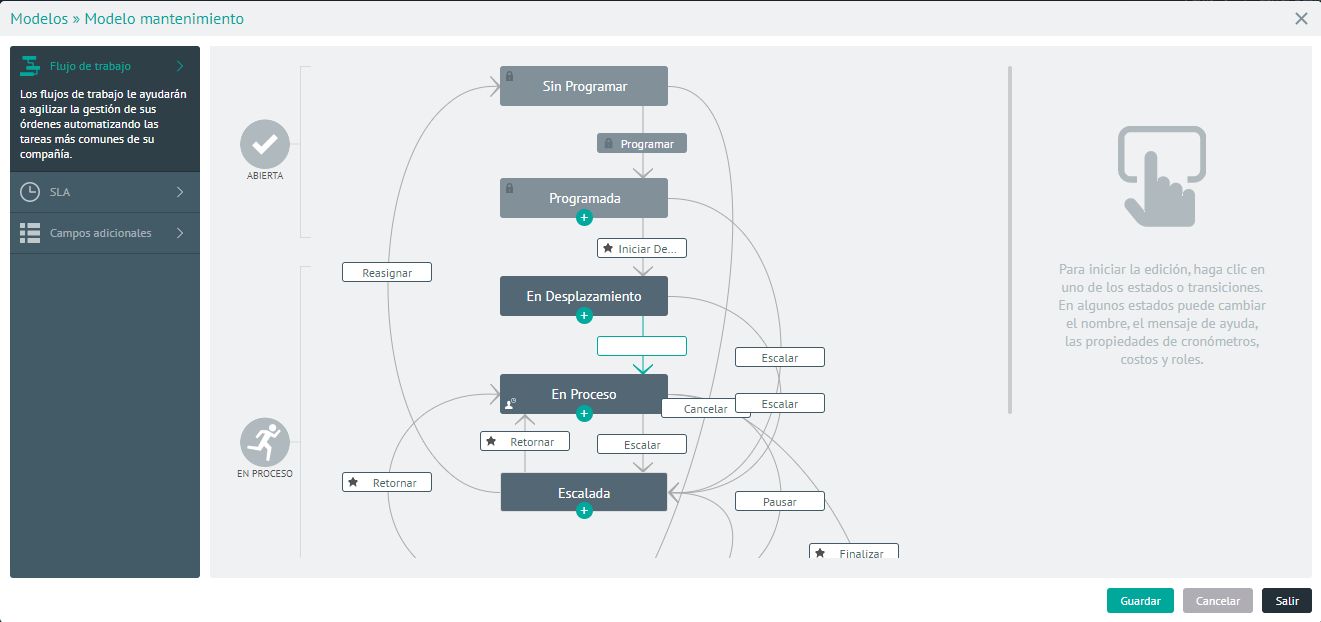
To query the ID of the states you want to map, validate the field in the database st_id in the table AFW_STATEMACHINE_STATES, taking into account the model ID (wfcom_id) in the field de_definition_id.
⚐ Example: select st_id, de_definition_id, st_display_name from AFW_STATEMACHINE_STATES where de_definition_id = 1.
IdASMSState
ID of the ASMS states of the model to be used in the integration; as a first step, enter the ASMS administration console, in the Service Desk from the main menu, select the States. In the information view, define the case type Task and the model chosen for integration; You will be able to visualize the states you want to map taking into account the existing flow:
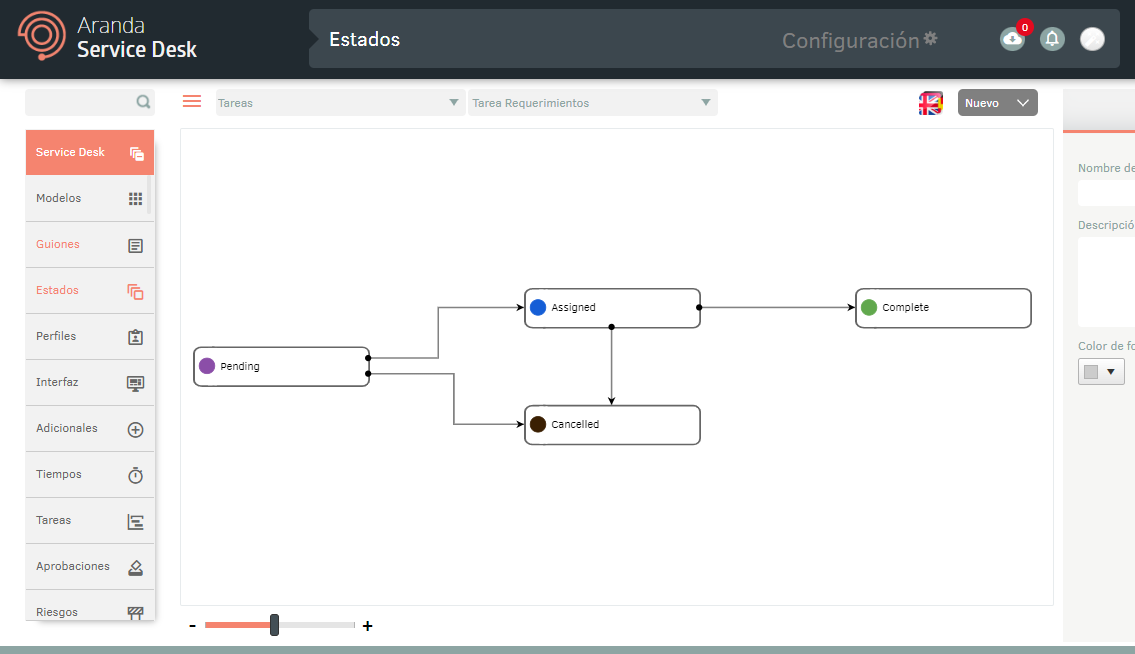
To query the ID of the states you want to map, query the database field stat_id in the table asms_status, taking into account the model ID (Id) in the field stat_model_id.
⚐ Example: select stat_id, stat_name from asms_status where stat_model_id = 20.
AflsfieldUniqueName
To create the additional field, go to the AFLS configuration console, in the Configuration from the main menu, select the Additional Fields And the item AFLS Work Orders. To modify the field, click on the Edit of the selected additional field and expand the Advanced Options option, copy the value of the Field Name Additional.
For more information, see creating additional fields in the AFLS manual Creating Additional Fields .
AsmsfieldUniqueName
To create the additional field, log in to the ASMS Admin Console, in the Service Desk from the main menu, select the Additional. Define as Case Type Task and the model.
In the Additional Fields Information view, select a record, and in the Detail view, select the General and the value of the field Identifier.
For more information, see creating additional fields in the ASMS manual Additional .
⚐ Note: For additional list-type fields, the values must be exactly the same in AFLS and ASMS in order to homologate the value correctly.
Below is an example of a JSON configured with 2 different models and each contains their respective states and additional fields mapped:
{
  "Models": [
    {
      "AdditionalFieldSolution": "ca-mp campo modelo 1-1",
      "HomologateStates": [
        {
          "IdAFLSState": 1,
          "IdASMSState": 168
        },
        {
          "IdAFLSState": 2,
          "IdASMSState": 402
        },
        {
          "IdAFLSState": 7,
          "IdASMSState": 169
        }
      ],
      "IdModelAFLS": 1,
      "IdModelASMS": 22
    },
    {
      "AdditionalFieldSolution": "ca-ma campo modelo 1-1",
      "HomologateStates": [
        {
          "IdAFLSState": 9,
          "IdASMSState": 400
        },
        {
          "IdAFLSState": 12,
          "IdASMSState": 170
        },
        {
          "IdAFLSState": 15,
          "IdASMSState": 172
        },
        {
          "IdAFLSState": 16,
          "IdASMSState": 173
        }
      ],
      "IdModelAFLS": 2,
      "IdModelASMS": 23
    }
  ],
  "Project": "SONDA",
  "ProjectId": 17,
  "Workordersadditionalfields": [
    {
      "AflsfieldUniqueName": "ca-campo orden parrafo-2",
      "AsmsfieldUniqueName": "1"
    }
  ]
}
10. Once the JSON file has been parameterized, click the Validate JSON. This button validates that the models and all parameterized AFLS and ASMS statuses match and exist. If the configuration file validation is successful, save the changes and finish the project parameterization.

11. In the Service Desk Integration Detail View in the AFLS Configuration Console, select the Schedule Sync to synchronize ASMS users to AFLS of the configured project,
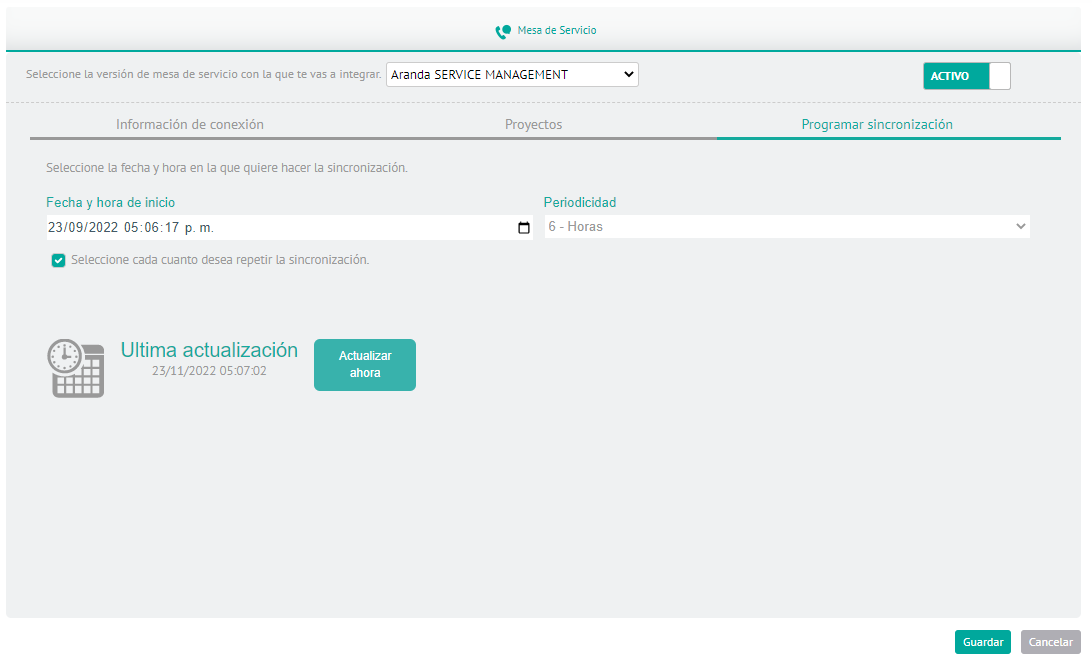
12. In the respective fields, select the Start Date and Time and define a periodicity for synchronization to run according to the configured time.
13. To complete the integration setup, click the save or select the Upgrade Now so that the synchronization is scheduled immediately.