
One model It groups several features common to the services such as: Workflows, Additional Fields, Satisfaction Survey and Service Level Agreements. Once a model is defined in Aranda FIELD SERVICE AFLS it is possible to use it within the services, in this way all the services will share the characteristics.
Creating a new model
1. To Create a Model, go to the AFLS configuration console, in the Service Catalog from the main menu, select the Models. In the information view, select the New and in the Detail View you can define the basic information of the model and associate the satisfaction survey.

2. Once a new model is created, in the detail list it is possible to modify its characteristics by selecting the option Edit Model.
3. In the model editor, the menu will have the options for workflow, SLAs, SLAs, and additional fields enabled.
To facilitate its use, Aranda FIELD SERVICE enables several elements used within the model so that they are not created from scratch.
Setting up a workflow for your organization
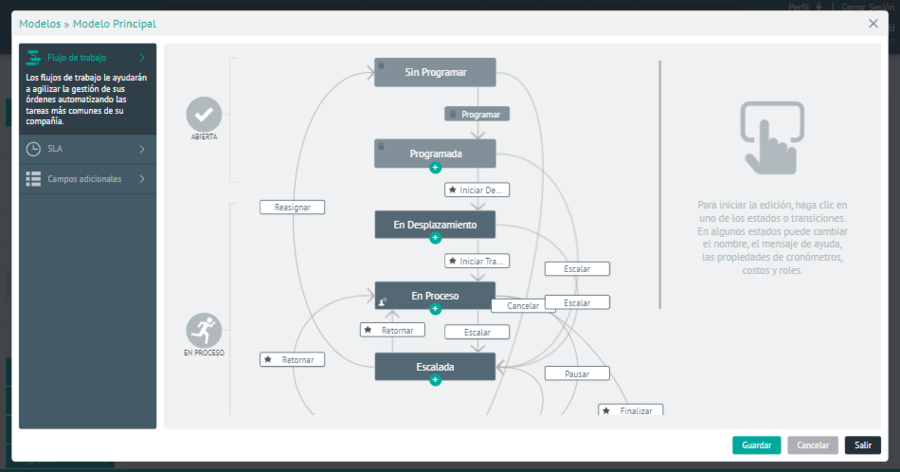
Each organization executes its services differently. Configuring workflows will allow you to tailor the tool to meet your particular procedures. The workflow determines the lifecycle of work orders. Each activity in the workflow will be a step that the field specialist must take to complete a job.
A workflow is made up of states, sub-states, activities, transitions that define the procedure.
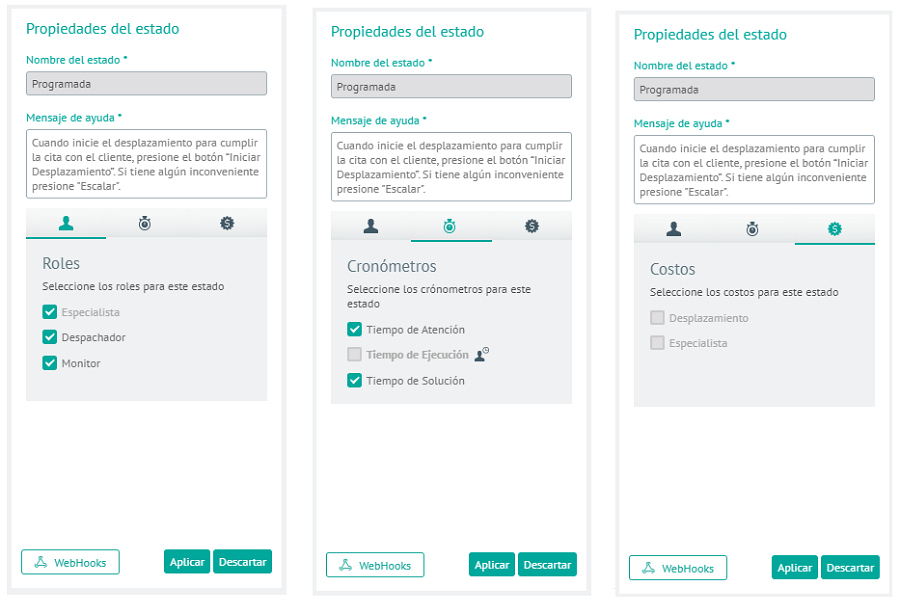
4. To create a new state, from the model editor menu, select the Workflow, the automatically generated flowchart is enabled with elements that can be reused; Select a state and click the option + to define the status type. In the state properties pane, enter data such as:
| Fields | Description |
|---|---|
| Basic Information: | This information includes the name of the state and the help message. This message is extremely important since it indicates to users (specialists and in some cases monitors) what they must do in each of the activities. |
| Roles: | This section defines who has permission to modify a case (with respect to workflow), i.e., which users can change the status of a case. |
| Timers: | This section allows cases in this substate to keep track of how long it takes. As soon as a case enters this sub-state, the marked timers begin to count time. When you leave the state, the timers stop, so you can keep track of the time it takes between different activities. |
| Costs: | This section allows the application to know in which states the time invested by the specialist should be counted, or the distance traveled in order to calculate the costs of execution and travel. |
| Webhooks: | This option allows you to configure Webhooks, to automate workflows by sending data from one application to another. For more details see the option Webhooks configuration.. |
5. When finished click Apply.
States
1. In the configuration of the Aranda FIELD SERVICE workflow there are three main phases or states that summarize the steps of order execution:
- Open: This status corresponds to orders that have not yet been assigned to a specialist, they are newly created orders or that must be rescheduled for execution.
- In process: This status includes all the steps that the field specialist must execute to perform a task. The sub-states defined within this state will guide the specialist step by step. Within this state you can create any sub-states you want, however, it is important to keep the process simple.
- Executed: The work order ends in this state, with two possible sub-statuses: executed or canceled.
Sub-states
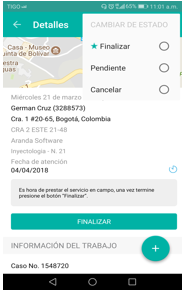
The field specialist receives orders in the “In Process” status and at this point the sub-statuses serve as a guide for the execution of an order. The order lifecycle is governed by sub-statuses and their transitions. When creating a sub-state, the administrator can configure different options that allow the model to be adapted to the business process:
Transitions
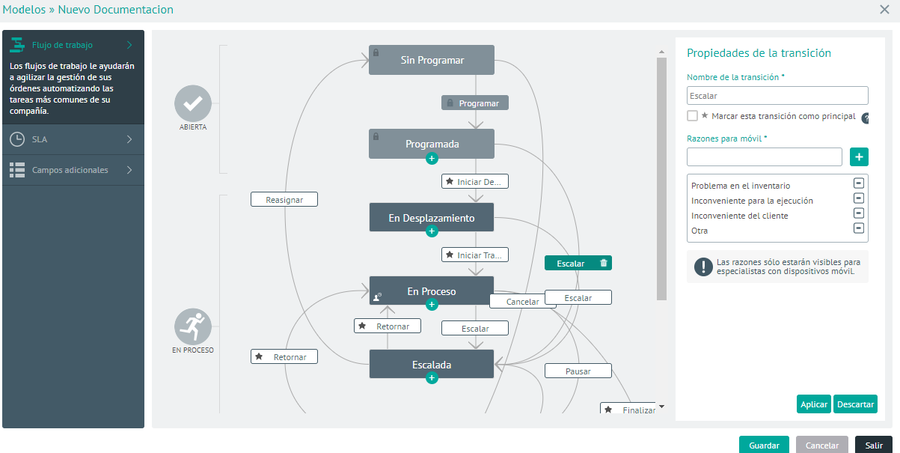
Transitions are represented by arrows or paths that go from one substate to another. Transitions have an additional context and that is that they become “buttons” that can be used by field specialists or agents on the web to move a work order from one state to another. When setting up a transition, the name is important, as this will identify the buttons on the mobile console that specialists use for execution. Recommendation: The nouns of transitions must be infinitive verbs; for example, to move from an “In Process” to a “Scaled” state, the transition should be named “Scale”. This word, “Escalate” will be used in the mobile app as an action that can be taken by field specialists to modify the order.
2. To create a transition, in the model editor menu select the Workflow, the automatically generated flowchart is enabled with elements that can be reused; Select a preconfigured transition. In the transition properties panel, you can modify information such as name and reasons for mobile.
The reason set will be requested from the field specialist when the status of a work order changes.
Special Elements of the Workflow
Within the workflow there are some elements that require special attention. They are listed below:
| Flow Elements | Description |
|---|---|
| Default transitions: | Within a workflow, a state can have multiple output transitions. For example, one approval status might have the transition “Approve” and another transition “Don’t Approve.” The Aranda FIELD SERVICE workflow requires that one of the transitions be marked as the default transition. When you do this, this transition will be the main one and will be displayed as a button in the Specialist’s console. The other transitions will appear in the Actions menu. Default transitions are marked with a star. |
| Flow Elements | Description |
|---|---|
| Unscheduled Sub-Status: | This sub-state is typical of the system. Any transition that comes to this sub-state will cause the engine to automatically take care of selecting a new date and time, as well as a new specialist who can handle the order. |
| Scheduled Sub-Status: | This sub-state is typical of the system. An order can go from “unscheduled” to “scheduled” status through two events: through the assignment engine, where the tool schedules the order, or through manual scheduling. In both cases, the condition that a work order must meet in order to move from one state to another is to have a planned execution date. |
| Canceled Sub-Status: | This sub-state is specific to the system. It corresponds to a terminal state. When the order reaches this status, it indicates that the work was not performed. |
| Sub-Status Executed: | This sub-state is specific to the system. It is a terminal status that indicates that the order was successfully completed. |
| Appointment Fulfillment Sub-Status: | Considering that a work order can include multiple activities (sub-statuses), and some of these activities can be carried out before having contact with the customer (travel, preparation, etc.), there is an activity that indicates that the field work begins at the specified location. This state has a star-shaped mark and corresponds to the first substate in which the runtime runs. |
Modifying the workflow
3. The tool administrator can modify the default configured workflow by including new sub-statuses and transitions. To create a new activity, use the  . The new sub-status will be created at the level immediately below. To create a transition, you must drag and drop the cursor from the initial activity to the final activity.
Modifying agreements within models
Generally, service agreement levels within organizations are common to different models, however, it may be the case that some models require unique behaviors, for example, that time agreements are different.
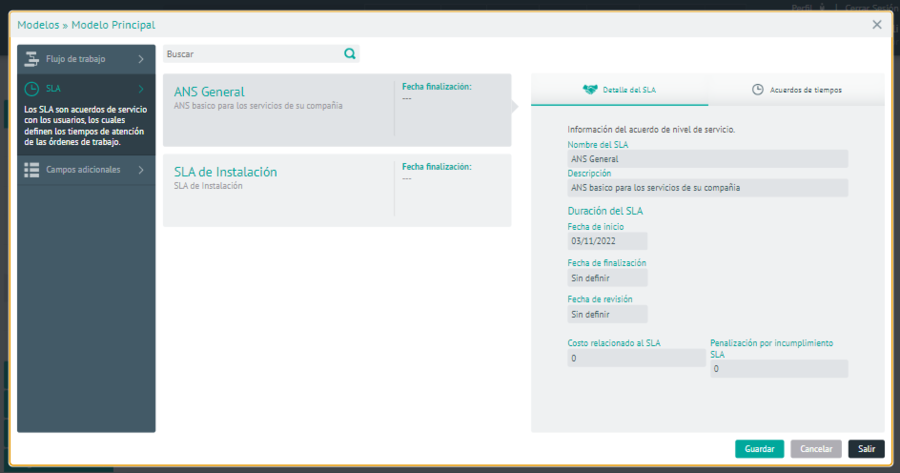
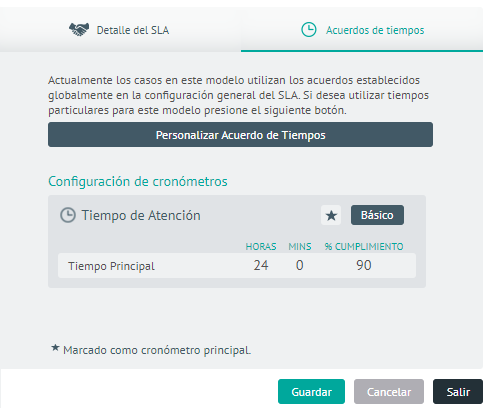
4. To create a Service Level Agreement, in the model editor menu, select the SLA, all SLA are deployed within a model configured for the tool.
In the SLA properties plan, the administrator will be able to enter the detail of the time agreements and overwrite the values for all cases that use the model.
⚐ Note: Created cases will use the model detail, if not otherwise specified. In this section, the user will be able to reset the global SLA values, for the cases of the model.
Setting up additional fields in a model
The additional fields in a model correspond to information for each of the work orders created. Here you can define the information that must be requested for each order, define the permissions and the mandatory nature of each field.
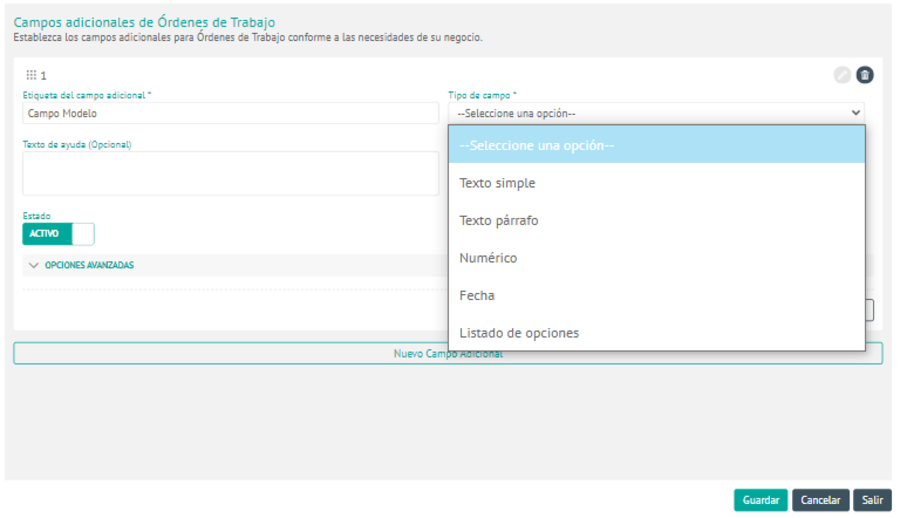
5. To create an additional field for the model, in the model editor menu, select the Additional Fields and enter the basic field information such as creating the label, help text, and selecting an additional field types: simple text, paragraph, numeric, date, and options.

When an additional field is active, it is observed as part of the concept (work order).
In the advanced options of the additional field, on the details tab you can configure name and description. This information corresponds to technical information that can be used later in integration with other systems.
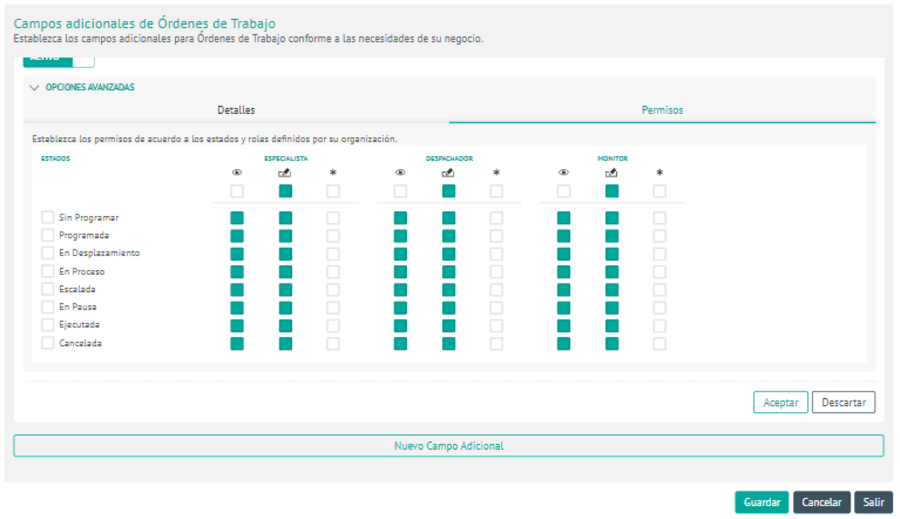
In the advanced options of the additional field, in the Permissions tab you can define:
- Roles (Dispatcher or Web Monitor and Mobile App Specialist) with permissions to view additional field information,
- Permissions can be configured for each of the defined states.
Once you configure the common information for the models, they can be associated with your organization’s services.