The domains present in (APRAdmin) must be previously configured in (ASMS Administrator) and then complement the configuration on the site (APRAdmin). You can administer and manage as many domains as you have created and configured correctly.
1. To create a domain, log in to the ASMS Management Console in the General Settings from the main menu, select the LDAP. Define a project, and in the information view, select the New filling in the respective information: Details, synchronization and business directory.

2. Log in to the Aranda Password Recovery management console, select the option Domains from the main menu. In the information view, select a record, and in the domain detail view, configure the General Information and Mail Settings sections:
Overview
3. In this section you can configure the domain data that needs to be filled in.
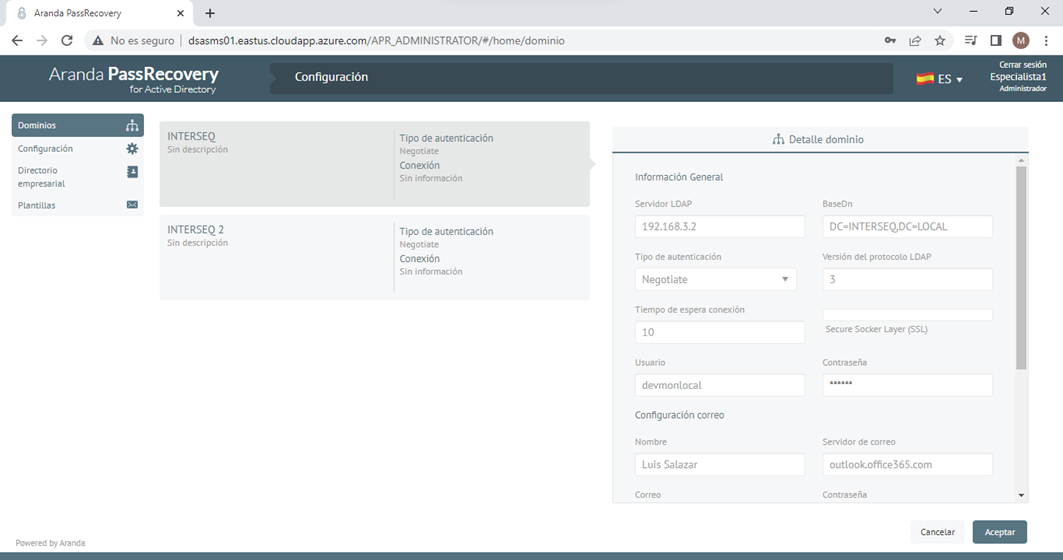
⚐ Note: It is important to configure a domain user with sufficient privileges, who has the “Reset user passwords and force password change” permission enabled at the DA (Active Directory) level; If this condition is not met, the actions executed will not be applied.
⚐ Note: To Delegate Control of Active Directory Objects, you must consider the following options:
- Delegate Account Unlocking.
- Unlocking User Accounts
Mail Settings
4. In the mail settings, there are two types of authentication (Basic and Oauth) for sending mail.
| Note | In the mail settings, the Administrator user requires a role with the CreateMailAccount and UpdateAuthProvider, which is pre-configured in the ASMS Management Console. |
5. In the field “Select a mail server” you can see the list of the output servers configured in ASMS and APR:

6. When you select a mail server, the fields are automatically registered according to its configuration.
Basic Authentication
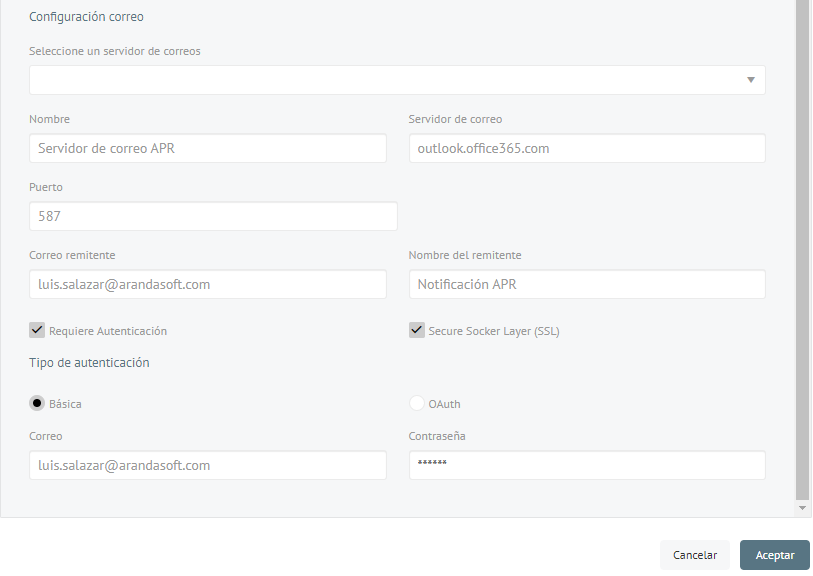
7. For Basic authentication settings from APR, the mail server field is left blank and the configuration fields are filled in.
When checking the “Requires Authentication” The authentication types are displayed. When you select the Basic option, the Mail and Password fields are filled in.
8. When finished, click the Accept, and the message will be presented Updated domain.
Oauth Authentication
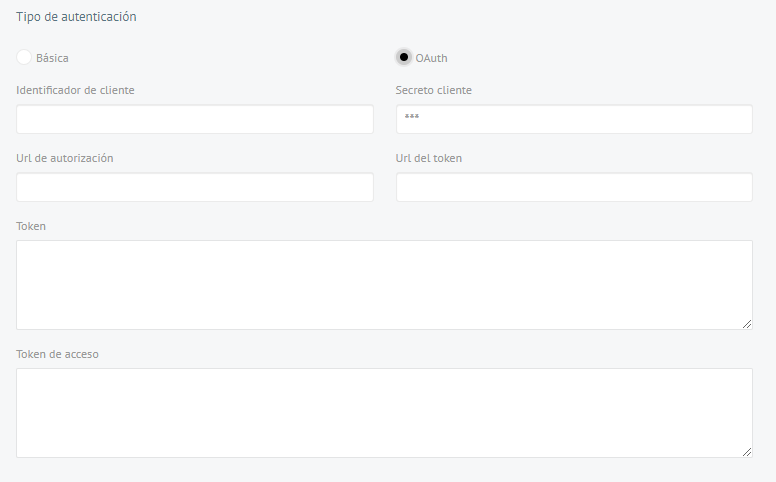
9. To configure Oauth authentication from APR, you must get the data found in the following table: Configuring for OAuth 2.0 Modern Authentication
| Fields | Description |
|---|---|
| Client ID | Get the Client Identifier |
| Customer Secret | Get the Customer Secret |
| Authorization URL | Get the Authorization URL |
| Token URL | Get the Token URL |
| Token | Get the Manual Token |
| Access token | Get the Access token |
Fill:
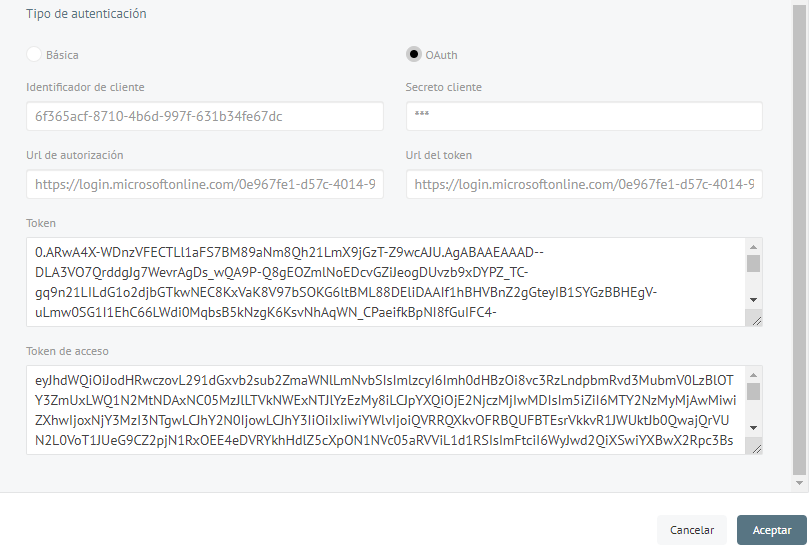
10. When filling in the data, click the Accept, and you can view the message Updated domain.
⚐ Note:If an existing mail server is modified from APR, the following message is displayed.
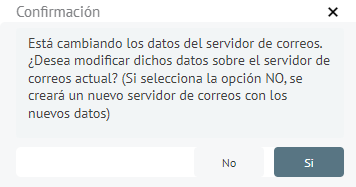
11. By clicking on the “No”, will create a new output server in the ASMS console.
12. When you finish setting up the domain, you will be able to view the message Updated domain.
Visualize LDAP by Project
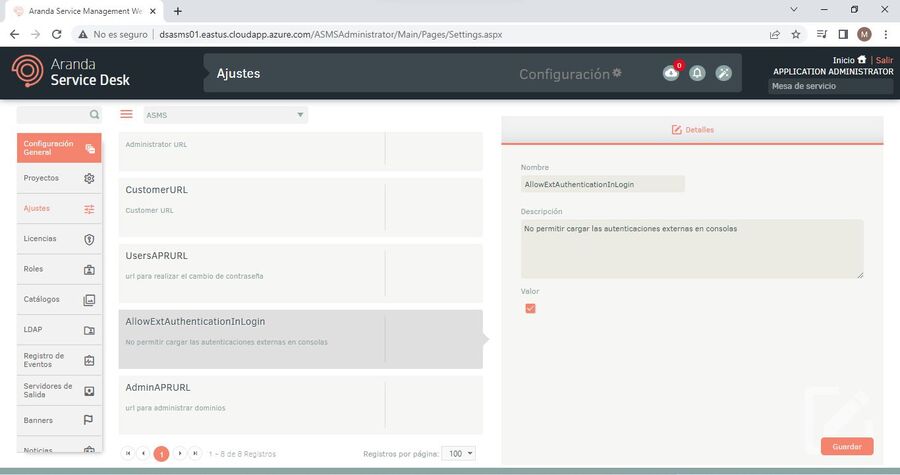
1. To view or configure the LDAp of a project, go to the ASMS administration console, in the section General Settings from the main menu, select the Settings. In the information view, define as product ASMS to display the available configuration options; Select Registration AllowExtAutenticationInLogin and in the detail view validate that the check Value is activated.
2. To append the respective URL of the APR console, enter the ASMS administration console, in the section General Settings from the main menu, select the Settings. In the information view, define as product ASMS to display the available configuration options; Select Registration AdminAPRURL and in detail view, in the field value, paste the Url and click Save.
Example: https://dominio.net/apradmin/

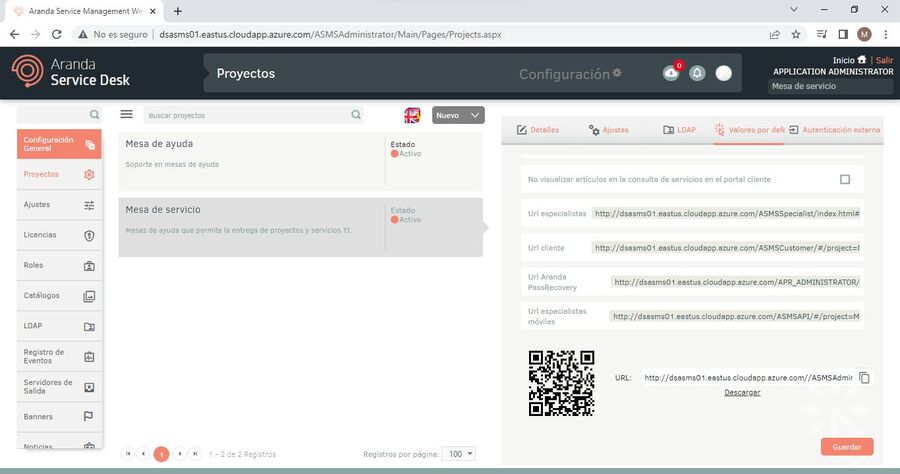
3. To copy the Url by project enter the ASMS administration console, in the section General Settings from the main menu, select the Projects. In the information view, select the required project, and in the detail view, select the Defaults; In the field Url Aranda PassRecovery Paste the URL and save your changes.
⚐ Note: When pasting the URL in a new browser, only the LDAP of the selected project will be displayed and it will only work with the link taken.