Edit requests
Edit requests allows you to manage previously selected cases and update the information required by the specialist.
1. En la consola móvil de ASMS, en la barra de tareas de Mi Portal, seleccione la opción Mis solicitudes. 2. After selecting one of the cases in the application, the user will be able to view the detail of the request.
3. In the floating menu of the request detail, the option Edit. Once this option is selected, the Edit Case window will be enabled, where the specialist defines the fields to be updated for the selected request.
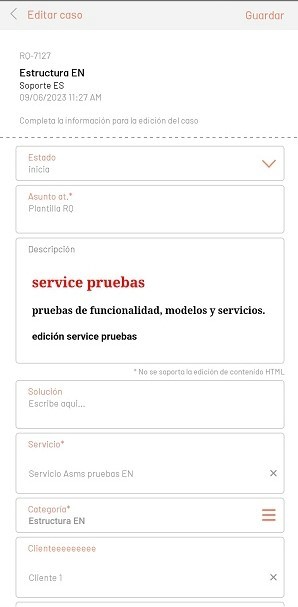

The editing screen features the following sections:
| Options | Description |
|---|---|
| 1. Save button | Confirms the changes made for the status change and additional fields in the request. |
| 2. Status Combo | Allows you to change your state. |
| 3. List additional fields | View the additional core and specialized fields for the type of case under edit. |
4. When the changes are finished, select the Save.
Case Attachments
4. When selecting the Add Attachment on the taskbar, the following options are available to you:
| Options | Description |
|---|---|
| Take photo | This option enables the device’s camera in photo mode. |
| Take Video | This option enables the device’s camera in video mode. |
| Photo Library | This option enables the device’s gallery by filtering by images. |
| Video Library | This option enables the device’s gallery by filtering by videos. |
| Attach File | This option enables the device’s gallery by filtering by files. |
⚐ Note: The following file formats are not allowed to be attached from the mobile app:
Formats not allowed
APK EXE LNK BAT COM PS1 DLL MSI SYS TTF OTF INI SCR INF BIN ANI BFC Black King Bar CER THEME TMP CLASS C CPP JAVA VBS ZIP RAR RAR5 7Z ACE R00 GZ tar.bz2 ISO CUE IMG HTML XML URL CSS JS PHP EML MSG SWF SPL EMZ INX EVT LOG RDLX SVCLOG PML AAM PRC RTF DMP REPX TIF VSD VSDX DSF JFIF EMF WEBM LS IPA AAB
IC Selection via QR Code Scanning
This functionality allows you to assign a CI to a case by reading a QR code generated from the CMDB console. The QR code contains detailed information about the CI, such as ID, name, category, responsible, serial, among others.
Editing a Case with QR Scanning
- To associate a CI by scanning, select the SCAN QR CODE option.
- The camera will be activated to scan the QR code generated from the CMDB console.
- Click Select to associate the CI with the case, or click Cancel to return.
- If the selection is confirmed, the CI is associated with the case being created using the returned ID.
⚐ Note:
• When scanning an invalid QR code, in a finished state, or from a project that the CI is not associated with, an error message will be displayed.
• Clicking Cancel closes the scan camera; clicking OK returns to the camera to allow another QR code to be scanned.
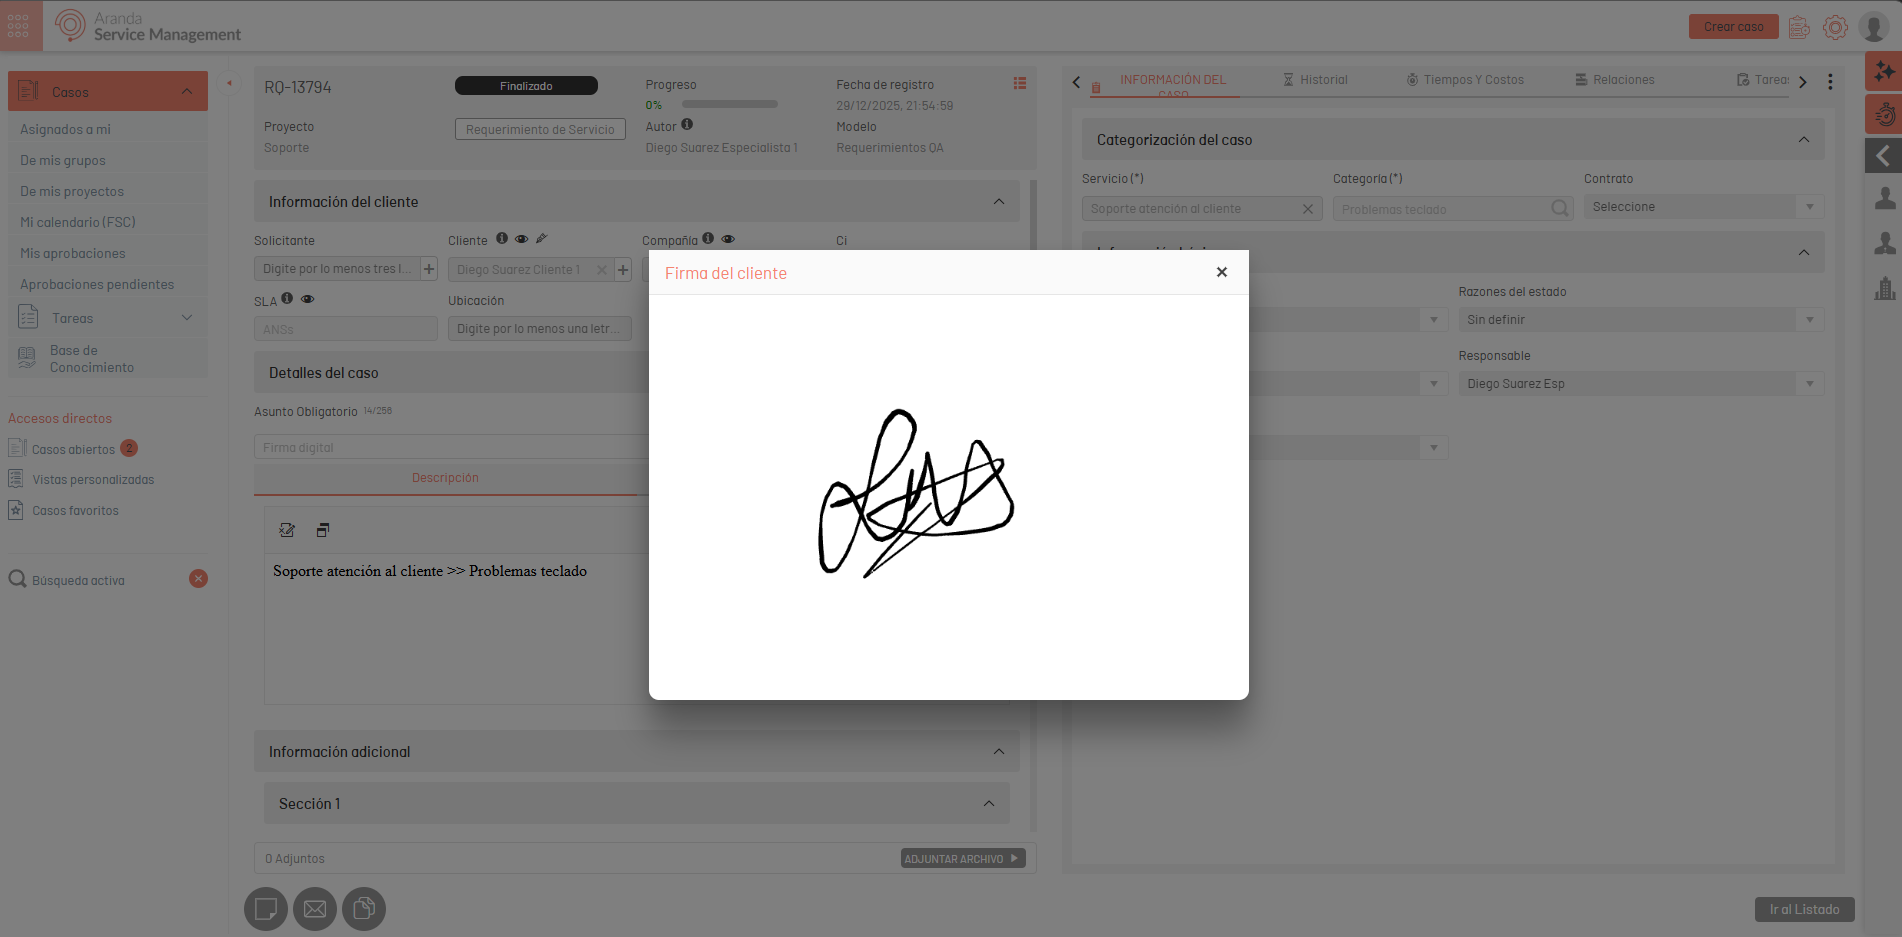
Digital Signature
The functionality of Digital Signature allows a specialist to capture the digital signature at the end of a case from the ASMS. The signature is associated with the case and is mandatory when enabled by the system configuration.
How to Capture the Signature
1. When changing the case to the final state of the flow from the App, the icon at the bottom will be displayed in the form when the functionality is available.
2. By pressing Sign, the App enables a view with a space where the user can include their signature and save it.
Requirements and configuration
1. Turn on Setting Request signature in the ASMS Administrator in General Settings > Projects.
2. The final state of the flow should have the Closed by default.
If both conditions are not met, the signature button will not be available in the App.
⚐ Note:
- When the Sign button is available, the signature is mandatory: If you try to save the case in the final state, without adding the signature, the App will prevent the saving and a message will indicate that the signature is required.
- The firm only applies to the types of cases Changes, Incidents and Service Requirements
Display in the ASMSSpecialist console
1. Once the case is signed, the signature will be visible from the console ASMSSpecialist in the list of closed cases, selecting the completed case.
2. In the Customer Information (customer field) you will be able to display a signature icon; Clicking on this icon will open the image with the signature associated with the case.