
The second taskbar item on the Aranda ASMS mobile console corresponds to My Requests and allows you to consult the requests assigned to the specialist in session.
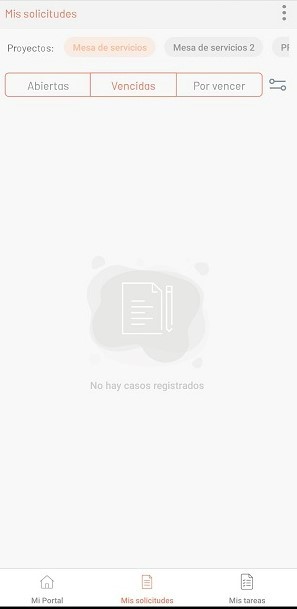
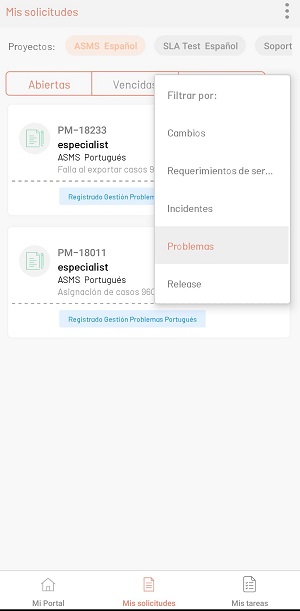
1. En la consola móvil de ASMS, en la barra de tareas de Mi Portal, seleccione la opción Mis solicitudes. Esta opción muestra los casos o solicitudes creadas en un listado y permite acceder a su detalle. In the list of cases or requests you can filter by open, expired and expiring, as well as by projects and types of cases.

The My Requests screen is divided into the following sections:
| Sections | Description |
|---|---|
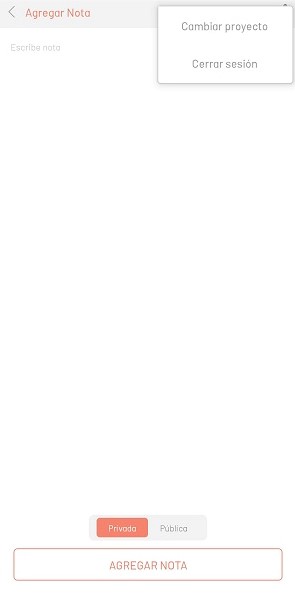
| 1. Floating menu | Displays a menu with the options: - Sort ascending/descending: Organize the list of requests. - Reassign: Start the reassignment flow. - Log off: The current session ends. |
| 2. Predefined views | This option allows you to filter cases by: - Assigned to me: Requires roles Changes Manager, Releases Manager, Incidents Manager, Problems Manager or ServiceCalls Manager. - From my Groups: Requires roles Group Viewer complementary (e.g.: Group Changes Viewer). - About my Projects: Requires roles Project Viewer complementary (e.g.: Project Changes Viewer). Note: If roles are missing, some options will not be displayed. |
| 3. Status filters | Filter requests based on their status (e.g., Open, In Progress, Closed). |
| 4. Project Filter | Displays requests for projects associated with the specialist. |
| 5. List of applications | Lists requests that meet the filters applied. Action: Selecting one redirects you to the detail. |
| 6. Filter by Case Type | Filter requests by type (e.g.: Incident, Change, Problem) |
If there are no cases or no results with the search filters, a watermark is displayed informing you that there are no matches.
When searching for services does not return results, a watermark is displayed:
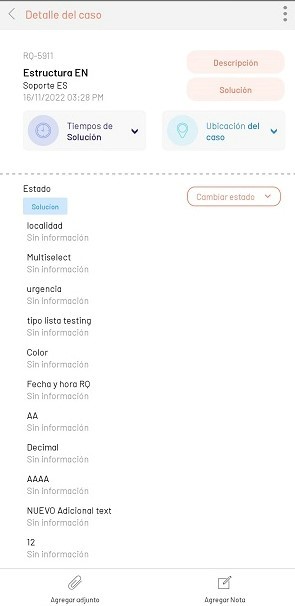
2. After selecting one of the cases in the application, the user will be able to view the detail of the request:
| Options | Description |
|---|---|
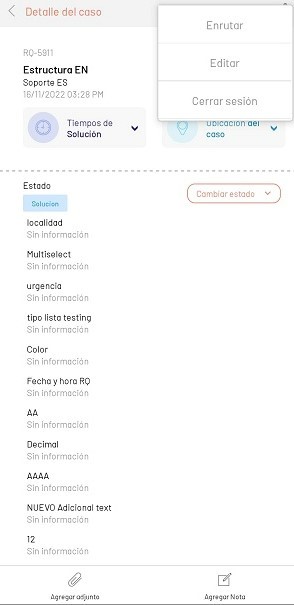
| 1. Floating menu | This section displays a floating menu where you can view options such as Route Request to another specialist, edit the Core and Additional fields, and log out, which allows you to finish the current section. |
| 2. General Case Information | In this section the generalities of the case are visualized; number of the case, status of the request, change status, date of creation. In addition, it is possible to access the following options: - View Description button: This option allows you to redirect to another view where you can view the full description of the application. - Solution: Display Screen the complete solution of the case. |
| 3. State | Displays the current status of the request.- The Change Status button allows Start the process of changing the status of the application. |
| 4. Additional Fields Section | This section shows the information provided for additional fields or the legend of No information by default. Note: The configuration of the additional dependent fields is subject to what is defined in the ASMS Administrator. View functionality |
| 5. Historical Section | Displays the history of changes made to the request: notes, attachments, status changes, etc. |
| 6. Add Attachment | This option on the taskbar displays a list of options to attach additional files to the case from different sources. |
| 7. Add Note | This option on the taskbar redirects to a new section for note creation. |
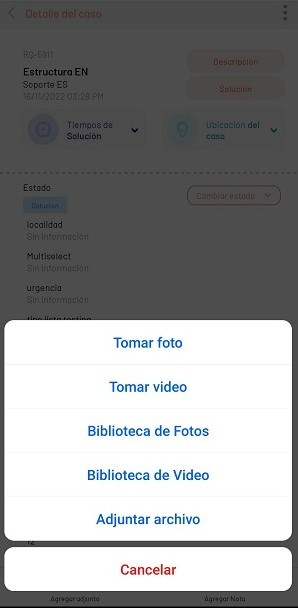
3. When selecting the Add Attachment on the taskbar, the following options are available to you:
| Options | Description |
|---|---|
| Take photo | This option enables the device’s camera in photo mode |
| Take Video | This option enables the device’s camera in video mode. |
| Photo Library | This option enables the device’s gallery by filtering by images. |
| Video Library | This option enables the device’s gallery by filtering by videos. |
| Attach File | This option enables the device’s gallery by filtering by files. |
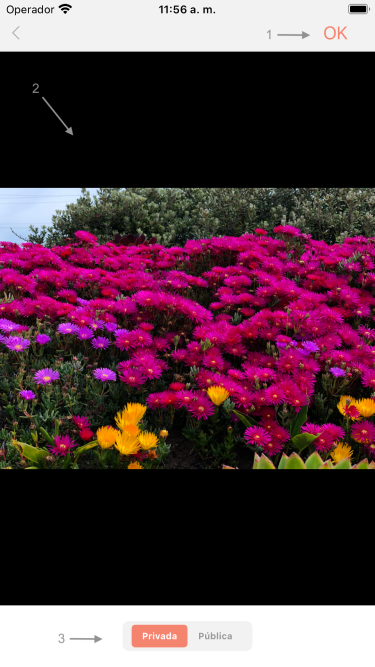
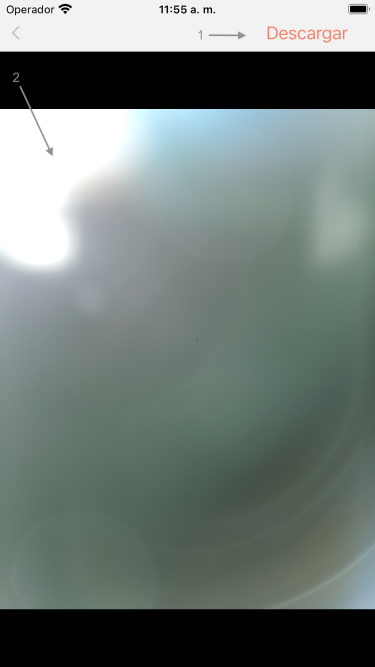
Once selected or captured, the attachment is redirected to preview view where the file can be marked as public or private.
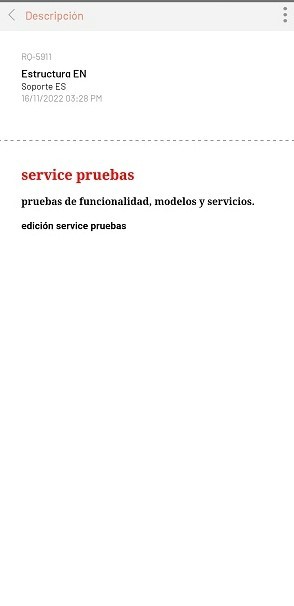
4. When you select the View Description In the detail of the application, the information associated with the description of the application is presented:
5. When selecting the Add Note from the taskbar, a field is enabled to enter the text of the note and add this information to the case.
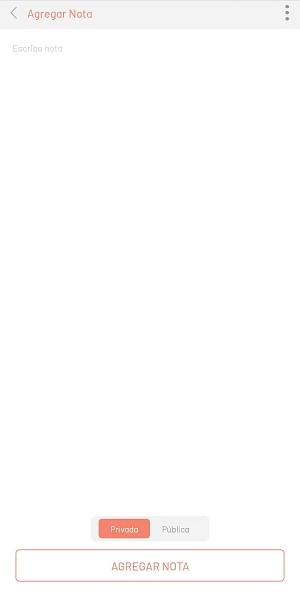
The notes view allows you to add a Private or Public note to the case, which will be visible in the history if it is marked as public.
Other views
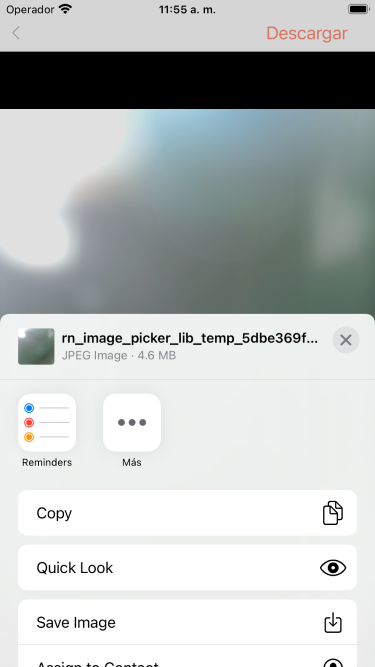
By selecting an attachment from the request history, the user will be able to: download the file, share, etc.
Assets
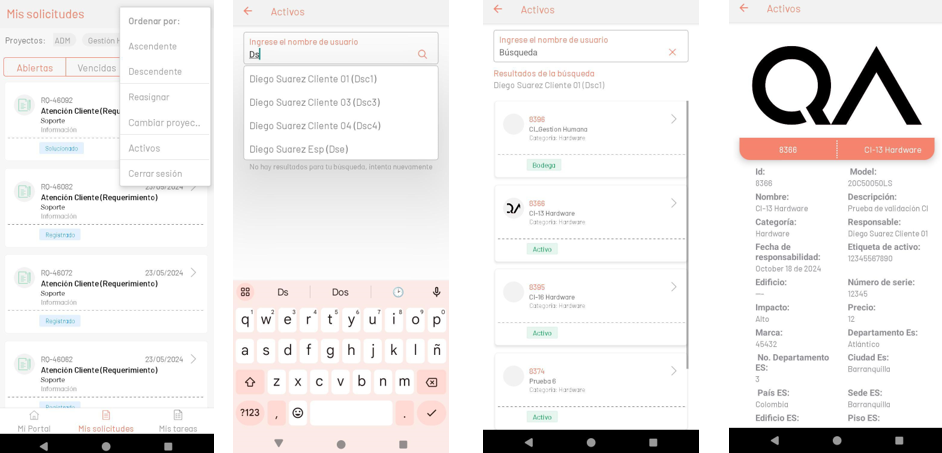
This functionality allows you to search and view the ICs associated with a user, either as a controller or as a user. The list shows in an organized way the assets linked to the selected name.
Steps to view the associated assets:
- Access the My Requests and click on the three options dots.
- In the floating window, select Assets.
- In the view of Assets, use the search field to filter by user name. This field includes predictive search, displaying names with your alias as you type.
- When you select a name, the app will load and display the CIs associated with the user.
- Each IC is presented on a card with details such as: image, name, ID, category, and status.
- Selecting a CI will open a view with detailed asset information.
Time Consultation
The time consultation in the ASMS mobile app allows you to track and determine the progress of the cases generated with the metrics established for the stopwatches in the ASMS console. ASMS administration. The service times and the dates of attention of the case present precise indicators for decision-making.
1. To view the times used in a case, log in to the ASMS, access the My Requests and select the appropriate case. In the case detail, click on the option Times.
Paused times
This option is enabled for cases created after configuration in the Admin console Times.
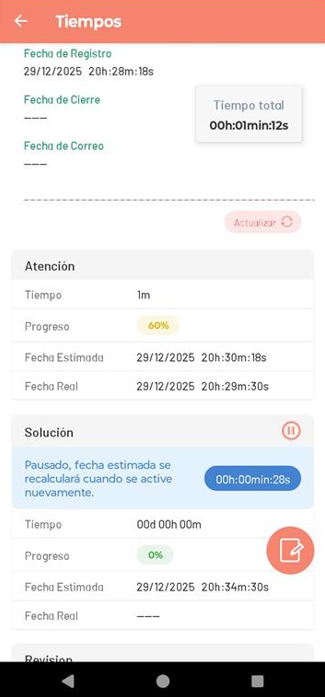
For the paused time to be triggered, the time and case must meet the following conditions:
- Estimated date calculated.
- Actual date unassigned.
- For times by state, the case must be in a state where time counting is not kept.
- For time by condition, the case must not meet the conditions for time execution.
Once the case enters again a state or condition where the time is counted and progressed or the actual date is assigned, the estimated date of time will be recalculated according to the duration of the pause and the timing of the pause.
If the case enters a final state and the end state does not assign the actual date of time, the paused time will have no effect on the estimated date of the case and the paused time will be set to 0.