Installing the agent from the UI
1. Run the agent app.
2. To view the privacy policy, click Our Website. To proceed with the installation process, please accept the terms of the privacy policy and select the option Following.
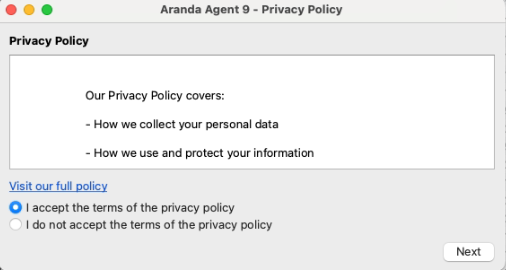
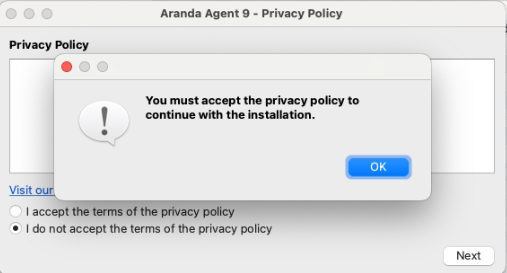
⚐ Note: If you do not agree to the policy, please refer to the privacy policy by clicking Visit our full policy.

3. Enter the profile identifier, typing 0 downloads the profile that is configured by default. Register the Conserver or Repserver address according to the pointing configured in the MQTT broker MQTT Broker Configuration. When you enter the ADM console you will be able to obtain the communication path. Configuration > ADM > Communications
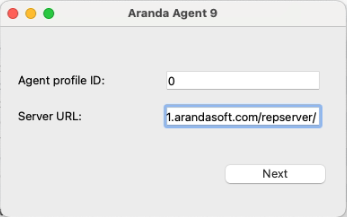
⚐ Note: Agent addressing when repserver only works with an agent version since 9.13.
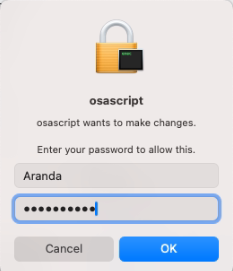
4. Enter the device credentials.
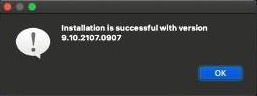
5. The agent will be installed and a success message will be displayed.
6. When the installation is complete, you will be able to view the device in the ADM console.
⚐ Note: If you already have an agent installed, you will be able to see the following messages.
| Message | Description |
|---|---|
| The version to be installed is the same as the installed version | This case is used to update the data in the conserver. |
| The version to be installed is lower than the installed version | In this case, the installation of the agent being installed will be prevented. |
Installing the agent from the command line
1. To install the Aranda DEVICE MANAGEMENT ADM agent via command line, run the following statement from a MacOS shell:
sudo sh RUTA_INSTALADOR/Aranda.Agent.Mac.x64.9.3.1801.3001.sh -- AGENT_SERVER_ADDRESS=http://localhost/Conserver AGENT_PROFILE_ID=0
| Line | Instruction |
|---|---|
| RUTA_INSTALADOR | Path where the installer is located, can be relative or absolute |
| AGENT_PROFILE_ID=[UNIT] | Identifier of the profile to be installed, 0 is a profile selected in the application as the default profile |
| AGENT_SERVER_ADDRESS=[STRING] | Conserver or Repserver Path |
2. After installing the agent, a folder named Aranda is created in the path ‘/Opt/local’ with the libraries, agent services, and another folder in ‘/etc/’ with the name Aranda, where the agent’s logs and database are stored. Deleting these folders will uninstall the agent.
Grant agent permissions
Full disk access permission must be granted to the agent, this action is performed taking into account the following steps:
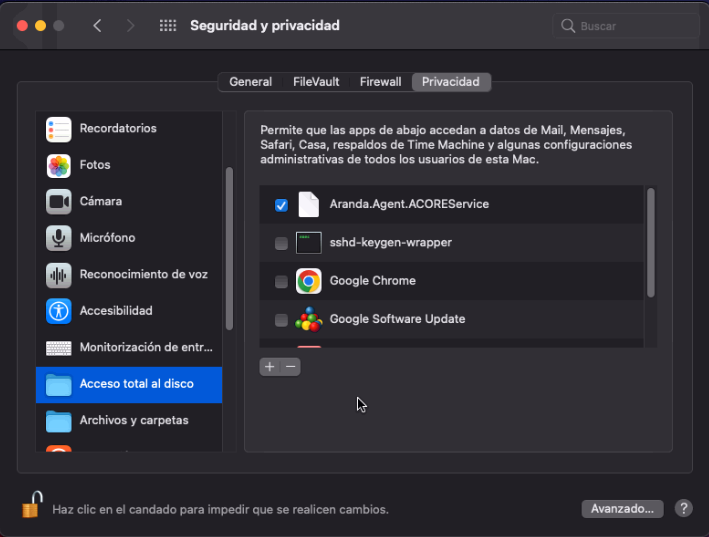
1. Open System Preferences > Security & Privacy.

2. Select the Privacy.
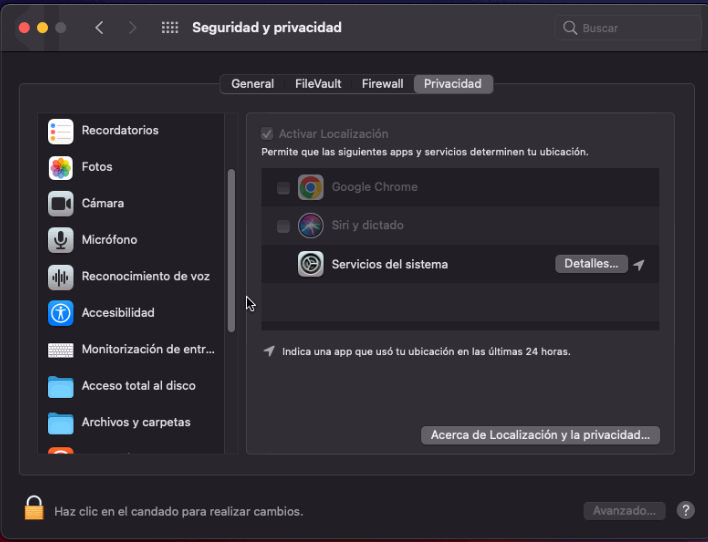
3. Select Full disk access and click the lock icon. Enter the system administrator credentials and click Unblock.
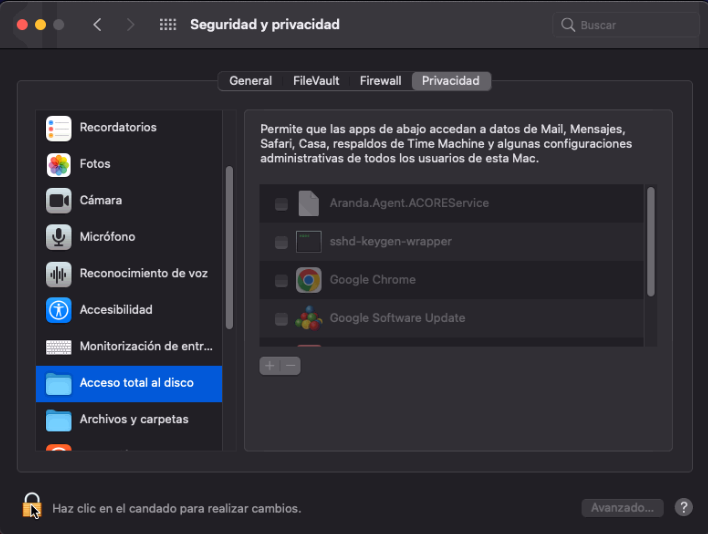
4. Select Service Aranda.Agent.ACOREServiceicon, then click the lock icon.
—
Agent exceptions on macOS
The functionalities currently supported in MAC are the Aranda Asset Manager except for the following functionalities.
- Device Location
- Virtualization
- Monitoring
- Sending messages
- Sending Commands (Only allowed with the current system user)
Agent Modification
⚐ Note: Available in the agent version higher than 9.14,
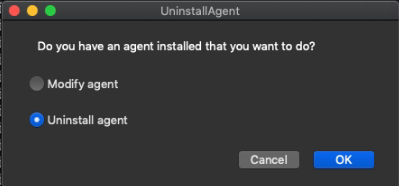
If you have an agent installed earlier than this, the uninstall window will not appear.
Agent Modification (Repserver Host or Conserver and Profile)
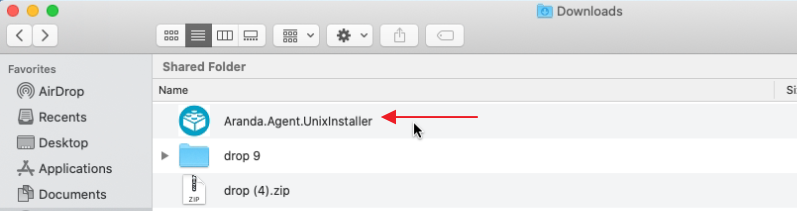
1. To modify the agent you can do it from the installer Aranda.Agent.Unixinstaller.app

2. Double click in the executable and the following window is enabled.

3. By default the option of Modify agent is selected; Click OK and the installation window is enabled. After upgrading click Next.

—
Uninstalling Agent
To uninstall the agent you will have two options:
- By Command Line using the terminal.
- Using the graphical interface.
Command Line
1. Open a terminal window and in the defined path use the following command:
cd /opt/local/aranda
2. Once the folder is entered Aranda We run the following command.
sudo sh UninstallAgent.sh
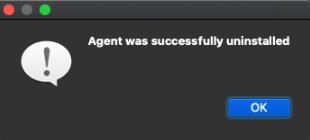
3. Once the command is executed, you can see that the agent was successfully uninstalled.
Graphical Interface
1. Run the installer Aranda.Agent.Unixinstaller.app.
2. In the Uninstall Agent window, select the Uninstall agent and click OK
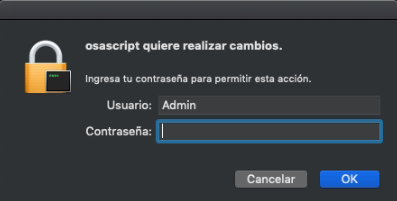
3. The next window asks for the credentials of the computer administrator; Enter the password and click OK
4.Wait a few seconds for the uninstall to finish and a confirmation message is enabled