After installing the file Aranda.ADM.Web.Installer perform subsequent configurations on the application server and from the ADM console to ensure the correct operation of the new remote control, taking into account the following steps:
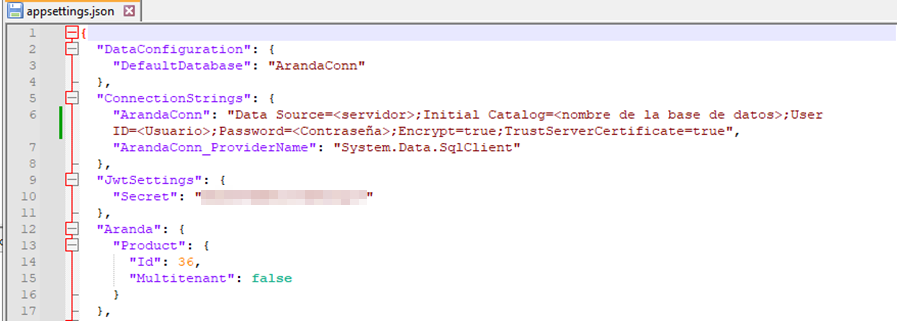
1. Configure connection chain
Configure the connection string for the recording site, via the Aranda Database Tools v9 module. Notification sites do not require configuring connection string.
⚐ Notes:
- When the configuration is applied with Encrypt enabled, an alert message may be displayed because encryption is not supported for JSON files.
- When you make changes to the recording server connection string, restart the IIS so that the changes are applied correctly.
- If changes are made to the storage provider after configuration, move the information contained in the previous provider to the current one. If this action is not taken, agent updates will not be successful, and you will not be able to access recordings in audits.
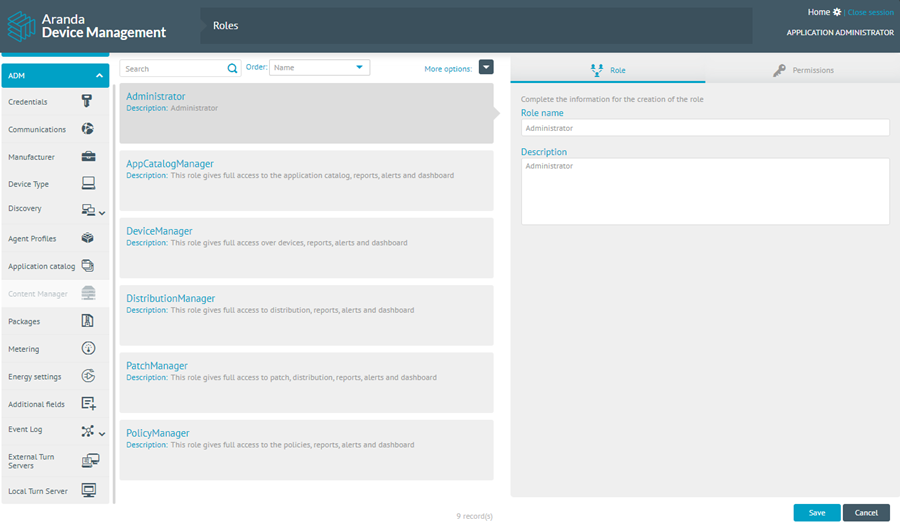
2. Log in to the console
Log in to the ADM console with the user with the required permissions to manage the External Turn Servers and Local Turn Server options in the ADM Settings.
⚠ Important: External and Local Turn options are available on On-Premise installations only.
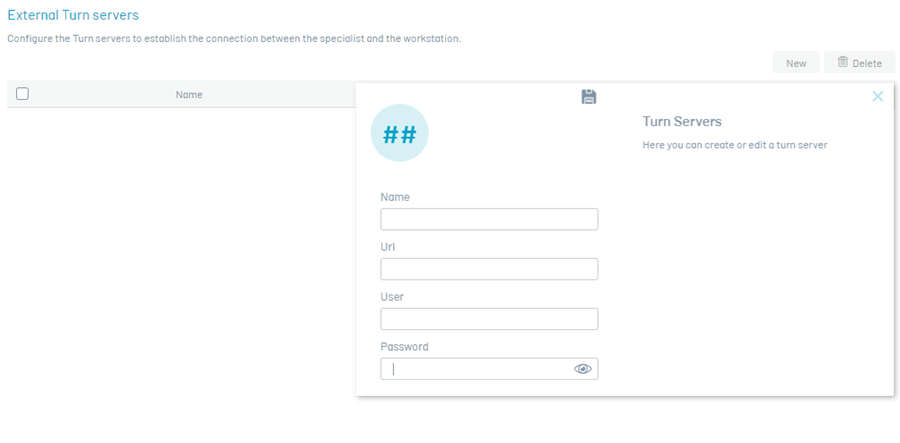
3. External Turn Servers
The file transfer functionality of the remote control uses a WebRTC-based P2P protocol. When two devices are unable to establish a direct connection to each other, a Turn server is needed to facilitate communication.
To add an external Turn server in the External Turn Servers, follow these steps:
A. Click on the option New.
B. Complete the requested fields according to the following table:
| Field | Description |
|---|---|
| Name | Name that you want to assign to the configuration, between 6 and 50 characters. |
| URL | It corresponds to the STUN/TURN server site, for example: turn:<server_public_ip>:puerto or stun:<server_public_ip>:puerto . |
| User | Name of the user authorized to connect to the STUN/TURN server. |
| Password | Password associated with the user that allows the connection to the STUN/TURN server. |
C. Finish by clicking the Save.
⚐ Note: This configuration is required for file transfer when the specialist agent and the workstation agent are not on the same network, therefore, both devices must be allowed to exit to the Internet through the configured port.
The user can register the number of external Turn servers that he or she deems necessary to have good communication between the specialist’s devices and the workstation through the ADM console.
To delete an external Turn server, in the External Turn Servers Select the server(s) to delete and click the Eliminate, it will be confirmed that the server(s) have been successfully deleted.
You can use public STUN/TURN WebRTC, by doing a web search “STUN server list” you will be able to list the different public STUN/TURN servers available. When configuring public servers on workstations and on specialist computers, they must allow the output of the servers that are configured to the sites. It is also possible to configure the STUN/TURN server provided in the installer by making the settings in the Aranda Turn Stun WebRTC Server Windows Service. In addition, public STUN/TURN can be used in conjunction with your own installed servers, as mentioned above.
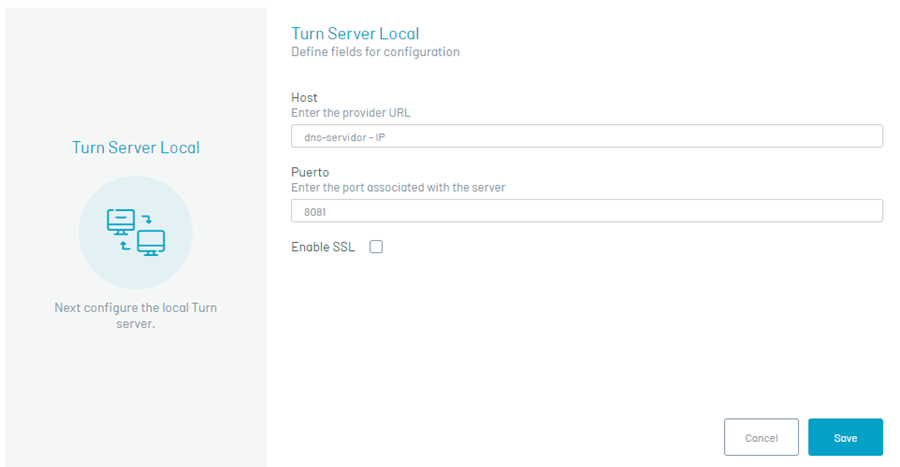
4. Turn Local Server
To establish remote takeover communication between the specialist agent and the workstation agent, use a local Turn server that can relay network traffic.
To add a local Turn server, follow these steps:
A. Click on the option Local Turn Server from the main menu.
B. Complete the field Host with the path to the local server, which can be the IP of the server or the DNS. The countryside Port it is set by default to the value 8081 and SSL is inactive; if the port is changed or SSL is enabled make the settings in the Aranda Turn Server service installed on the server.
C. Finish by clicking the Save