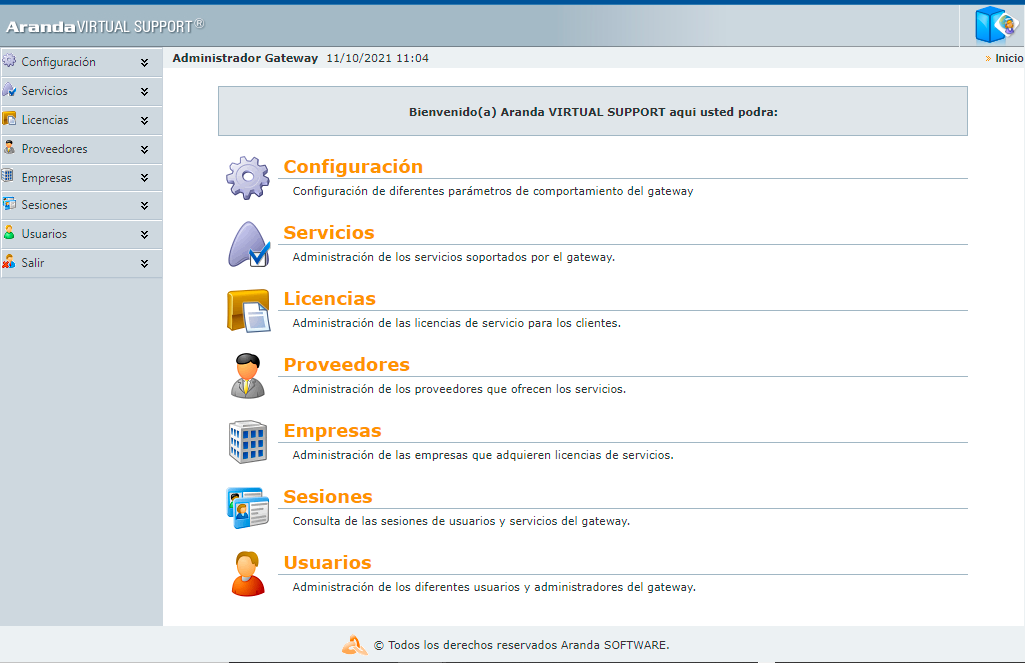
Immediately after you have loaded the corresponding permissions, the application console interface will It will show as follows:
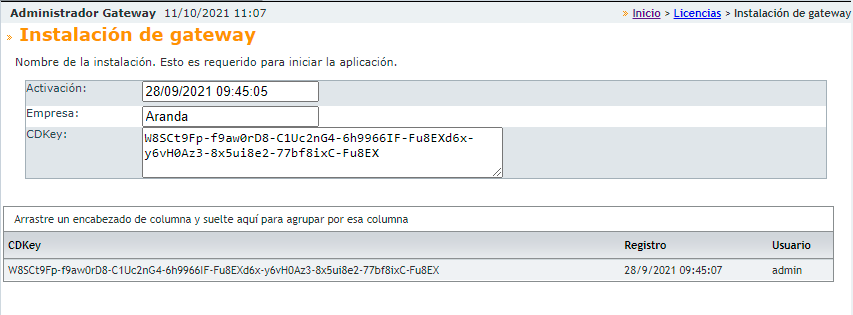
Initially, you will need to go to the Licences - > Installing Gateway. The following will be loaded immediately:
interface:

Follow the steps below:
1. Enter the name of the company where the Gateway will be installed.
2. Click the Save.
3. A form is then loaded, showing the date of Gateway Activation, the name of the Company that licenses it.
4. Click the Generate CDKey.
5. At the bottom you will see a grid where the Generated CDKey’s will be listed, their creation date and the user who generated it.
Gateway Configuration
1. Go to Configuration -> Gateway Configuration.
2. Enter the following fields according to the description given below:
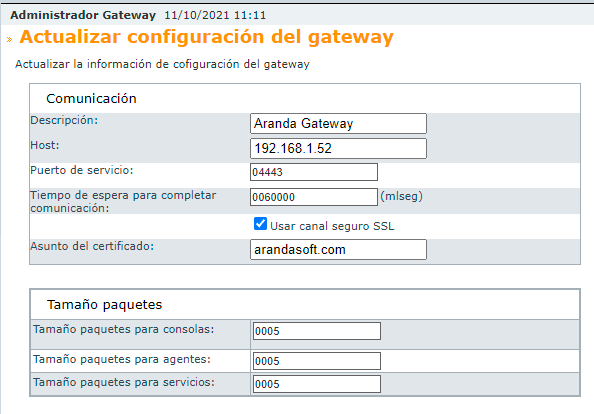
Communication
- Host: IP address or public host to which software clients (Consoles and Agents) will refer.
- Service Port: Port in which the Aranda AVS Gateway will run, and to which the software clients will refer (Consoles and Agents).
- Waiting time to complete communication: By default it is 30000 milliseconds, it is recommended not to handle lower values, as this depends on The speed of the network you are working on.
- Certificate Subject: By default there is the subject of the Aranda Software certificate, it can be modified to use a own certificate.
Package Size
- Size Console Bundles
Maximum number of console sessions that are reported to a console per message reported by the party of the Aranda AVS Gateway.
- Agent Package Size
Maximum number of agent sessions that are reported to a console per message reported by the Aranda AVS Gateway.
- Package Size for Services
The number of maximum service sessions that are reported to a console per message reported by the party of the Aranda AVS Gateway.
Configure Software Clients
1. Go to Configuration -> Software Customers
In the Release Notes You can find the latest version of the Windows Agent, today you don’t have Agent for Linux.
2. The list with the agents supported by the Aranda AVS Gateway will be loaded.
3. To edit or view an Agent’s information in detail, click the Update and then you will be able to observe the characteristics of the Software.
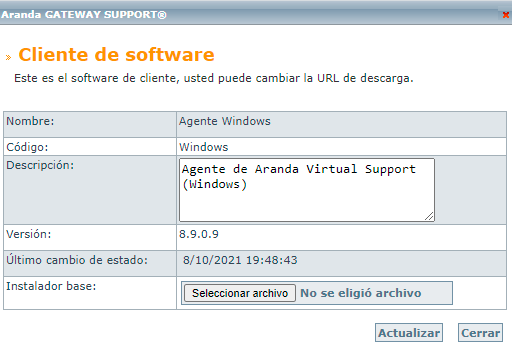
- Name: Name of the Software.
- Code: Identifier number of the software.
- Description: Features of the Software Client.
- Version: Software Version.
- Last Status Change: The last known date on which the client was updated.
- Base Installer: Option that allows you to upload an update or patch of the Software Client, it must be in DAT format, and must comply with the system’s own format.
4. Click the Update To process the DAT file, if the system finds it to be a recent version, it will update the base installer, and each software client will be notified upon authentication that a new version is available for download.
Configure SAML Authentication
AVS has authentication through a third-party provider using the SAML standard for logins to the management Web page.
The SAML configuration page to allow SAML authentication providers to enter in the Configuration -> section SAML Configuration
To configure a SAML client, the following steps must be performed.
1. Log in as an administrator to the AVS website.
2. Go to the Configuration -> SAML Configuration.
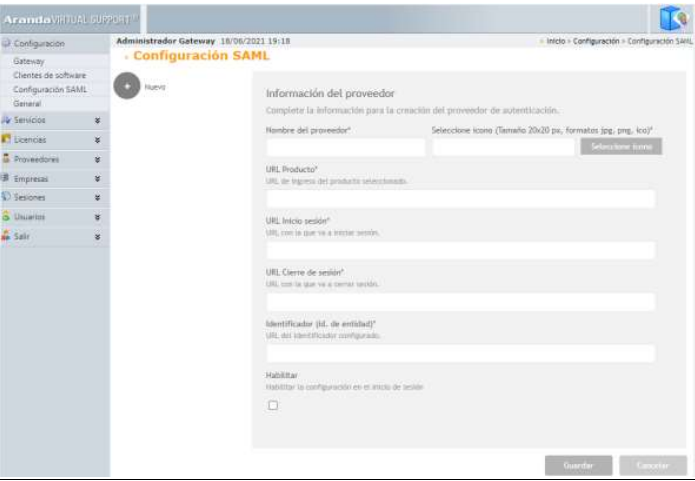
3.. Click the New (+) button.
4. Give a name in the ‘Vendor Name’ field. This will be the name that will appear in the SAML Settings list, and on the login page in the event that the provider is enabled.
5. Click the “Select Icon” button.
6. Select an image that meets the characteristics: Dimensions equal to 20x20, with any of the formats indicated, namely: jpg, png, ico.
7. Click save and display that the text field in the image is loaded with the file name.
8. Fill in the product URL. This should be the URL of the AVS web administration page. Depending on the provider, SAML must have HTTPS as its schema (in most cases this is required). The most common format is: https://[address-ip-or-domain]/ArandaGatewayAdmin.
9. Enter the login URL provided by the SAML provider.
10. Enter the logout URL provided by the SAML provider.
11. Enter the ID. This is a secret code provided by the SAML provider.
12. Enable login by activating the combobox.
13. Click save.
14. The SAML provider will likely require the “Response URL (SP)” generated by the AVS.
15. The result will look something like this:
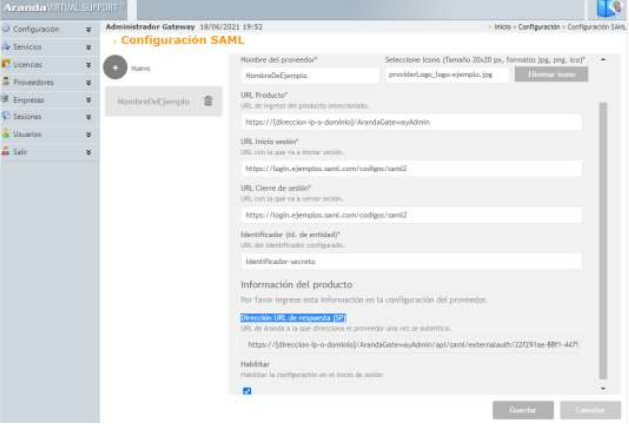
16. When you log back in to the login page, you’ll see the new provider for authentication.
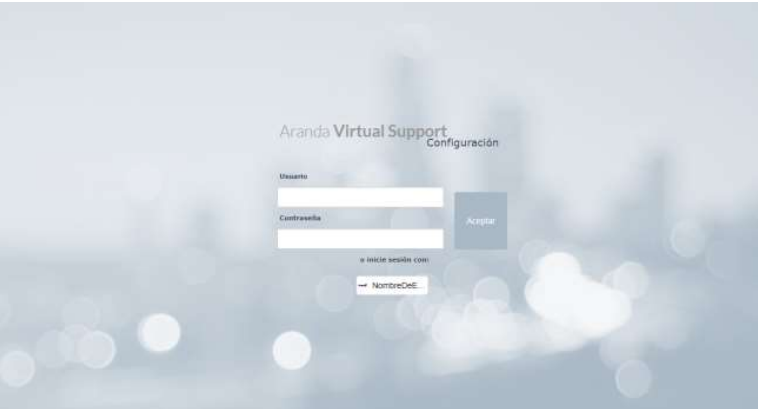
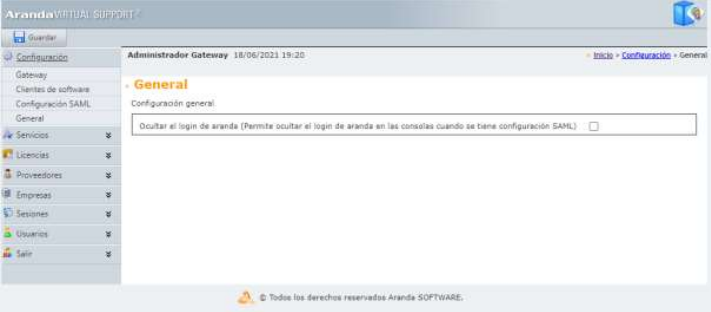
General Settings
This section allows you to make general configurations in the Configuration -> General, where you can activate or deactivate the traditional Aranda login, allowing you to hide the text fields for username and password, forcing the use of previously configured SAML providers.
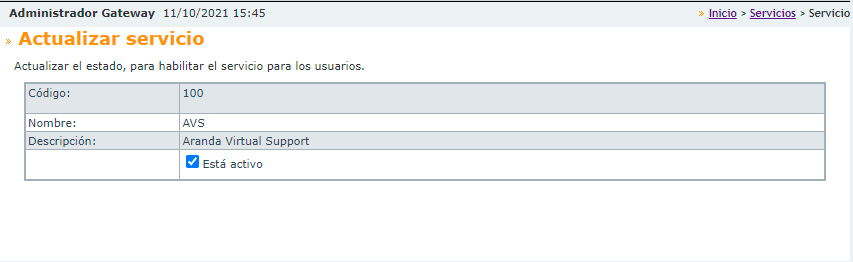
Services
You can verify that AVS, Remote Control, and File Transfer services are working.
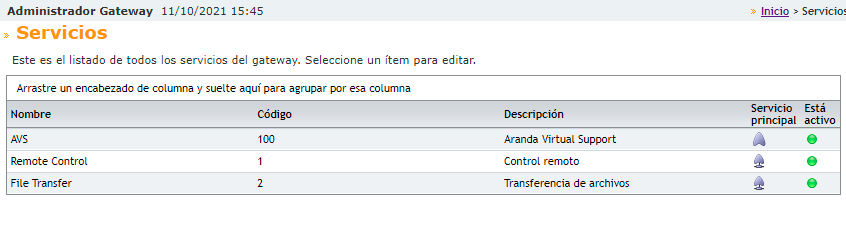
If you want to stop a service, click on it and click Edit, there you can turn off the service.
Licences
AVS manages a master licensing and sub-licensing scheme; Master licenses are associated with vendors and sublicenses are associated with enterprises (customers who manage vendors).
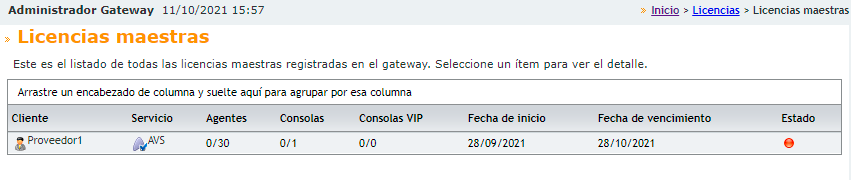
These licenses allow you to enable access to the web console as well as have licenses available to the end users’ machines (agents) and achieve the connection through the gateway.

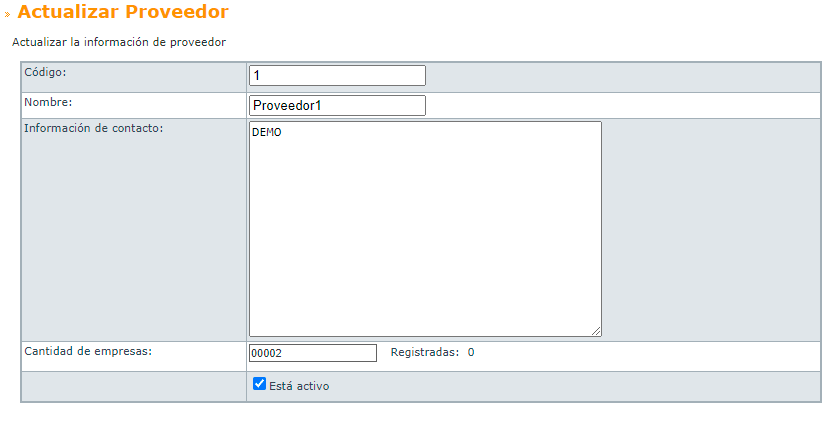
Suppliers
An AVS installation can have one or more suppliers, this hierarchy allows you to delegate some companies to the supplier for their administration and management.
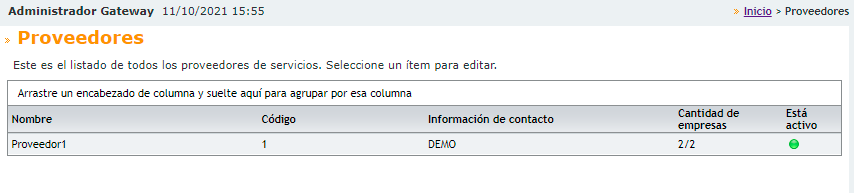
The supplier can be assigned how many companies it can be in charge of; This can be disabled at any time.
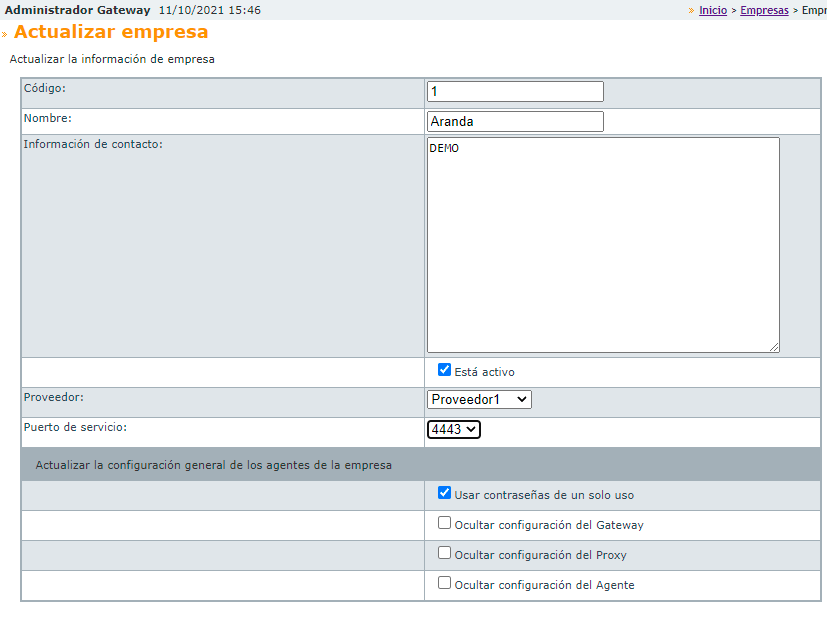
Enterprises
Companies are the ones that allow customer devices to be grouped, these companies can be associated with specialists to carry out support actions through remote control.
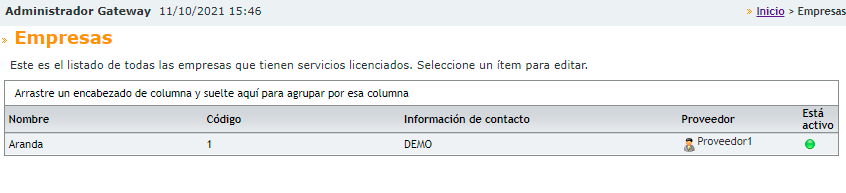
Each company must be associated with a single provider, for each company functions can be enabled in the agent such as:
- Enable one-time passwords
- Show/Hide Gateway Settings
- Show/Hide Proxy Settings
- Show/Hide Agent Settings
Sessions
On the website, you can review a history of console, service, and agent sessions. (devices that were taken from remote control).
Agent Sessions (End-User Devices)
List of all agent sessions logged by the gateway.
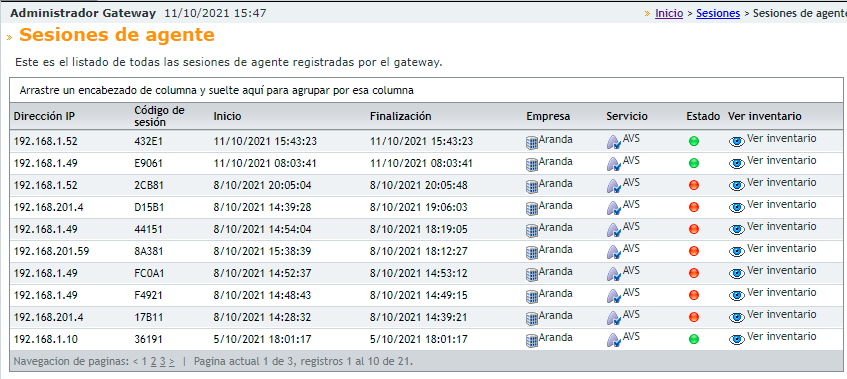
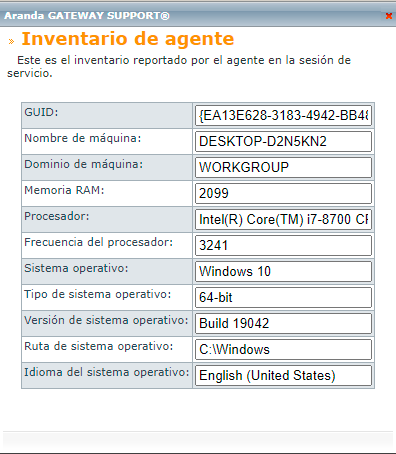
You have the opportunity to view a summary of the device’s inventory.
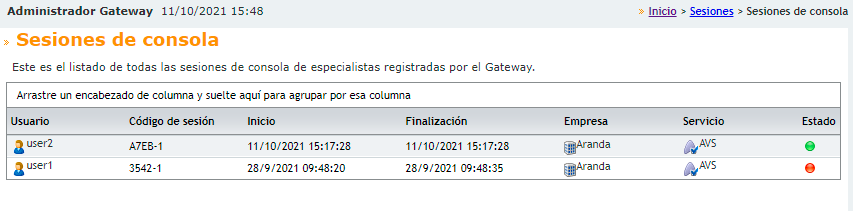
Console (Agent) Sessions
You have the opportunity to see the sessions that the specialists have had:
Service Sessions
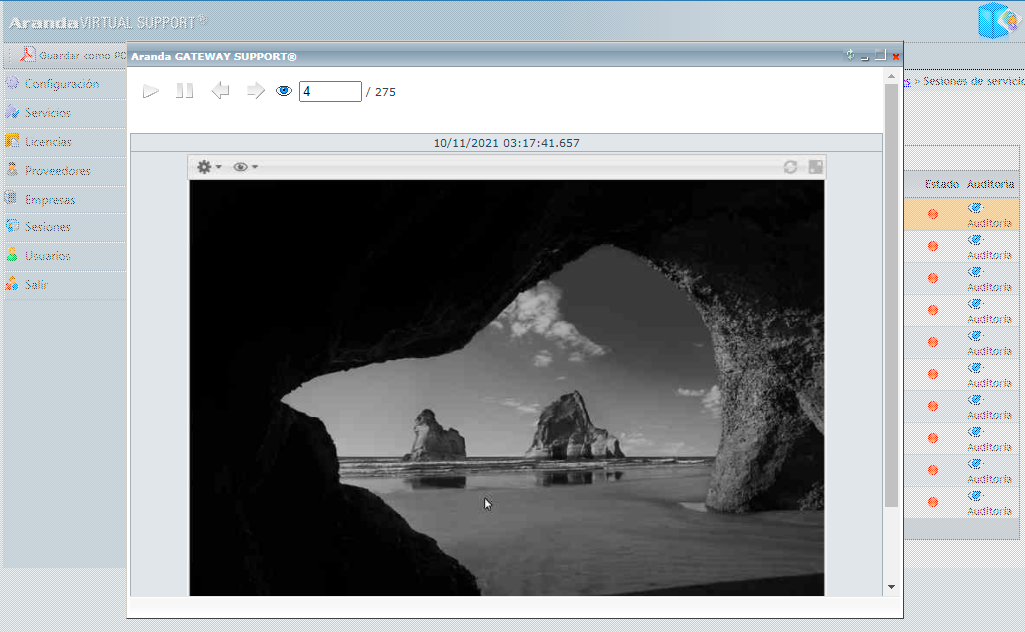
You have the opportunity to view service sessions (remote control and file transfer).
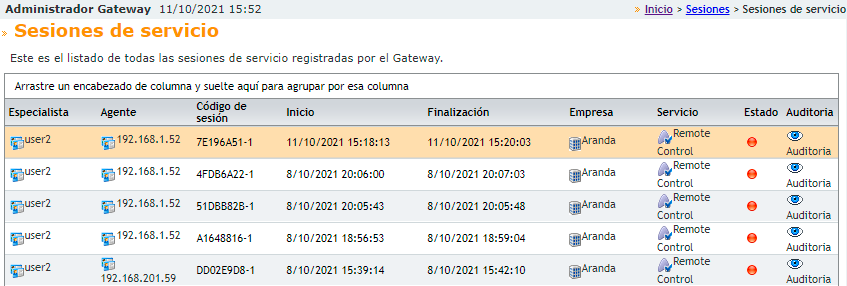
In remote control sessions, you can view the audit recording of the session: