
CI Creation
1. To create assets or configuration items, log in to the CMDB console, select the Cis from the main menu and in the Header menu click the Create. In the information view, the New IQ.

2. In the window New IQ You will be able to fill in the required information. Select a category, the projects to which the IC will be associated and enter the basic information requested. When finished, click on the Save to confirm the changes made.
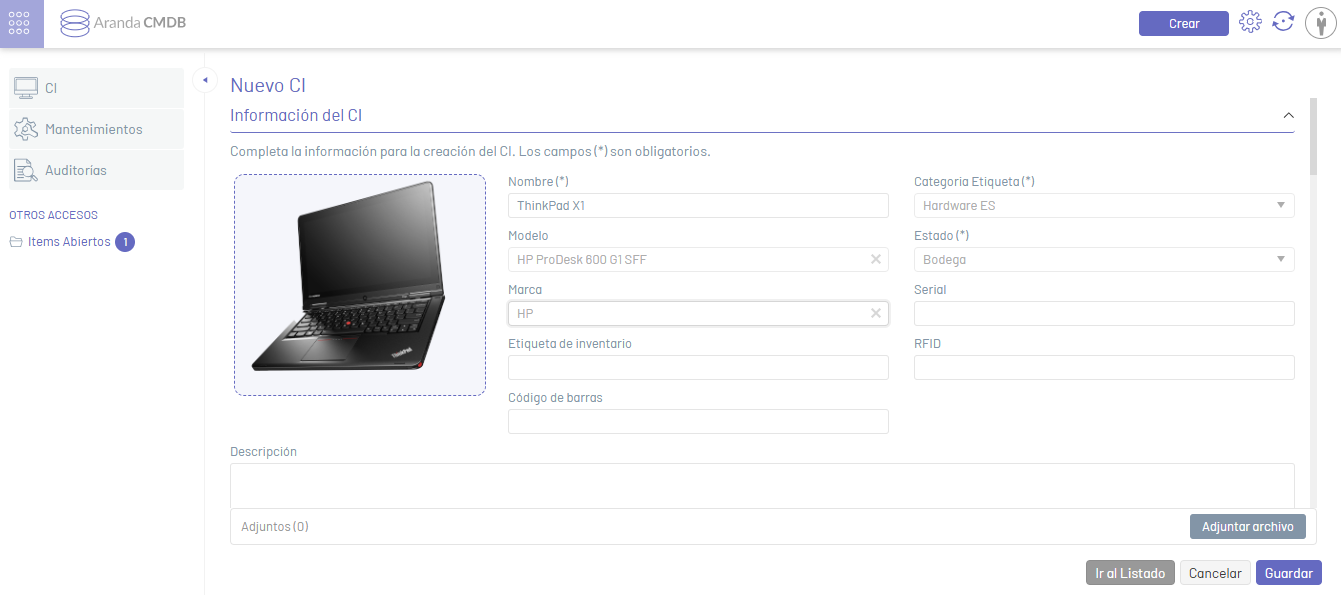
⚐ Note: When attaching files to the CI, you should note that the files allowed to be added are defined in a whitelist that is only modifiable from the site’s webconfig file (cmdb). The use of the whitelist is due to ethical hacking guidelines that have been applied after vulnerability tests carried out on the application.
- Allowed file types: zip, rar, emz, 7z, docx, pdf, txt, inx, xlsx, doc, evt, log, xls, rdlx, svclog, pml, xlsm, aam, prc, rtf, pptx, dmp, repx, ppt, jpeg, jpg, png, gif, tif, vsd, vsdx, svg, dsf, bmp, jfif, ico, emf, bmp, avi, webm, mp4, msg, eml, resx, cll, sql, rdl, config, amk, bak, css, csv, dll, mov, xml
3. By consulting the detail view of the new CI, you will be able to view and manage the information in the tabs that are enabled as Additional information, Historical, CI Users, Relations, Components, Approvals and Accounting Management. A QR code is also generated that stores the IC information. To view the code, click on the QR code icon.
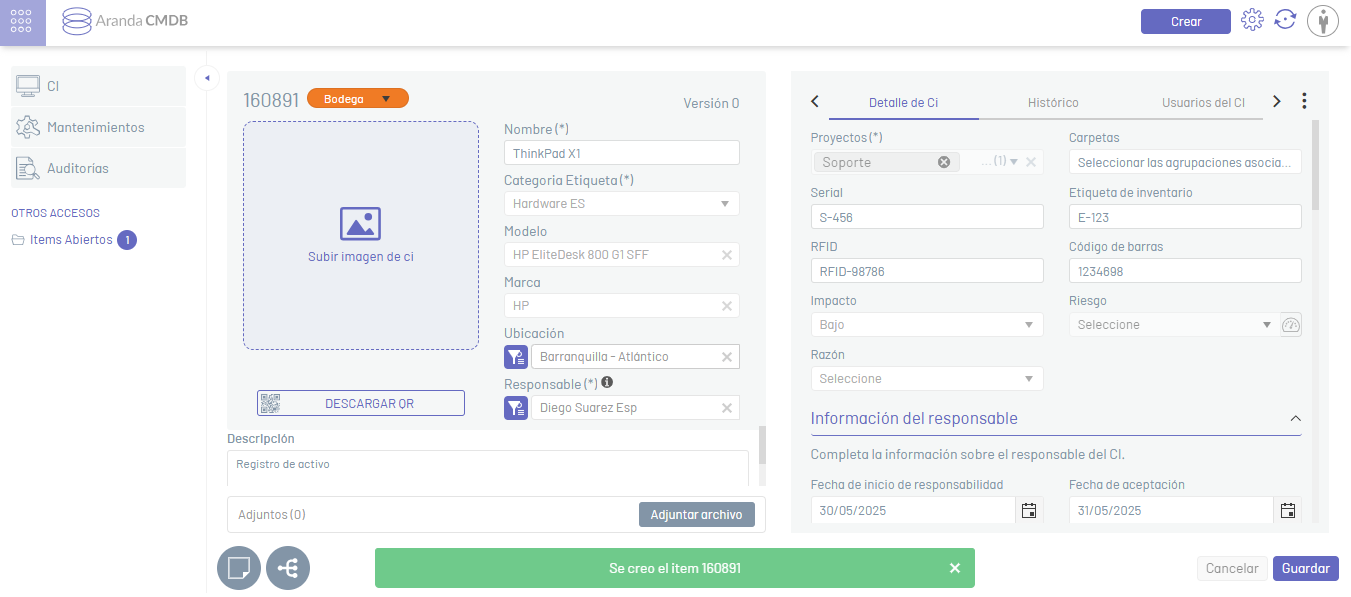
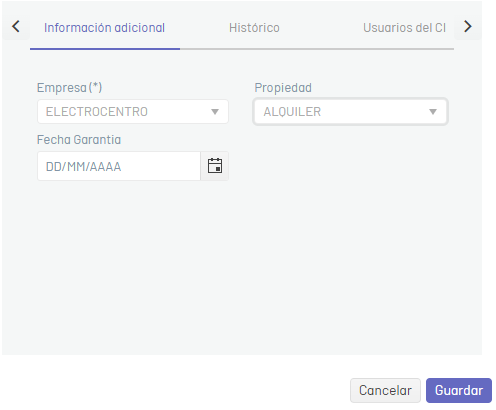
4. In the CI detail view, select the Additional information, where you can manage additional CI fields.
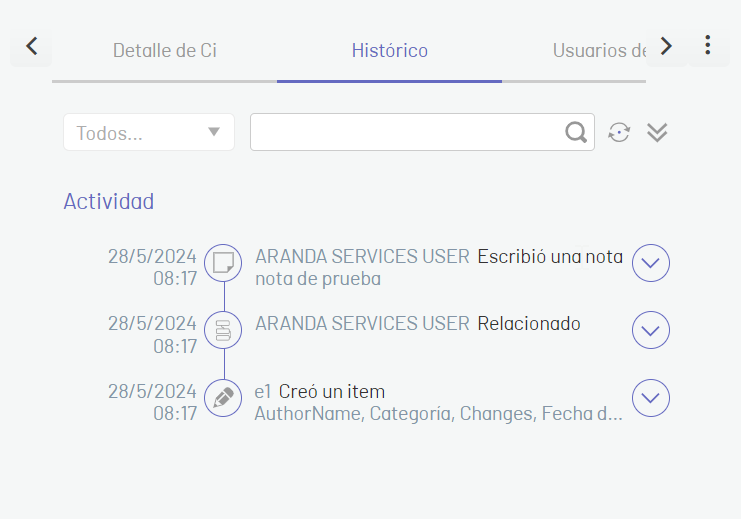
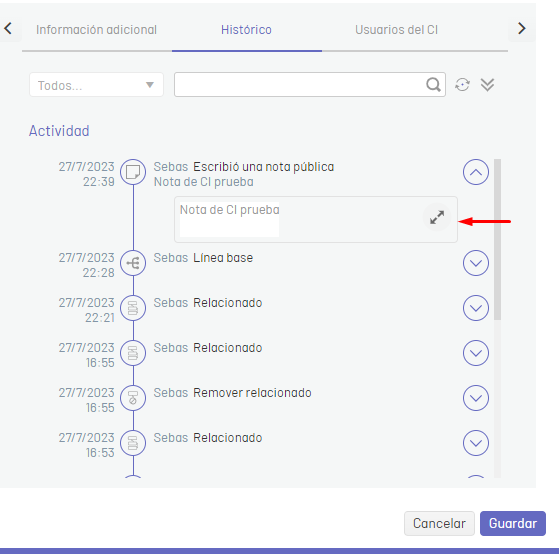
5. In the CI detail view, select the Historical, where you can view all the events that occurred with the CI.
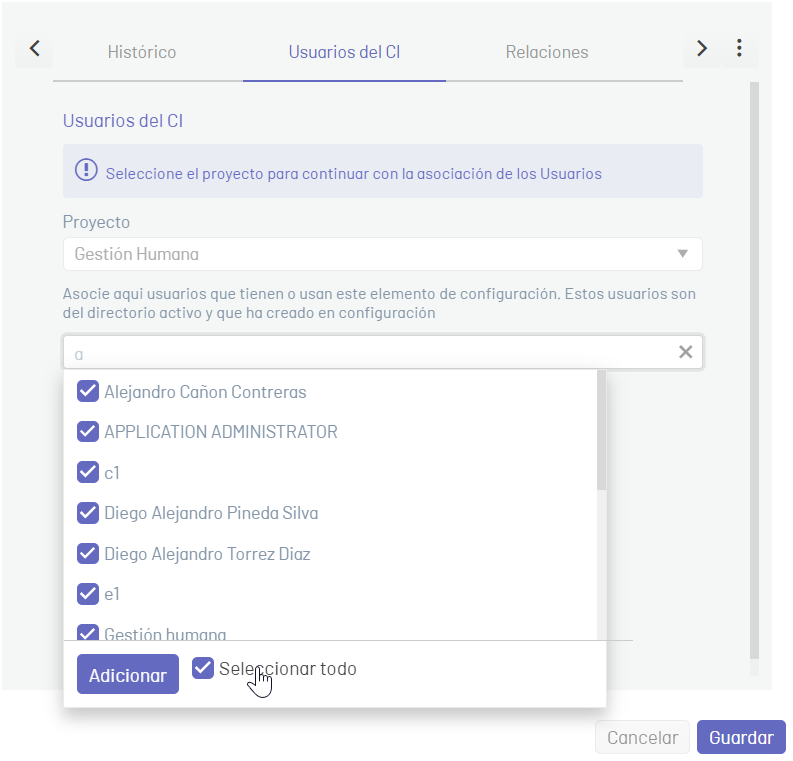
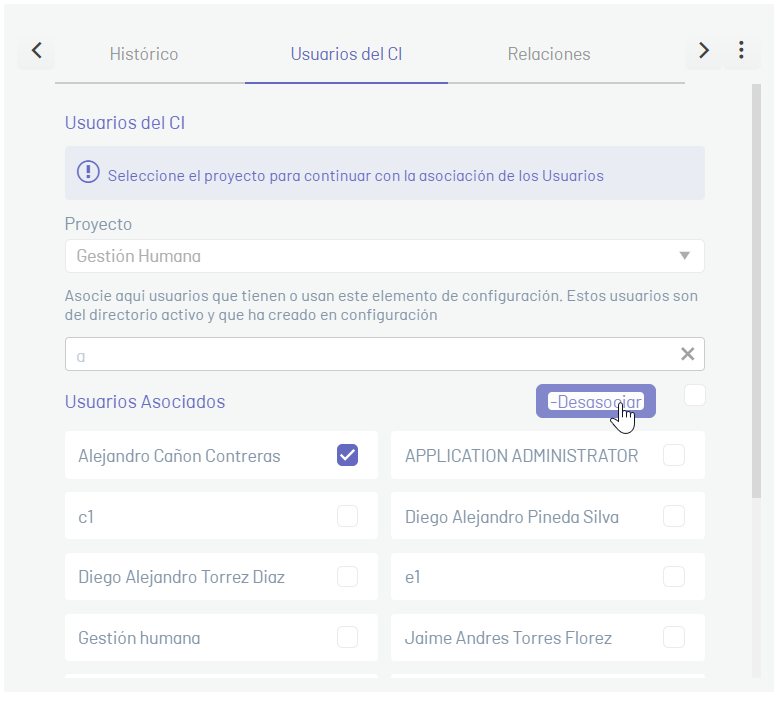
6. In the CI detail view, select the CI Users, where you can manage the users who use the CI (active directory users and pre-created users in the configuration).
To add one or more users to the CI, select the project, in the search field select the users you want to associate, and click the Add.
To detach users from the CI, select the users and click the Disassociate.
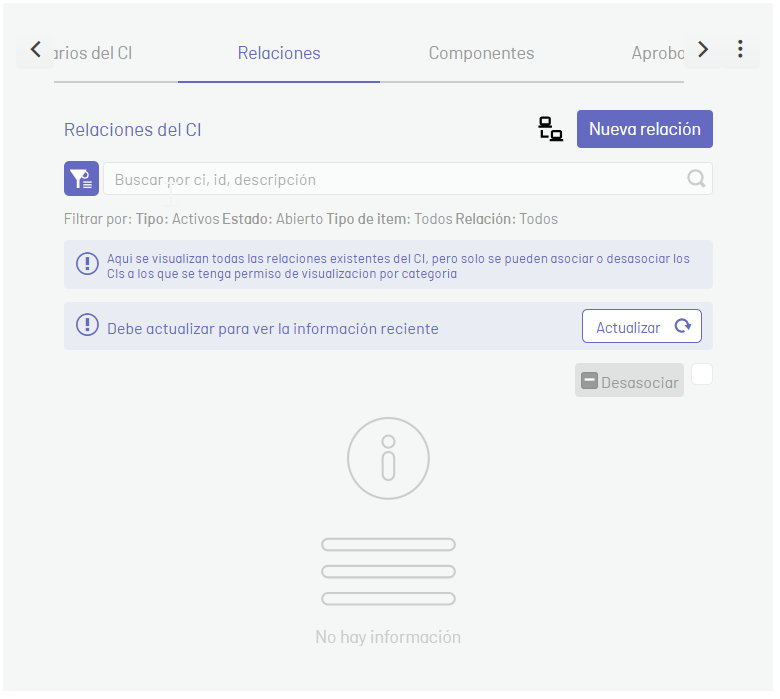
7. In the CI detail view, select the Relations, where you can manage CI relationships with other assets, knowledge base articles, cases, or events. To add a relationship, click the New Relationship.
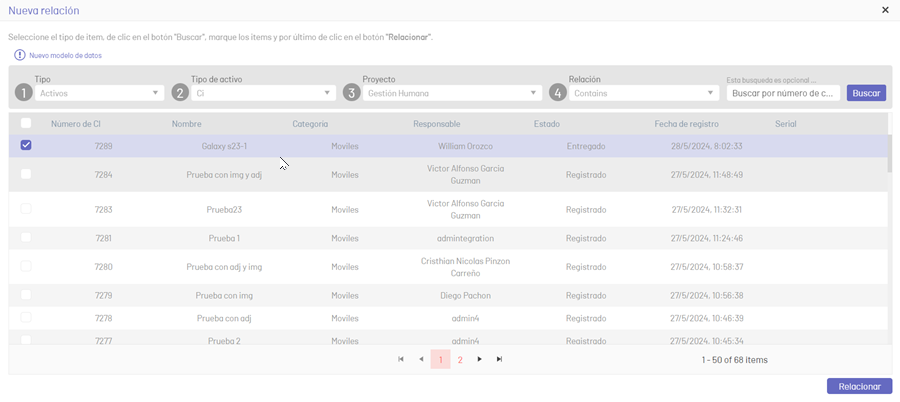
In the window New Relationship, select the Relationship Type (Case, Assets, Item, Event), Project, and Relationship. To perform the query by clicking the To find.
Select a record from the generated list of results and click the Relate.
To perform the relationship query that the CI has, click on the filter icon and select the Type of record you want to search; Click the Apply to display the list of IC relationships.
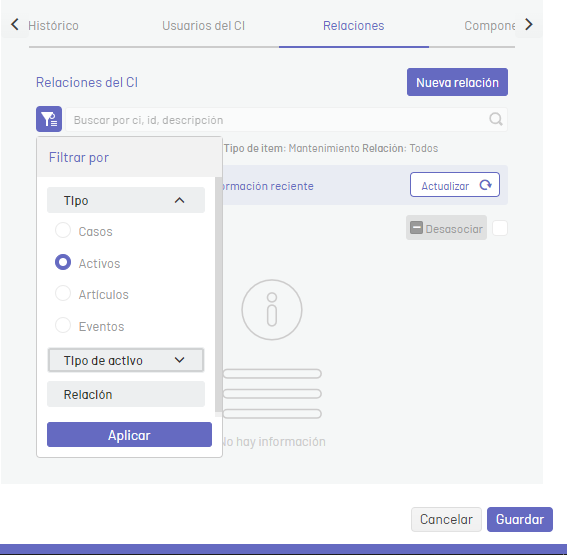
To detach relationships from the CI, select a record and click the Disassociate; You will be able to view the confirmation message to disassociate the item and click the Disassociate.
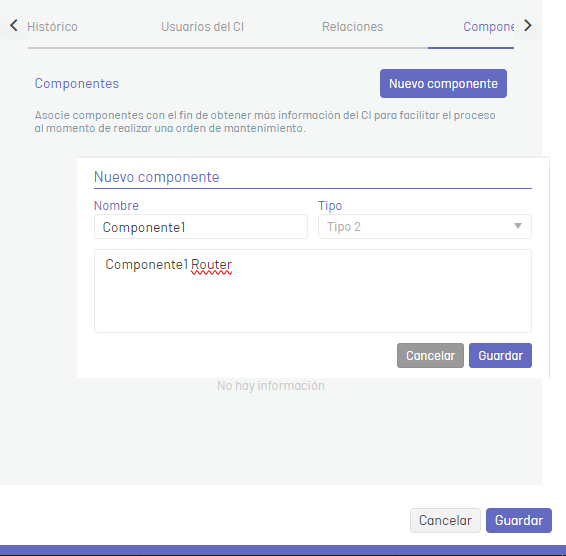
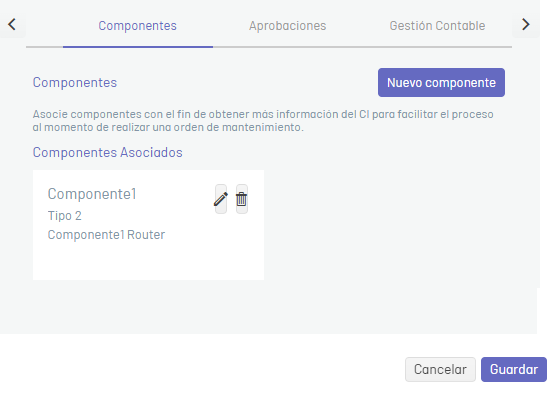
8. In the CI detail view, select the Components to include components that are part of the IC. To add a component to the CI click the New Component and enter the requested information such as Name, Type, and Description of the component, to add it by clicking the Save.
To edit a component, click the Edit of the existing component; in the window Edit of the component, make the changes and click the Save.
To delete a component, click the Eliminate of the respective component.
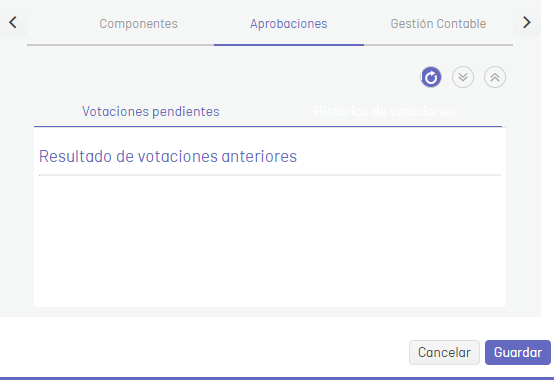
9. In the CI detail view, select the Approvals, where you can view the results of the approval processes for ICs.
You can also vote on an approval process that is pending.
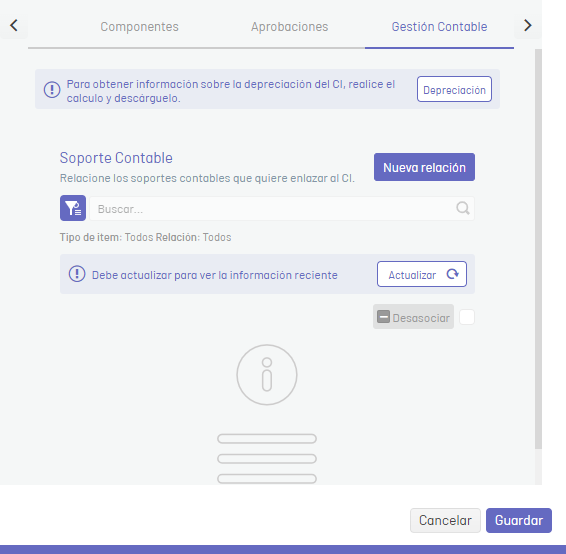
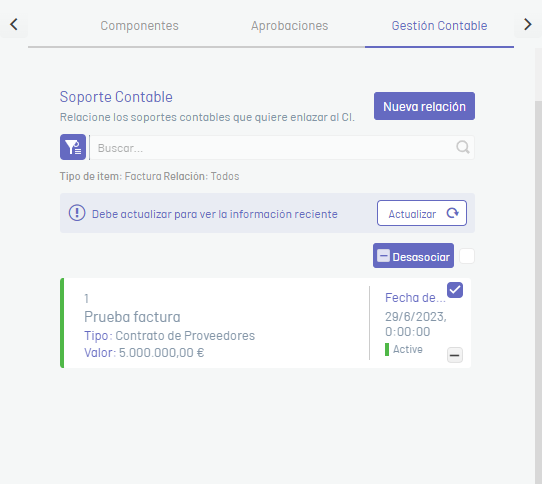
10. In the CI detail view, select the Accounting Management, where you can associate accounting supports with the IC, such as invoices, contracts, and other documents.
View Contracts, View Invoices and See Other Documents.
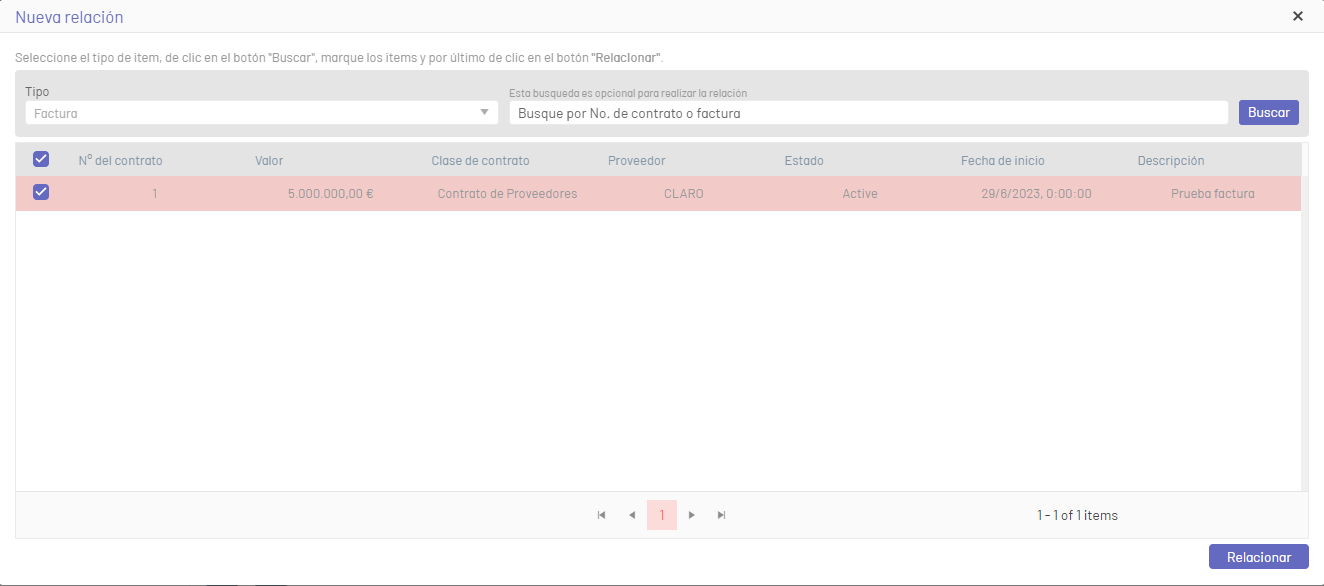
To add a click-to-button accounting support New relationship.
In the search window, select the Media Type and click the To find.
Select the appropriate record and click on the Relate.
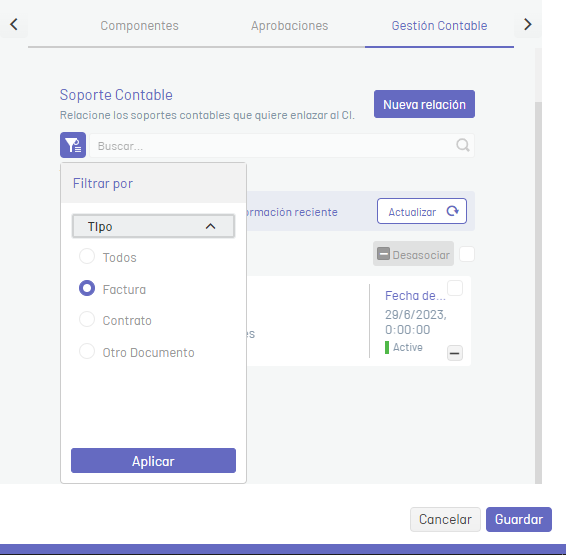
To filter the accounting management documents, click on the filter icon and select the type of media.
To delete an accounting support, select the post and click the Disassociate, a confirmation window will be displayed, to continue click Disassociate.
Baselines
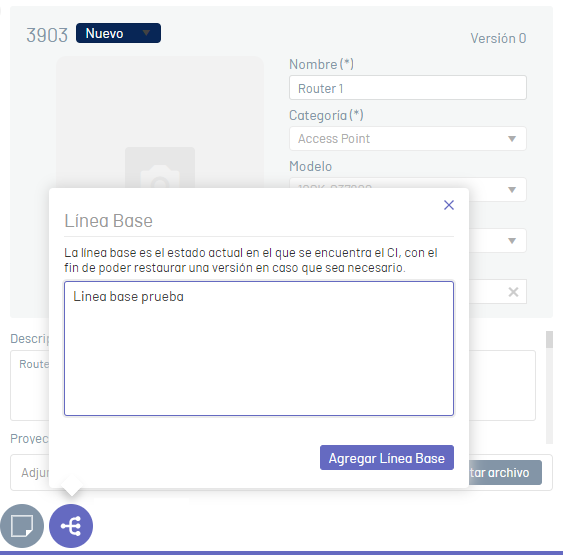
1. To create an IC Baseline, in the CI detail view, click the Baseline  at the bottom of the window. Enter the name of the Baseline and click the Add Baseline; this record is added to the IC history.
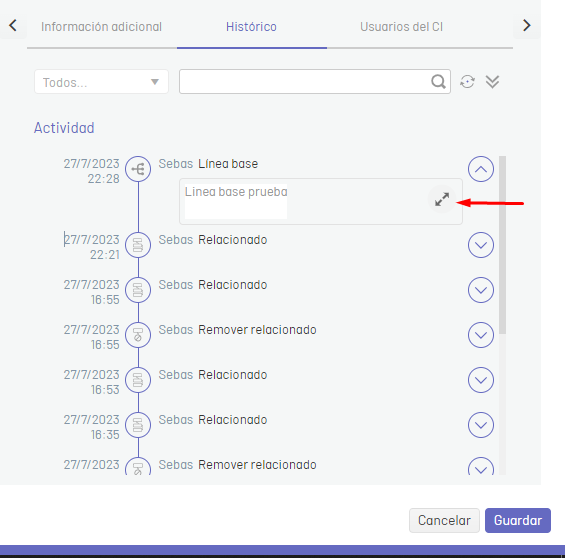
In the CI detail view, select the Historical, to consult the IC Baselines. Expand the baseline record and click the Expand.
In the window Baseline Detail you will be able to compare the baselines created against the current IC information.
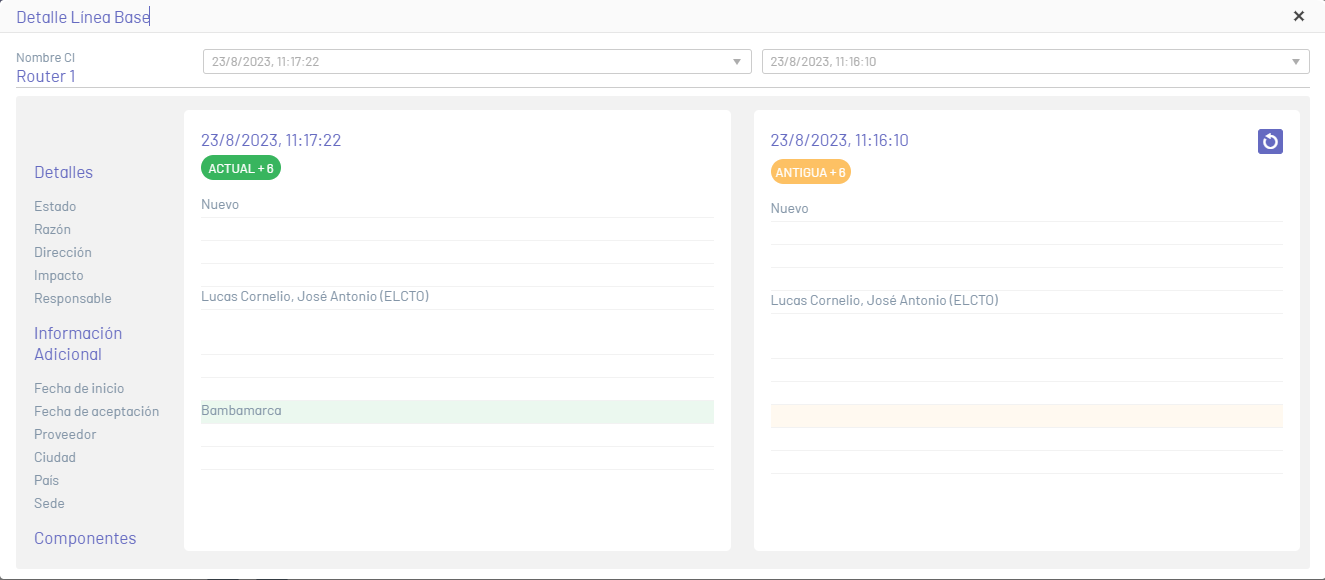
To restore a click-through baseline, click the Restore  .
.
Notes
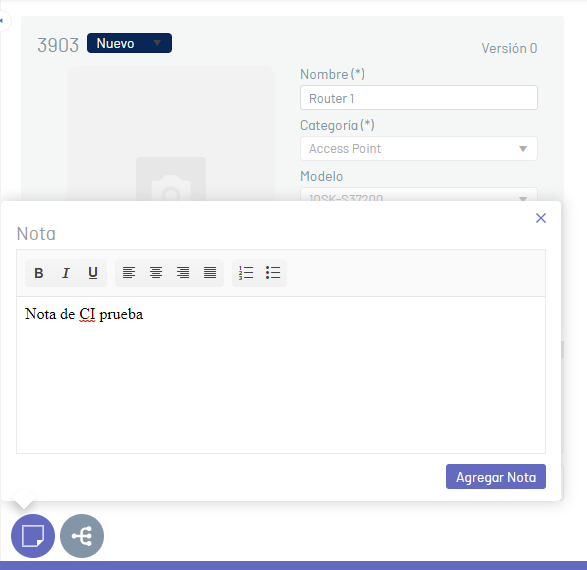
1. To add a public note to a CI, in the CI detail view, click the Note  at the bottom of the window. Enter the description of the note and click the Add Note. once this is done, the note will be added to the IC history.
In the CI detail view, select the Historical, to view the IC notes. Expand the baseline record and click the Expand.
You will be able to display a window with the IQ score defined.