
Creating contracts
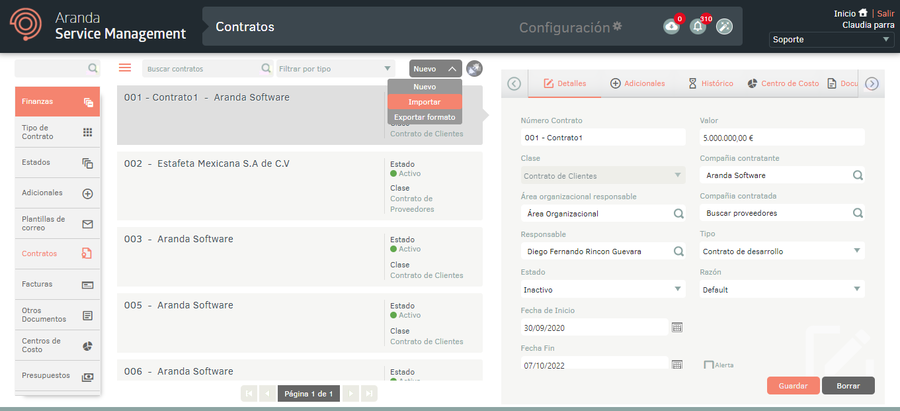
1. To create contracts, log in to the ASMS Admin Console, in the Finance from the main menu, select the Contractsicon, define a project, and in the information view, select the New and in the detail view you can configure the basic information of the contracts and associate them with services and CIs.
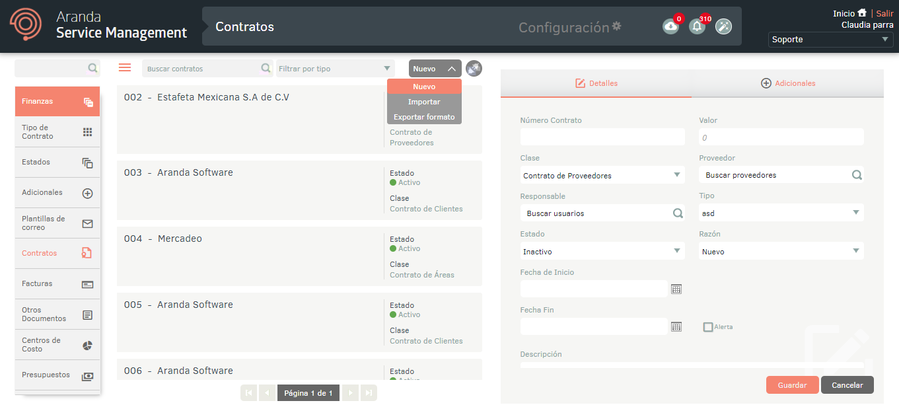
2. In the Contract Detail View in the ASMS Admin Console, select the Details tab, where you can fill in the required contract data:
| Field | Description |
|---|---|
| Contract number | Enter the contract number. |
| Value | Enter the contract value. |
| Class | Select the contract type (vendor, customer, or area). |
| Supplier/Contracting Company/Organizational Area | Select the vendor, contracting company, or organizational area. |
| Responsible organizational area | Select the area responsible for the contract. |
| Contracted Company/Organizational Area | Select the contracted company or area to which the service will be provided. |
| Responsible | Find and select the user responsible for the contract. |
| Guy | Choose the type of contract. |
| State | Initial status of the selected contract type. View States. |
| Reason | Reason for the initial state. |
| Start Date | Enter the start date of the contract. |
| End date | Enter the end date of the contract. |
| Alert | Description |
| Field | Check the box if you want to generate an alert warning of the termination of the contract and define how many days before the end date the alarm should be triggered. |
| Description | Enter a description of the contract. |
3. In the Contract Detail View in the ASMS Admin Console, select the Additional, where you can fill in any additional fields that you have set up for the contract type.

4. When you finish setting up the basic information for the contracts, click Save to confirm changes made; in the Detail View of the ASMS console, tabs are enabled Historical, Cost Center, Documents, Cis, Records, Services and Benefited Companies/Areas.
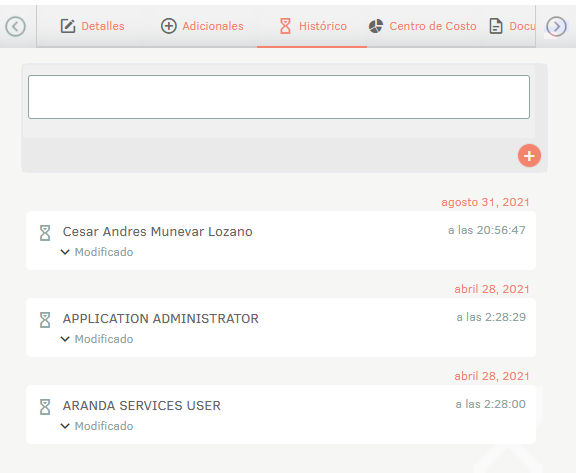
5. In the Contract Detail View in the ASMS Admin Console, select the Historical, where you can view all the adjustments that have been made to the contract and you can add annotations.
6. In the Contract Detail View in the ASMS Admin Console, select the Cost Center, where you can define the cost/revenue centers associated with the contract and the percentage of the contract value assigned to each cost/revenue center. Cost/revenue centers are associated according to the type of contract: cost centers for suppliers and income centers for customers.
| Example | Description |
|---|---|
| Example | - Training campaign contract - Total cost: 4,000,000. - Pre-sales cost center: 80% (3,200,000). - Marketing cost center: 20% (800,000). The values distributed in the cost or income centers are reflected in the associated budgets. See Quotes 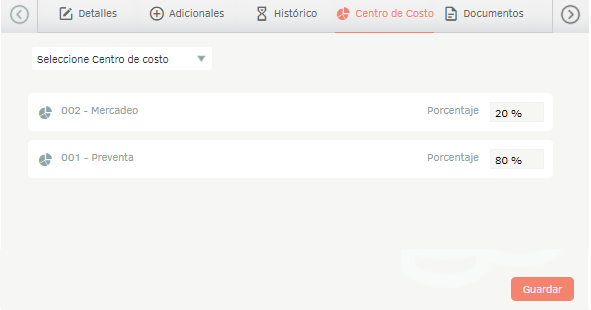 |
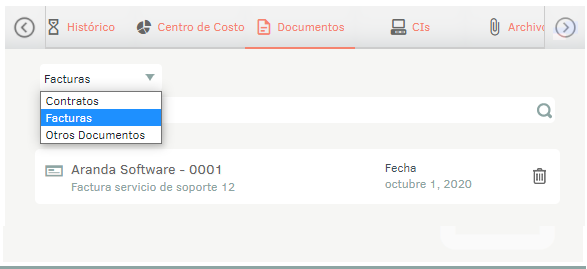
7. In the Contract Detail View in the ASMS Admin Console, select the Documents, where you can associate documents (contracts, invoices, or other documents) that have been previously created and that are related to the selected contract.
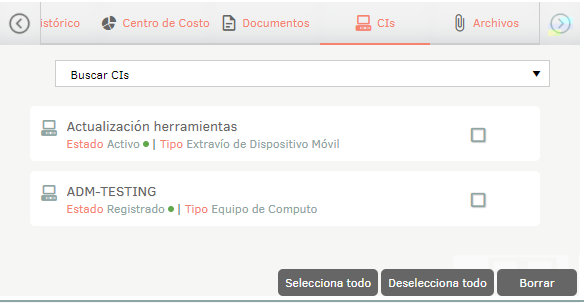
8. In the Contract Detail View in the ASMS Admin Console, select the Cis, where you can relate contracts to CIs. See 8.16 ICs.
9. In the Contract Detail View in the ASMS Admin Console, select the Records, where you can attach files to the contract and give a brief description of the contents.

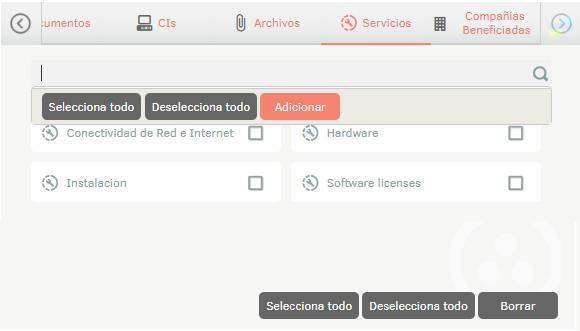
10. In the Contract Detail View in the ASMS Admin Console, select the Service where you can associate contracts with services. In the search box, type in the name of the service, tick the checkbox, and click the Add button.
11. In the Contract Detail View in the ASMS Admin Console, select the Benefited Companies/Areas (as selected when creating the contract) the companies or organizational areas associated with the service previously associated with the contract are displayed.
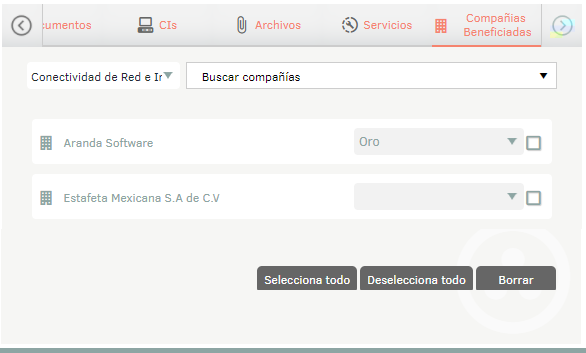
From the search bar it is possible to associate companies or organizational areas with the services. To do this, select the service and, in the search box, type the name of the company or organizational area and select it.
Viewing SLAs outside the date range of contract dates
1. After creating the contract, if there are agreements (SLAs) associated with the services that are Outside the date range of the contract, an informative message will be displayed indicating that “There are service agreements outside of the contract dates.”
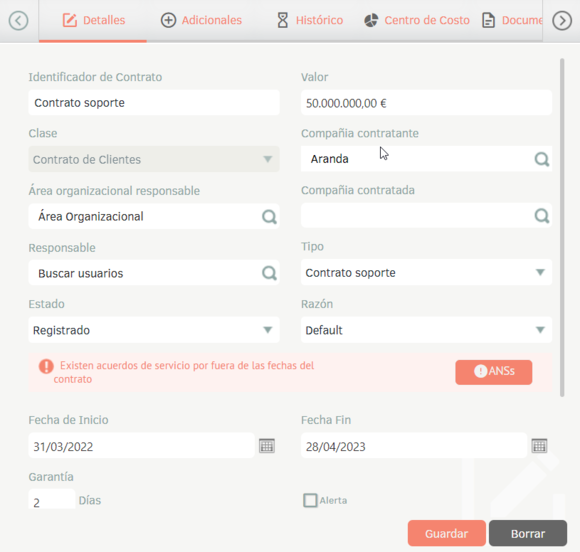
2. By clicking the “ANSs”, a window will open showing details of service agreements that are outside the range.
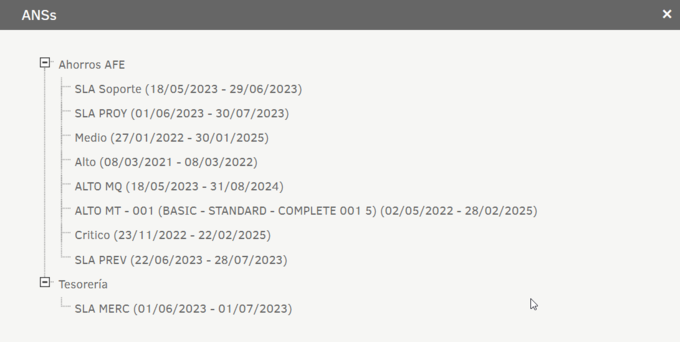
⚐ Note: This option only applies to customer contracts.
Associate contracts with projects
1 To associate contracts with a project, log in to the ASMS Admin Console in the Finance from the main menu, select the Contracts. Define a project, and in the information view, select the Associate Mode; This option will allow you to associate contracts from other projects with the project that is selected.
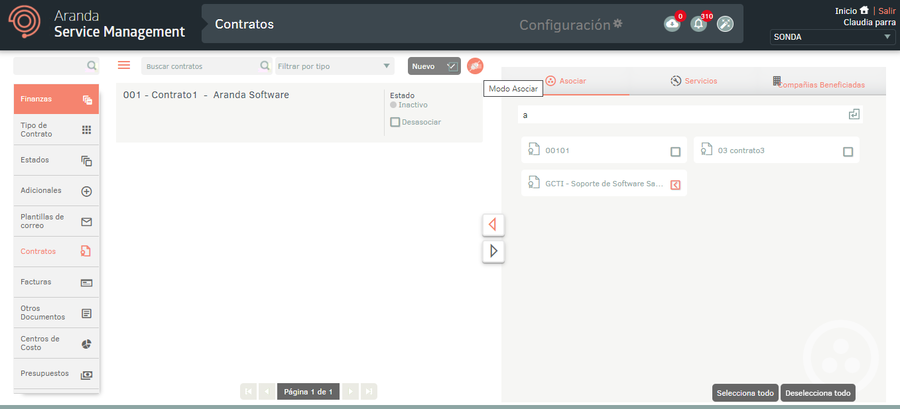
2 When activating the Associate, in the detail view of the ASMS Configuration Console, the Associate, where you can view contracts by code and associate them with the project by checking the checkbox and then the Associate.
3 You can also detach a contract by checking the checkbox and then the Disassociate.
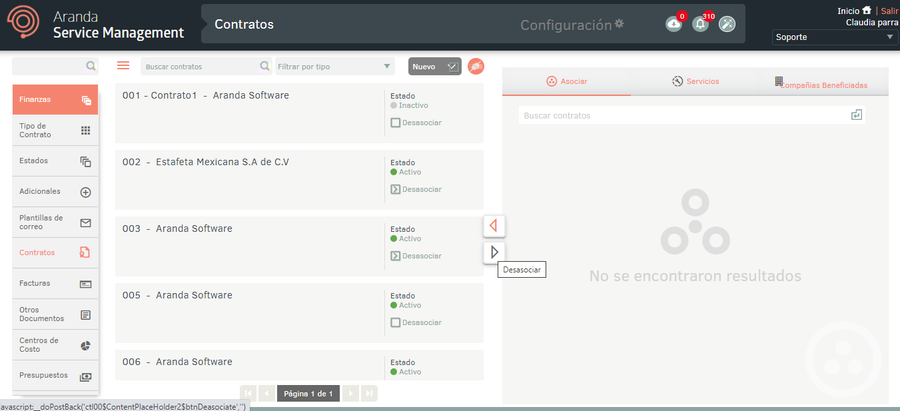
4 If you want to detach contracts in bulk, click the checkbox at the top, then click Disassociate.
Bulk Contract Upload
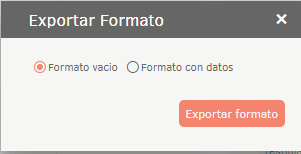
1 To export the contract information, log in to the ASMS Admin Console, in the Finance from the main menu, select the Contracts. Define a project, and in the information view, select the New/Export Format; This option will allow you to export the information with or without data for updating and/or creating contracts.

2 The window is enabled Export format where you must select whether you need to export the empty format (contract creation) or with data (update or contract creation). Click Export Format.
3 A file in Excel format will be downloaded, which includes all the necessary fields for the creation and/or updating of the contracts.
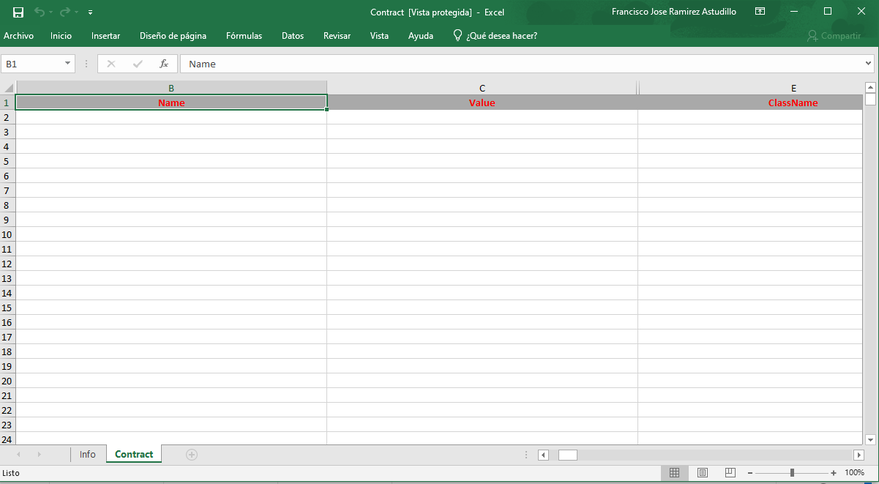
4 The Info tab describes in detail the obligation and information to be filled in on each field.
Import Format for Contracts
1 Once the form has been completed, enter the ASMS administration console, in the section Finance from the main menu, select the Contracts. Define a project, and in the information view, select the Import Format.
2 In the window Import, upload the file, and click the Save.
3 Once the import is complete, the number of contracts created and/or updated will be displayed at the bottom of the screen.
⚐ Note:
- When you enter a duplicate or existing contract name in the console, importing the file will ignore the duplicate record(s) and continue importing the next records.
- When creating or editing a contract, if one of the fields of the contract to be edited or created is not correctly filled in, this field will be ignored and the next field of the contract will continue.