
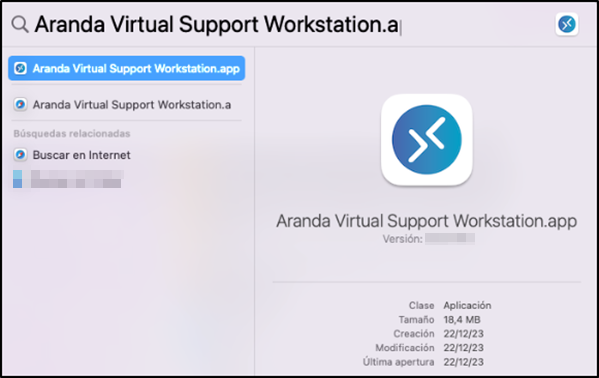
Once the agent is installed, follow these steps to access the user interface:
1. Click the “Launchpad” icon or the magnifying glass icon in the Spotlight.
2. Find and select the “Aranda Virtual Support Workstation” option.
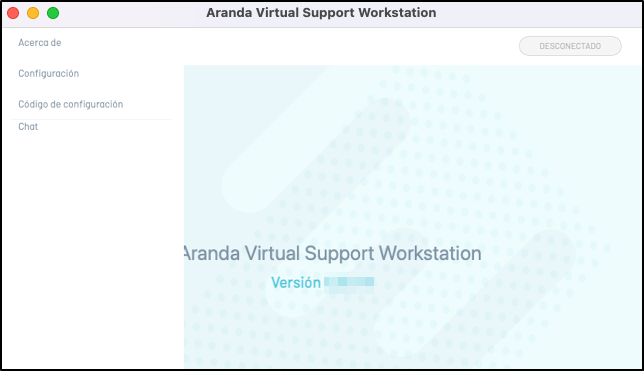
The agent UI is enabled where you can make adjustments to the configuration.

| Option | Description |
|---|---|
| Drop-down menu | Displays a menu of options: - About: Allows you to display the current version of the agent (default option). - Configuration: Allows you to adjust the Host configuration, group code, and apply the configuration code. - Configuration Code: Allows you to update the agent’s configuration by inserting a new configuration code. View Configuration Code. |
| Status message | It allows you to visualize the current status of the agent. View Notifications |
Configuration
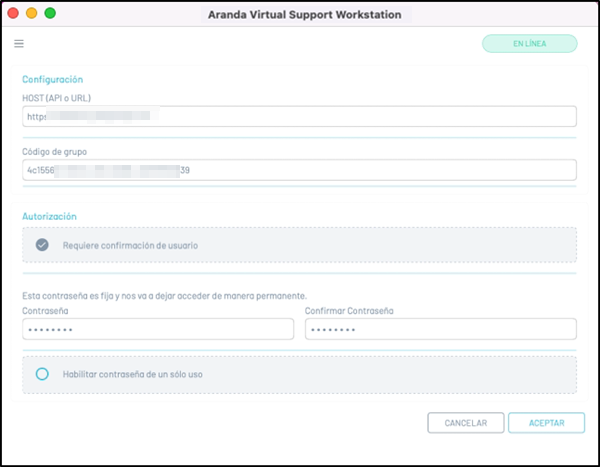
1. From the agent UI drop-down menu, select the Configuration:
2. In the Settings window, complete the following Fields.
| Field | Obligatory | Description |
|---|---|---|
| Host(Api or Url) | Yes | Url of the notification server that must be delivered by the specialist who performs the support. |
| Support Group Code | Yes | Support group code that must be provided by the specialist who will provide the support. |
| Requires user confirmation | No | This field is for enabling or disabling confirmation by the user when authorizing a support session. |
| Fixed password | Yes | The authorization password for the support session. The password must meet the following characteristics: 1. It must have at least one capital letter. 2. It must have at least one lowercase letter. 3. It must have at least one number. 4. It must have at least one special character. 5. It must have a minimum length of 12 and a maximum of 50 characters. |
| One-time password | This password is made to be used only once when authenticating the support session, once the support session has been authorized the password will no longer be valid and a new one will be generated. A new password can be invalidated and generated by clicking the refresh icon in that field or by clicking the Accept. |
3. To save the settings, click Accept. If the fields have been entered correctly, the message will be displayed: “ Correct, Updated settings.”
⚐ Notes:
- Click the Cancel to undo the modifications made, in case the changes have not been previously saved.
- If you are required to modify the agent settings, after installation, you will be able to log in again The Configuration Code.
If the configuration is done on a workstation Marked for deletion, the agent will not be brought online and will be automatically uninstalled within the following timeframes:
- Up to 5 minutes for new installations or when restarting the Agent process.
- Up to 24 hours for existing installations.
{: #important}
User confirmation
User confirmation means that the specialist cannot enter the workstation until the user approves the authorization. The following steps must be followed:
1. In the agent UI, in the Settings window, turn on the Requires user confirmation.
2. When the specialist requests authorization for a support session, the workstation will receive a validation message:
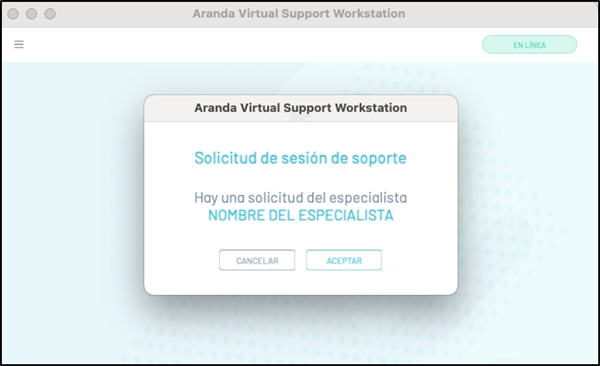
3. The specialist will be on hold, while the application is accepted. If accepted, support is authorized.