
Run Agent with Installation
For macOS systems, there are two installation agents, which should be used specifically depending on the type of processor of the device.
- Aranda Virtual Support Workstation.X.X.X.X_arm64.pkg: For devices with Apple Silicon (M1-M2) processors.
- Aranda Virtual Support Workstation.X.X.X.X_x64.pkg: For devices with Intel processors.
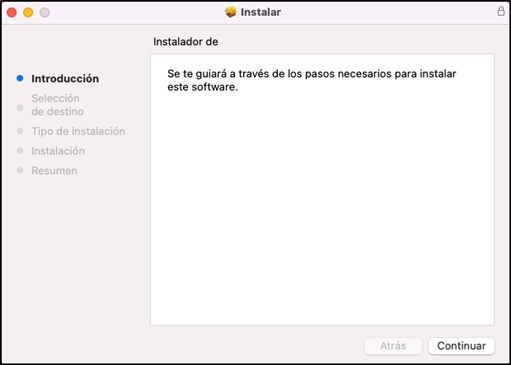
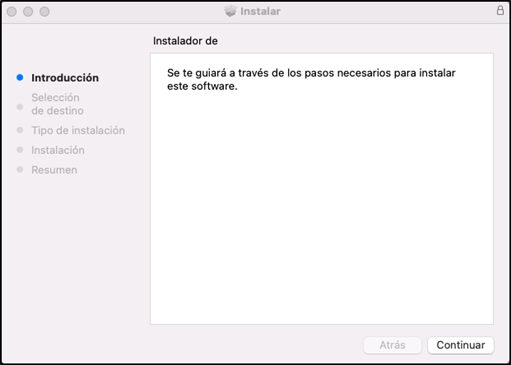
1. To perform the manual installation of the agent, the specialist provides the executable file of the Aranda Virtual Support agent according to the processor of the device. Entering the installer will launch the installation wizard, click Continue.
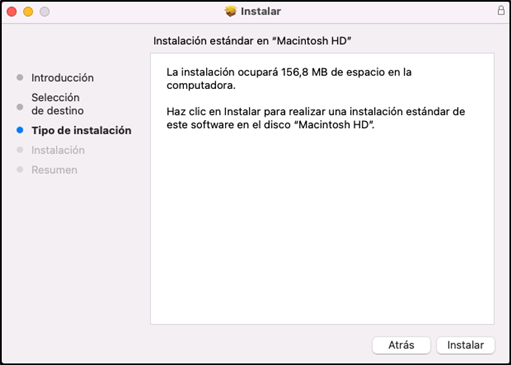
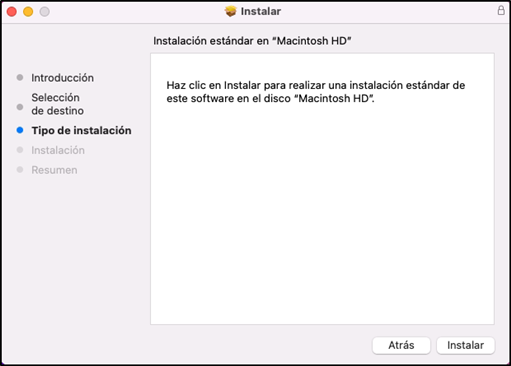
2. The auto wizard selects the destination route and provides a summary of the space required for the installation. Select the option to Install.
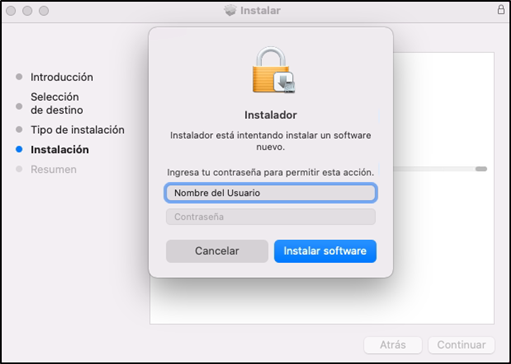
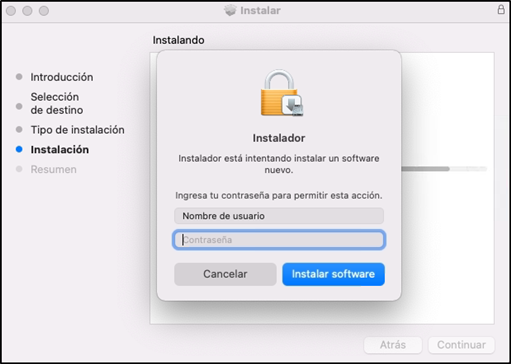
3. In the pop-up window, fill in the requested data and click Install software.
⚐ Note: Installing the agent generates different Aranda Virtual Support processes.
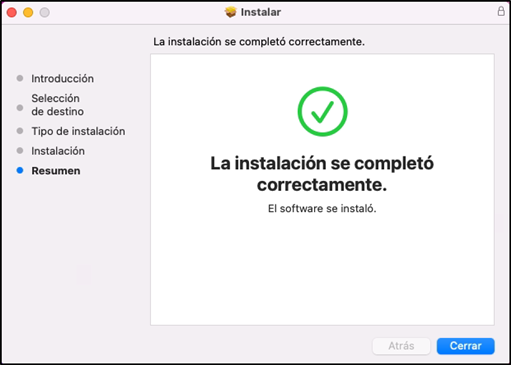
4. Once the installation is complete, click Close.
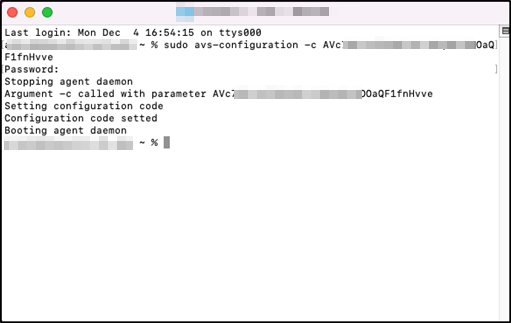
5. To apply the Agent Configuration Code From the terminal, use the following command: sudo avs-configuration -c {código de configuración}, not including the curly brackets {}.
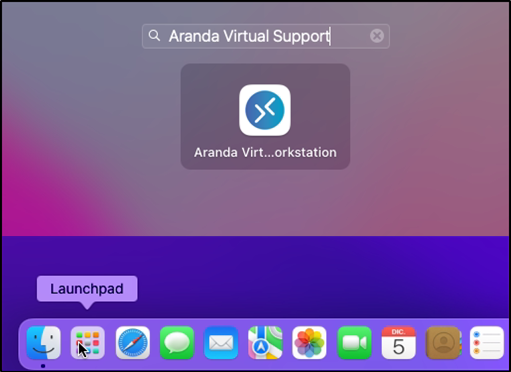
6. From the Launchpad search for ‘Aranda Virtual Support Workstation’. Select this item to open the Agent UI.
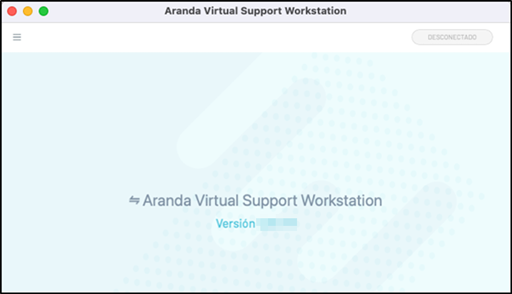
7. Si no se ingresó ningún código de configuración en el paso 5, en la interfaz de usuario del agente, podrá visualizar el mensaje de notificación en color gris y con el estado ‘Desconectado’. Diríjase a la sección Configuración manual de agente para completar el proceso. Ver también Notificaciones
⚐ Notes:
- During agent installation, grant the Permissions Accessibility and Access.
- Once the agent installation process is complete, if required, you can log in again The agent configuration code
- If the installation is performed on a workstation Marked for deletion, the agent will be automatically uninstalled after 5 minutes. In this case, reinstall and configure the agent again.
Installing and configuring the agent by command line
Agent installation and configuration can also be done by command line. This action can be performed remotely by the workstation itself or by the specialist. In this case, follow the steps below:
1. Enter the Terminal.app
2. Run the command:
sudo installer -pkg "Downloads/Aranda Virtual Support Workstation.X.X.X.X_arm64.pkg" -target /
What is in quotation marks corresponds to the path and name of the installer. The X.X.X.X correspond to the version.
3. To apply the Agent Configuration Code From the terminal, use the following command:
sudo avs-configuration -c {código de configuración}
Not including curly brackets {}.
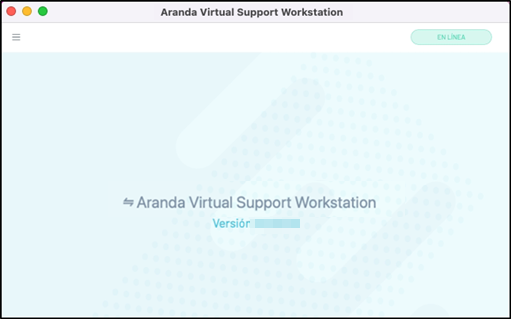
4. If the installation and configuration were successful, from the Launchpad search for ‘Aranda Virtual Support Workstation’. Select this item to open the Agent user interface, display the notification message in green and with the status ‘Online’; This can take about 10 minutes. If the configuration code is incorrect or no licenses are available, the agent will be installed, but it will not be configured and the agent’s notification message will remain grayed out in the ‘Disconnected’ state after 10 minutes.
⚐ Note: If the execution is performed on a workstation Marked for deletion, the agent will not go online and will automatically uninstall after 5 minutes. In this case, it will be necessary to reinstall and configure the agent again.
Uninstall agent
1. Access the agent uninstaller Aranda Virtual Support Workstation Uninstaller.X.X.X.X.pkg. Make sure that it matches the version of the agent installed on your system.
2. The installation wizard will start, click Continue.
3. The Auto Assistant selects the destination route. Select the option to Install.
4. In the pop-up window, fill in the requested data and click Install software.
5. You receive the following message: “Installation completed successfully”, click Close. The agent will be successfully uninstalled.

⚐ Note: From the terminal you can also run the command:
sudo installer -pkg "Downloads/Aranda Virtual Support Workstation Uninstaller.X.X.X.X.pkg" -target /. (What is in quotation marks corresponds to the path and name of the uninstaller. The X.X.X.X correspond to the version.) This allows the agent to be uninstalled.