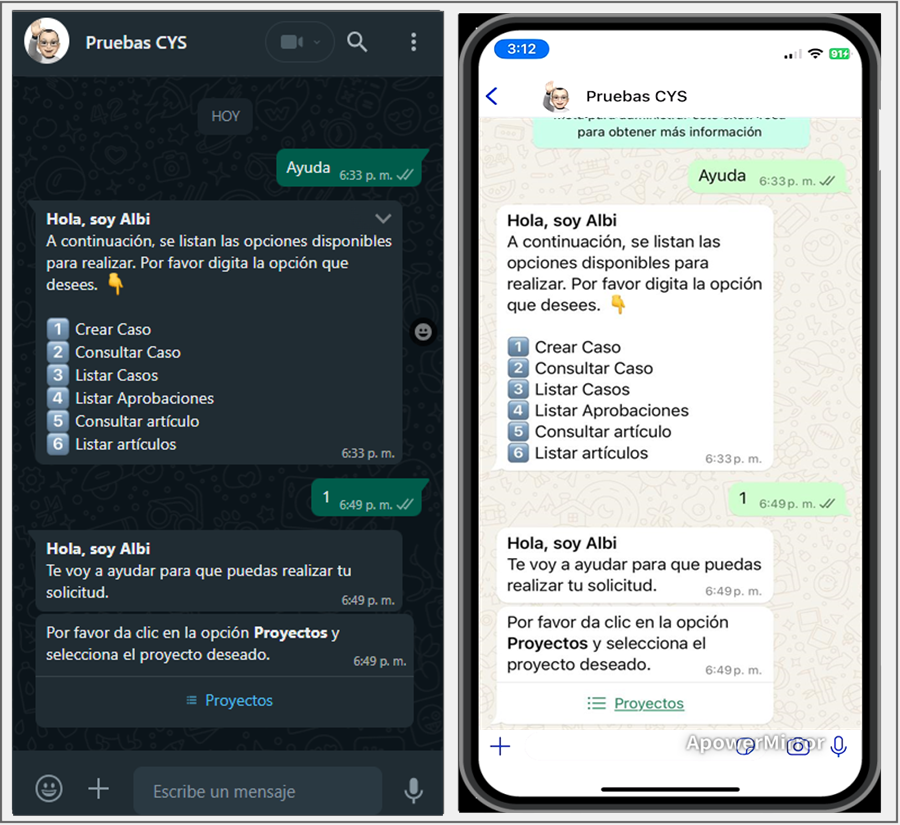
1. To invoke the Bot, start a chat with the contact number via the WhatsApp web or mobile app. After that, type any text and the Bot will respond with a greeting message and display the available options. Select the option Create Case by writing the number 1 as an answer.
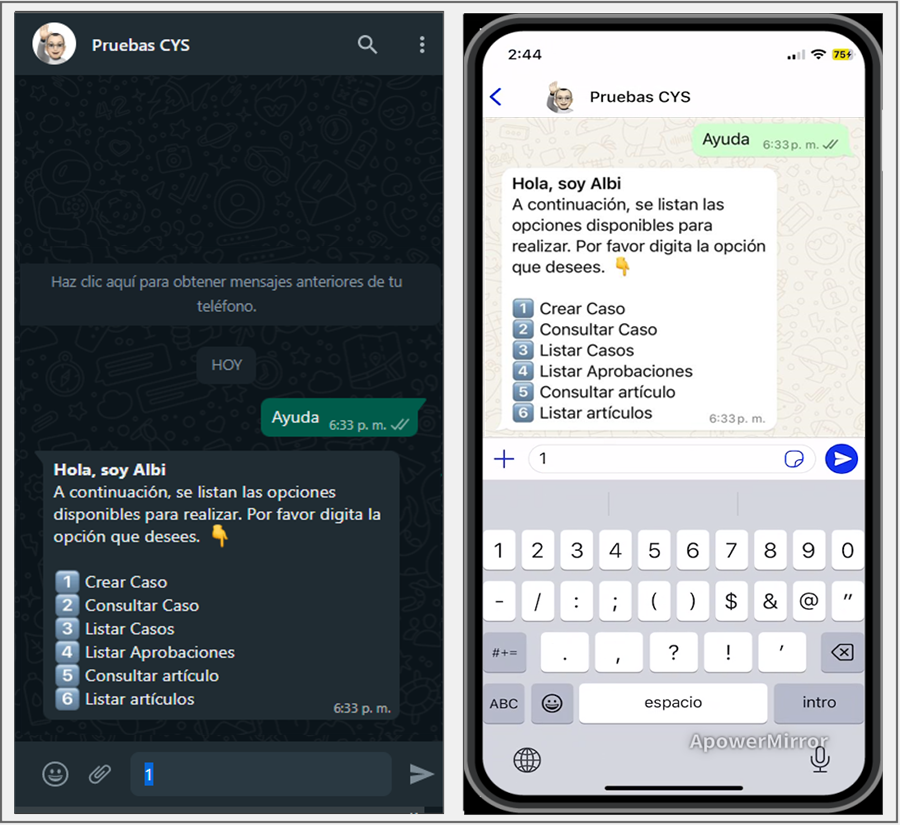
2. The Bot receives the user’s response and returns the service message that has been configured accompanied by one of the following options:
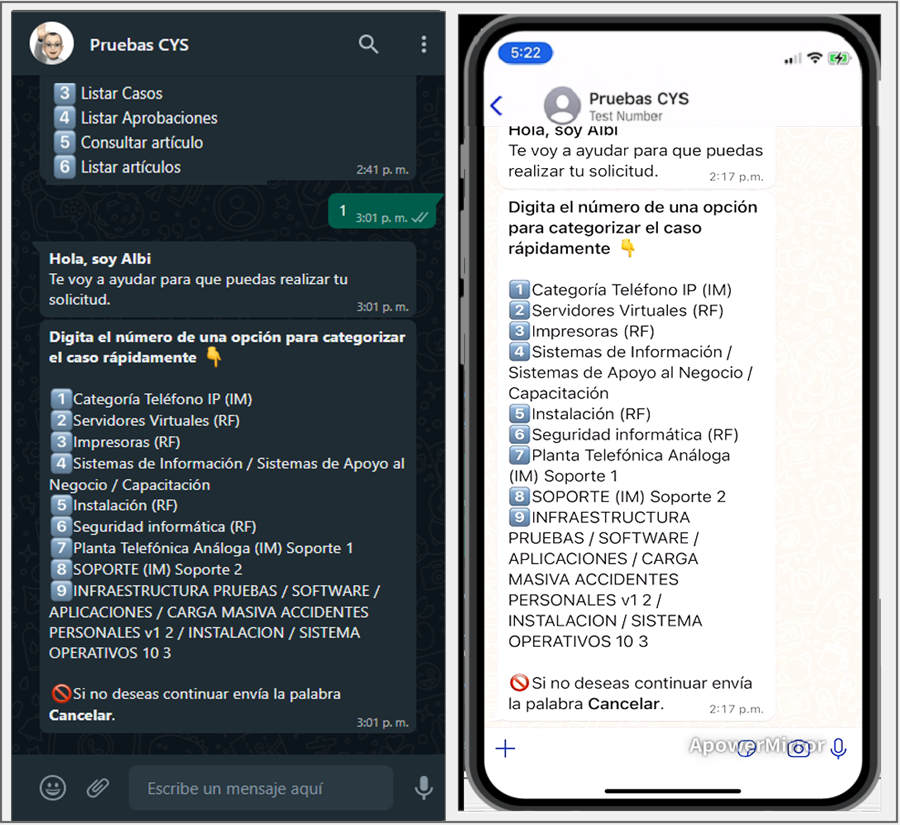
a) By enabling the “Use category quick links” option in the Bot Customization; the Bot will ask you to type the number of an option.
⚐ Note:
1 If the user interacting with the Bot is not associated with the service(s) configured for the enabled categories, by selecting the Create Case, the Bot will respond with the message I am sorry. At this time you don’t have categories set to continue.
2 For the generation of the list, the Bot validates that the user is associated with the service or services configured in the categories that have the Check “Category in the User Home” enabled in the administration web console (BASDK) > Itil > Categories.
3 It is recommended to configure labels in the categories, to facilitate identification in the categorization of the case, due to the restrictions on the number of characters that allow the hierarchy to be viewed in a complete way.
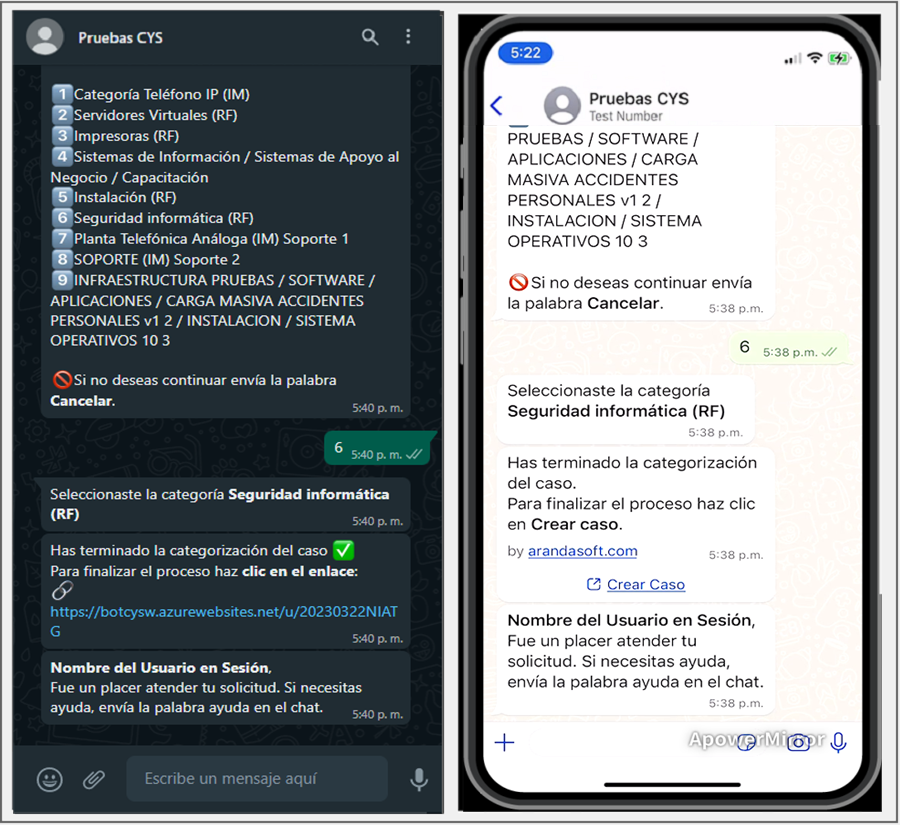
The Bot receives the response sent by the user and returns a message notifying the selected category and informing that the categorization of the case has been completed; Ask to click on the link or button Create Case if you’ve set up a custom template.
⚐ Note:
1 If the user interacting with the Bot sends an incorrect value in response, the Bot generates the message You must type the Option Number in order to continue with the creation of the case. If you don’t want to continue, text the word Cancel. The list with the categories is generated and the option is requested.
2 If the Bot responds with the message Create unidentified case template, contact the Administrator, validate that the template configuration is in an active state View Configuration Template Status and/or that the name assigned to the custom template matches the one entered in the Application configuration in the Bot environment in the Create Case Template field.
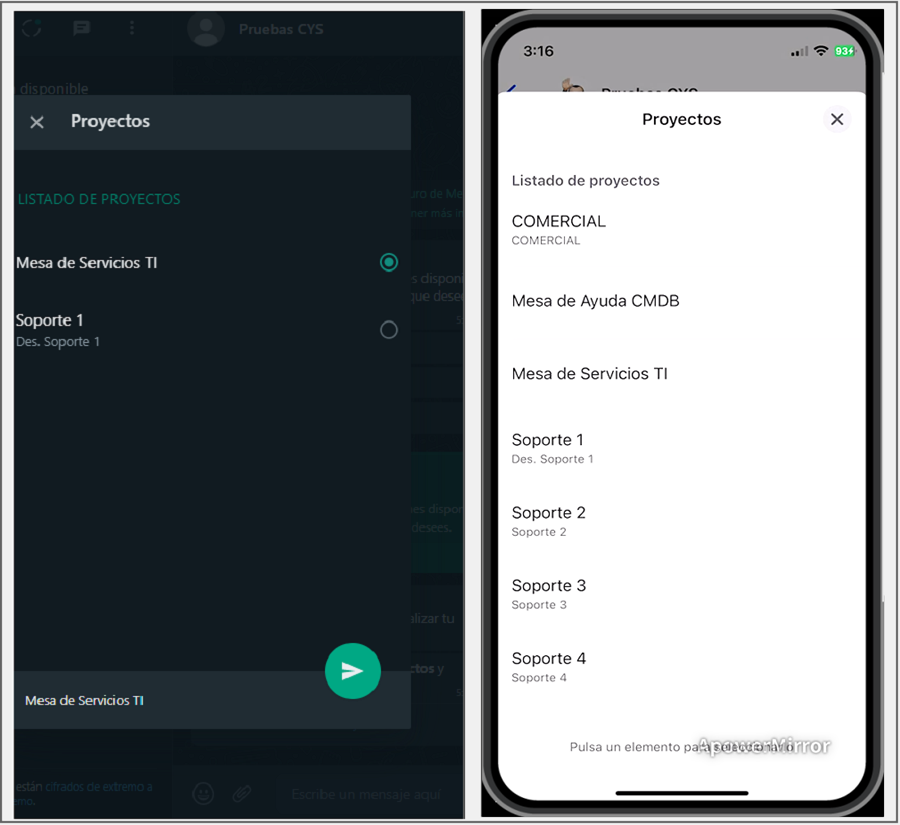
b) If the “Use category quick links” option is not enabled in the Bot Customization; the Bot will prompt you to select a desired Project.
⚐ Note:
1 If the user interacting with the Bot is associated with a project and not with a service, selecting the Create Case, the Bot will respond with the message I am sorry. At this time you don’t have any projects set up to continue.
2 If the user interacting with the Bot is associated with a single project, by selecting the Create Case, the Bot will automatically choose the project.
3. When selecting the Projects, you will be able to view the list of projects in which the user is associated. If the user in session is associated with more than 10 projects, 9 are listed and an option is enabled Following which will be sent as a response to the chat and generates a second list of projects.
This action can be repeated until the last listing is no more than 10 projects. The user in session will be able to select a project from the generated lists, select the desired project and click on the Send.
⚐ Note: After defining a project, the Bot does not allow you to change the selection and must submit the text Cancel to end the dialogue and start the categorization of the case again.
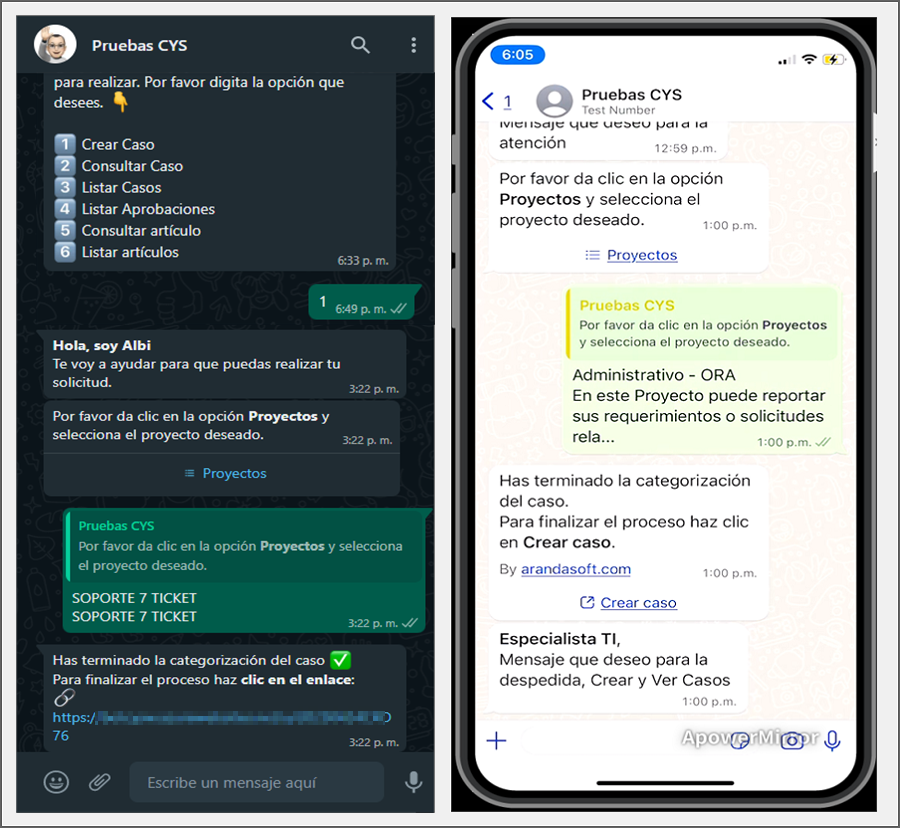
4.The selected project is sent as a reply in the conversation; if the project is enabled only for request creation, the Bot will send the link for case creation or the Create Case if you have the custom template set up.
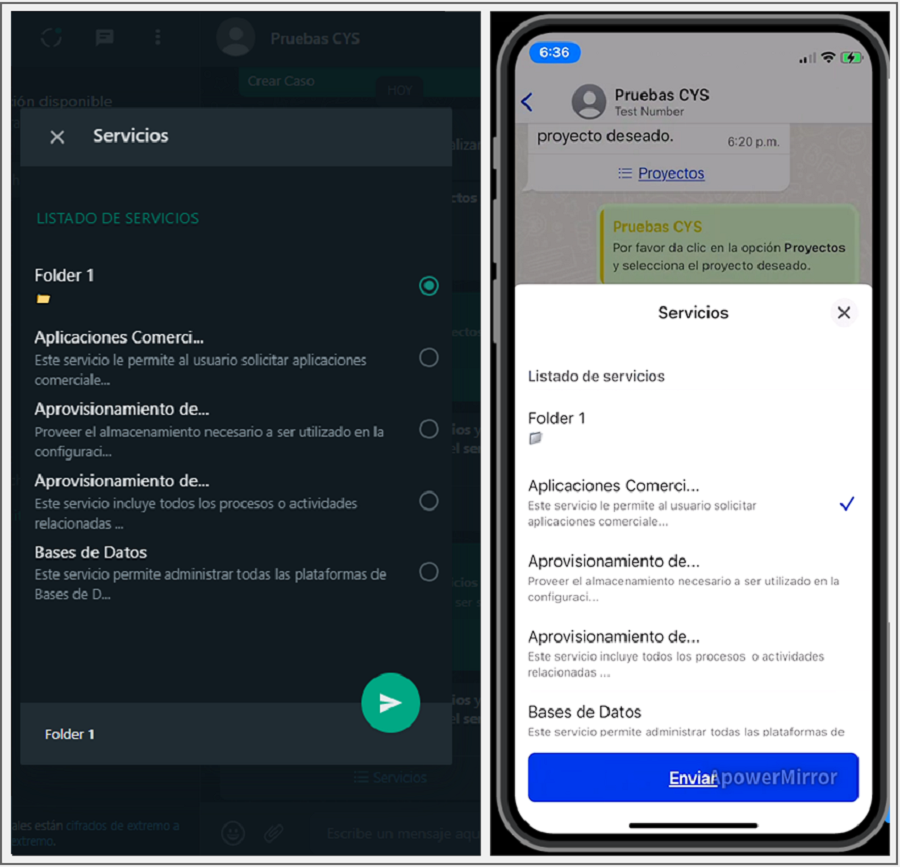
5. If the selected project allows you to create Requirement, Incident, or Change type cases, the Bot will display a message requesting to select the Service Group (when you have service groupings) or the service.
⚐ Note: If the user interacting with the Bot is associated with a single service within a project, when selecting the project, the Bot will automatically select the service.
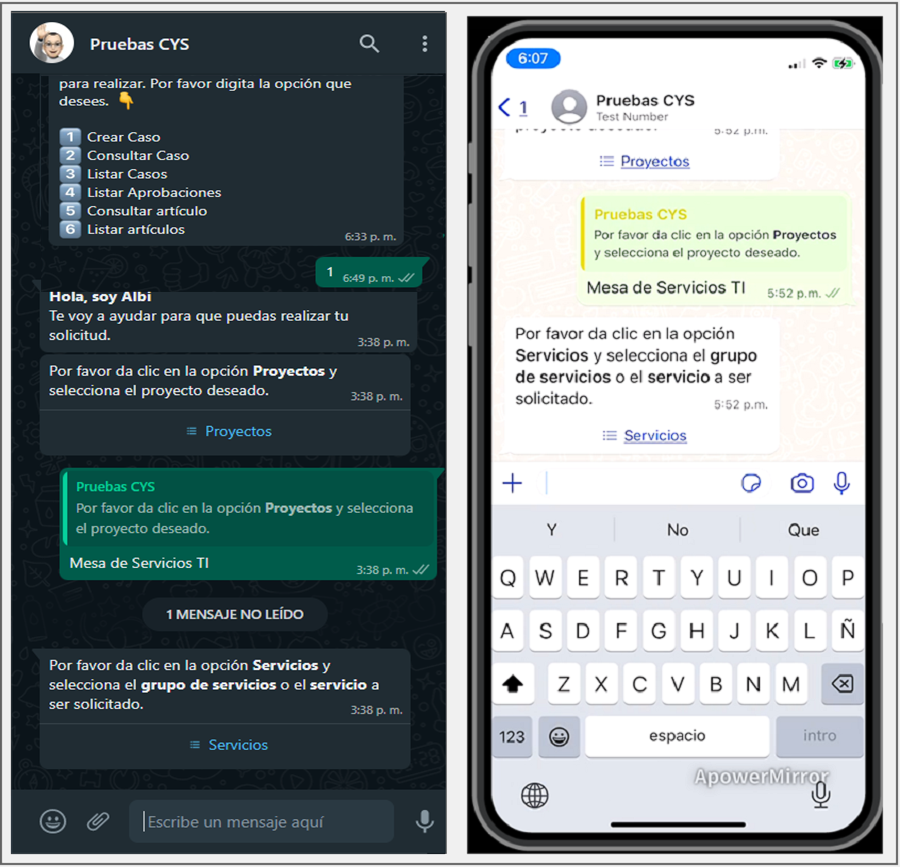
6. If you select the Services, you can view the list of service groups or services in which the user is associated. If the user in session is associated with more than 10 services, 9 are listed and an option is enabled with the text Following, which will be sent as a response to the chat and generates a second list of services.
This action can be repeated until the last listing is no more than 10 services. The user in session will be able to choose the desired service group or service from the generated listings, select the desired service, and click on Send.
⚐ Note:
1 After a service is selected, the Bot does not allow you to change the selection and must send the text Cancel to end the dialogue and start the categorization of the case again.
2 If the selected service is not associated with a category, no list is generated and the Bot does not take any action because it is considered bad configuration practices.
7. The selected service is sent as a reply in the conversation, the Bot returns a message requesting to select the category.
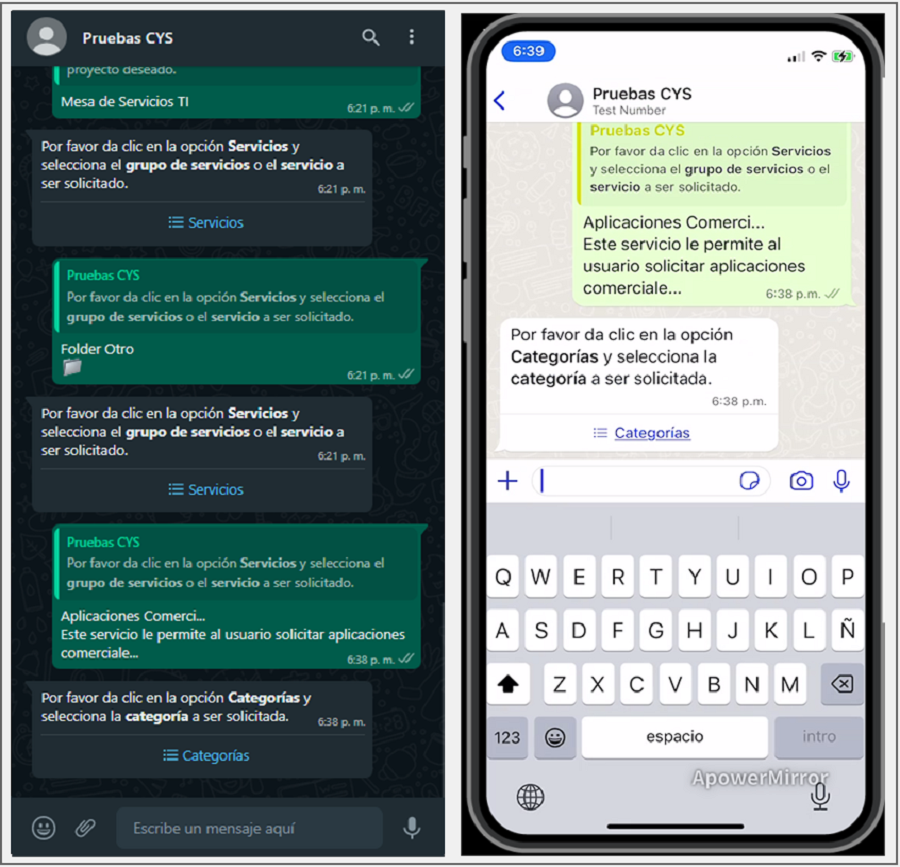
8. When selecting the Categories you will be able to view the list of categories related to the selected service and associated with the user; If the number of categories is greater than 10, the behavior is similar to that of the previous steps. Select the desired category and click Send.
⚐ Note: It is recommended to configure labels and descriptions in the categories, to facilitate identification in the categorization of the case, due to the restrictions on the number of characters that allow the hierarchy to be viewed in a complete way.
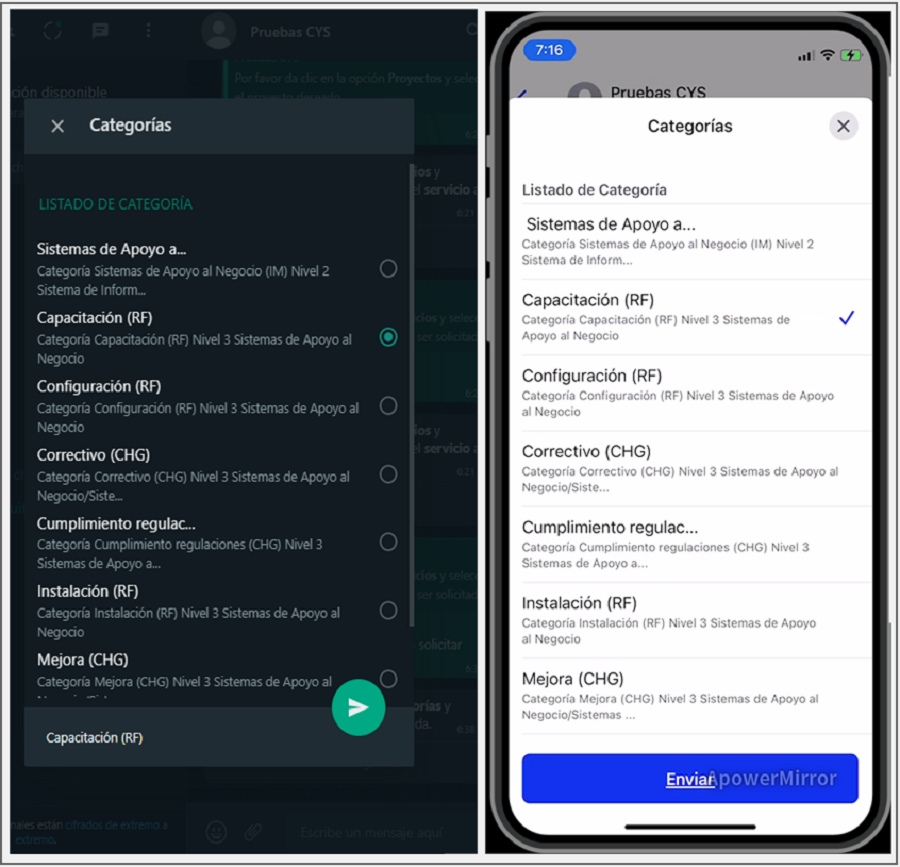
9. The selected category is sent as a reply in the conversation, the Bot will display a message notifying that the categorization of the case is finished and asks to click on the link or button Create Case if you have the custom template set up.
⚐ Note:
1 The confirmation message must match the one configured when creating the custom template - Create Case. View Template Creation - Create Case.
2 If the Bot responds with the message Create unidentified case template, contact the Administrator, validate that the template configuration is in an active state View Configuration Template Status and/or that the name assigned to the custom template matches the one entered in the Application configuration in the Bot environment in the Create Case Template field.

10. Select the option Create Case (if you have a custom template) or the generated link, to be redirected to the form that allows you to create the case.
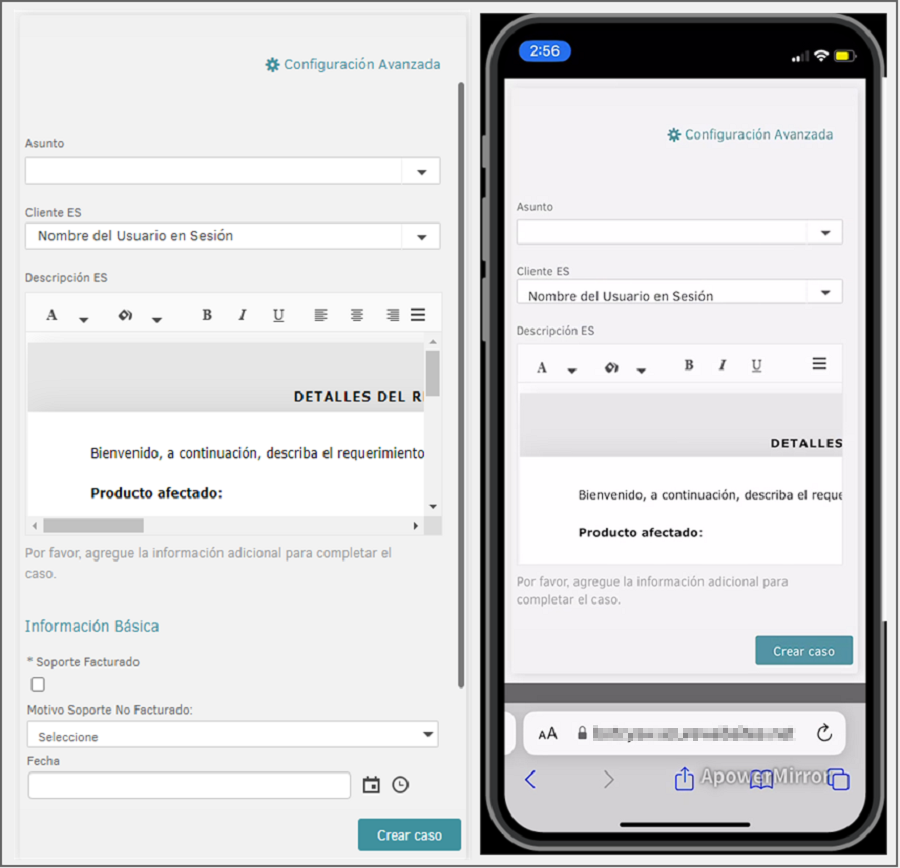
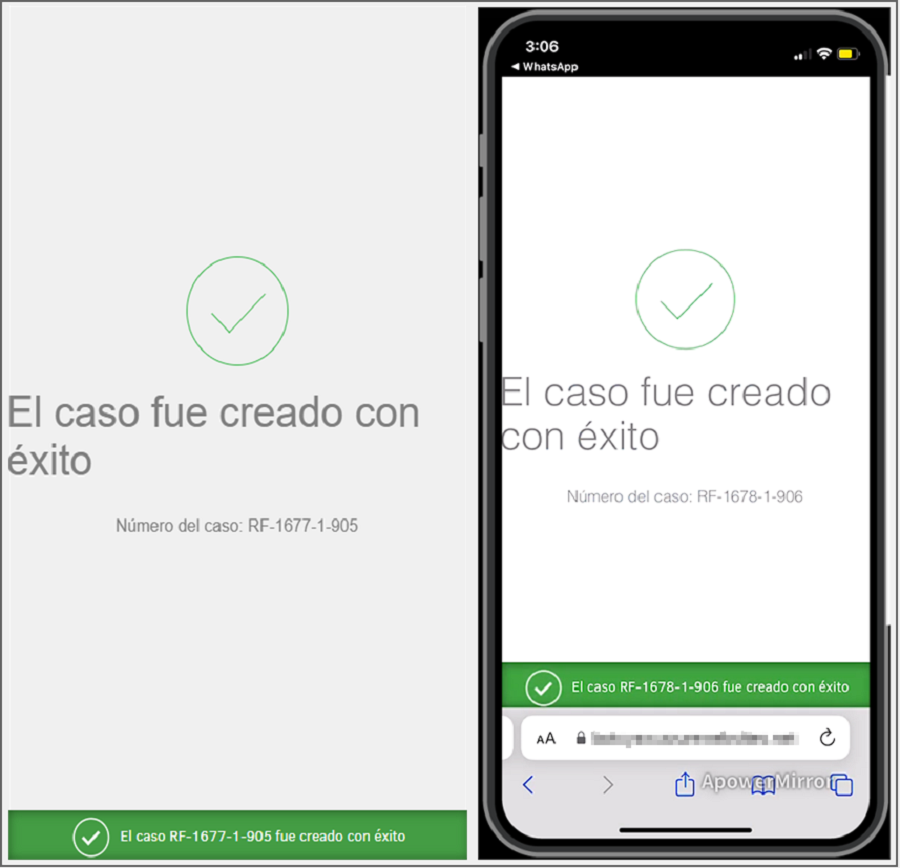
11. Fill out the required information on the case form and click on the Create Case. At the end you will be able to view the filing number of the created case and the respective confirmation message.
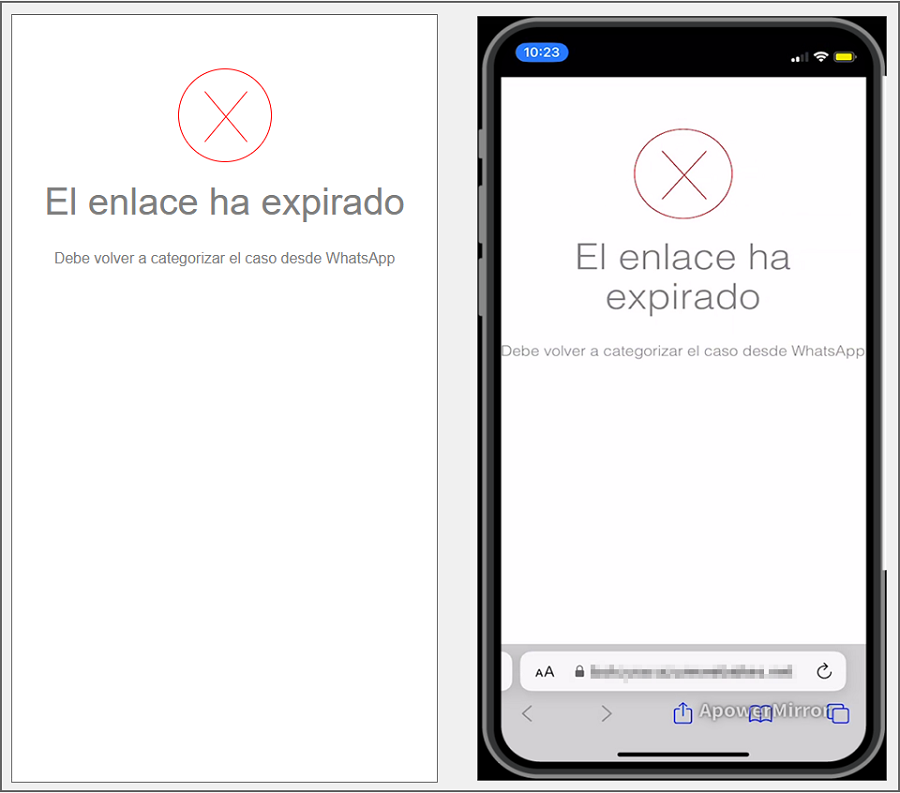
12. The generated link is for single use; To create a new case, it must be categorized again. If you try to log in with an already used link, the app will notify you through an alert like the following: