Default Views
In the Aranda SERVICE MANAGEMENT ASMS specialist console you will be able to view all the information associated with the cases generated, tasks and pending approvals of the specialist.
How to View Case Information
1. To view the case information, log in to the ASMS Specialist Console, in the Cases From the main menu, select a category to filter the information:
- Open Cases
- Closed Cases
- All cases (To display this option, the user must have a new or existing role with the View_All_Filter)

For the display of the following sections of the menu, the corresponding checks are carried out in terms of roles:
- My Cases and My Tasks: The specialist must have one of the following roles: Changes Manager, Releases Manager, Incidents Manager, Problems Manager or ServiceCalls Manager.
- Cases and Tasks of my Groups: The specialist must have each of the Group Viewer roles that complement the My Cases roles; for example, if you have the roles of Changes Manager and Releases Manager must have the roles Group Changes Viewer and Group Releases Viewer, if the user has Changes Manager and Releases Manager and only with Group Changes Viewer, the options Cases and Tasks from my Groups They will not be displayed in the menu.
- Cases and Tasks of my Projects: The specialist must have each of the Project Viewer roles that complement the My Cases roles; for example, if you have the roles of Changes Manager and Releases Manager must have the roles Project Changes Viewer and Project Releases Viewer, if the user has Changes Manager and Releases Manager and only with Project Changes Viewer, the options Cases and Tasks of my Projects They will not be displayed in the menu.
- FSC: The specialist must have the role Changes Manager to display this option in the menu.
- Pending Approvals and My Pending Approvals: This option will be displayed if the specialist has any of the following roles Changes Manager, Releases Manager or ServiceCalls Manager.
Consultation Criteria
2. Once the category to view the cases has been defined, the specialist will be able to consult the information of the cases, taking into account the following criteria:
| Consultation criteria | Description |
|---|---|
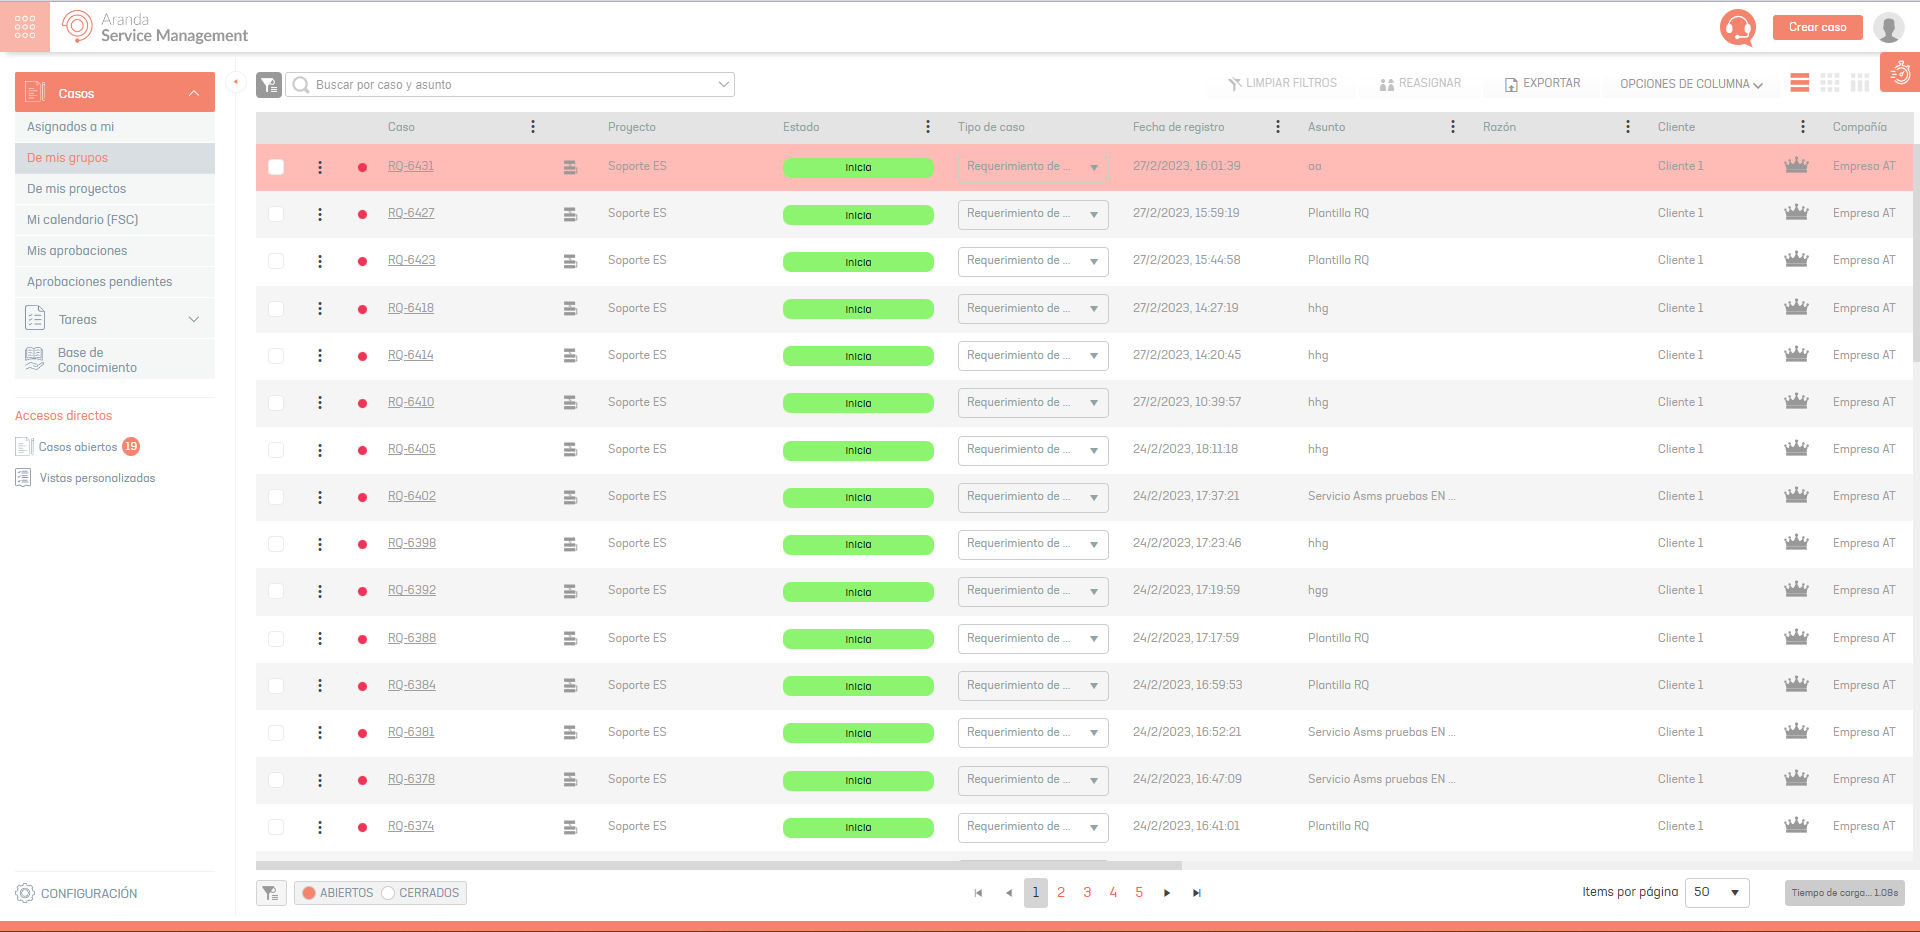
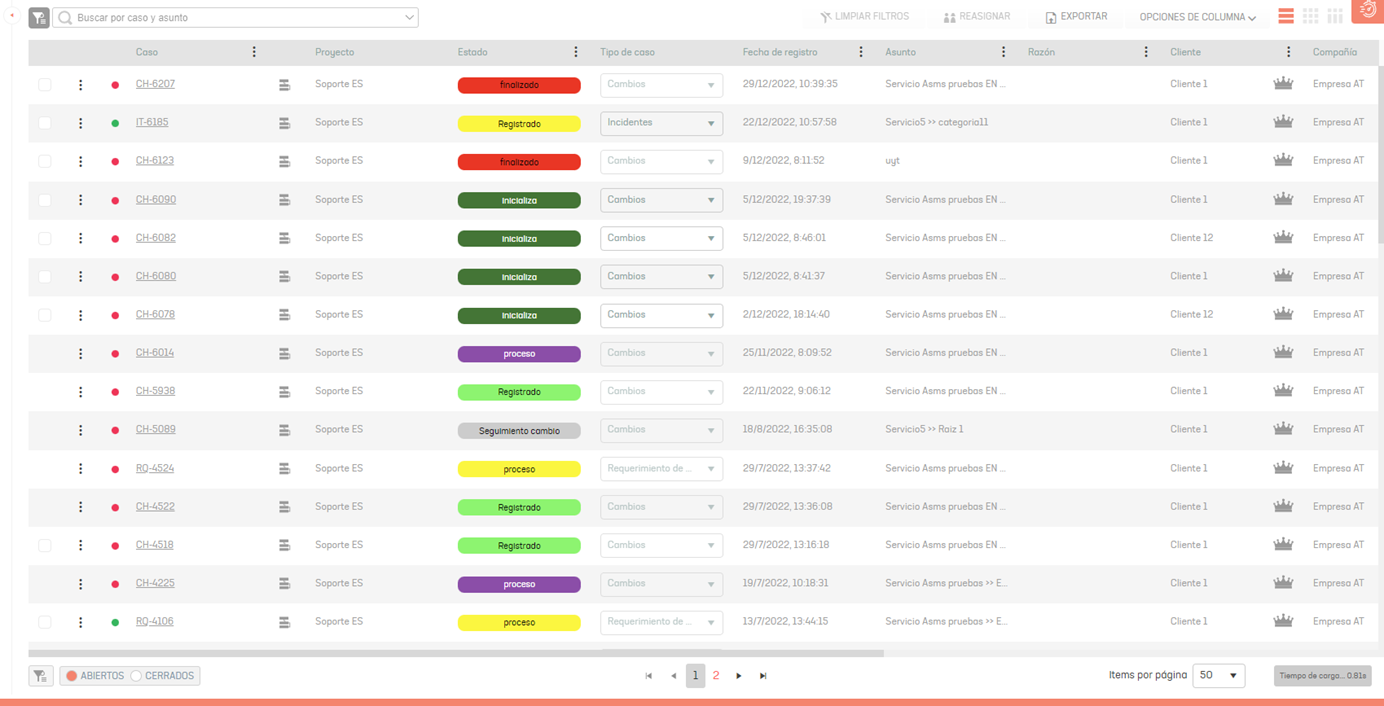
| View Case Information | In this view, you can identify and learn about the information associated with the case (ID, project, status, case type, customer, issue, company, responsible, responsible group, service, CI). |
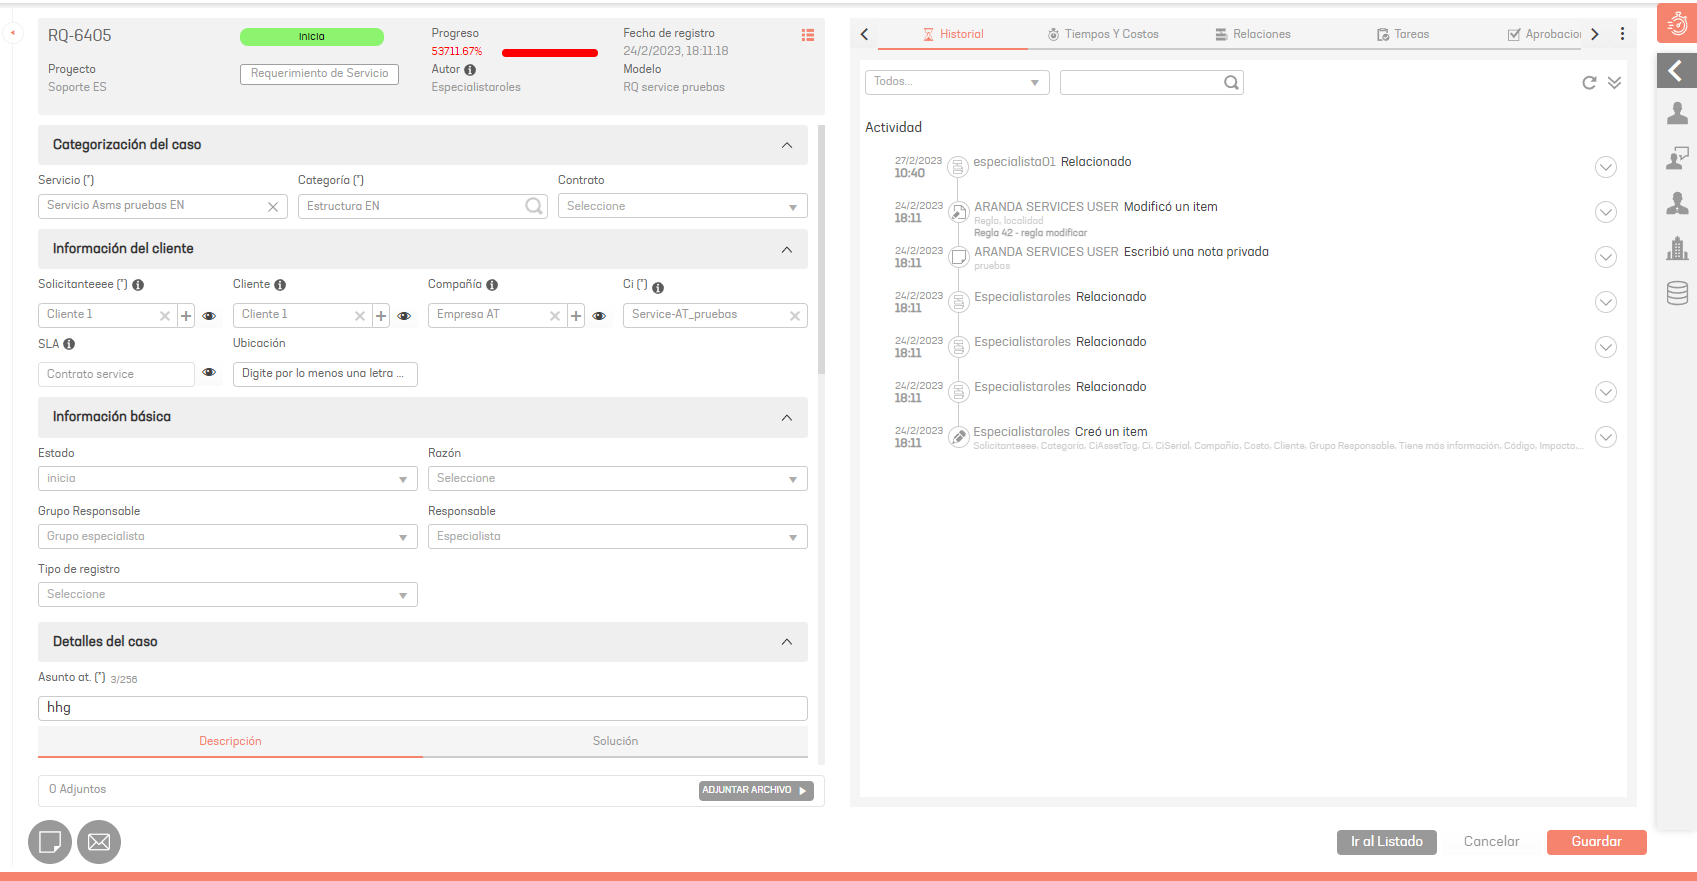
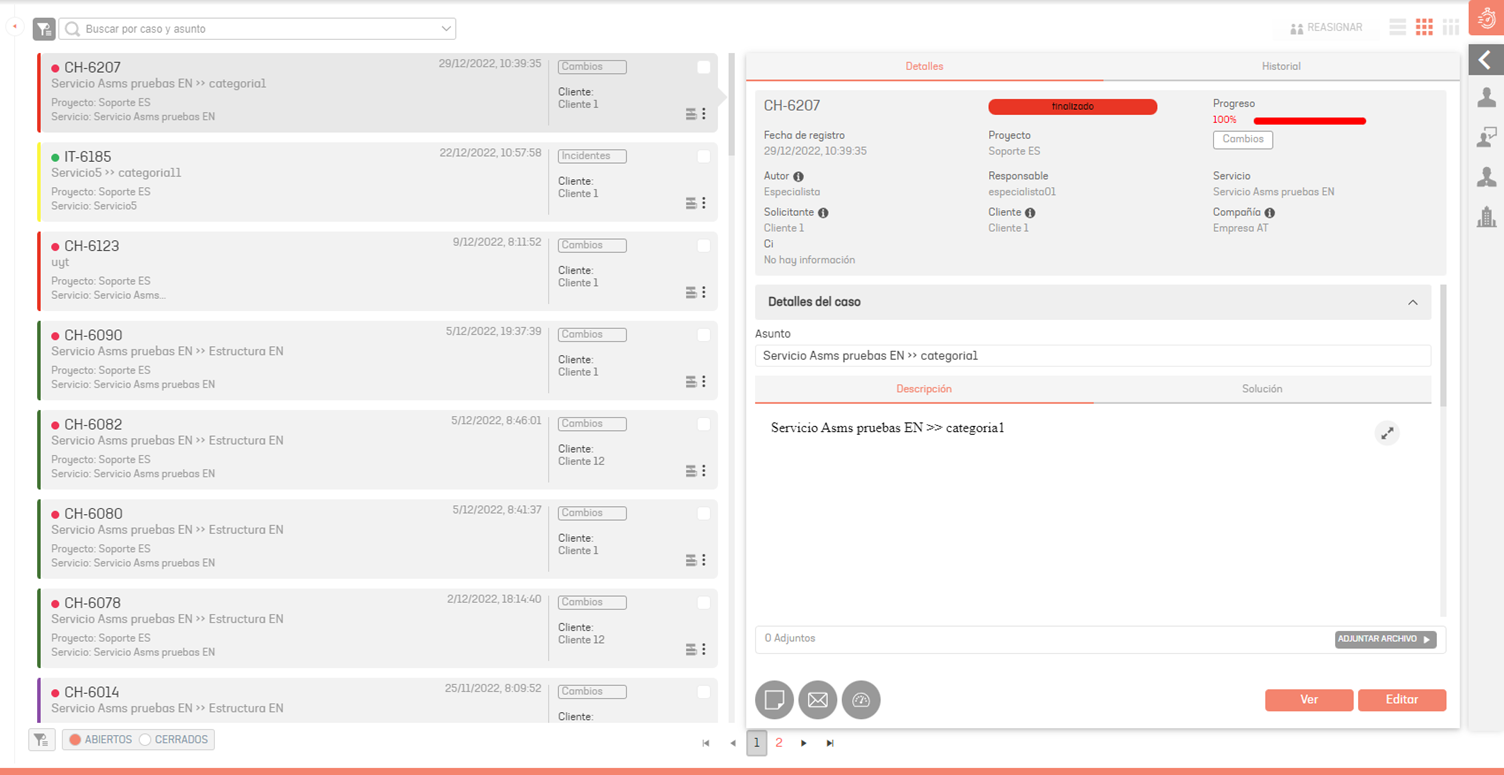
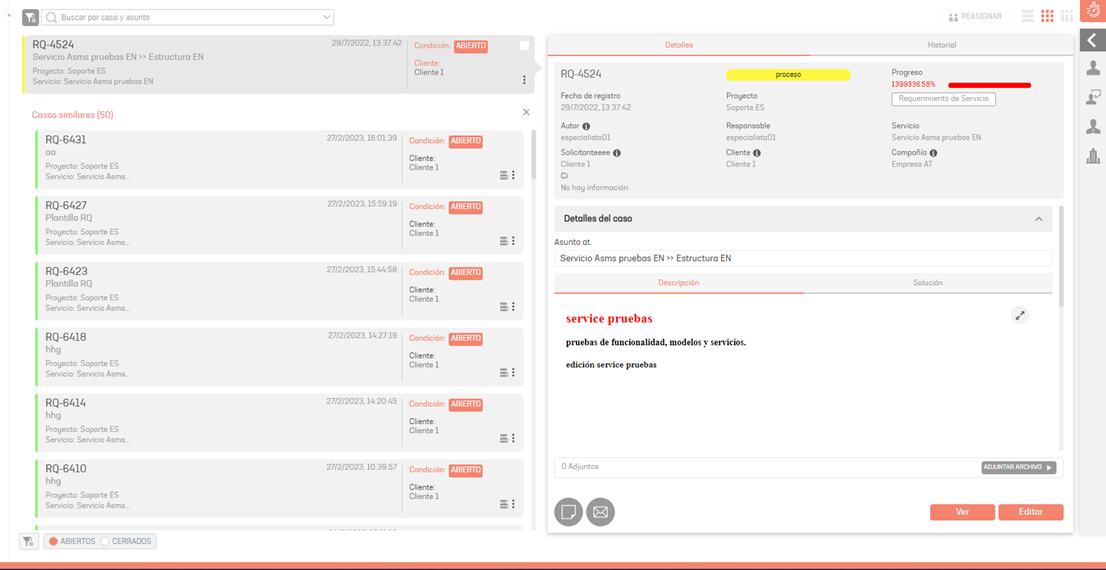
| Case Details | By selecting a case from the listing or case id, you can view basic information and case details. |
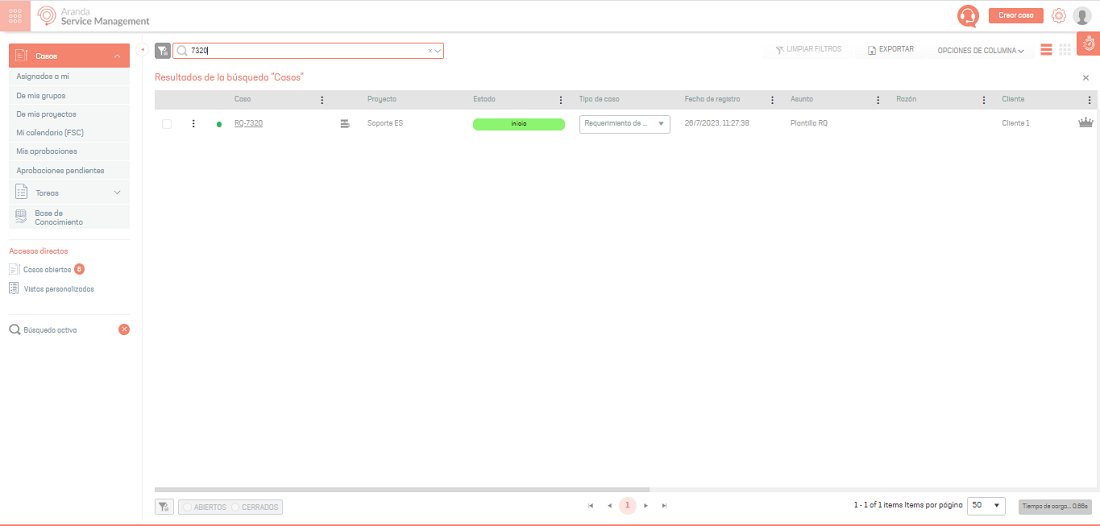
| Case Consultation | The specialist will be able to perform a global search by case number and Subject; in the search field, define the criteria for the case search and press the Enter key. |
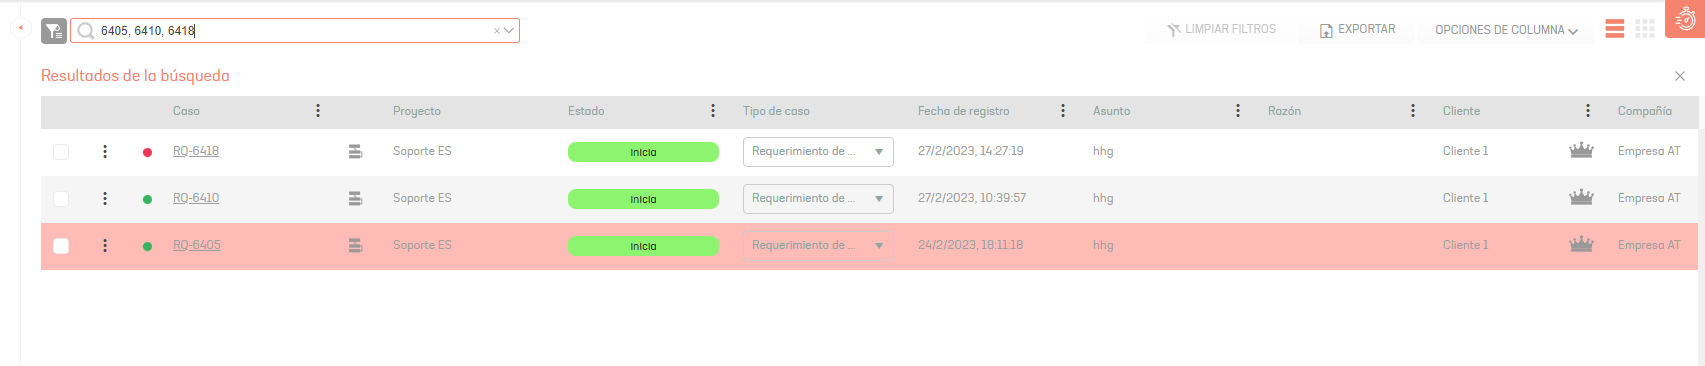
| Multiple Case Consultation | To query multiple cases, expand the search field option and select Multiple Cases. Type the case numbers separated by commas and press the Enter key. |
| Inquiry by case number | To query by case number, expand the search field option and select Case Number. Type in the case ID and press the Enter key. |
Case Details:
Multiple Case Consultation
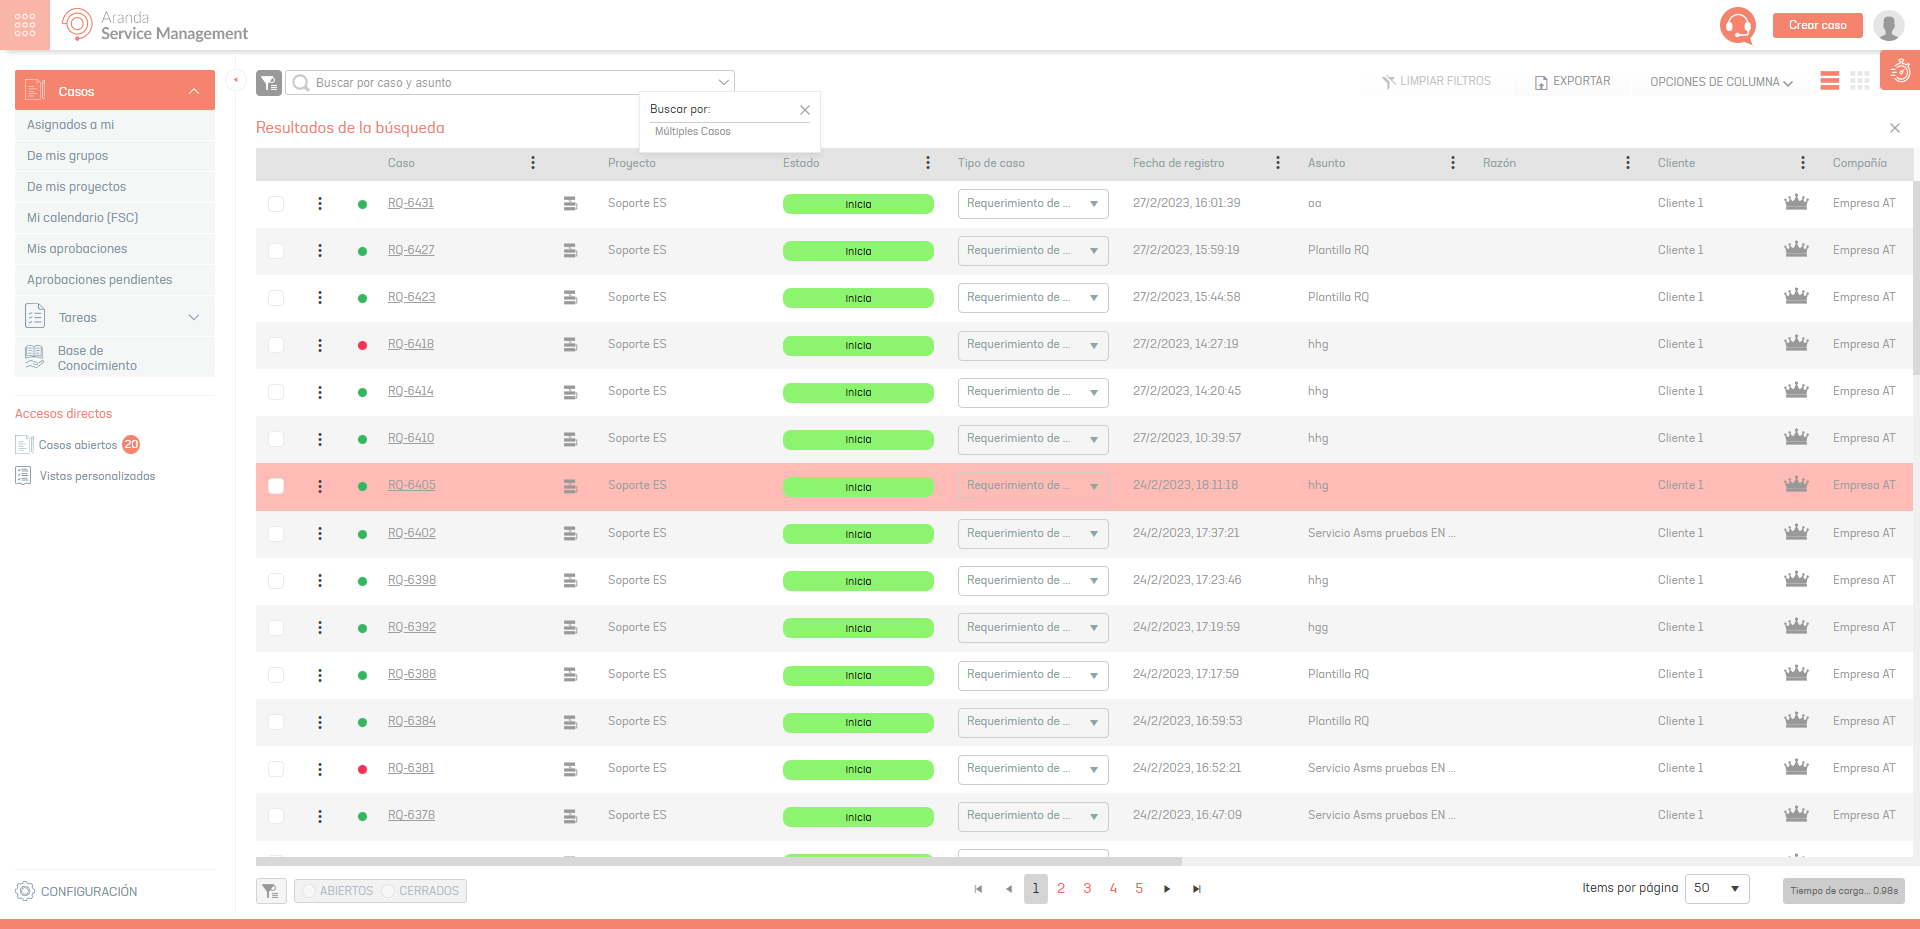
⚐ Note: The console allows you to search for cases and tasks, filtering and preserving the search made by the user, you can return to this information, as long as the button (Active search)
Filters
3. Once the category to view the cases has been defined, the specialist will be able to filter the information of the cases in different ways:
| Filters | Description |
|---|---|
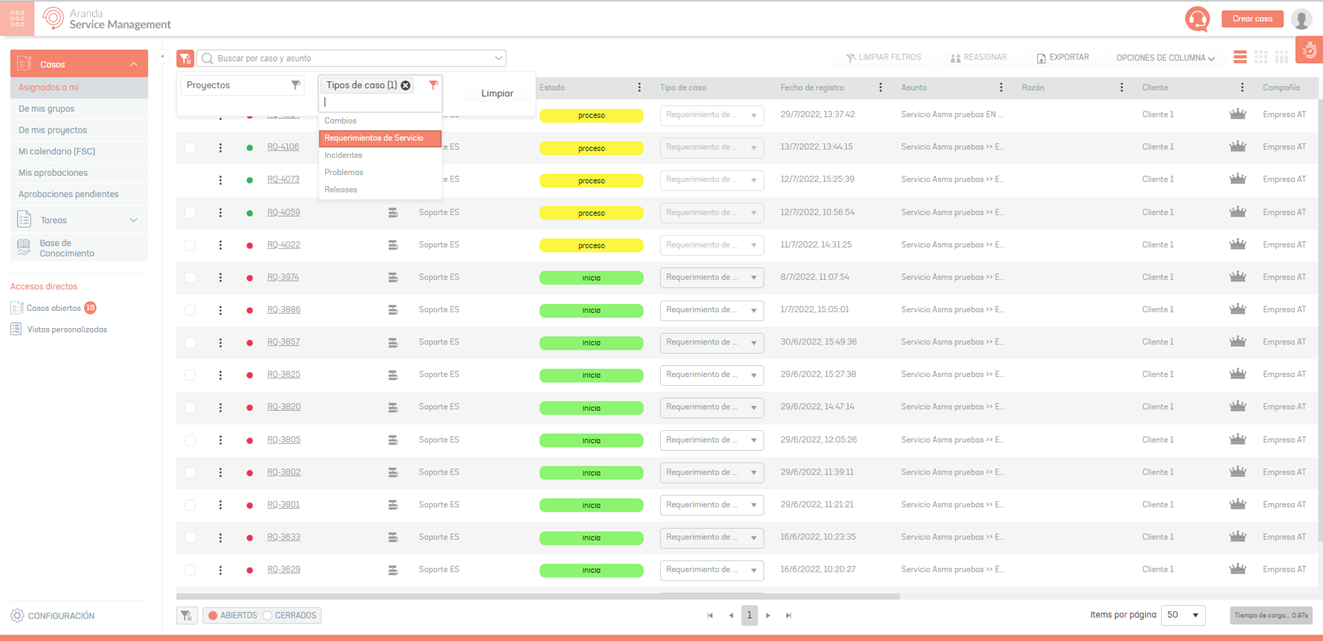
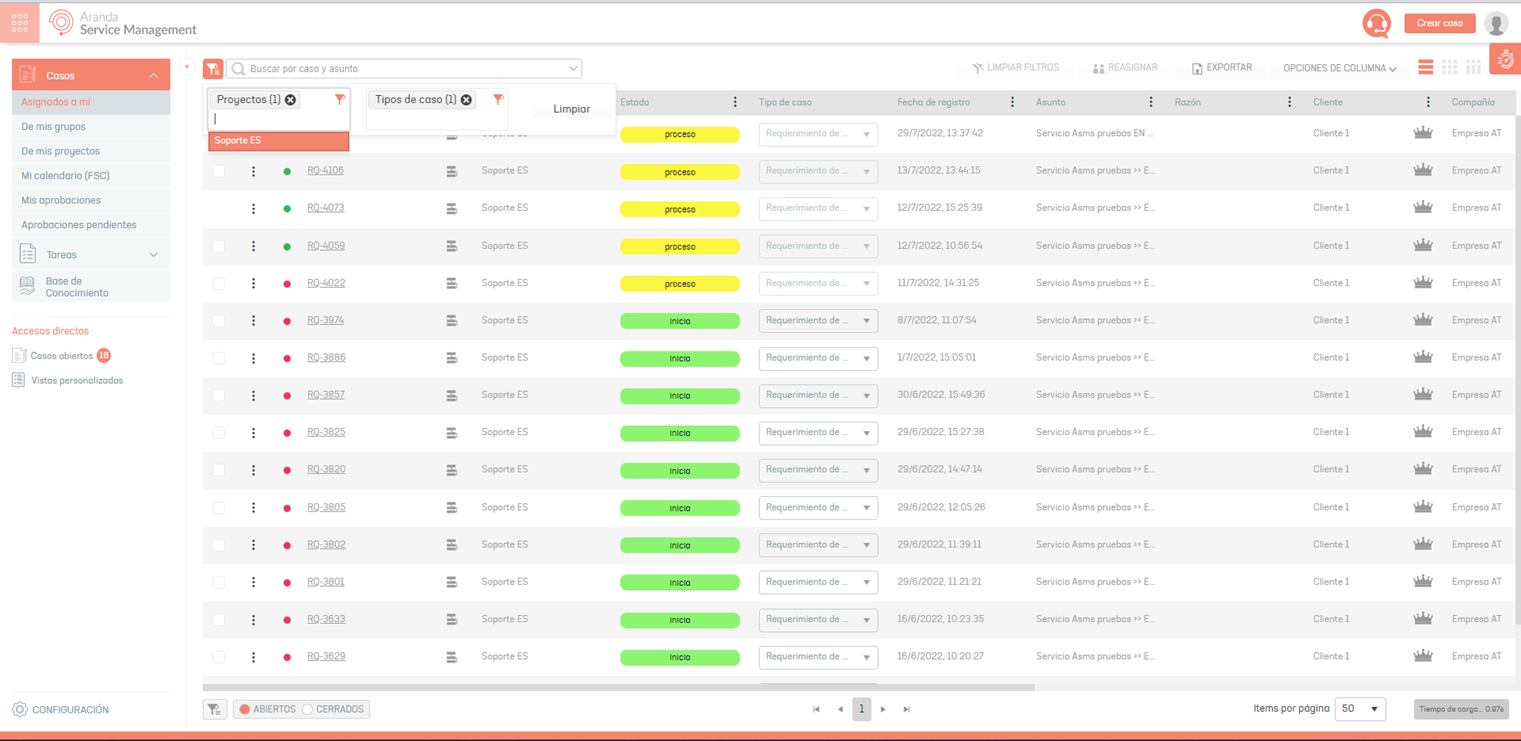
| Main filter | This option allows you to filter the information in the case list by projects or case type (Requirements, incidents, problems). |
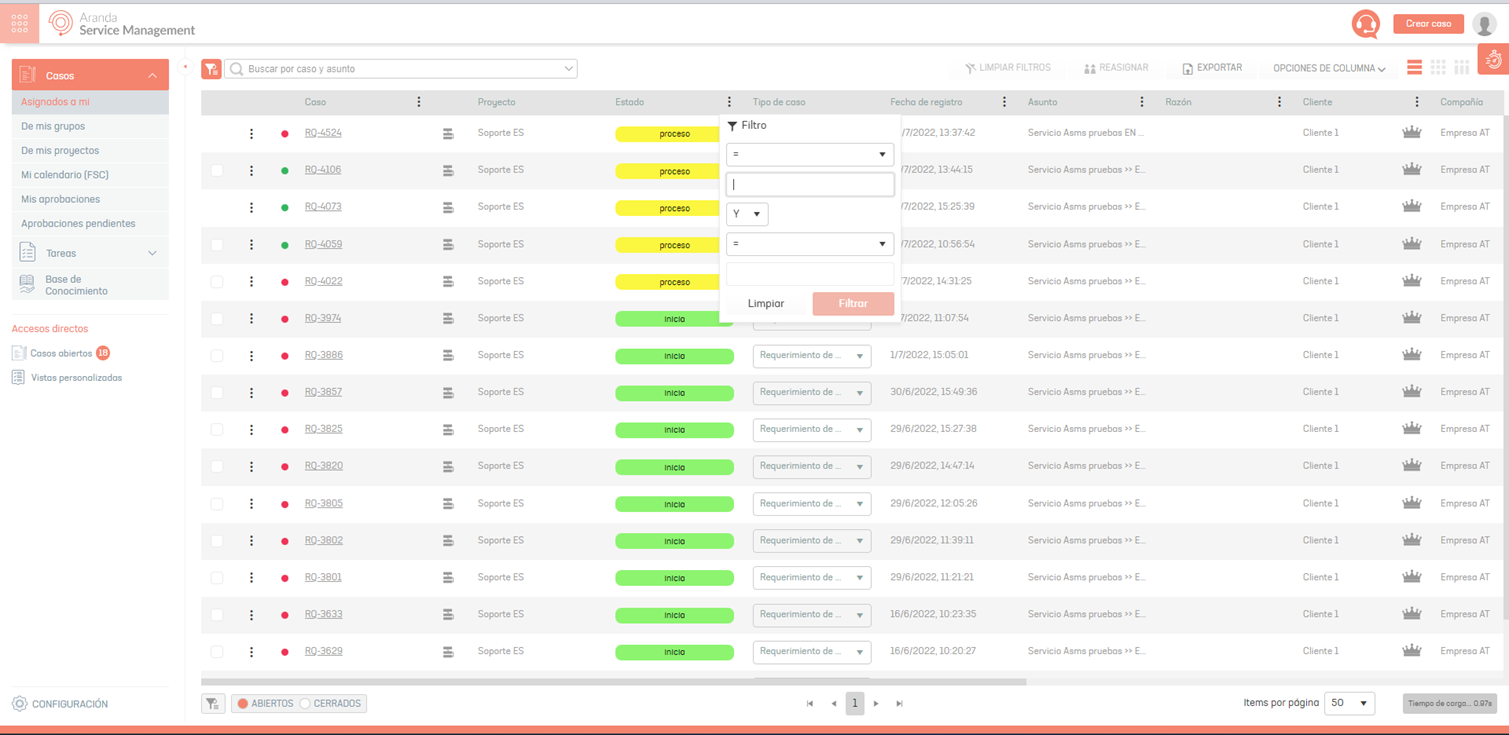
| Filters by Column | This option allows you to filter the information in the list of cases by information specific to the case such as case, status, date of registration, subject, reason, among others. To apply filters by column, click on the filter icon of the column you want to filter by and define the desired criteria. If you have applied more than one filter and want to clean them all, click on the option CLEAN FILTERS at the top of the console. |
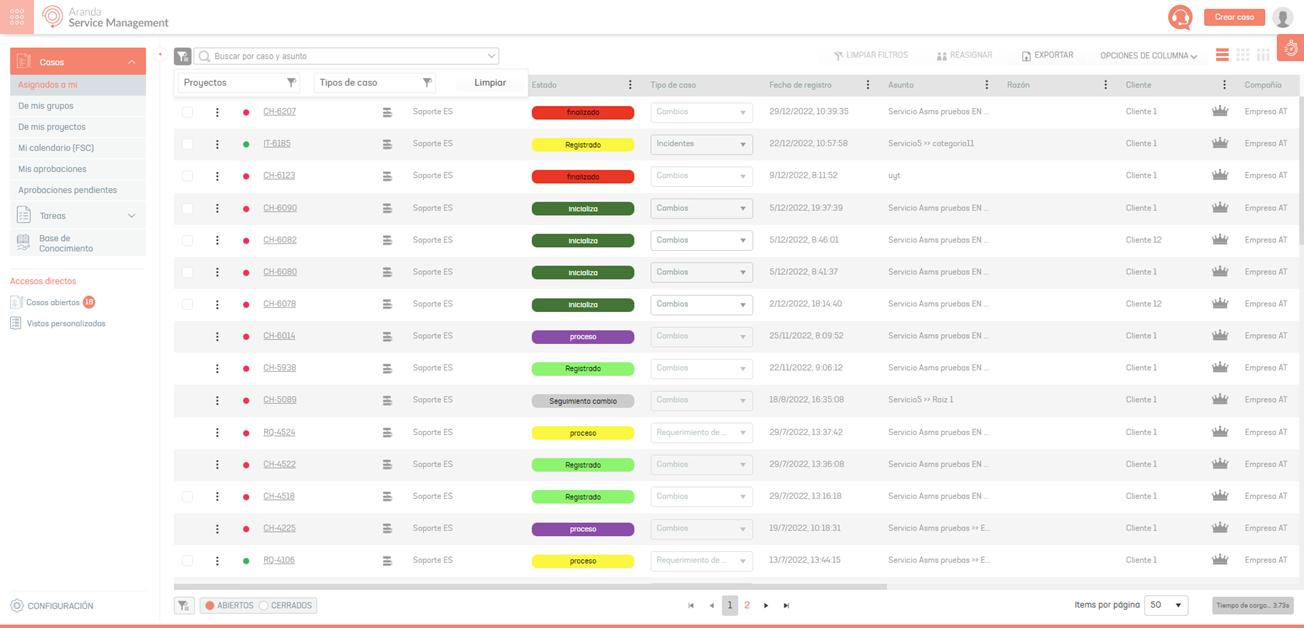
Filters by Column

| Filters | Description |
|---|---|
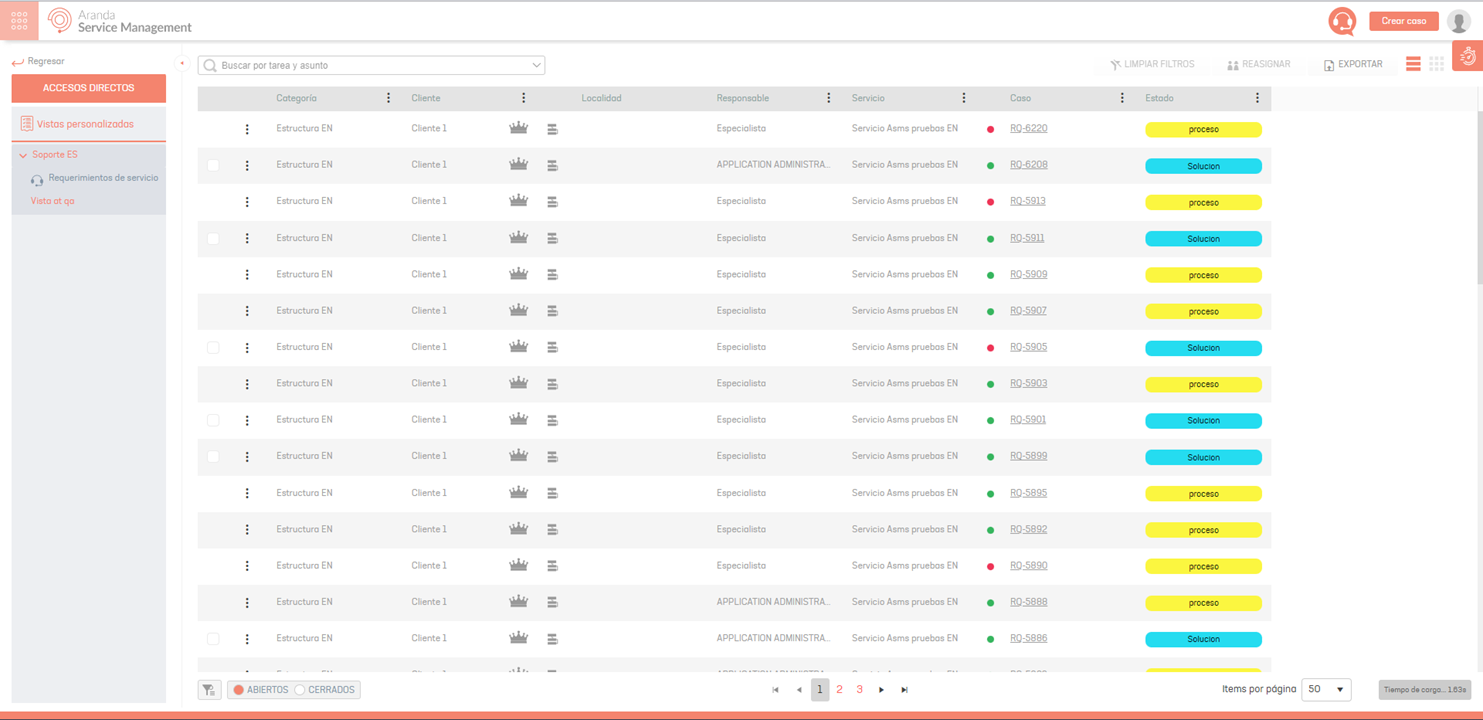
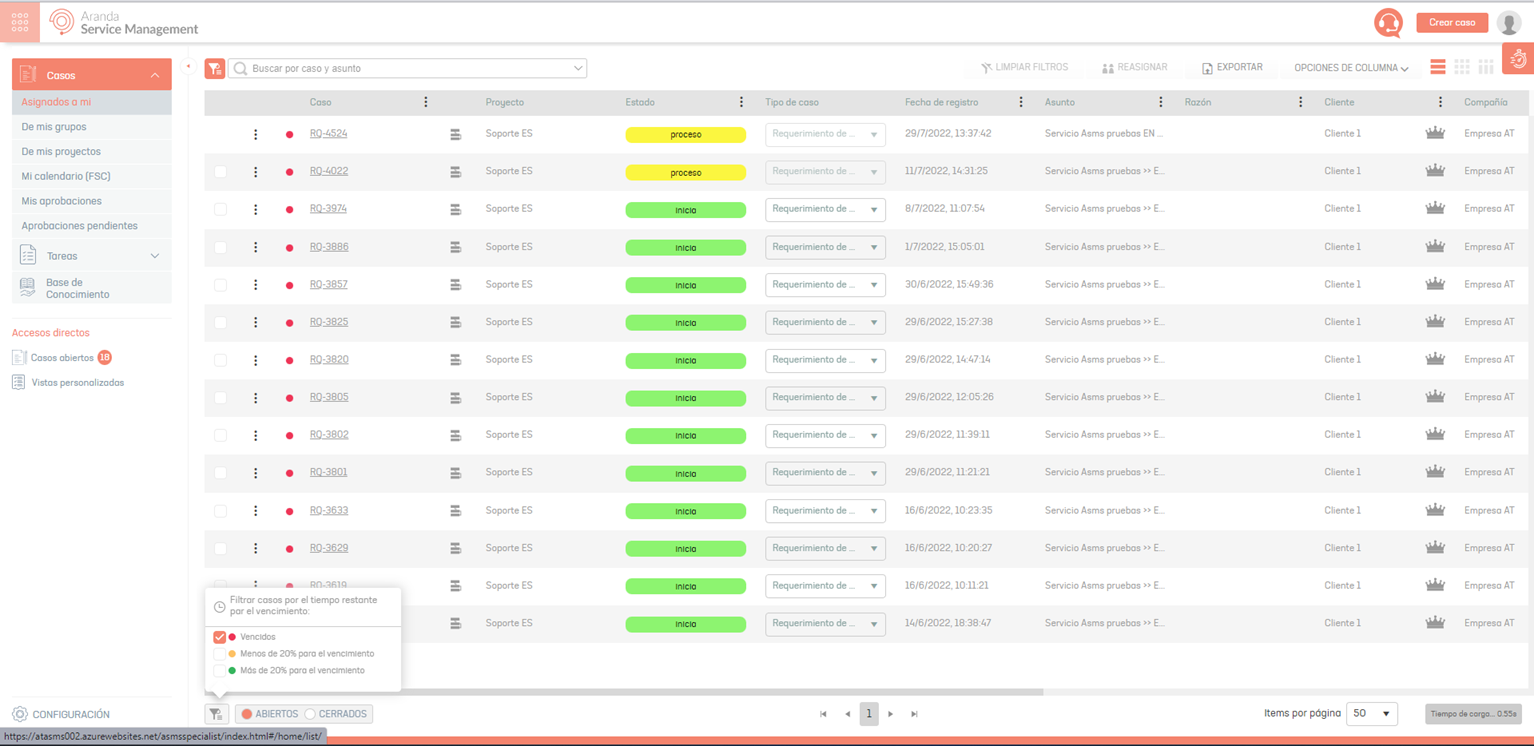
| Time Remaining to Maturity | This option allows you to filter the information in the case list to identify cases that are past due and cases that are about to expire. - Cases to expire: Presents cases whose expiration is between 80% and 99%. - Overdue cases: Presents cases whose expiration is equal to or greater than 100%. |
Organize Case Information
4. Once the category to view the cases has been defined, the specialist will be able to organize the information of the listed cases using the following options:
| Options for Organizing | Description |
|---|---|
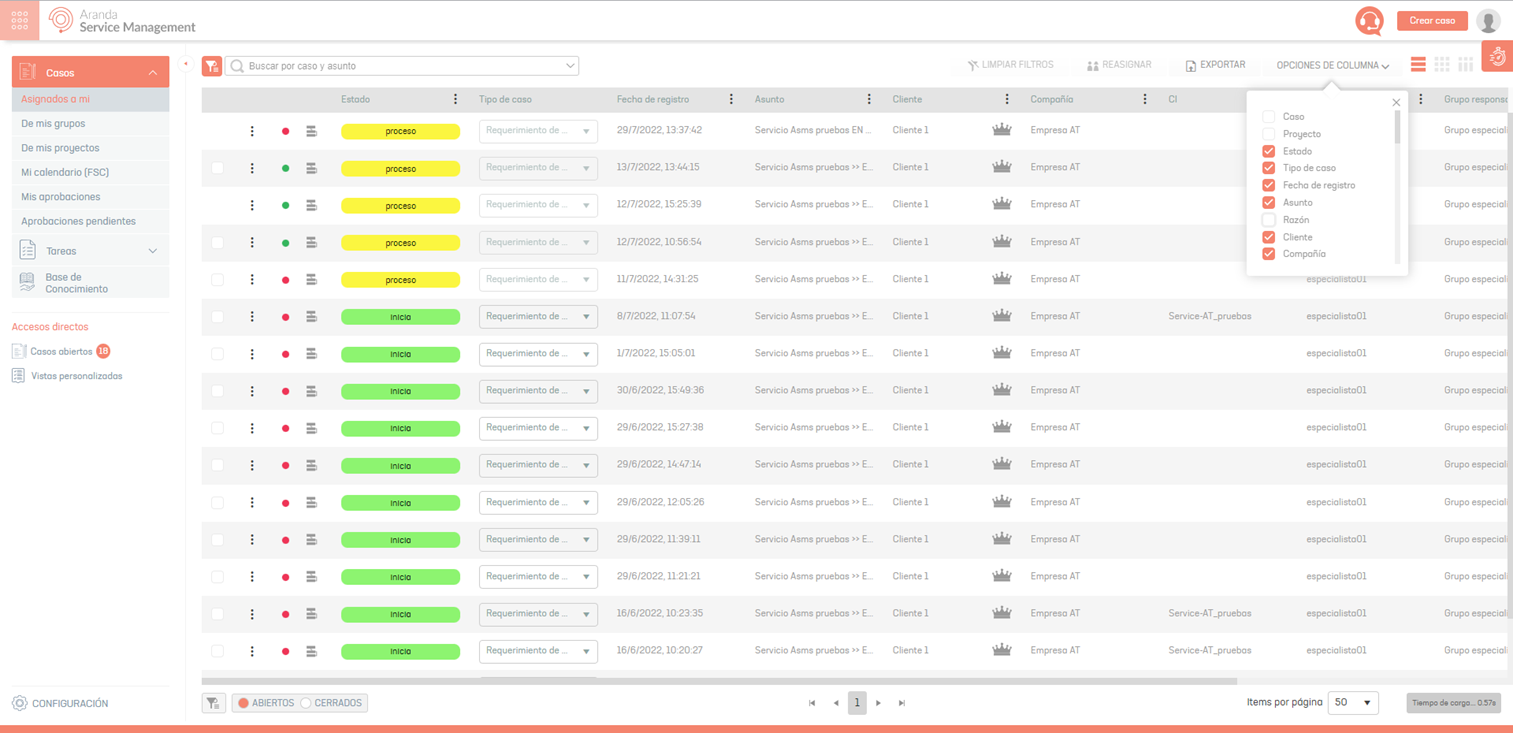
| Column Options | Organize the information in the case list by enabling or not enabling related data. When you select this option, select the fields you want to display. |
| Options for Organizing | Description |
|---|---|
| Grid | It organizes the information in the case list in grid mode and allows you to filter the information with information specific to the case such as case, project, type of case, status, date of registration, subject, reason, among others. Click the Grid icon and choose the filter criteria by column. |
| Card | Organizes case list information in card mode and allows you to filter cases by project, case type, status, and posting date. Click the card icon and choose the filter criteria. |
Grid
Card
| Options for Organizing | Description |
|---|---|
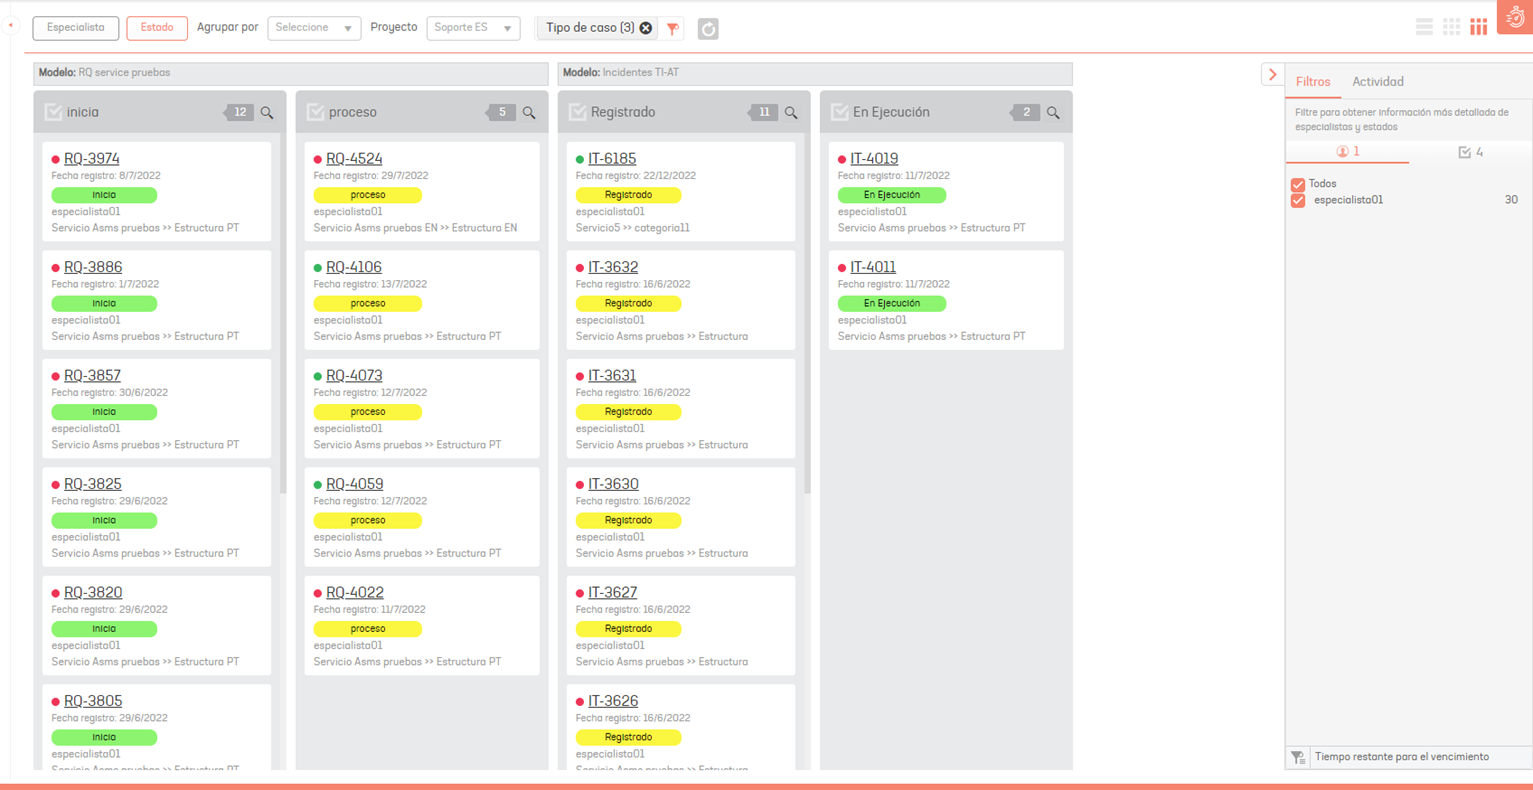
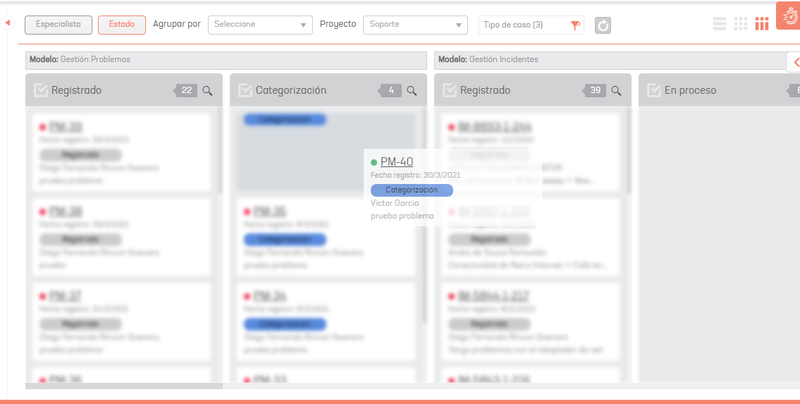
| Boards | Organizes the information in the case list in board mode and allows you to filter cases by specialist or status, project, and case type; it is also possible to group cases by company, customer, author and CI In the Dashboards section you can change a status case, move the card to the next status. According to the filter selected for the dashboard view, you will have an additional filter where you can filter the information by overdue cases and overdue cases. It is also possible to filter by operating model In the last tab you can apply filters by customer, company and/or CI depending on the grouping made in the main filter. In the Activity tab, you can view the actions performed in the dashboard display mode. Note: The display of information in the ‘Dashboards’ view is subject to the permissions assigned in the administration console (ASMSAdministrator). In case the user does not have the necessary permissions, the card will not be displayed. |
Activity filter for boards

Change Status Case
Actions
5. Once the category to view the cases has been defined, the specialist will be able to select the cases and carry out different actions:
| Actions | Description |
|---|---|
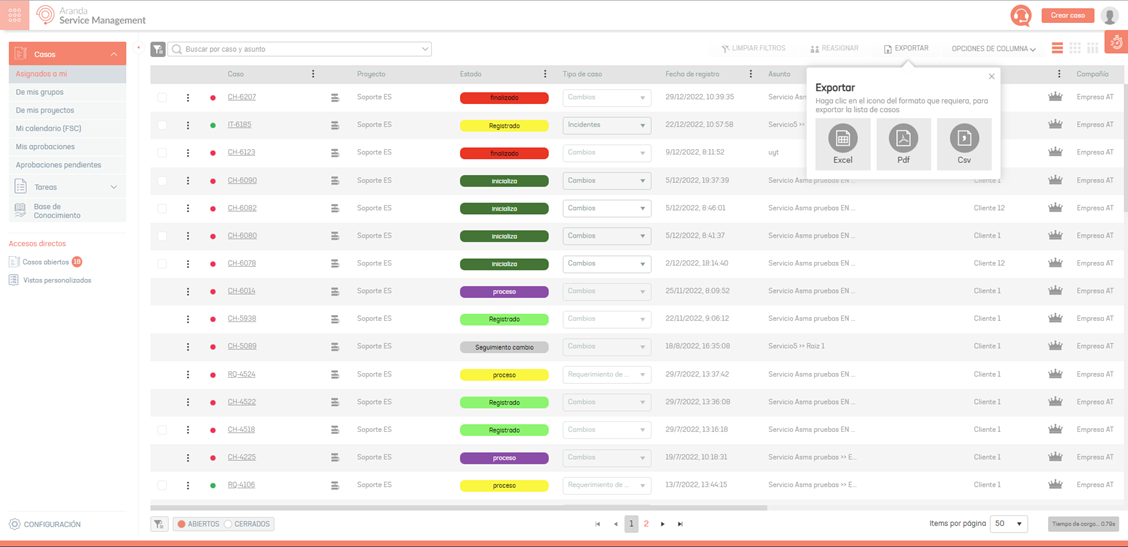
| Export | This action allows you to export the list of cases that are being viewed in the grid view of the specialist console. Select the Export and choose the file type to export the information; The following options will be available: Excel and CSV: With this option, up to 150 case records can be exported to an XLSX file. This limit is set to ensure adequate performance of the solution and to avoid excessive use of resources (mainly memory). PDF: With this option, up to 150 case records can be exported to a PDF file. The limit of 150 records is given by the maximum number of cases that can be viewed (per page) in a grid within the Specialist website. . Define a name for the file and click Export. You can include the description of the cases to be exported, by checking the checkbox. |
Case Options
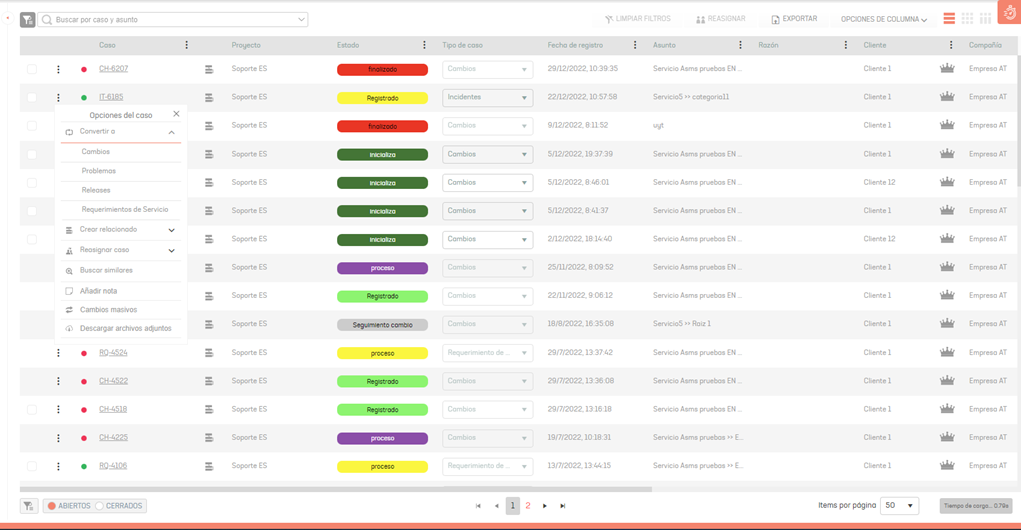
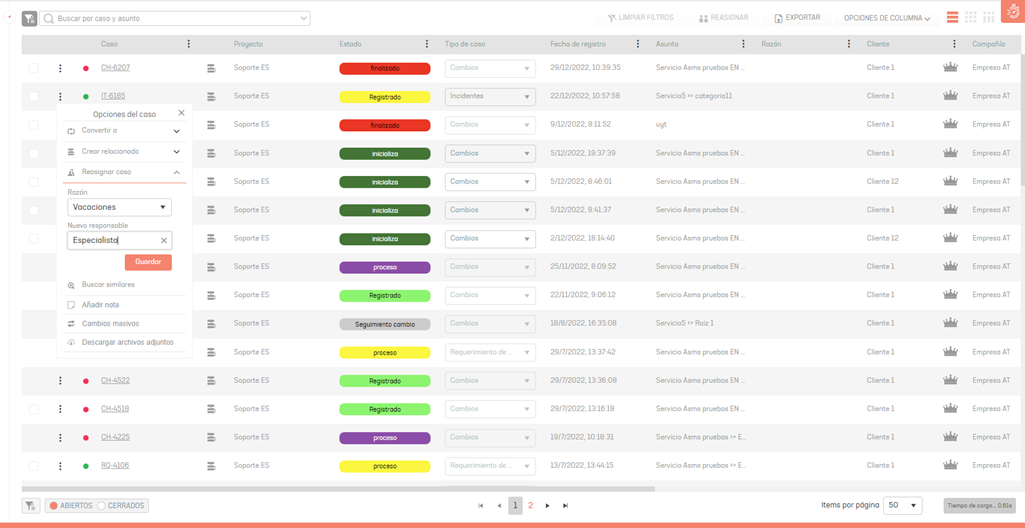
6. This item allows different actions to be carried out for the cases generated. In the information view, identify a case and select the three dots option; window is enabled Case Options in which the following actions will be available:
| Actions | Description |
|---|---|
| Convert to | This action allows you to convert the selected case to an incident, problem, change, or release case. The system generates a confirmation message before converting the case, informing that the information in the additional fields will be cleaned up. |
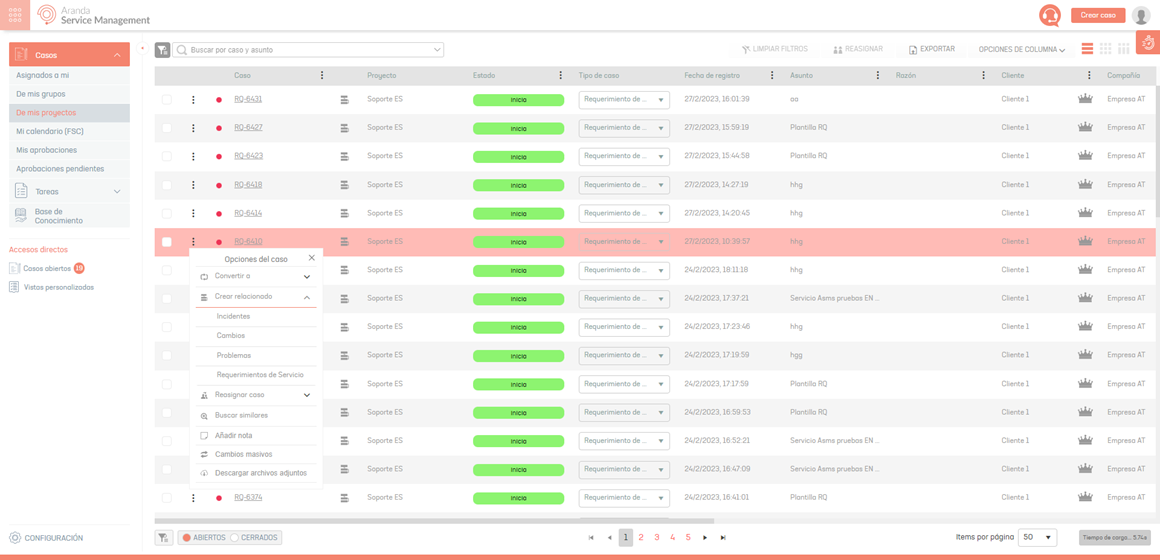
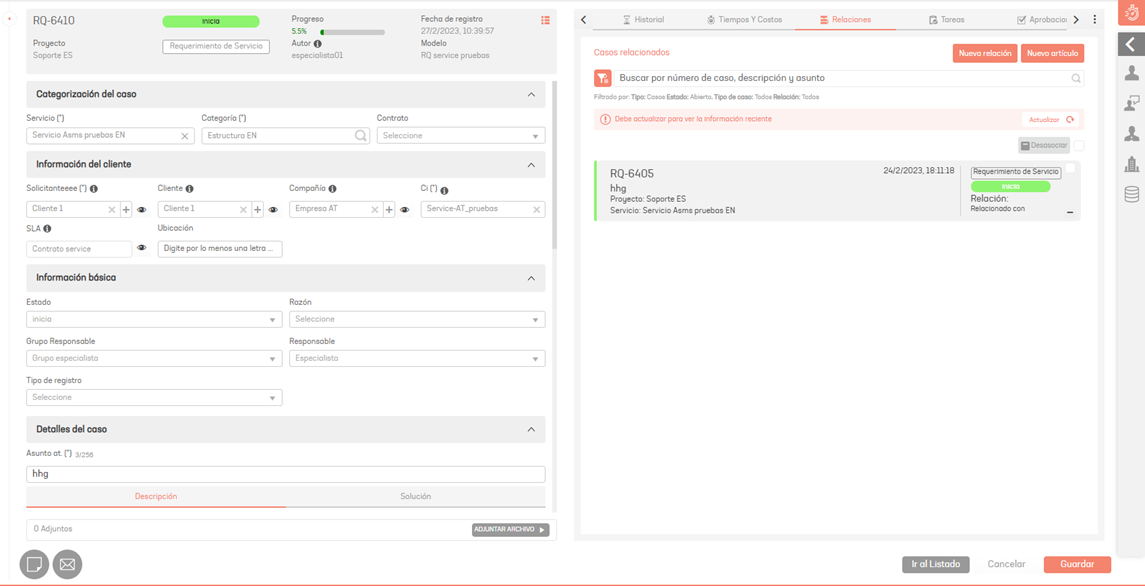
| Create Related | This action allows you to create a related case for the selected case. Related cases can be incident, problem, change or service requirements. In the information view of the ASMS Specialist Console, you can view the related cases by clicking on the relationship icon. |
| Duplicate Case | This action allows you to create a new case, from the selected case, duplicating the values of the original case. This option is also available in case editing. ⚐ Note: 1. If the Service or Category field is not available for case creation, the creation form will not be displayed to duplicate the case. 2. If one of the items associated with the original case is not available for creation, the creation form will be loaded, but the item will not be associated in the field. |
Duplicate case functionality is implemented in the specialist console (ASMSSpecialist), for open or closed cases, allowing you to create a new case, duplicating the values of the original case, the values that are entered when creating a duplicate case are:
{: #important}
Convert to
Create Related
| Actions | Description |
|---|---|
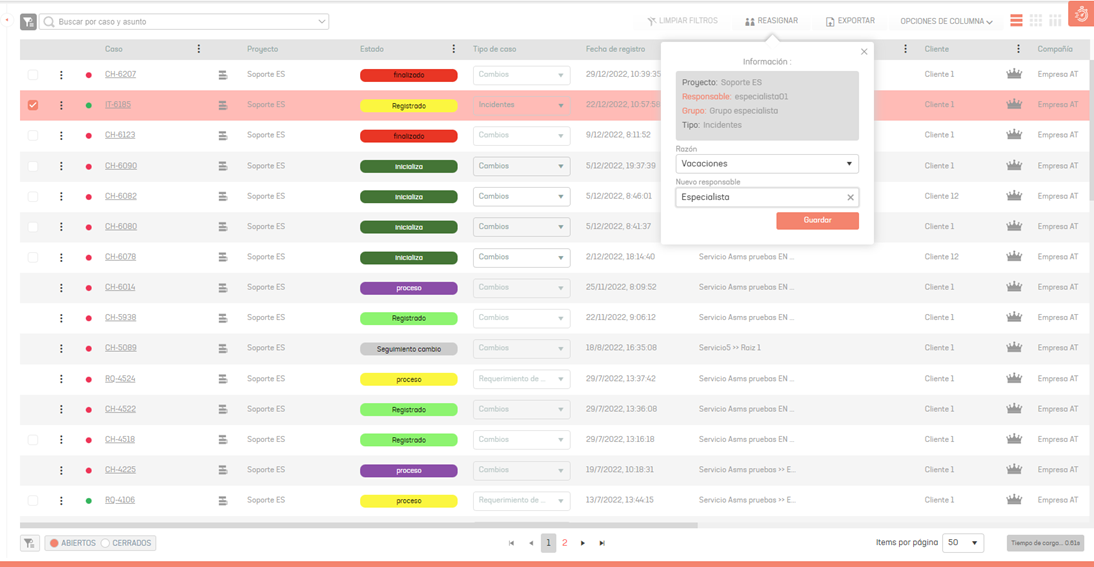
| Reassign Case | This action allows you to reassign a selected case by defining the reason for the reassignment and the new person responsible. To reassign cases in bulk, select each case by checking the checkbox and in the information view at the top of the Specialist console, click the REASSIGN. Select the reassignment reason and the new assignee. By clicking Save, a notification will be displayed indicating the number of cases reassigned and the specialist to whom they were assigned. |
| Actions | Description |
|---|---|
| Find similar | This action allows you to search for similar cases with the selected case. In the information view you will be able to view the basic information and details of the similar cases found. |
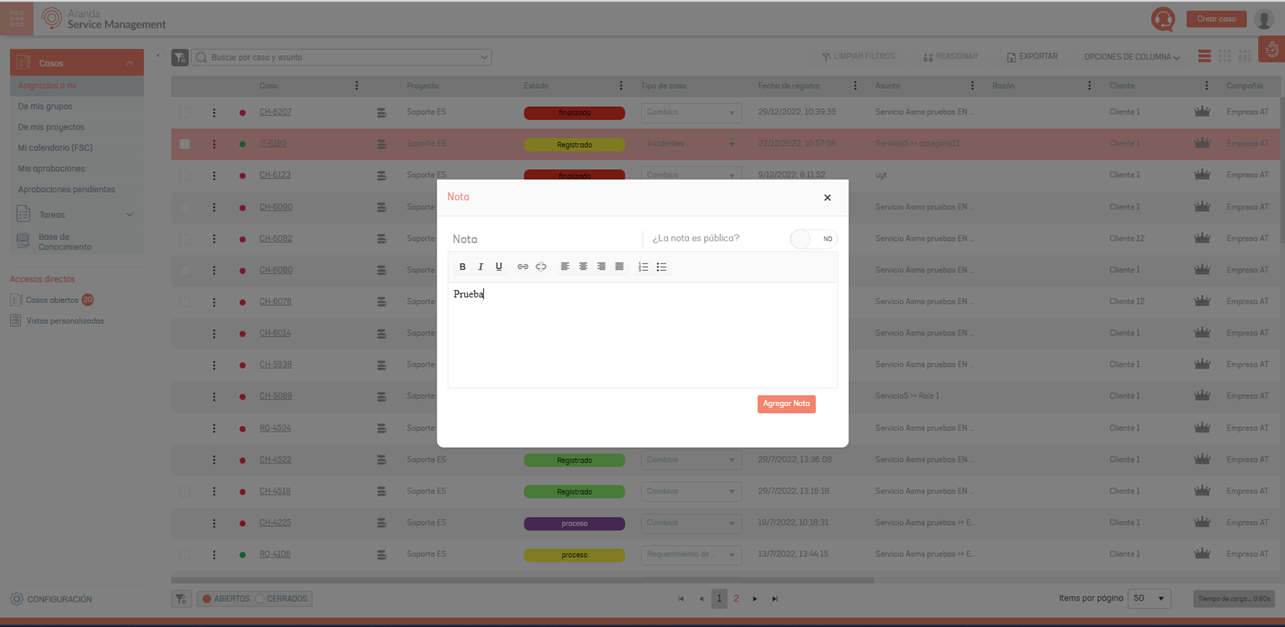
| Add Note | This action allows you to include a note for the selected case. The Note window is enabled, where you can include the required information and add it. |
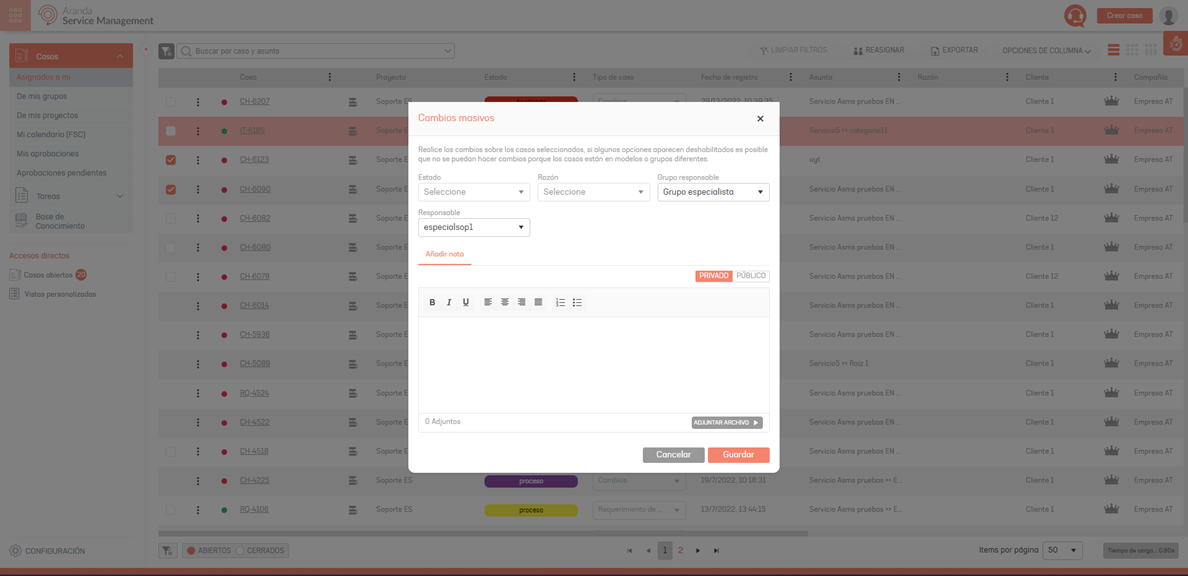
| Massive Changes | This action allows you to make changes to the selected cases. Changes will be made to the common properties of the case such as statuses, reasons, notes, attachments, responsible group, responsible group, scheduling date and additional mandatory fields. 1. Selecting the Bulk Changes option enables the corresponding window. 2. Select the properties to be added and/or modified, such as status, reason, and responsible. 3. By clicking the Next button, you must fill in the information of the additional fields in case they are required. Note: Additional fields are enabled when selecting cases from the same project, case type, model, and status. When you make an additional status change, only the required additional fields are displayed. Finally, click on the Save button to perform the bulk update on the selected cases. Note: Some options may be disabled for the following reasons: Status and reason: When selecting cases from different project, case type, model and/or status (It is not possible to make bulk changes to final states). Responsible: When selecting cases that are NOT assigned to the same group of specialists. Note: For the state change, the behaviors of the new state are evaluated and the fields configured in the state are requested. |
Find similar
Add Note
Massive Changes
| Actions | Description |
|---|---|
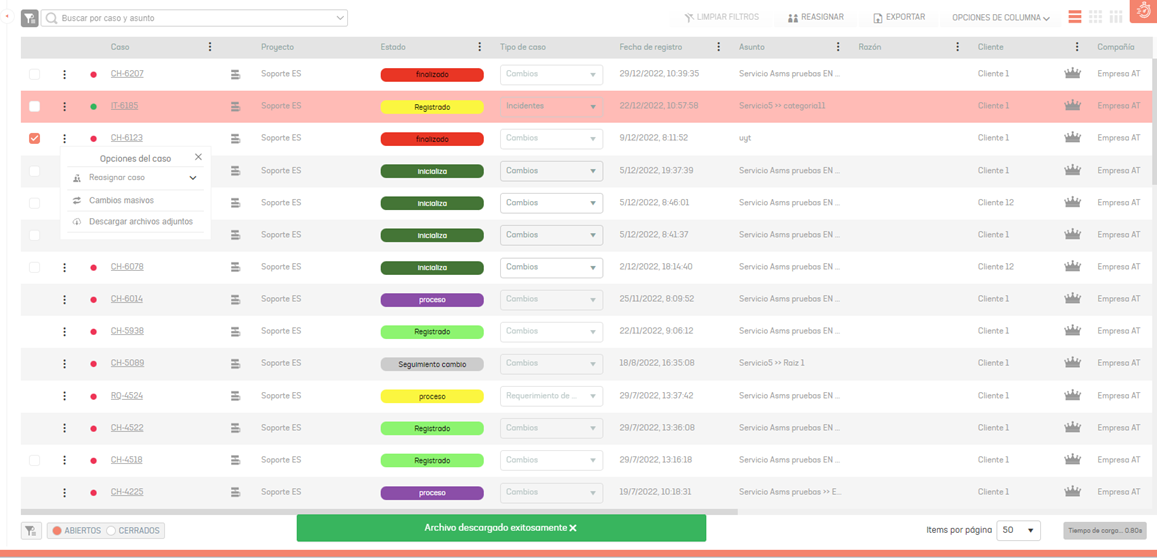
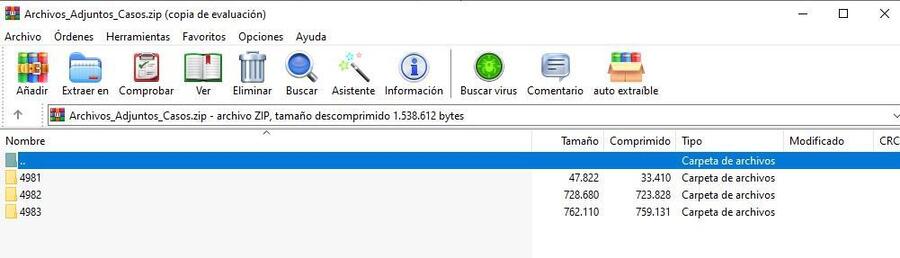
| Download Attachments: | This action allows you to perform bulk download of attachments for selected cases. When executing this action, a file is downloaded .zip which contains the folders of each of the cases, which are identified by the global id of the case. Within each folder, two subfolders are displayed with the private and public attachments of the case. Note: This action is only available for the list of open cases. |
View My Calendar (FSC)
The FSC (Forward Schedule of change) view shows the calendar with the schedule of the changes that were approved with their respective dates for each of the stages. See 5.1 Time and Costs
1. To view the schedule of changes, log in to the ASMS Specialist Console in the Cases from the main menu, select the My Calendar (FSC) option:
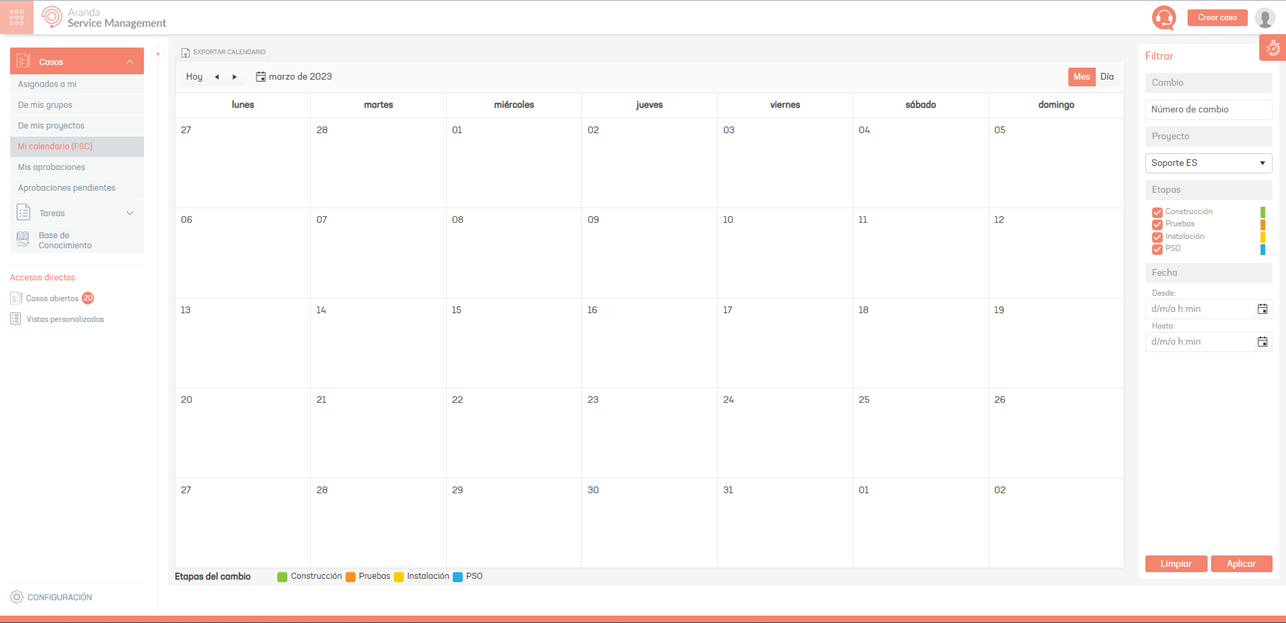
2. In the information view, you can filter the query by change number, project, stages, start date, and end date.
How to View Tasks
1. To view the tasks associated with cases, log in to the ASMS Specialist Console in the Tasks From the main menu, select a query criterion such as Open Tasks, Closed, My Tasks, My Groups Tasks, and My Projects Tasks.
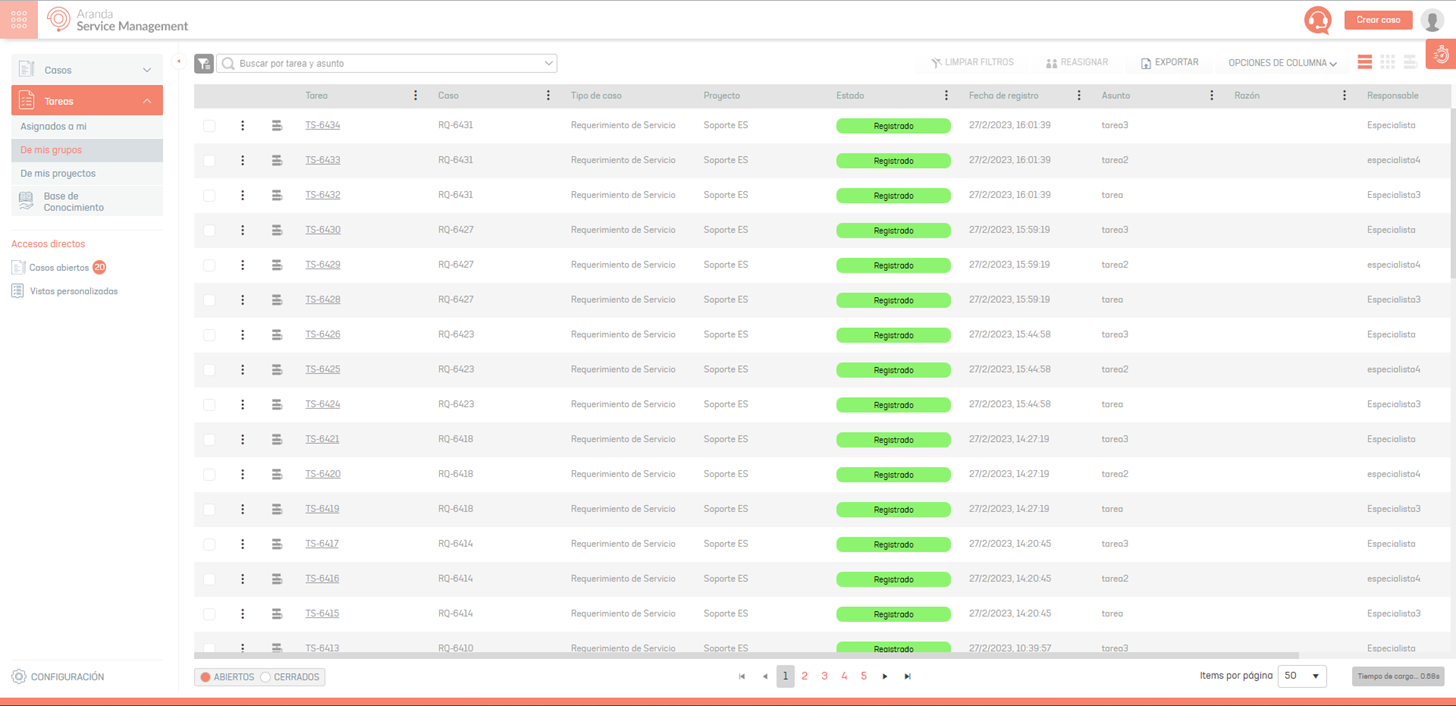
2. After selecting the criterion, in the information view you will be able to view the list of tasks according to the selected filter and perform the following activities:
- Apply filters by project and case type; Per Column and by Expiration
- Search by case
- Organizing information by grid, card, and board
⚐ Note: The query criteria and task filters are the same as those used to query the information of the cases.
How to View the Custom Listing
1. To view custom views that have been previously configured from the Admin Console, log in to the ASMS Specialist Console in the Custom listing From the main menu, select an option to filter the information like this: