
Editing a Case
1. To edit the case information, log in to the ASMS Specialist Console in the Cases From the main menu, select an option associated with the cases (Open, Closed, My Cases or Cases from my groups) and in the information view you will be able to see the list of created cases.
2. In the information view of the ASMS Specialist Console, you can access a case for querying or editing in the following ways:
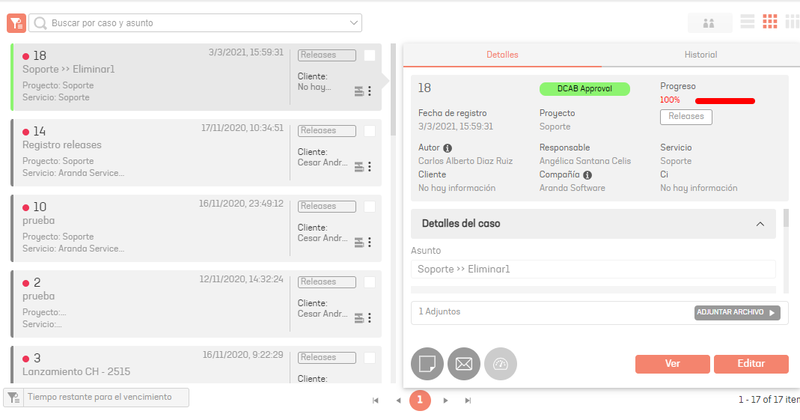
- Preview: In the case list, click on one of the records and you will be able to access a non-editable preview of the case, with basic information and history of the case. You can select the View or Edit case.
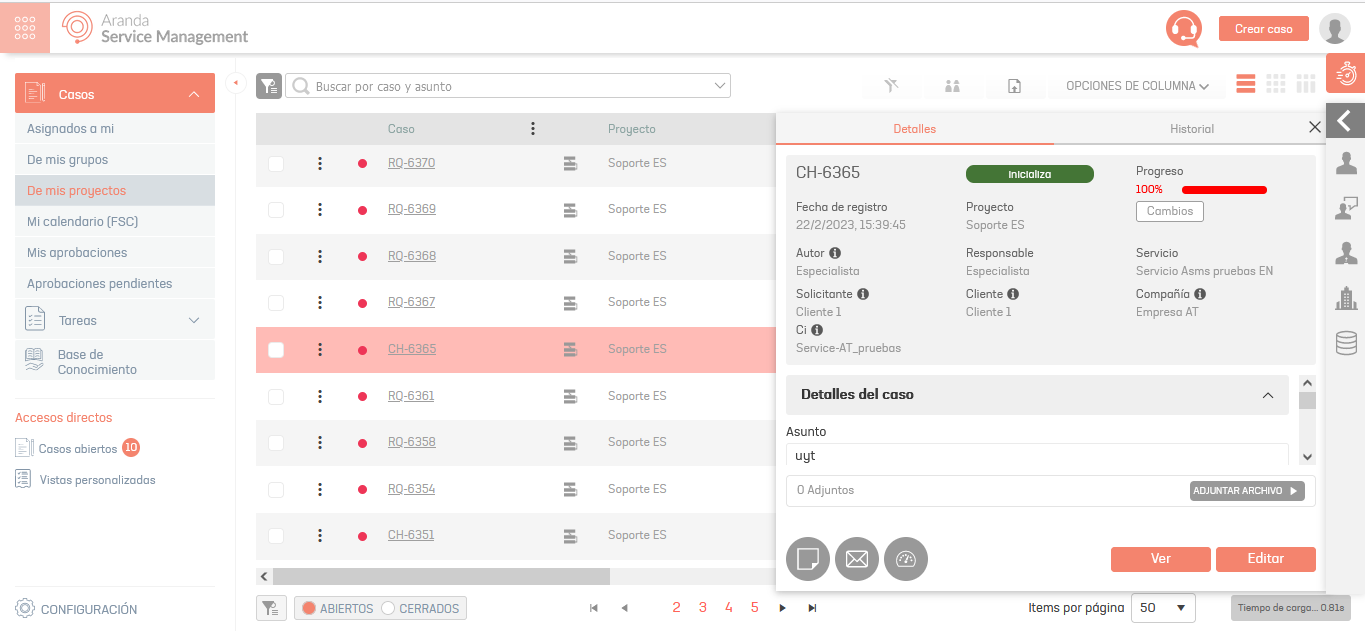
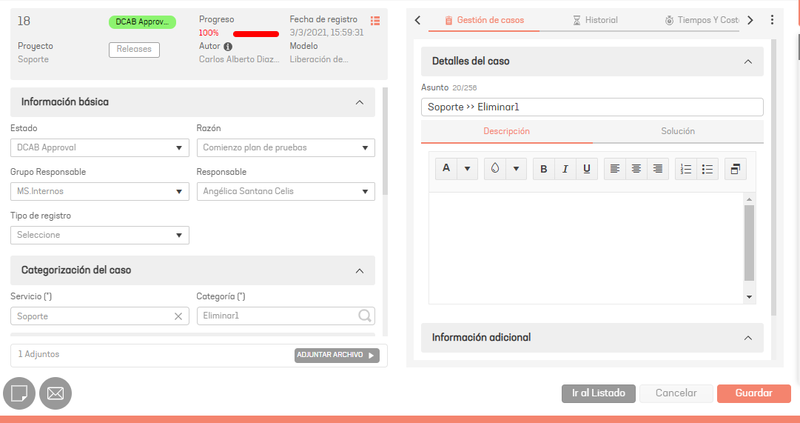
- Overview: In the list of cases, click on the case ID and you will be able to access an overview of the case, with information such as status, project, progress and date; categories such as basic information, customer information, case categorization, priority level, or additional fields, among others. You can select the View, Edit or Save the case.
- Cards View: In the information view, click on the Card icon, and you will be able to view the list of cases and a non-editable preview of the case. You can select the View or Edit case.
⚐ Note: When editing a case in the ASMS Specialist Console, you will be able to modify case information if you have the permissions assigned to you during project setup in the ASMS Admin Console.
3. When you finish editing the case, click Save to confirm the changes made.
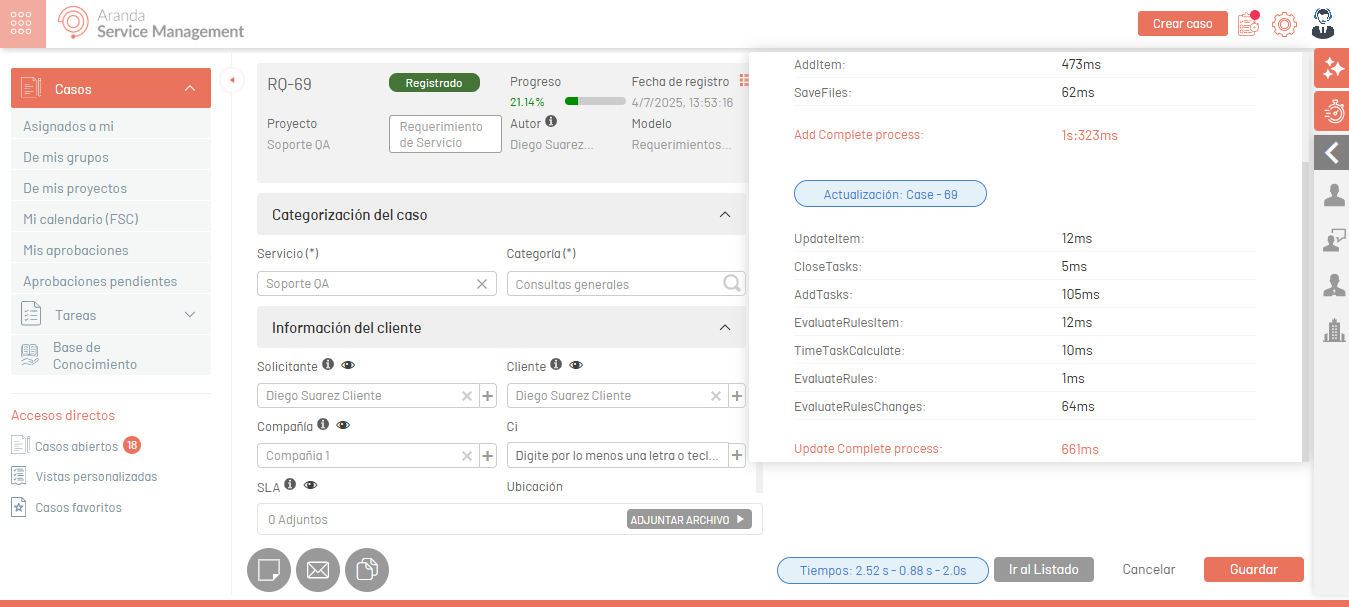
⚐ Note: When updating a case, an icon with a red badge will be displayed
. Clicking on it will open a modal window that will indicate the load times of the processes involved in updating the case.
Smart Article Search
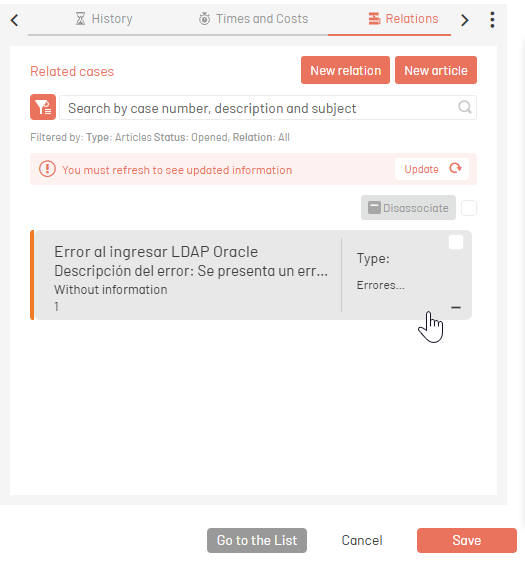
This functionality allows advanced searches in the knowledge base, using the subject and description of the case under editing as a criterion. To use this option, the action must be configured “Intelligent search in the knowledge base”. For more details on this setting, see the AI Settings.
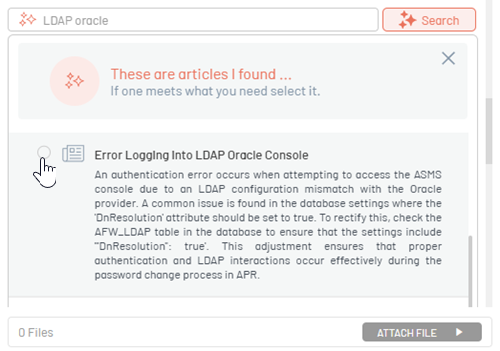
By clicking the “Search”, an advanced search will be run on the content and attachments of the available articles. The system will display up to a maximum of 4 relevant articles based on the information entered.
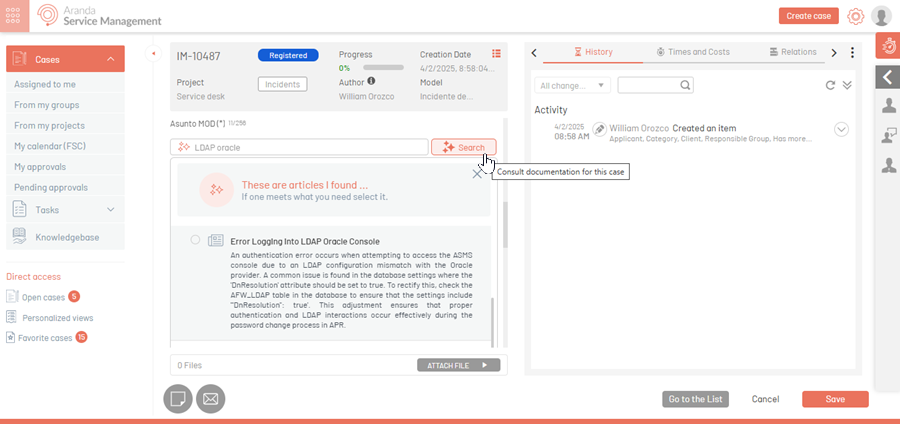
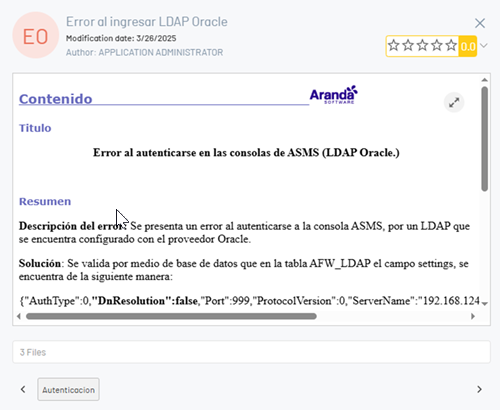
Click on the article of interest to view its content.
If you want to associate the article with the case, check the appropriate box.
Next, you will be asked to select the type of relationship with the case.
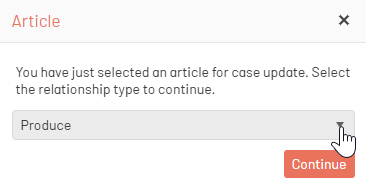
Once the relationship is selected, click the “Continue”. The article will be automatically related to the case.
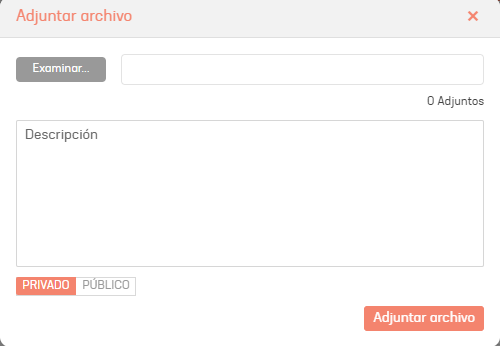
Attach File
When editing a case in the Specialist Console, you will have the option to add documents enabled by selecting the option Attach File.

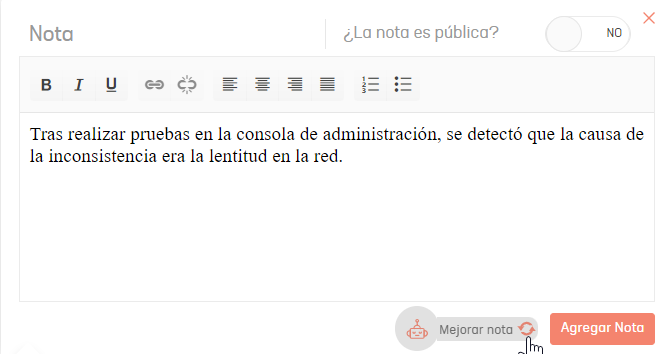
Add Note
When viewing a case in the Specialist console, you can add a note to the case without editing it by clicking the New note. In the window that is enabled, describe the note, confirm if it is public, and select the Add Note.

If you have the action set up “Improved wording” on the admin site View Configuration Writing Improvement, a button will be displayed at the bottom called “Improve grade”. This button is enabled when typing more than 20 characters and allows you to improve the clarity, coherence and style of the text entered.
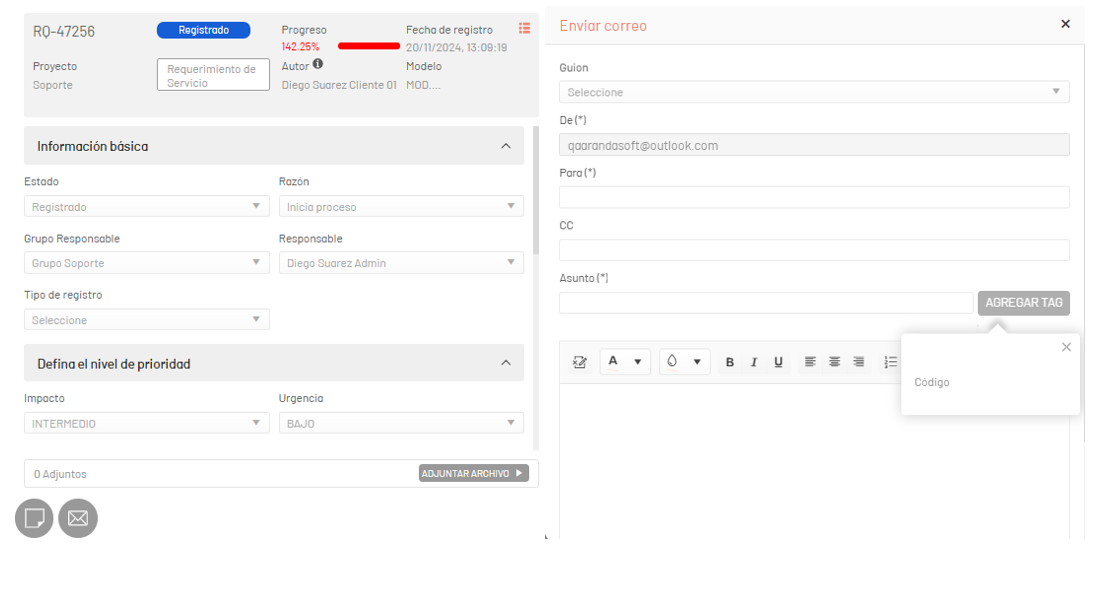
Send mail
When editing a case in the Specialist Console, you will have the option Send mail, to send a case report via email. Define the script, a subject, the body of the email, and the attached documents if required. When you select the ADD TAG, you can include information from the case fields. A list of the fields in the case is enabled. Select the fields you will use in the email text and the values will be replaced with the case information.
Recipient Management in “To” and “CC”
By clicking on the fields For or CC, triggers a predictive search that displays an email list of active specialists associated with the project. As at least 3 characters are entered, matching recipient suggestions are displayed, facilitating quick and accurate selection.

⚐ Note: When you select the ADD TAG In the subject of the email, the tag can be included Code which corresponds to the identifier of the case.
The fields For and DC They have the following characteristics:
Allowed Parameters:
- Full length: Up to 113 characters.
- Length before @ symbol: Up to 64 characters.
- Length after @ symbol: Up to 48 characters.
-
Characters allowed:
- Letters: a-z and A-Z (excluding the letter ñ-Ñ).
- Numbers: 0-9.
- Special characters: ‘ . - _ ! # ^ ~
Restrictions:
- The use of a period (.) immediately before the @ symbol is not allowed.
⚠ Note:
- The labels in the date and time fields will be replaced based on the time zone of the user who is signed in to the app. If the user does not have a defined time zone, the values will be adjusted to the UTC time zone.
- For security reasons, the email preview will not replace the tag corresponding to the survey link.
Click the Preview, you will be able to preview the mail.
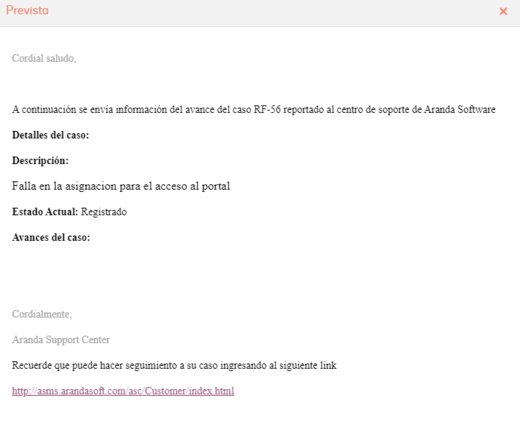
When you send the email, a private .eml file with the information sent in the email including the attachments will be automatically attached to the case.
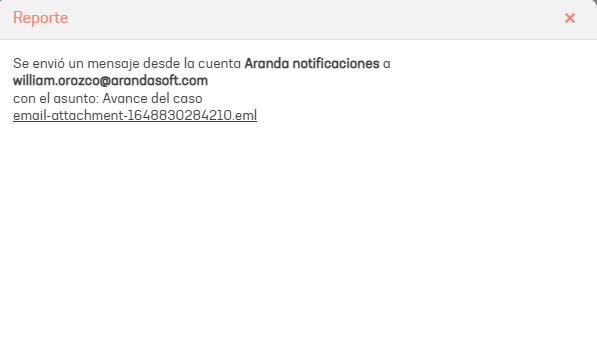
In the History tab of the case, the sending of the report will be registered with a link to download the email sent.
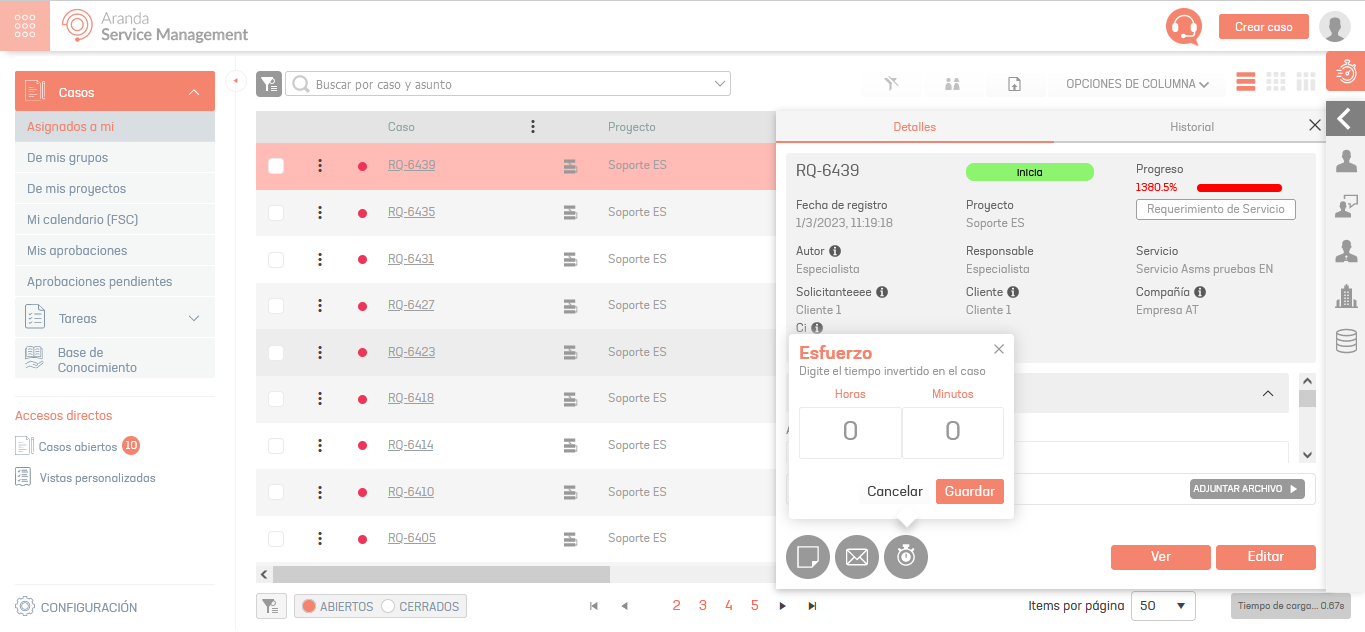
Effort
This functionality allows you to record the time a specialist has invested in a case throughout its lifecycle.
Effort Configuration
To set up the effort, follow these steps:
- Log in to the ASMS Admin Console, in the General Settings from the main menu, select the Projects. Select a project, and in the project detail view, select the Settings.
- Enable the Accounting, which applies to each type of case.
Once the Accounting option has been activated, it is necessary to create a Fare or a Financial Model.
⚠ Note:
- If only the Rates, the effort will take the values of this setting.
- If the Fare, but not the Financial Model, the effort will take the cost and price of the Fare.
- If both the Fare like the Financial Model, and the latter is associated with the Operating model, values Cost and Price shall be taken from the Financial Model.
Specialist Effort Log
1. To record time, click on the Effort within the case. 2. Enter the hours and/or minutes spent on the case.
⚠ Note:
The specialist must be responsible for the case so that the Effort is enabled. {: #important}
Visualization of the Cost or Price of Effort
To display the cost or price related to the effort invested in the case:
1. Refer to the details of the case. 2. Select the option Time and Costs > Costs.
This way, you can review the information related to the costs accrued based on the effort recorded.
Risk
The Risk allows the specialist to assess the risk when implementing a Change or a Release (only applies to these two types of cases). When editing the case, the Risk button is enabled depending on the state in which the risk was defined from the management console.

If you edit the case, by entering through the case ID, you will be able to identify the Risk option, in the Define the Priority level tab, in the Risk field, click on the corresponding icon.
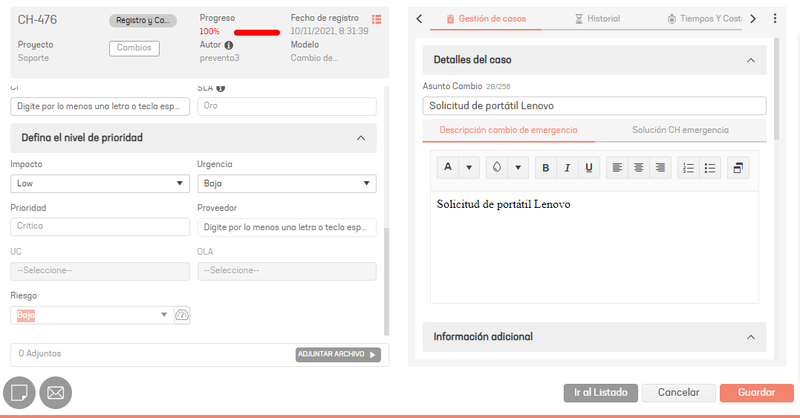
In the window Assess Risk, define the risk levels for the selected case.
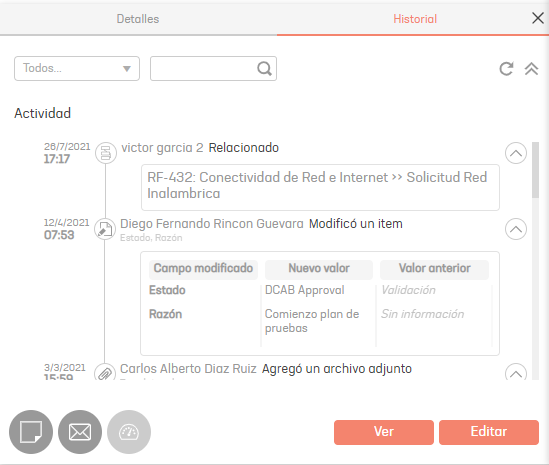
History
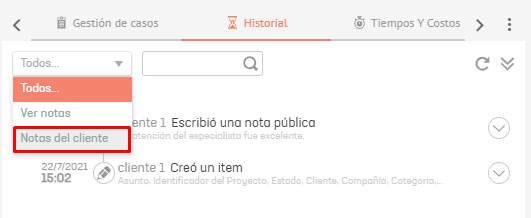
At any point during the editing of the case, you can access the History to view the record of the actions taken on the case during its life cycle.
Sentiment Analysis
Preconditions
- Have the endpoints and actions required for proper operation configured in the admin console. View Sentiment Analysis Settings
1. When the customer has added a note to a case type such as Service Requirement, Incidents or Changes, the specialist will be able to see the customer’s sentiment in the Case Details, in the field History / All / Customer Notes.
2. All the notes added by the client will be listed, there click on the option Sentiment Analysis.
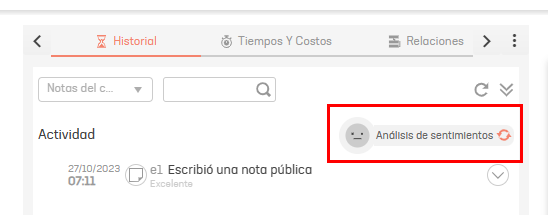
3. An analysis of all the notes added to the case will be carried out and the client’s sentiment regarding the case will be visualized.
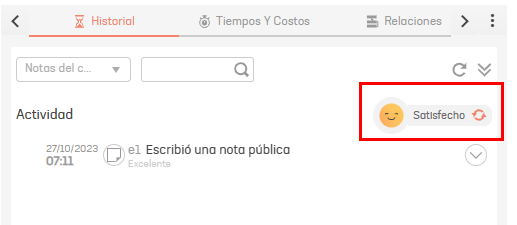
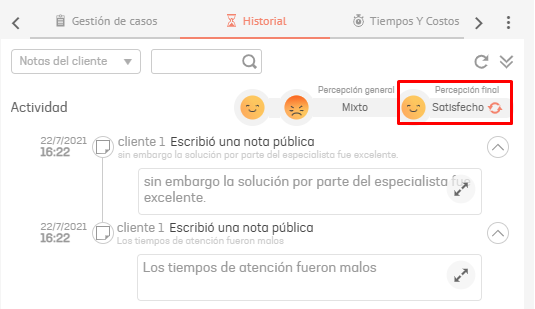
4. Within the sentiment options, the following are available:
- Satisfied: feeling when the grades are positive.
- Unsatisfied: feeling when the grades are negative.
- Mixed: feeling when there are positive and negative notes.
- Neutral: feeling when internally it is not possible to interpret the notes added to the case.
5. For the feeling Mixed A final perception is calculated according to the last grade added to the case.
Case Summary
Functionality Case Summary It allows you to generate a summary document, in basic or complete format, with the information recorded in a case. This tool makes it easy to review, analyze, or send key case information to others.
Preconditions
It is necessary to have the endpoints and actions required for them to function properly configured in the administration console. View Case Summary Settings
1. From the edit or view view of the case, access the right side menu and click on the option Case Summary.
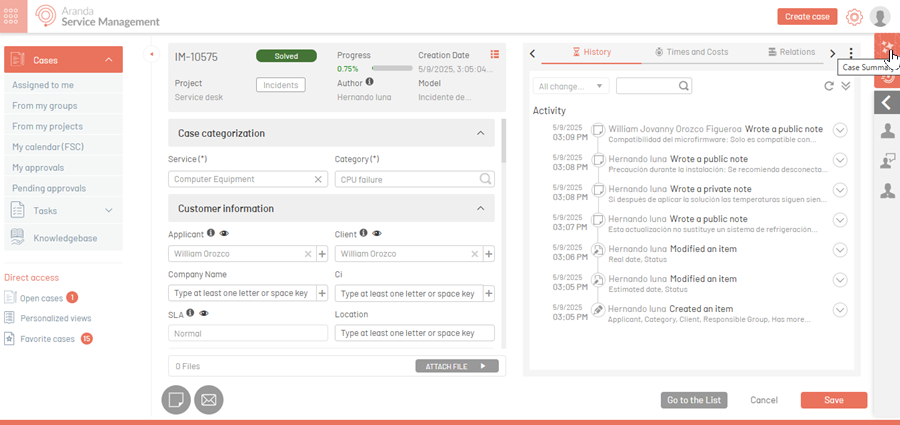
2. A pop-up window will open to generate the summary. The drop-down menu will show two available options:
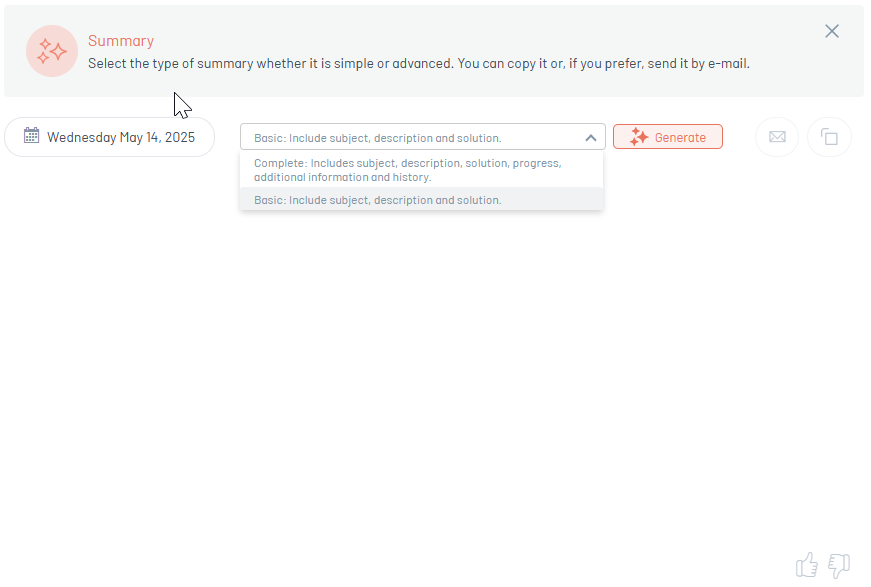
-
Basic Summary: Include the following elements of the case:
- Affair
- Description
- Current status
- Solution Comment (if the case is resolved or closed)
-
Public Notes
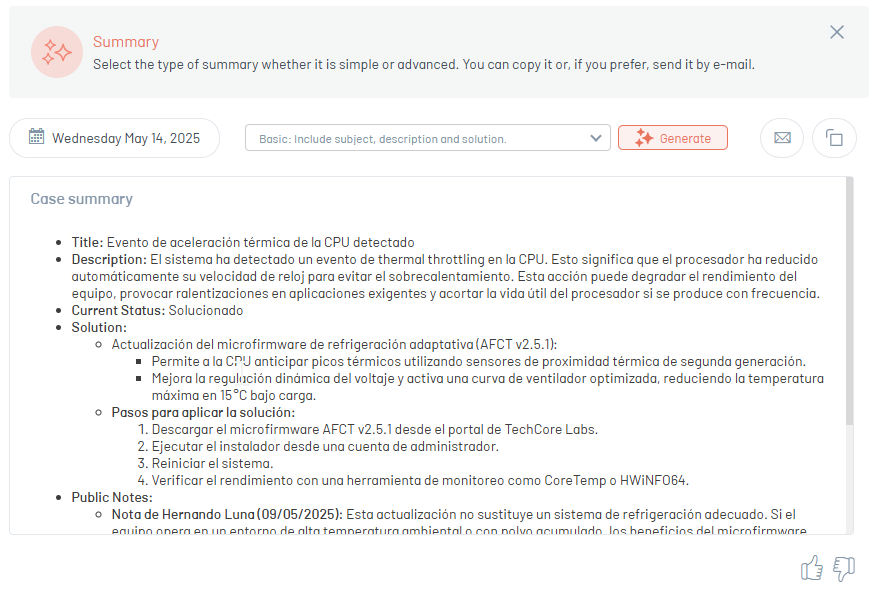
This summary is generated in a simple format, intended for quick and clear review. Select the Basic Summary option from the drop-down list and click the Generate. The system will process the case information in real time and generate the summary.
-
Full Summary: Includes detailed case information:
- Affair
- Description
- Current status
- Solution Comment (if applicable)
- Public Notes
- Classification data: project, service, category, impact, urgency, priority
- Case Dates: Created, Last Modified, Closed
- Status history: with dates and assignees
- Additional fields
-
Approval History
This summary is generated in a structured format (tables and icons). Select the Full Summary option from the drop-down list and click the Generate. The system will process the case information in real time and generate the summary.
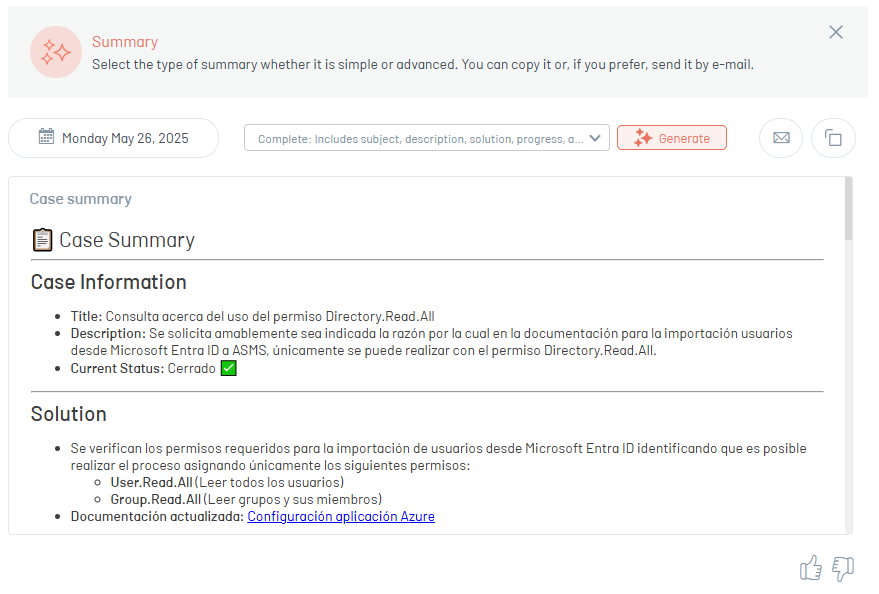
3. Once the summary (basic or complete) has been generated, the following options are enabled:
- Email: It allows you to send the abstract directly by email to one or more addresses.
- Copy to clipboard: Copy the contents of the summary to the clipboard, in Markdown format. It can be easily pasted into emails, external systems, or documentation tools.
- Rate the quality of the abstract: Allows you to indicate whether the generated content was useful using the buttons “Like” or “I don’t like it”. This information is stored in the database.