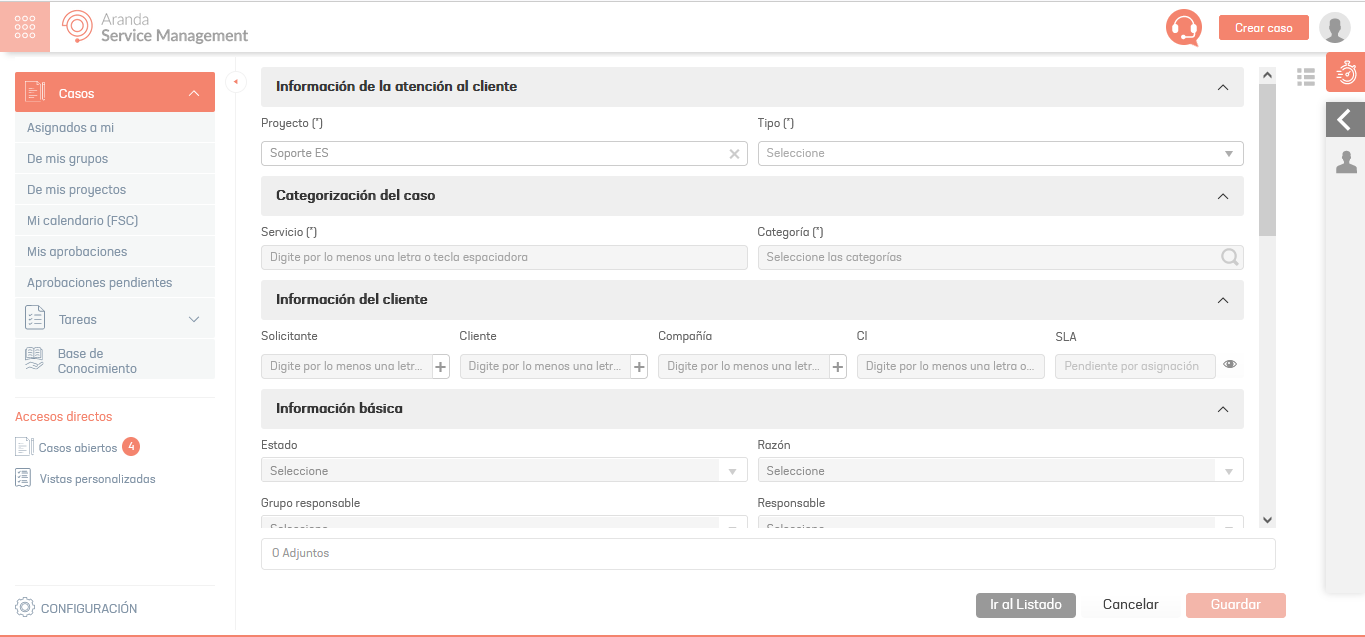
Creating a Case
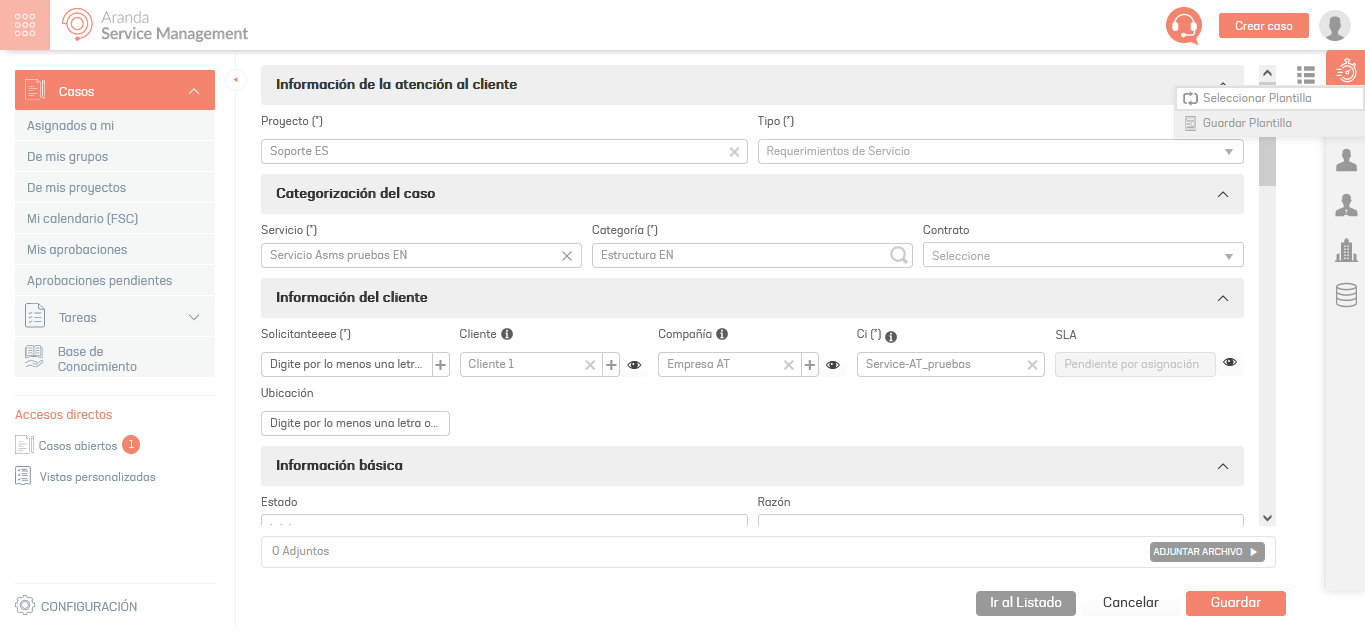
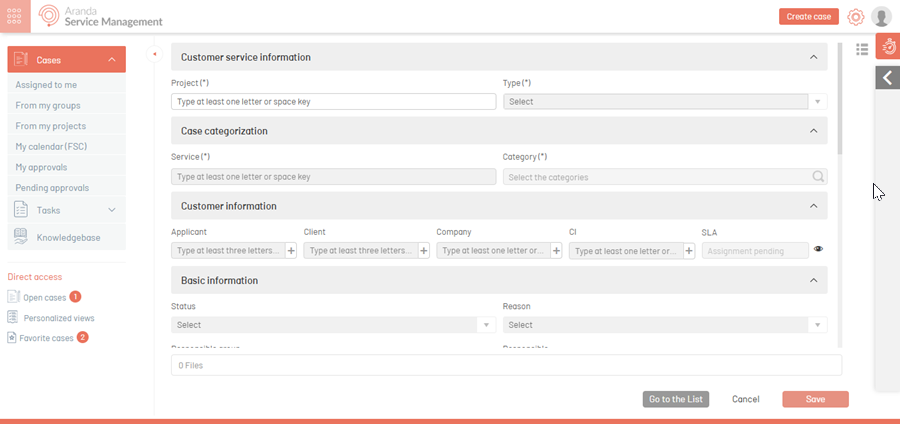
1. To create a case, log in to the ASMS Specialist Console, in the header menu, select the Create Case. The form to enter the new case information (as configured in the Admin console) is enabled.
Modify Format
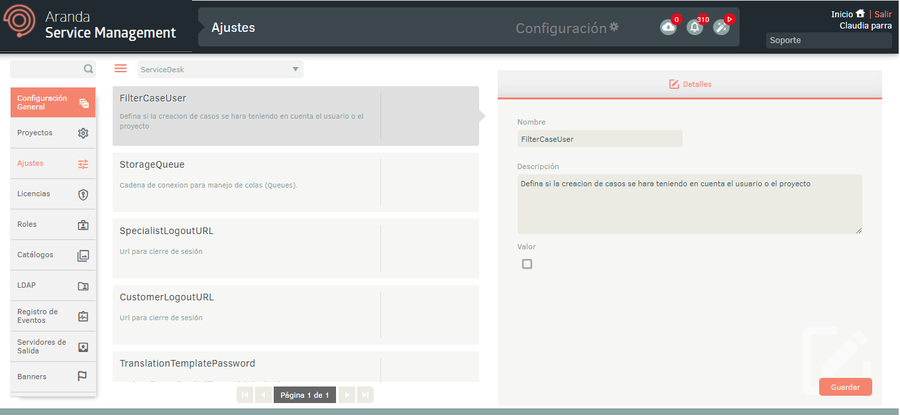
2. During the project configuration in the ASMS administration console, you can activate the FILTERCASEUSER filter check box, entering the General Settings from the main menu, select the Settings, in the Detail view, set the Service Desk option and select the corresponding value.
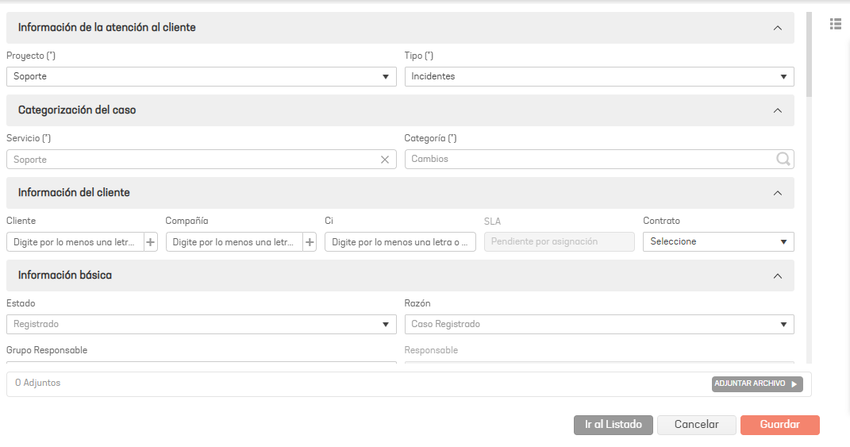
3. When you create a case in the ASMS Specialist Console, you see a change in the order of the Customer Information and Case Categorization sections. It is visualized as follows:
Add files
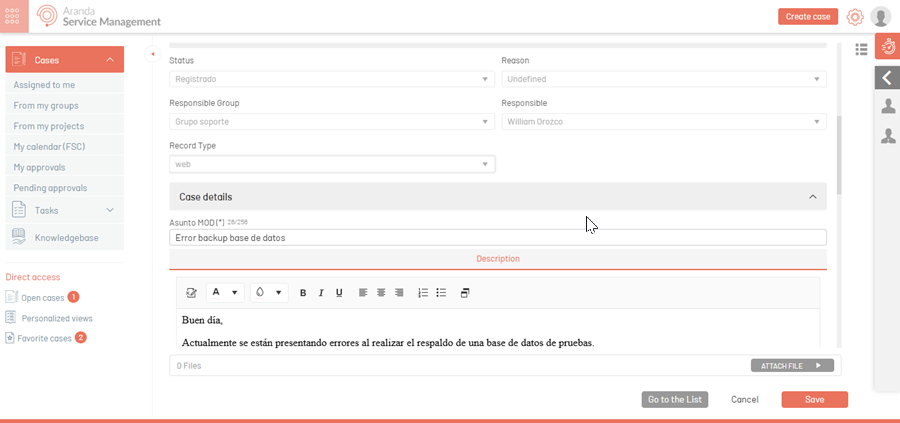
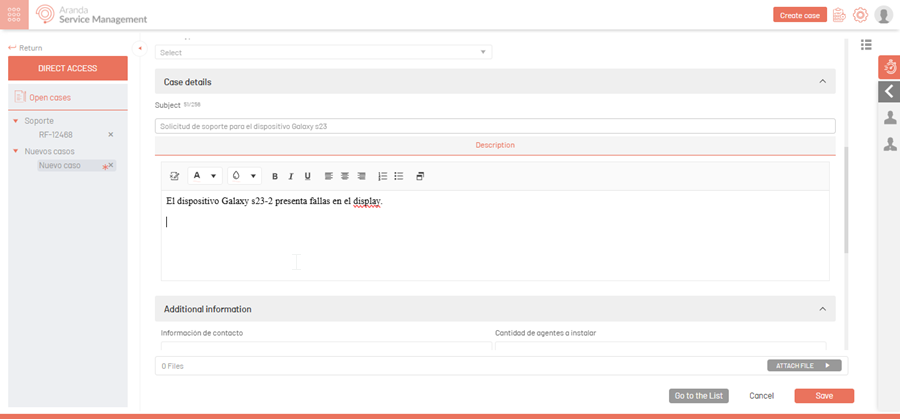
4. In the Create Case form in the ASMS Specialist Console, select the Attach File, to add one or more documents to the case.
5. The window is enabled Attach File. Click the Examine and choose the files you want to include in the case. Include a description of the attached documents.
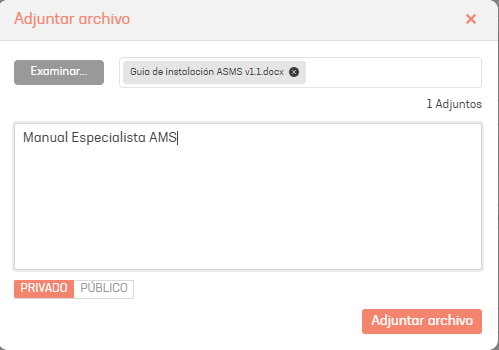
6. Define the status of the files:
- PRIVATE: Visible only to specialists.
- PUBLIC: Visible to users and specialists.
7. Finally, click the Attach File. If you want to delete any files, you can do so from the list of files by clicking on the delete icon.
⚐ Note: The file types allowed by the application to add attachments are defined in a whitelist that is only modifiable from the site’s webconfig file (ASMSAPI). The decision to use this whitelist is made by ethical hacking guidelines that have been applied after vulnerability tests carried out on the application.
Allowed file types:
zip, rar, emz, 7z, docx, pdf, txt, inx, xlsx, doc, evt, log, xls, rdlx, svclog, pml, xlsm, aam, prc, rtf, pptx, dmp, repx, ppt, jpeg, jpg, png, gif, tif, vsd, vsdx, svg, dsf, bmp, jfif, ico, emf, bmp, avi, webm, mp4, msg, eml, resx, cll, sql, rdl, amk, bak, css, csv, dll, mov, xml.
Save a case as a template
8. To save the parameterization of a case as a template, in the create case form in the ASMS specialist console, fill in the basic information of the case (project, case type, service, category, customer, status, among others); Select the option Save Template.
9. The window is enabled Template, where you can fill in the name of the template. When finished, click the Save.
Create a case from a template.
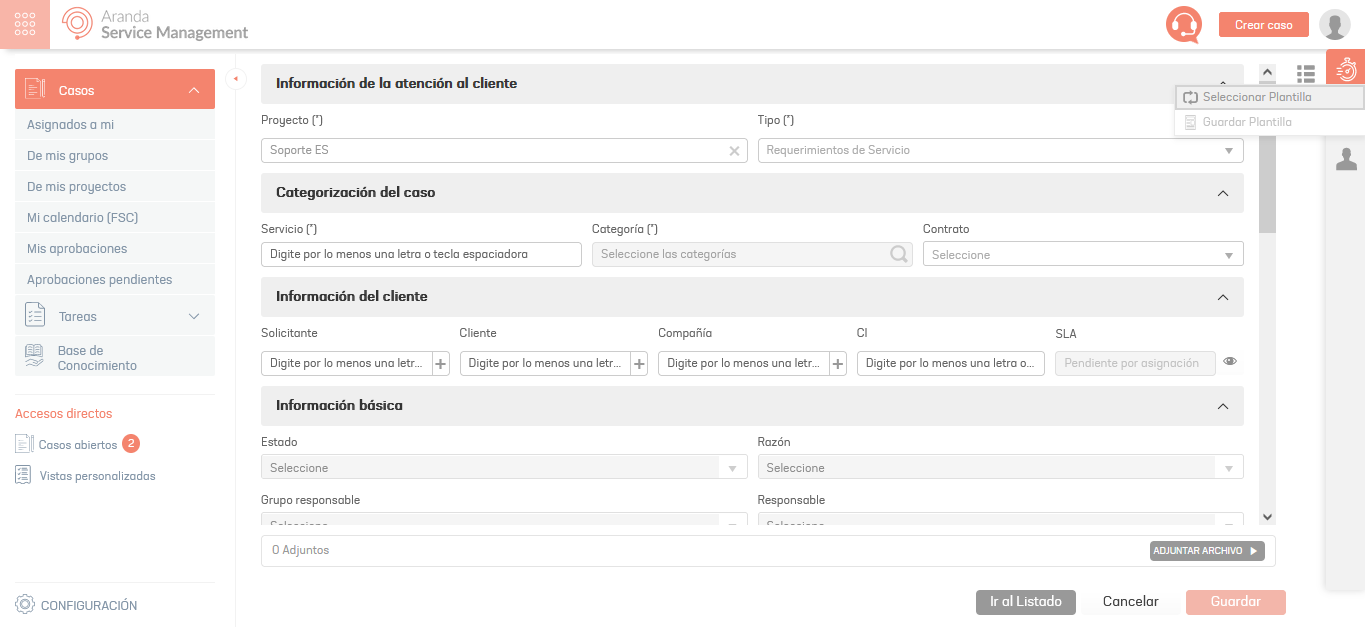
10. To create a case from a template, in the Create Case form in the ASMS Specialist Console, define a project and case type; Select the option Select Template.
11. The window is enabled Template where you can select the data from the previously created template.
⚐ Note:
- Templates will not be visible for template case creation when:
- They are marked as scheduled action templates in the Administration Console / Service Management / Templates.
- Have associated concepts that are not available for the creation of cases, these concepts are: service, category, group of specialists, specialist, client, company or CI.
12. By clicking the Apply The predefined data will be automatically loaded in each of the fields.
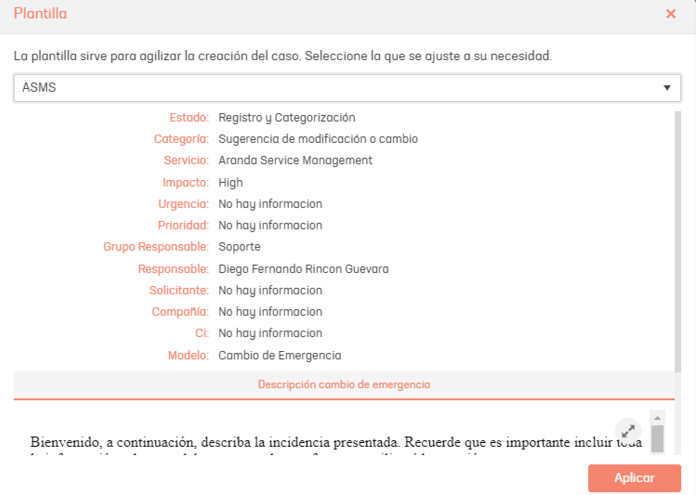
13. Finally, click the Save to complete the case creation.
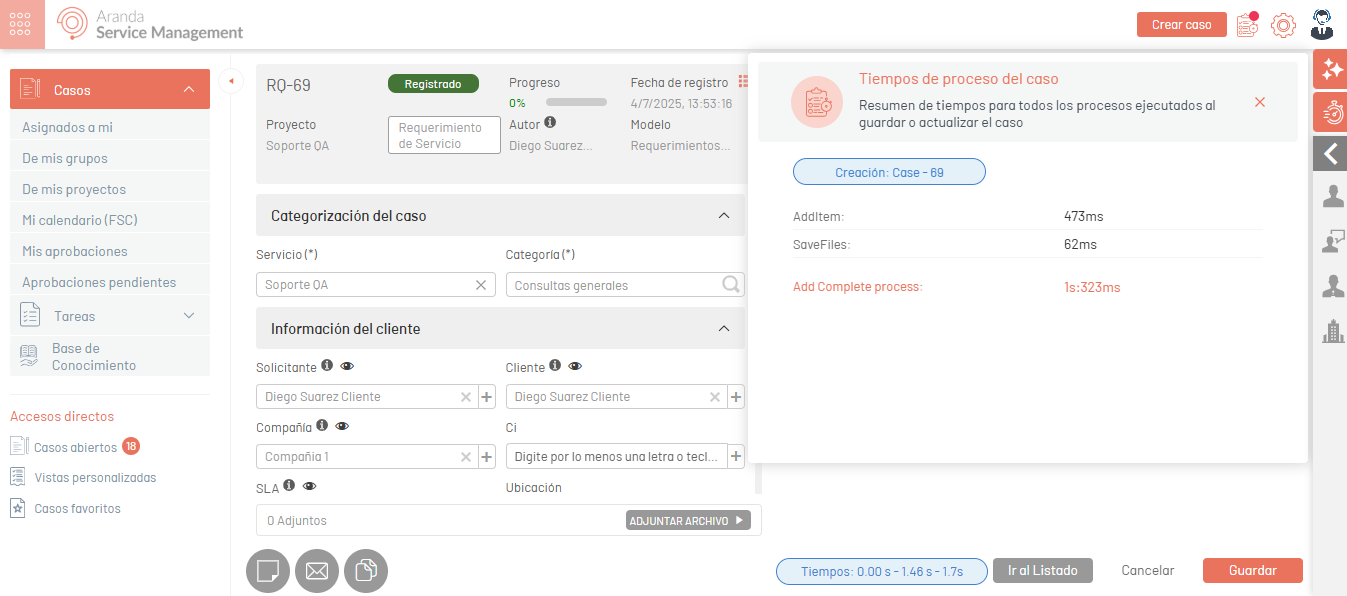
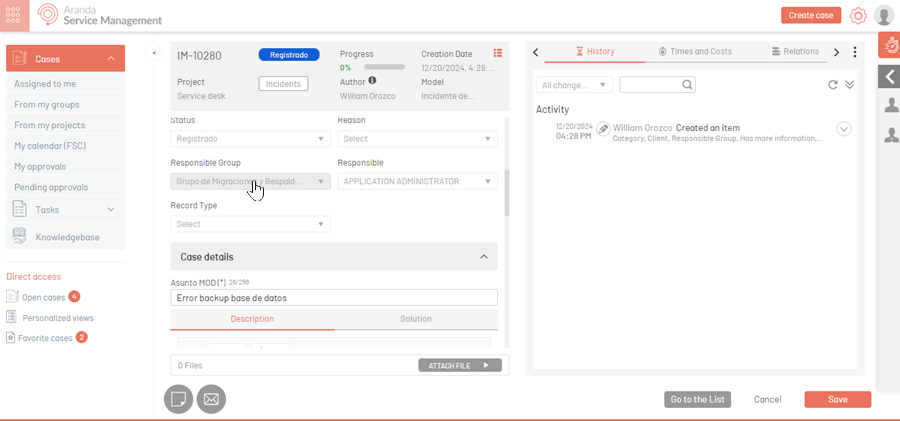
⚐ Note: When creating a case, an icon with a red badge will be displayed
. Clicking on it will open a modal window that will indicate the loading times of the processes involved in the creation of the case.
Create Cases with related articles
This functionality allows you to display articles related to the subject entered by the user, providing timely support in the attention of the case. It also allows you to perform an advanced search in the knowledge base if the action is enabled “Intelligent search in the knowledge base”. For more information, see the AI Settings
1. From the specialist site, click “Create Case”. This will enable the form for case creation.
2. Fill in the form fields, such as Project, Type, Service, Category, among others.
3. There are two scenarios depending on the configuration:
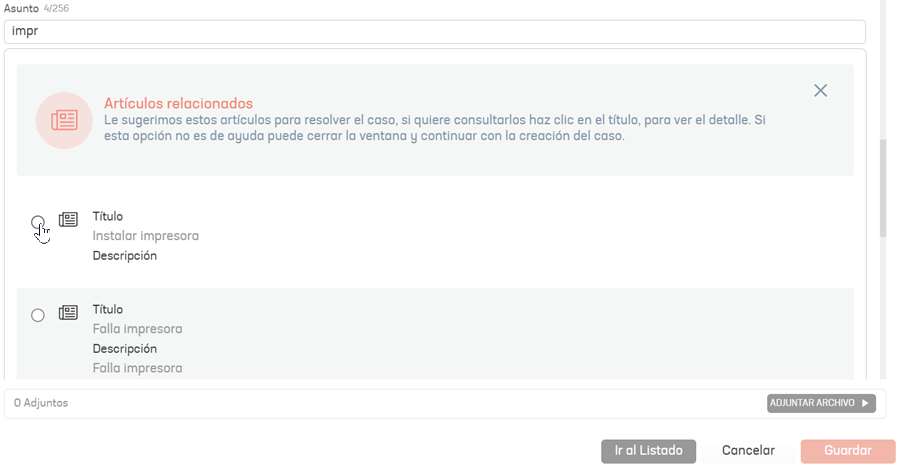
- No Smart Search enabled: Entering text in the Subject field will automatically list matching articles. The search is carried out by title, description, identifier, keywords and/or content of the article.
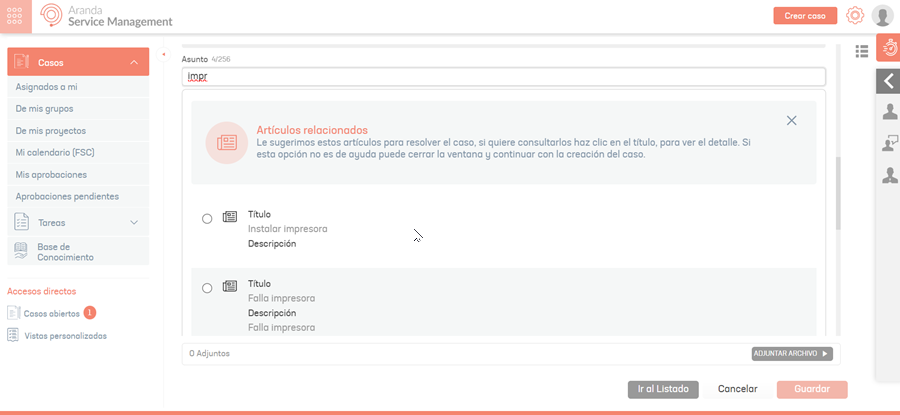
- With Smart Search enabled: The “Search”. Entering the subject and clicking this button will perform an advanced search on the content and attachments of the available articles. Up to a maximum of 7 articles will be displayed based on the information found.
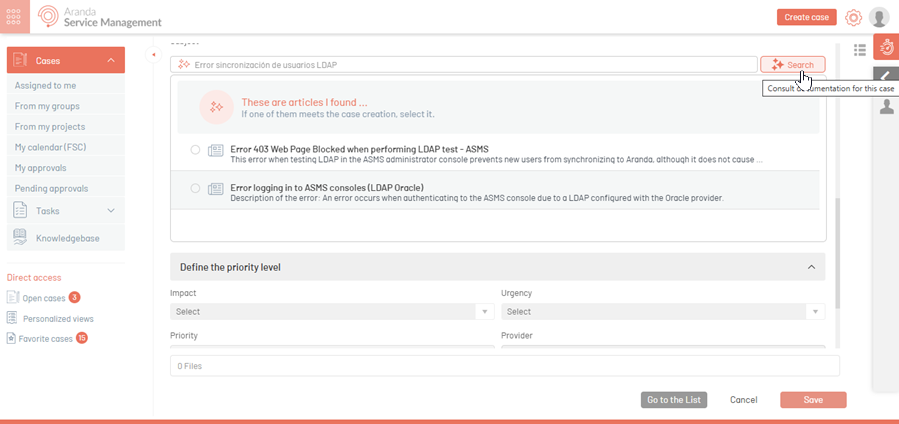
4. Click on the article of interest to view its content.

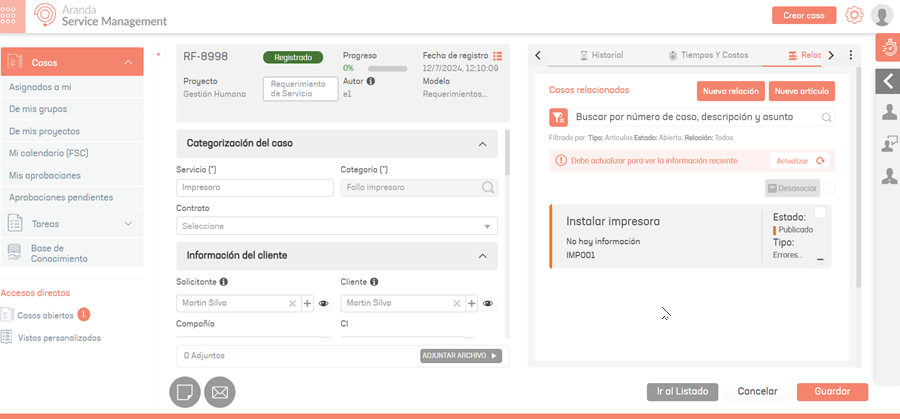
5. If the article responds to the case you are posting, check the box to associate it.
6. To disassociate an item, click the “Disassociating”.
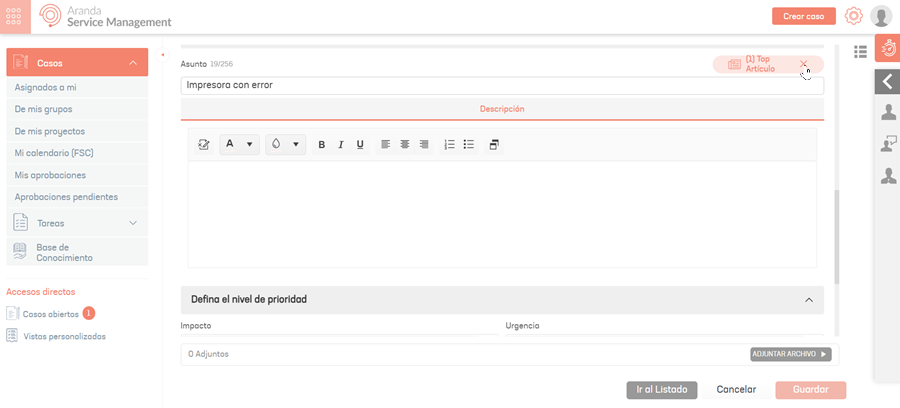
7. Once you have filled out the case, click on the “Save”. A window will appear asking for the type of relationship with which the item will be associated.

8. Click the “Continue” to create the case with the related article.
⚐ Note:
- If there is a state with the behavior “Closed by default” In the status flow, the case will automatically be created as closed.
- If there is no state with the behavior “Closed by default” In the state flow, the case will be created in the first state of the flow.
Create cases with automatic specialist group assignment
This functionality allows you to automatically suggest the most appropriate group to handle a case, taking into account the subject and description provided. To use this functionality, the action must be previously configured “Assigning responsible groups” on the admin site. See Responsible Group Assignment Settings
1. From the specialist site, click “Create Case”. This will enable the form for case creation.
2. Fill in the form fields, such as Project, Type, Service, Category, among others.
3. Once you have filled out the necessary fields, click on the “Save”. A window will appear with a list of suggested groups sorted by relevance.
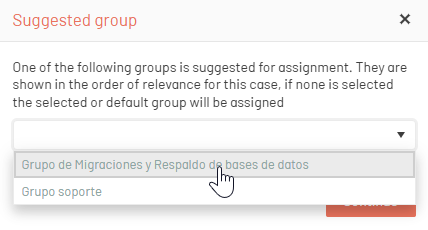
4. Select a suggested group.
- If you would like to accept a suggestion, select the group you think is appropriate and click the “Continue”. The case will be created automatically by assigning the selected group.
- If you do not want to accept any suggestions, do not select any groups and click “Continue”. In this case, the case will be created with the manually selected group or with the default group assigned to the service.
⚐ Note:
- If during case creation the manually selected group matches the first system suggestion, the responsible group assignment suggestion modal is not displayed.
Create cases with automatic CI assignment
The CI auto-mapping functionality evaluates the match between the fields of the case form (Subject, Description, and Category) and the attributes of the available CIs (Brand, Category, Description, ID, Manufacturer, Model, Name, and Serial). Based on this assessment, the system automatically assigns the most relevant IQ as the primary IQ of the case.
For this functionality to be active, it is necessary that the artificial intelligence action “IQ Assignment” is previously configured in the administration site.
See CI Assignment Settings
1. From the specialist site, click “Create Case” to open the creation form.

2. Fill in the form fields, such as Project, Type, Service, Category, Subject, and Description, among others.
2. Once you have filled out the necessary information, click “Save”.
If during the creation of the case there are CIs that match the Subject and/or Description entered, the system will automatically assign the most relevant CI and display a message confirming that the assignment was made using artificial intelligence.

⚐ Important considerations:
- The process analyzes only the first 100 ICs associated with the client of the case or in which the client is listed as responsible.
- The filter “Enable Service Filter on Case Creation” it does not affect CI auto-mapping logic.
- If the user selects a CI manually, the system will not execute the automatic assignment.
- If the case does not have an associated client, the CI auto-mapping logic will not be executed.
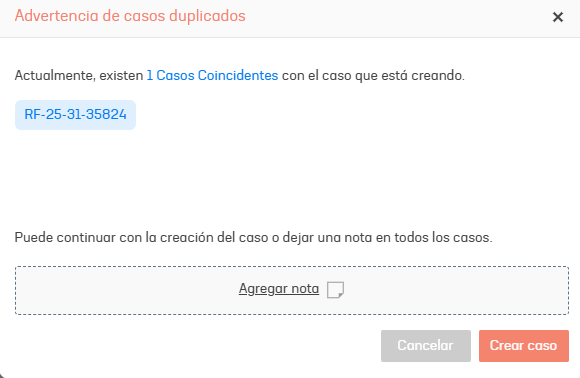
Identification of duplicate cases
By having the identification of duplicate cases configured in the administration console for the project and case type, if the case to be created matches in project, case type, service, category and client with any of the existing cases according to the configuration, the specialist will be informed of the list of duplicate cases and the option to add a note to all cases or continue with the creation of the new one case.