
In this section you can consult a request on the Aranda AssistMe mobile console.
1. In the AssistMe mobile console, on the My Portal taskbar, select the My Requests.
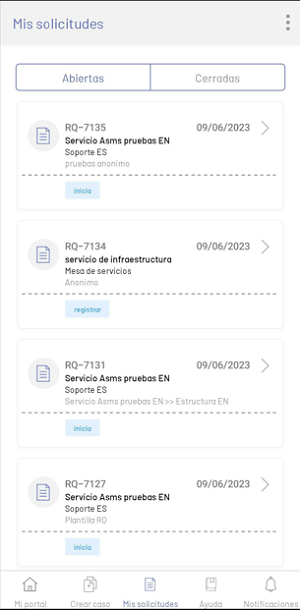
This option displays the cases or requests created in a list and allows you to access their details. In the list of cases or requests, you can filter by open or closed.
| Options | Description |
|---|---|
| 1. Floating menu | This section displays a floating menu with options such as Ascending, Down, Profile, News and Log Out (described in My Portal). |
| 2. Open/Closed Filter | This option filters the cases found in Open and Closed. |
| 3. List of Cases | This section allows you to view a list of the cases that meet the with the criteria of filter and order. |
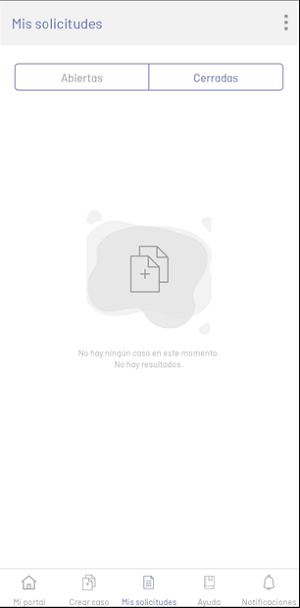
If there are no cases or none with the filters, a watermark is displayed informing that there are no matches.
2. When searching for services does not return results, a watermark is displayed:
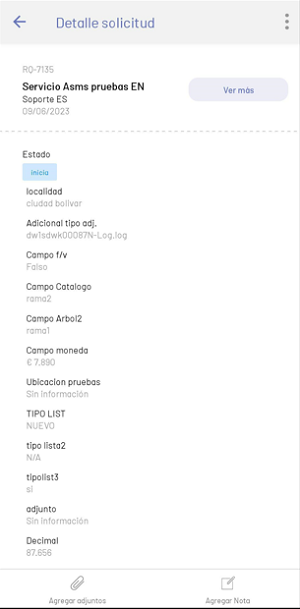
3. After selecting one of the cases in the application, the user will be able to view the detail of the request:
| Options | Description |
|---|---|
| 1. Floating menu | This section displays a floating menu with options such as Profile, News and Log Out (described in My Portal). |
| 2. Case Information. | This section shows the general information of the Case: Case number, project, service, category, and creation date. |
| 3. View Description Button | This option allows you to redirect to another view with the description of the case. |
| 4. Additional Fields | This section shows the information provided for each additional field or the legend No Information. Note: The configuration of the additional dependent fields is subject to what is defined in the ASMS Administrator. View functionality |
| 5. Add Attachment | This option displays a list of options to attach files from different sources. |
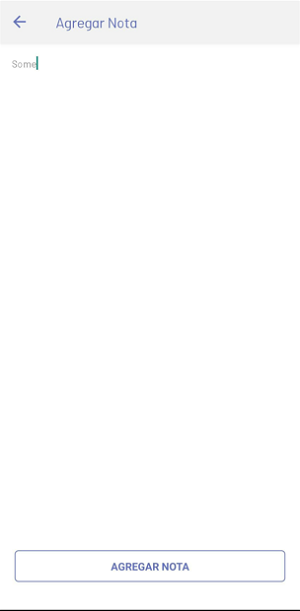
| 6. Add Note | This option redirects to a new section for creating notes. |
4. When selecting the Add Attachments on the taskbar, the following options are available to you:
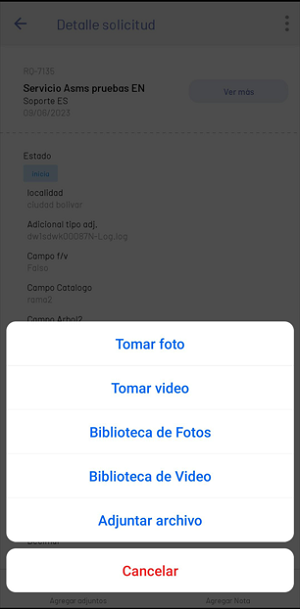
| Options | Description |
|---|---|
| Take photo | This option enables the device’s camera in photo mode. |
| Take video. | This option enables the device’s camera in video mode. |
| Photo Library | This option enables the device’s gallery by filtering by images. |
| Video Library | This option enables the device’s gallery by filtering by videos. |
| Attach File | This option enables the device’s gallery by filtering by files. |
5. When you select the View Description In the detail of the application, the information associated with the description of the application is presented:
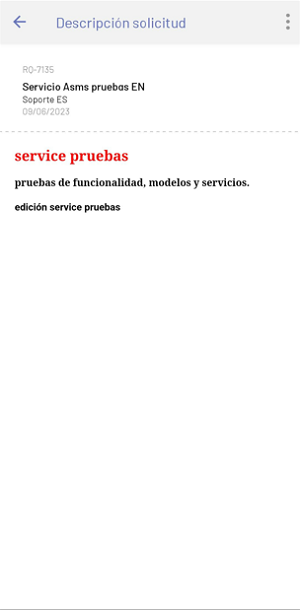
| Options | Description |
|---|---|
| 1. Floating menu | This section displays a floating menu with options such as Profile, News and Log Out (described in My Portal). |
| 2. Case Information | This option presents the general information of the case: Case number, project, service, category, and creation date. |
| 3. Description of the application | This option expands the information in the request. |
6. When selecting the Add Note on the taskbar, a field is enabled to enter the text of the note.
When I finished, I selected the Add Note button, the system sends the request to add this information to the case.
⚐ Note:
- If in the ASMSAdministrator, in the Projects > Settings, check is active Not allowing the client to include notes to the case, it will not be possible to add notes to the case. This restriction applies to the following case types: Changes, Incidents, Problems and Service Requirements.
My Assets
This functionality allows the user to view the ICs that they are responsible for or use. The listing provides an organized view of the assets associated with the user.
Steps to view associated assets
- Go to the My Requests and click on the three options dots.
- In the floating window, select My Assets.
- In the view of My Assets, the ICs that the user is responsible for or makes use of will be displayed.
- Each CI in the list is presented on a card that shows: image, name, ID, category, date of responsibility, and status.
- When you select an IC, detailed information about it is displayed.
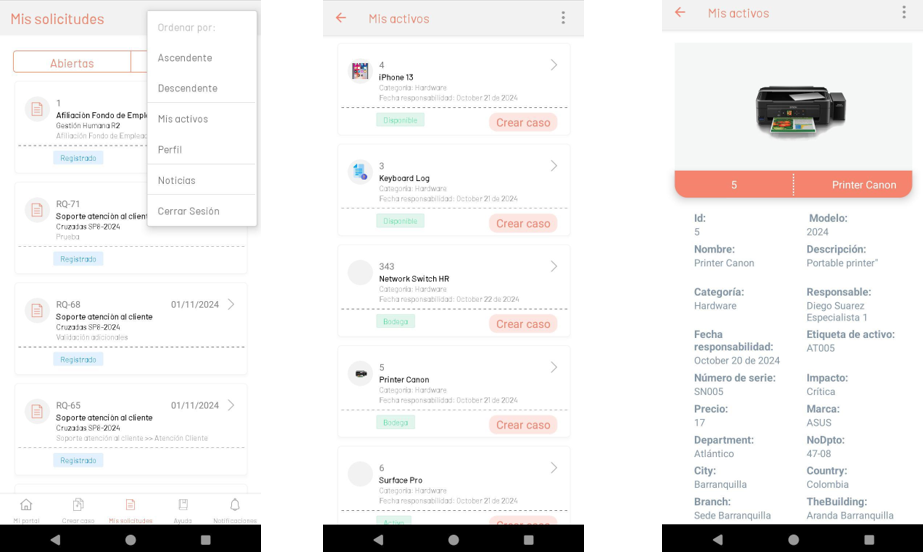
Create Case from a CI
To start the process of creating a case, click the Create Case. This redirects to the case creation window, where you will need to select the service and the type of case to create. Once selected, the IC will be automatically assigned on the case creation form, where you can fill in the required information and finalize the creation.
⚐ Note:
- If the CI does not belong to the project when you select the project, a message will be displayed with the options Cancel to return to the previous service view or Accept to return to the My Assets to select another asset.