LDAP Provider Type Configuration
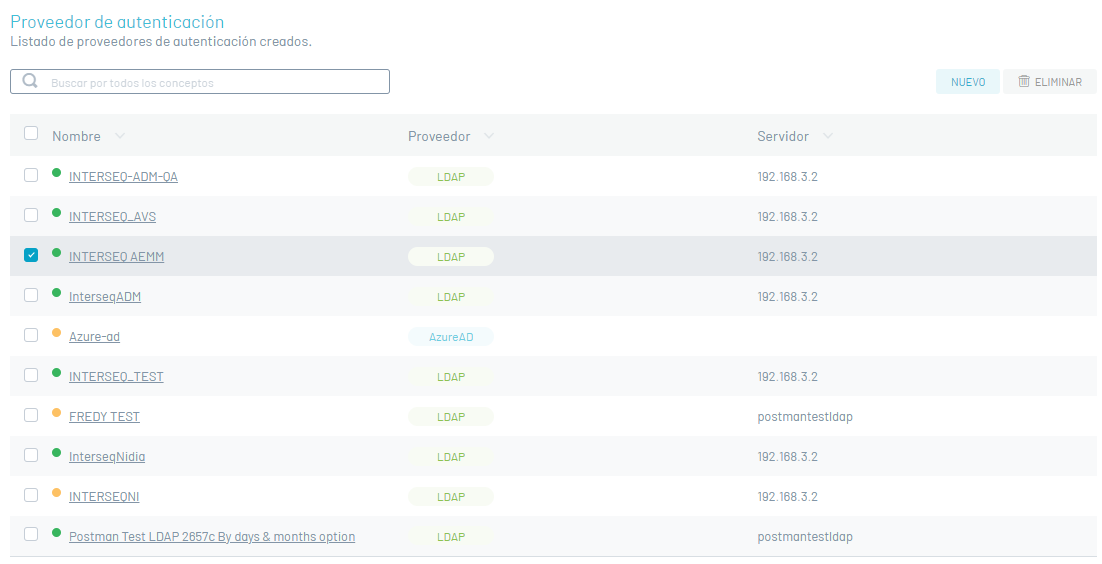
1. Log in to the Aranda Security console with the administrator role, in the General Settings from the main menu, select the Directory Services. In the information view, the list of authentication providers is displayed.
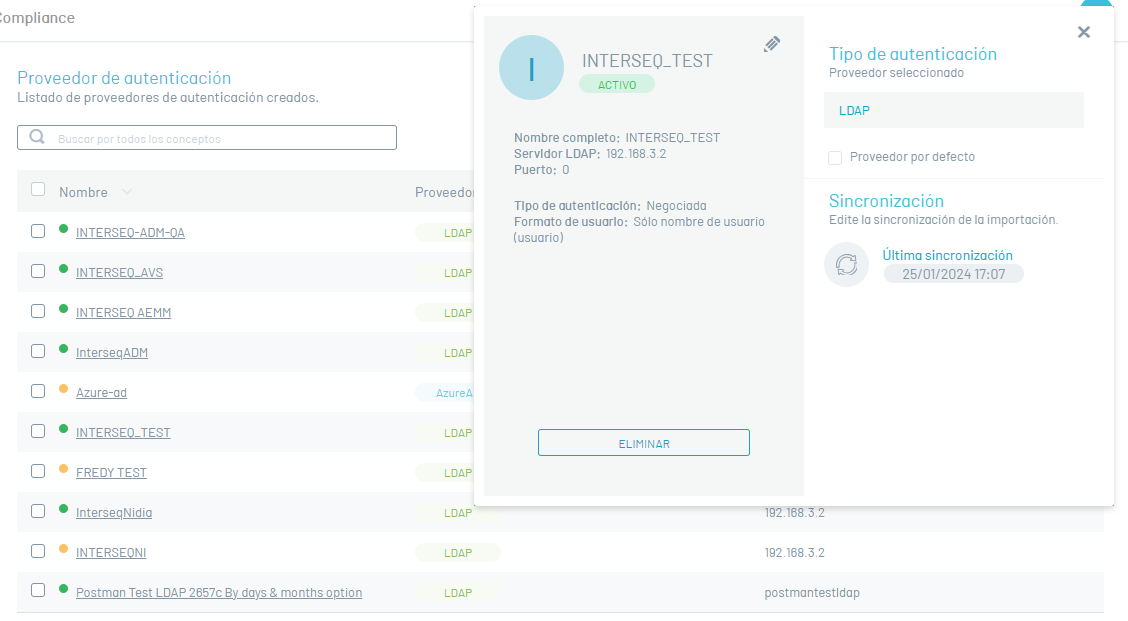
2. In the vendor information view, you will have information management and organization actions enabled. Information View in ASEC Web Environment
Create Suppliers
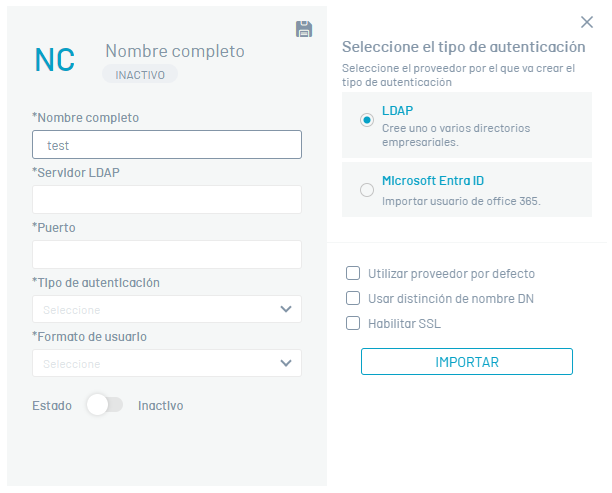
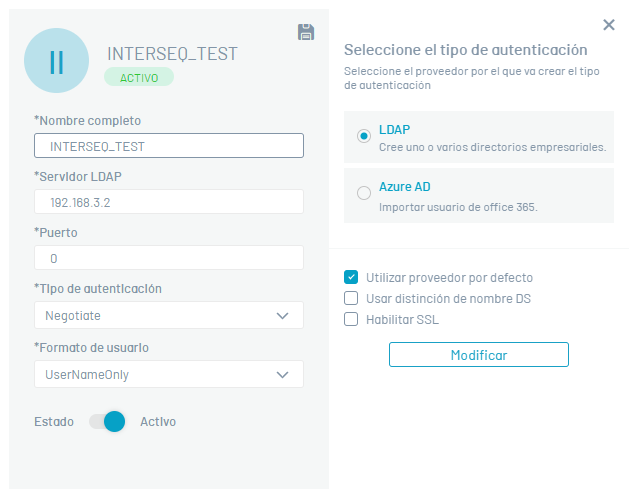
3. In the directory server information view, select the New and fill in the basic information required to establish the connection to your directory server:
| Field | Description |
|---|---|
| Full name | Name you want to assign to your directory. |
| LDAP Server | DNS or directory server IP. |
| Port | TCP port to establish communication with the directory server. |
| Authentication Type | Authentication mode through which connections are allowed. |
| User Format | You can choose from 3 user formats: UserNameOnly, FullyQualifiedDomainName, and UserPrincipalName. |
| State | For the creation of the directory, you must select the active state. |
| Authentication provider | You can choose between two LDAP or Azure AD providers. |
| Use Default Provider | This option is activated so that the authentication type that appears by default is the one created (LDAP or Azure AD) when entering the AVS site. |
| Use DS Name Distinction | This option is enabled when the directory server is OpenLDAP and you must submit the distinguished name for logon (Username is not used). |
| Enable SSL | Indicate if you apply a security protocol. |
4. In the Authentication Type, you can set the type of provider for authentication:
- LDAP: It is a standard application protocol for queries, which can store, manage, protect, and authenticate user information, such as username and password.
- Azure: Microsoft’s cloud-based identity management service.
LDAP Provider
5. In the Vendor Detail view, click the Modify; window is enabled Import where you will be able to enter the necessary data for synchronization. In the LDAP Business Directory Basic Information, enter the username and password data.
On the User Mapping the mandatory fields to be registered are: User filter to take into account in the import, unique identifier and username.
6. When registering the fields, click on the Test Connection  . If the connection was successful, you will be able to view the message: The information is complete, you can now finish the import and the continuation of the process is authorized.
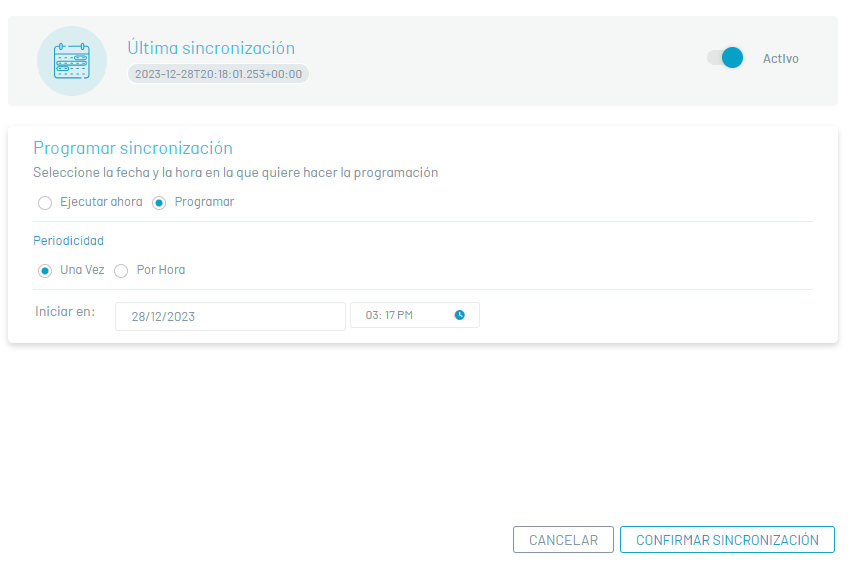
7. When you finish recording the information, click the Synchronize  and in the window that is enabled, activate synchronization.
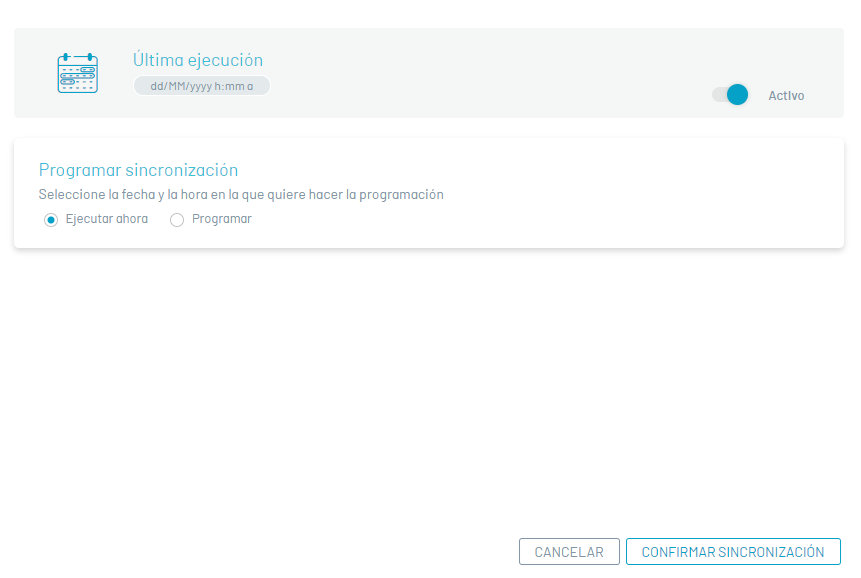
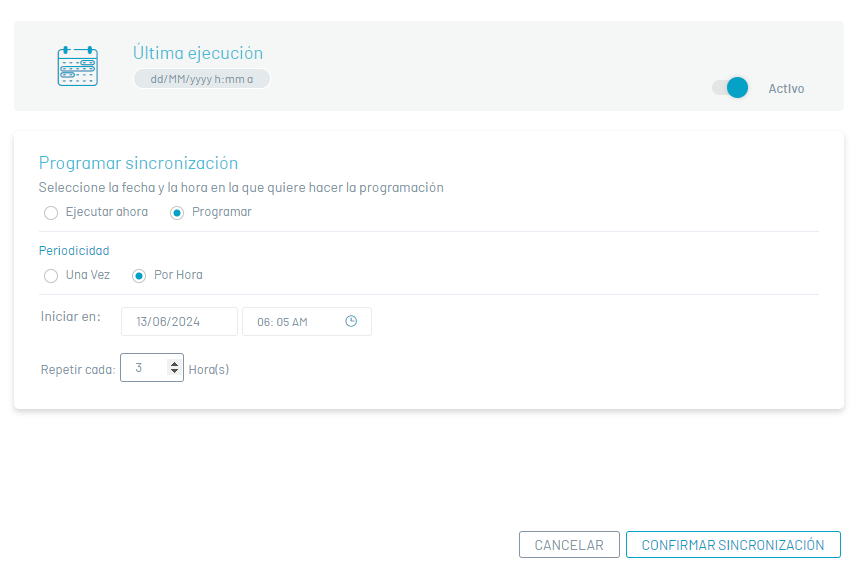
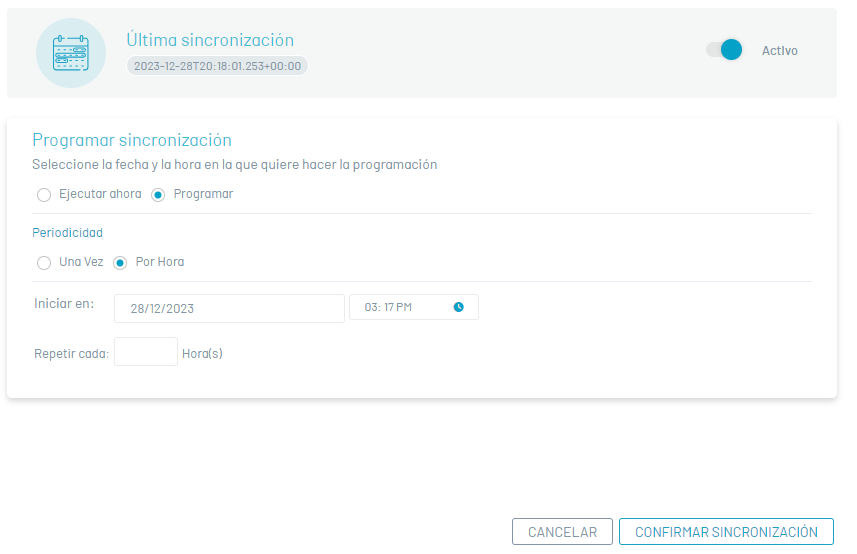
8. Synchronization can be manual (immediately) or it can be automatically scheduled once or every few hours to update new users. After selecting the sync type and performing the settings, click the Confirm synchronization.
9. When you finish configuring the LDAP directory, in the Import window, click the confirmation  and in the LDAP Basic Configuration window, click Save
  .
.
10. Once the synchronization is complete, the administrator will be able to assign the respective roles to the synchronized users.
Azure AD Provider
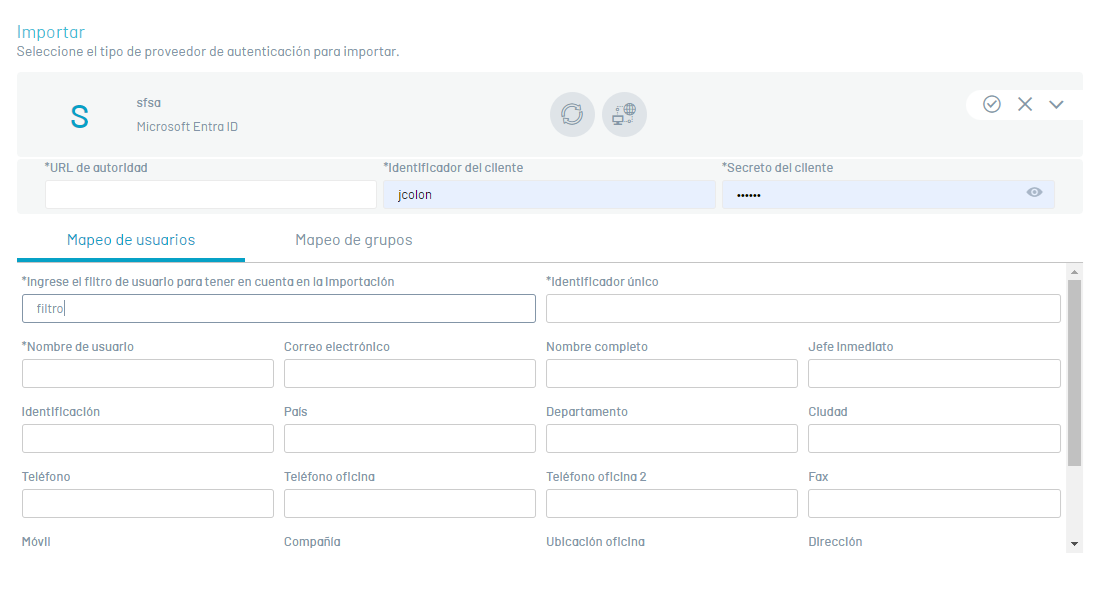
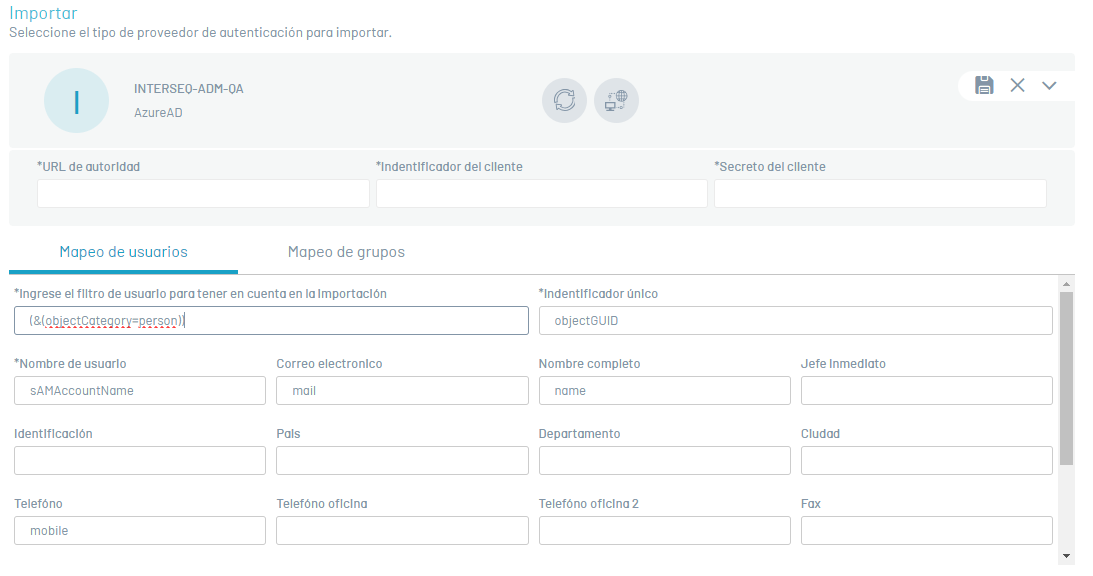
1. In the provider detail view, enter the full name of the Azure directory you want to sync, and click the Modify; window is enabled Import where you will be able to enter the necessary data for synchronization. In the Azure directory basics, enter the authority URL, customer ID, and Azure-supplied customer secret.
On the User Mapping the mandatory fields to be registered are:User filter for import, unique identifier and Username.
6. When registering the fields, click on the Test Connection . If the connection was successful, you will be able to view the message: The information is complete, you can now finish the import and the continuation of the process is authorized.
7. When you finish recording the information, click the Synchronize and in the window that is enabled, activate synchronization.
8. Synchronization can be manual (immediately) or can be scheduled automatically once or every few hours. After selecting the sync type and performing the settings, click the Confirm synchronization.
9. When you finish configuring the Azure AD directory in the Import window, click the confirmation and in the Azure AD Basic Configuration window, click Save .
Edit an authentication provider
1. To edit a directory or authentication provider, in the Directory Services Information view of the ASEC Web Console, select a record from the Directory Services Listing, and in the Detail view, click the edit icon  to modify the required information.
Delete an authentication provider
Deleting directory services records can be done in two ways:
1. Select a record from the directory services or authentication providers list, and in the detail view, click the Eliminate.
2. Select the checkbox of the record you want to delete and click the Eliminate  of the list of records. In both cases, you will receive a confirmation question before performing the deletion.