
Service configuration
This document describes the steps required to configure the service Aranda Virtual Agent.
1. Portal Access
Access the configuration portal from your web browser using the following link: https://albi.arandasoft.com/
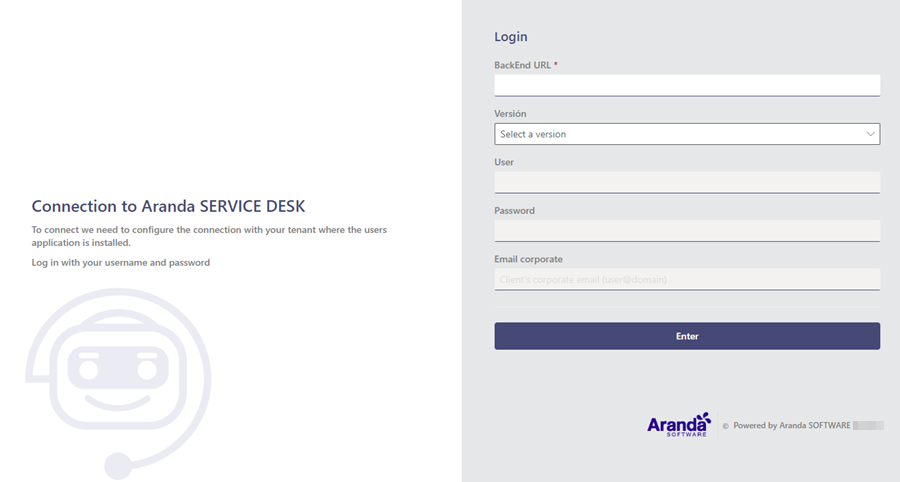
2. Authentication
On the initial screen, fill in the requested fields and click Continue.
| Field | Description |
|---|---|
| Version | Select V8. |
| URL del BackEnd | Customer Site URL https://servidorarandav8/ASDKAPI/ |
| Corporate Email | Client’s corporate email (usuario@dominio). This data is used to extract the domain required for the bot configuration. |
On the next screen, enter your login credentials and click Enter.
| Field | Description |
|---|---|
| User | tmanager |
| Password | Key defined for the user tmanager. |

3. Creating the Connection
Once authenticated, the connection configuration form will be displayed. Complete the requested fields and click Save.
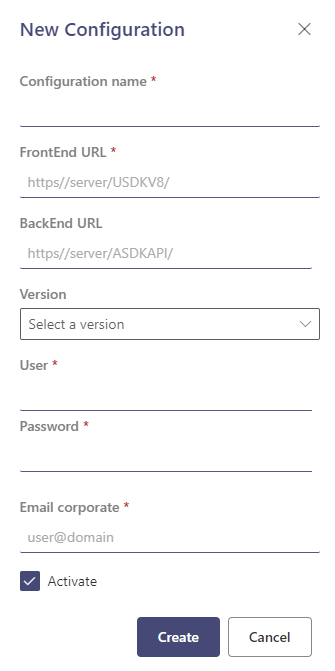
4. Enter the following data in the requested fields and click Save:
| Field | Description |
|---|---|
| Connection Name | Name that identifies the connection to be configured. |
| Version | Select V8. |
| URL del FrontEnd | User console URL ‘USDKV8’. |
| URL del BackEnd | URL of the ASDKV8 API ‘ASDKAPI’. |
| User | TEAMS CLIENT (tclient) user. |
| Password | Key defined for the TEAMS CLIENT (tclient) user. |
| State | Check this option to enable the connection (enabled by default). |
4. Confirmation
Once the connection is saved, the system will display a confirmation message and the following tabs will be enabled:
- Customization
- Imagery
- Messages
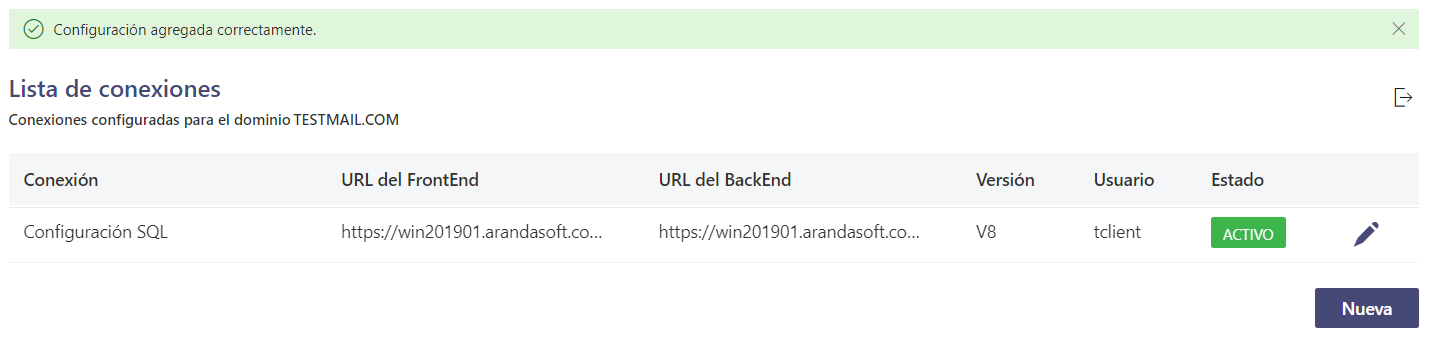
From these sections you can continue with the visual and functional configuration of Aranda Virtual Agent.
⚐ Note: When connections are already configured, the login must be made using the USDK Backend URL of the connection that is active for the domain. If the URL of any connection other than the configured one is entered, the following message will be displayed:
