
1. From the channel or chat authorized for this use, in the option View inquiries, a drop-down menu will appear where you can select the Create Case.
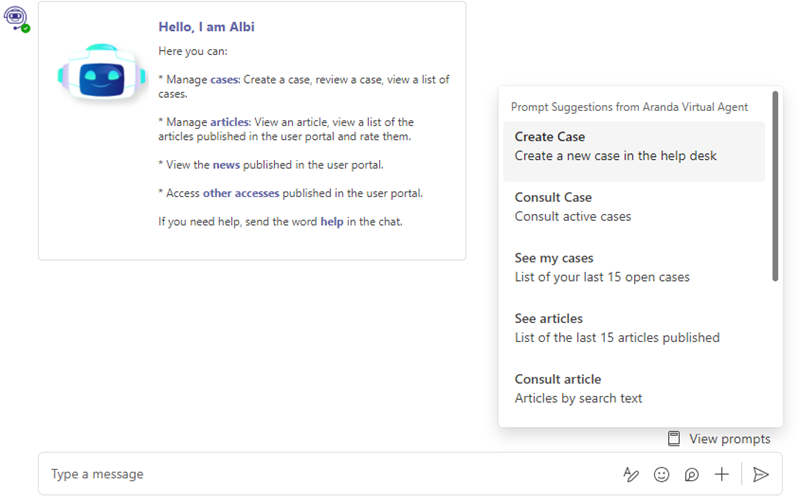
Alternatively, you can type “create case” and send the message to the conversation. The bot will display a greeting message and prompt you to select a Project.
⚐ Note: When the user interacting with the Bot is associated with a single project, the Bot will automatically select the project when it starts categorizing the case.
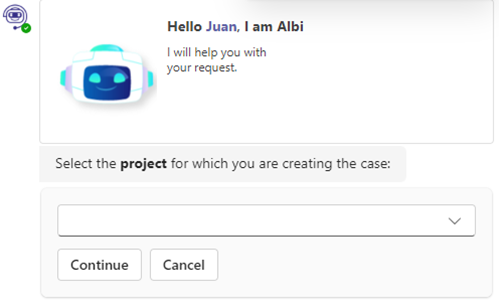
2. Select the Project and click Continue. The bot will prompt you to select a Service Group or a Service.
⚐ Note: When the user interacting with the Bot is associated with a single service within a project, the Bot will automatically select the service.
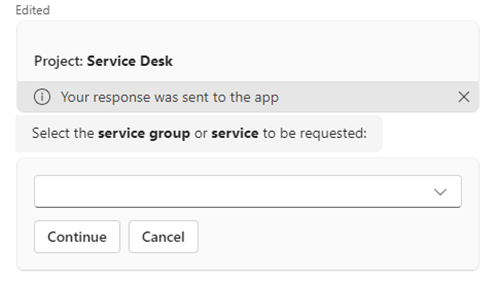
If there are more than 100 records to list, a maximum of 100 records are listed and the displayed message informs about it.
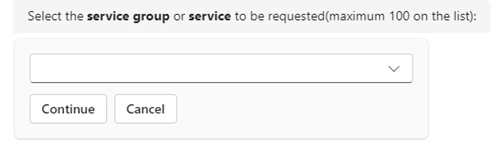
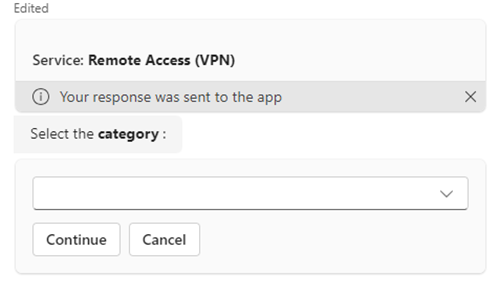
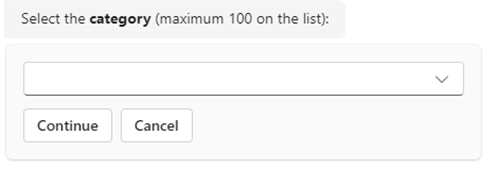
3. Select the Service Group or the Service and click Continue (If you select a service group, you must continue selecting until you reach a service.) The bot will prompt you to select a Category.
If there are more than 100 records to list, a maximum of 100 records are listed and the displayed message informs about it.
4. Select the Category and click Continue. The bot will display a message with the selected project, service, and category and the Create Case to access USDK and complete case creation.

5. Click Create Case. If you have enabled the option to create cases using Adaptive Cards in your bot customization View Custom Bot Settings. A form with adaptive cards will be displayed that allows you to fill in the fields required for the creation of the case.
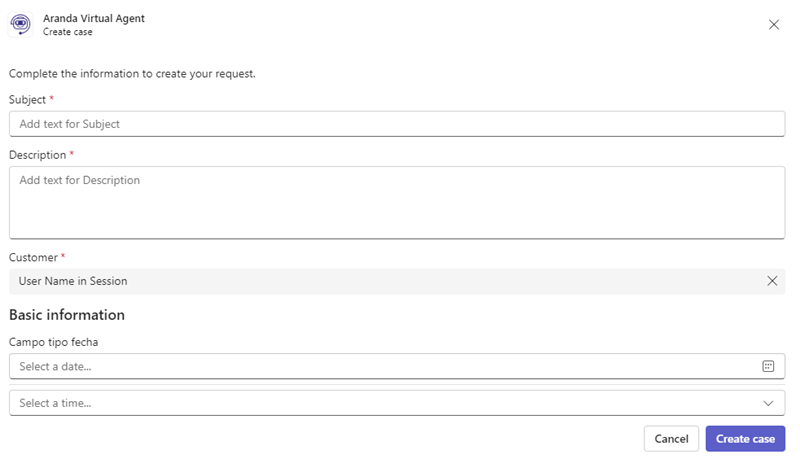
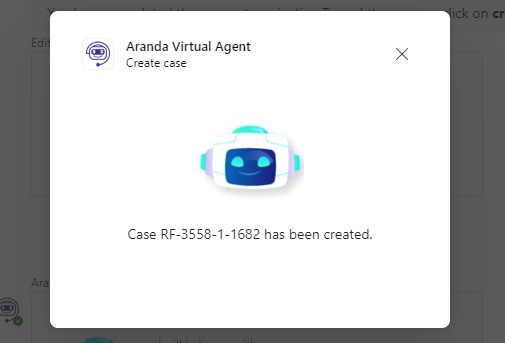
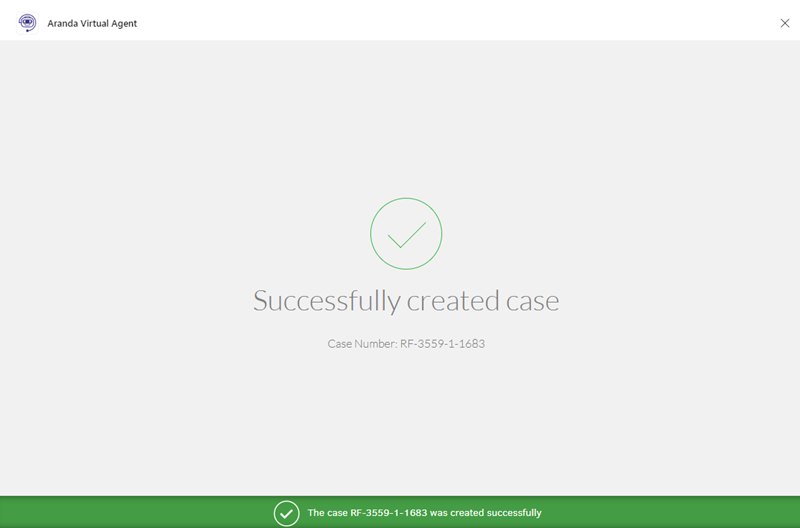
6. Enter the required information and click the Create Case. Once the process is complete, a message will be displayed confirming the creation of the case and the number of the created case. In the chat history, the create case card is replaced with the basic case data.
⚐ Notes:
- If you experience intermittent or slow communication while filling out the required fields, you may see an error message “I couldn’t reach the server. Please contact the Aranda administrator.”. This is because Microsoft Teams handles a default time for requests. However, you can continue to fill out the fields.
- Date fields must be filled in with the date and time separately. This is because adaptive cards handle these types of data independently. If only one value is filled in, the application will fill in the missing value according to the field settings when it is not required, if the field is required the date and time must be filled in respectively.
- Files cannot be attached during case creation.
- Additional advanced fields such as rich text and description only accept text.
7. In cases where there is an additional field of type list in relation to another field, the ASDK version is lower than 8.29.30 or does not have case creation enabled by Adaptive Cards in the bot customization View Custom Bot Settings, a pop-up window will be displayed with the case creation form from the ASDK User Console website.
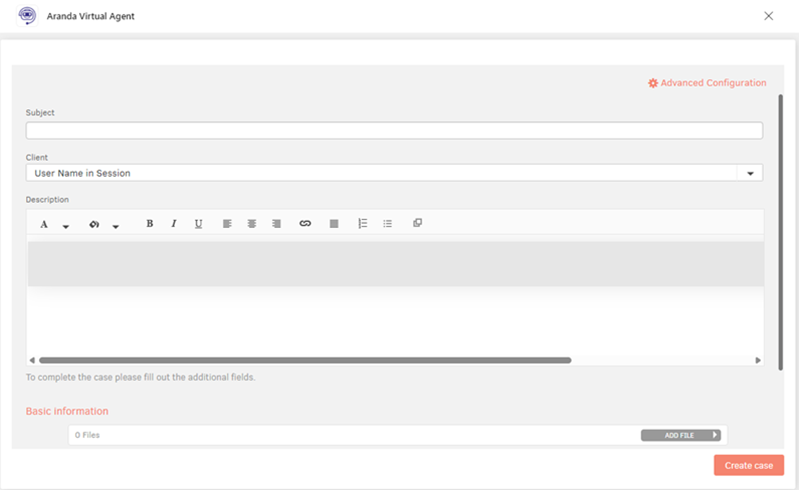
8. Enter the required information and click the Create Case. Once the process is complete, a message will be displayed confirming the creation of the case and the number of the created case.
If during the registration of the case you select a wrong option or do not wish to continue, send the word “cancel” or click on the Cancel.