
Data sources
Data sources allow you to set up connections to get the information needed to build reports or dashboards.
Data sources can be configured with SQL Server or Oracle provider.
Configuring SQL Server Data Sources
1. Once you have logged into the AQM console, in the General Settings from the main menu, select the Data Sources.
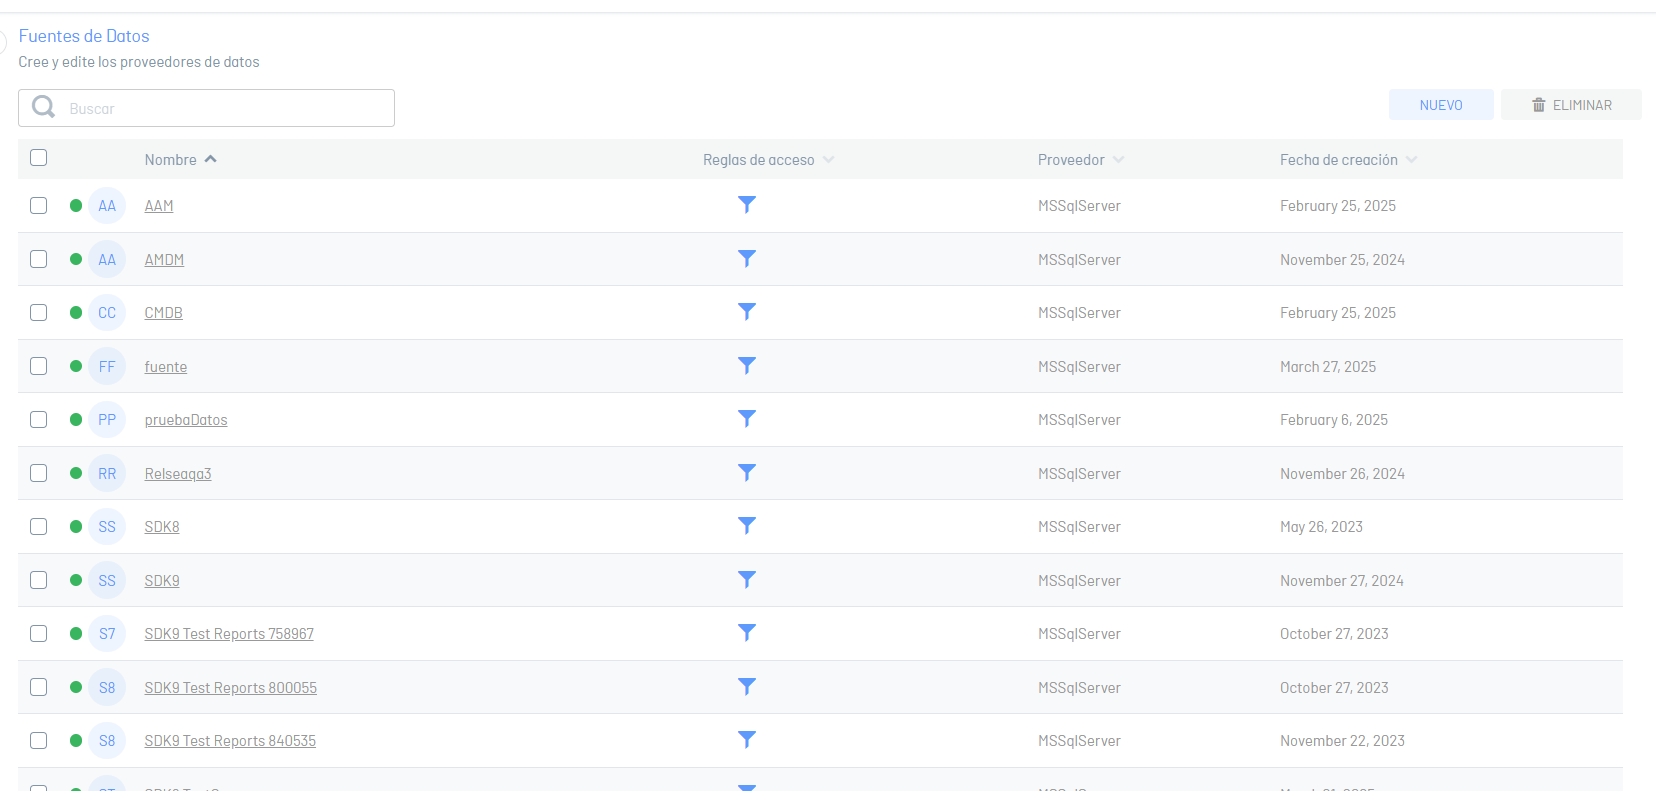
2. In the information view, the list of data sources is displayed. Select the New And in the detail view you can configure the information of the data source, enter the requested data. Test the connection by clicking the ![]() before Save the information.
before Save the information.
⚐ Note
- For this configuration, select the SQL Server provider.
- The default value of the field supplier is SQL Server.
- The requested parameters change for each type of provider (Microsoft SQLServer or Oracle).
| Fields | Description |
|---|---|
| Name | Enter a name for the data source. |
| Supplier | This is the SQL Server or Oracle provider type (For this configuration select the SQL Server option). |
| Data source | Enter the name of the SQL Server database server. |
| Initial catalog | Enter the name of the SQL Server database. |
| User ID | Enter the user with whom you connect to the SQL Server database server. |
| Password | Define the password with which you connect to the SQL Server database server. |
| Connect timeout | Set the maximum time in seconds for AQM to wait for the connection. |
3. When you finish configuring the data source, click on Save icon  in the Detail View of the AQM Configuration Console, to confirm the changes made.
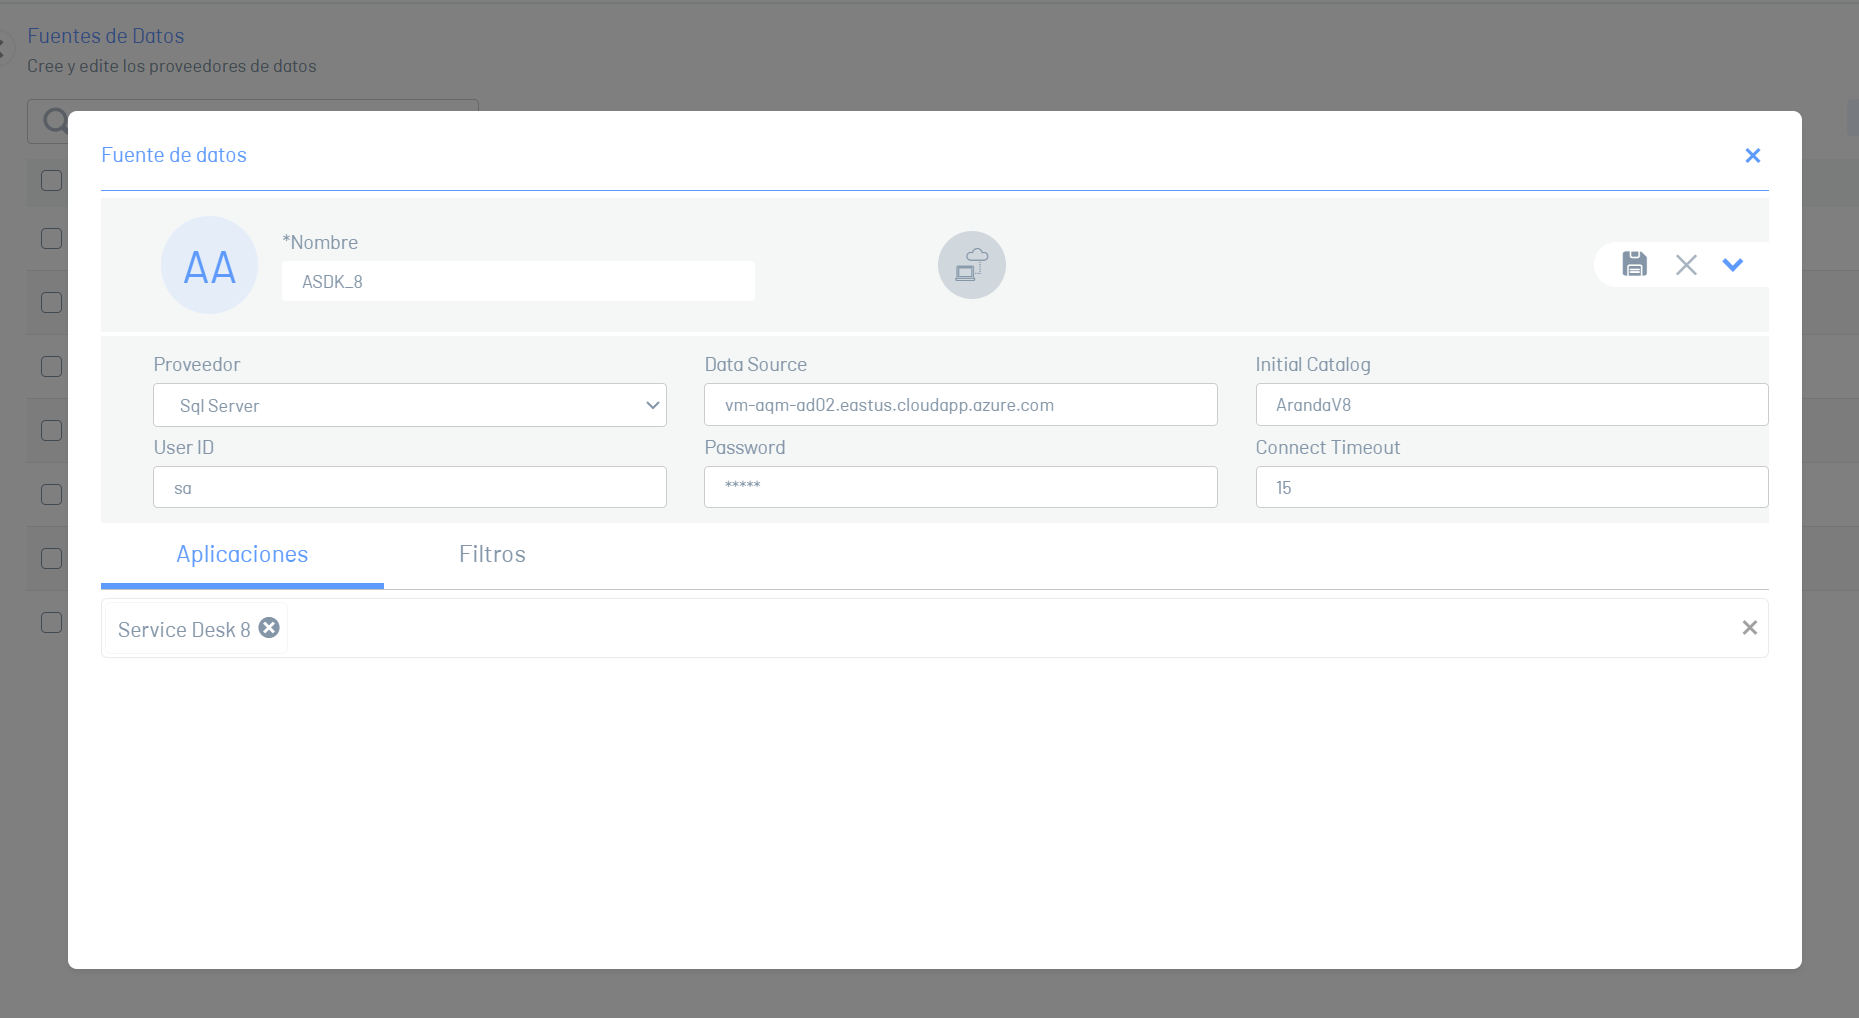
Configuring Oracle Data Sources
1. Once you have logged into the AQM console, in the General Settings from the main menu, select the Data Sources.
2. In the information view, the list of data sources is displayed. Select the New And in the detail view you can configure the information of the data source, enter the requested data. Test the connection by clicking the ![]() before Save the information.
before Save the information.
⚐ Note
- For this configuration, select the Oracle provider.
- The requested parameters change for each type of provider (Microsoft SQLServer or Oracle).
| Fields | Description |
|---|---|
| Name | Enter a name for the data source. |
| Supplier | This is the SQL Server or Oracle provider type (For this configuration, the Oracle option is selected). |
| Data source | Enter the TNS name of Oracle. |
| User ID | Enter the user with whom you connect to the Oracle database server. |
| Password | Define the password with which you connect to the Oracle database server. |
3. When you finish configuring the data source, click on Save icon in the Detail View of the AQM Configuration Console, to confirm the changes made.
⚐ Limitations
- The data sources allowed for the reporting system in the product will be SQL Server and Oracle. Data sources from plain text and csv files are not allowed, even if they appear when editing reports.
- To connect to Oracle databases, copy the tnsnames.ora file to the AQM web application path.
Access rules
Data sources allow you to create access rules which filter the information that is displayed in reports and dashboards.
These filters can be applied to multiple users and groups; When the filters have an access rule related to them, they will be able to display only the filtered information in the Access rules.
⚐ Considerations and limitations
- An access rule, when part of a data source, will filter the information from all reports associated with that data source along with its related users and groups.
- At the moment the functionality will only be useful for queries made in Query Builder and not for custom queries.
- A user can only have one access rule.
- A user with an access rule will not be able to create custom queries in designers, they will only be able to make queries in Query builder.
Configuring Access Rules
⚐ Requirements
- At least one data source must exist to configure access rules.
1. Navigate to the Data Source Settings section.
2. Click the filter  next to the data source to open the access rules menu.
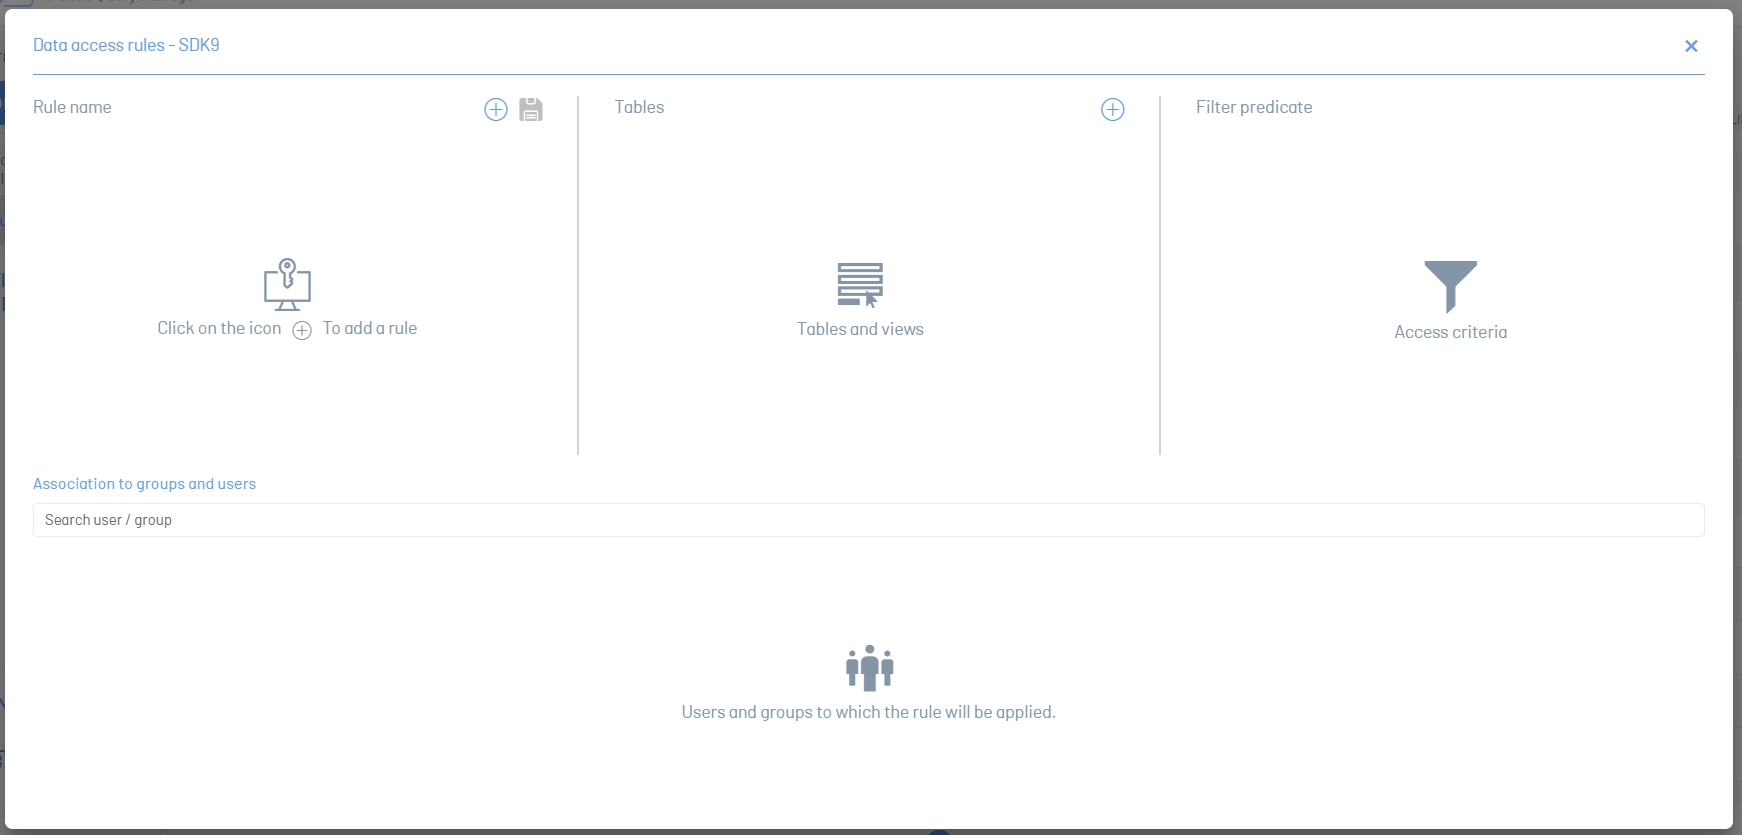
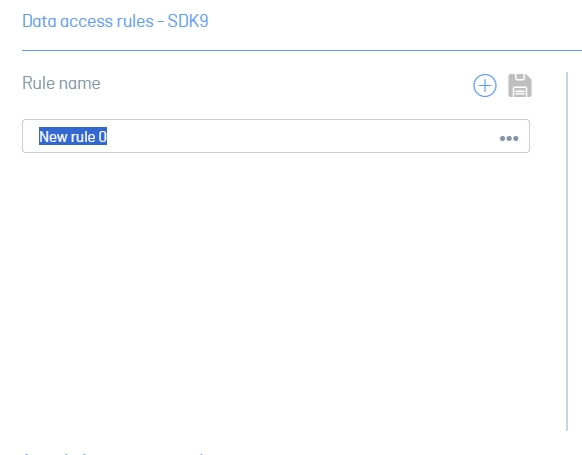
3. In the Rule Name section, click the add and optionally you can add the name of the rule.
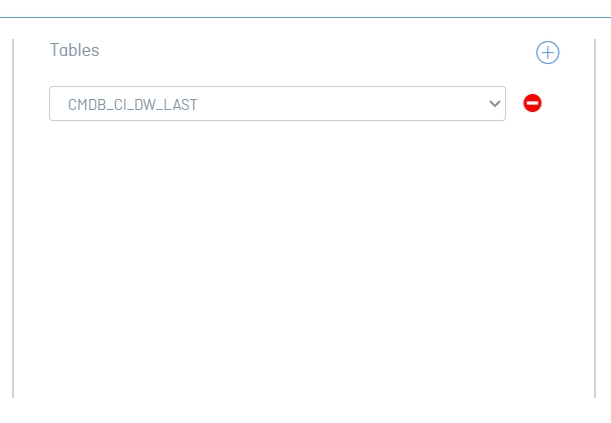
4. In the Tables section, click the add; A selector is added underneath.
5. Expand the list and select a table to add the filter to.
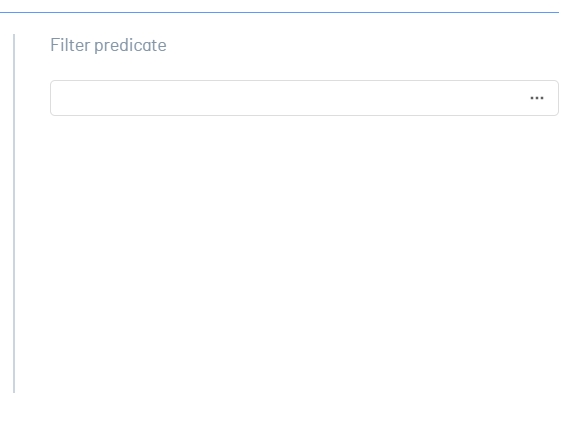
6. In the Filter Predicate section, click the ellipsis to open the filter editor.
7. In the filter editor, define the conditions and use the logical operators that you require to create the filter. You will be able to see a brief description of the operators you can use.
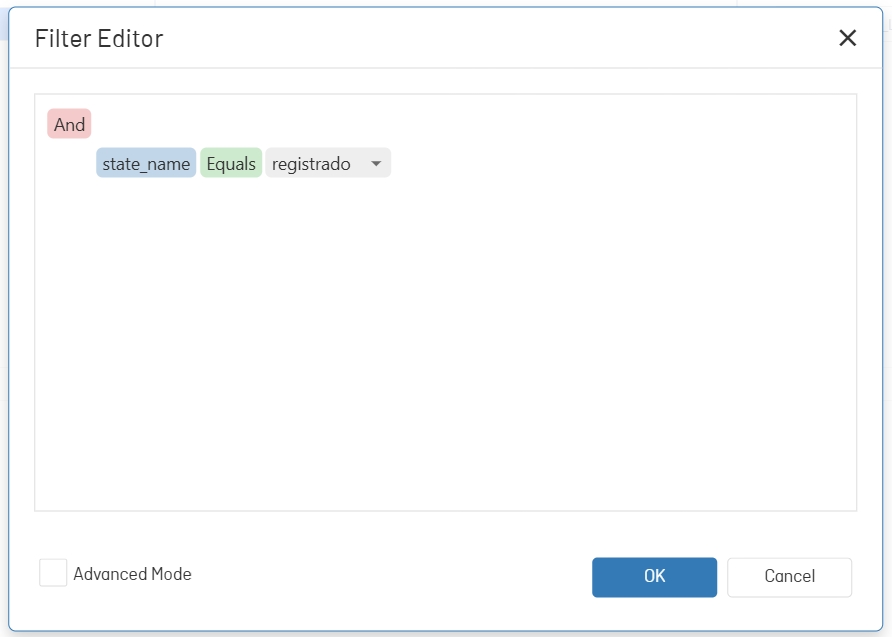
|Logical operators|Description| |Equal|Filters the information when it matches the given value| |It’s not the same|Filters the information when it does not match the given value| |It is greater than|Filters information when it is greater than the given value| |Is greater than or equal to|Filters information when it is greater than or equal to the given value| |It is less than|Filters information when it is less than the given value| |Is less than or equal to|Filters information when it is less than or equal to the given value| |It is between|Filters information when it is between the ranges of 2 given values| |Not among|Filters information when it is not between the ranges of 2 given values| |It is null and void|Filters information when the value is null or non-existent| |Not null|Filters information when the value is not null or non-existent| |It is any of| Filters the information when it matches one or more given values.| |It is none of the| Filters out information when it doesn’t match one or more given values.|
8. Click OK to save your changes.
9. In the group and user association section, click the finder to type and select the groups and users to which you require to apply the access rule.

10. Click the Save  in the Rule Name section to save your changes.
⚐ Note
- If you make changes to different access rules, they must be saved individually.