
A dashboard in Aranda QUERY MANAGER is a tool that allows you to graphically customize the metrics required by the organization and facilitates the selection of relevant data and indicators, for analysis and intelligent business decision-making.
Creating Boards
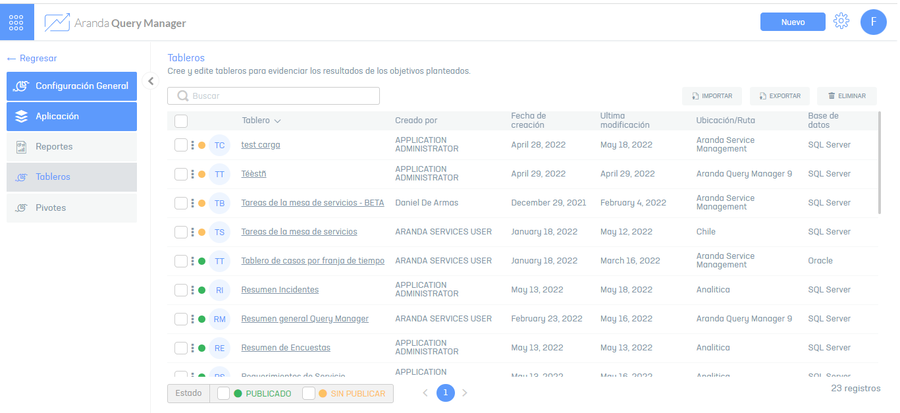
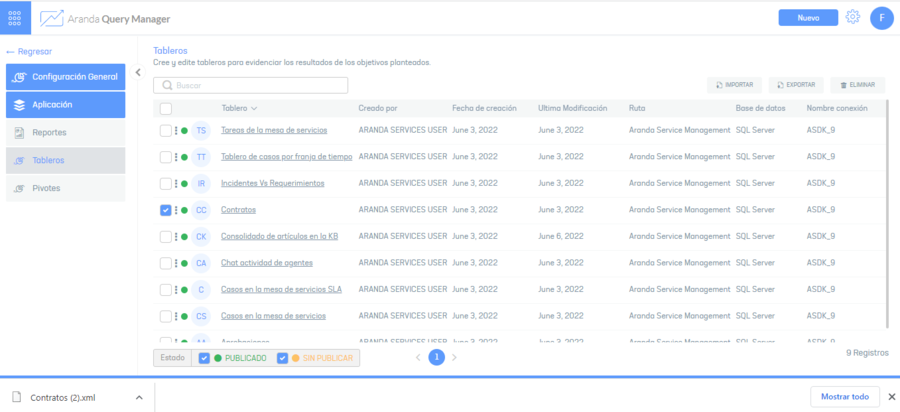
1. To create the dashboards, go to the AQM configuration console, in the Application from the main menu, select the Boards.
A list of boards is displayed through a table that occupies the entire screen. You can sort the information by clicking on the header of each column. To see the detail of a board click on the name and a side menu will be displayed from the right to show the corresponding detail.
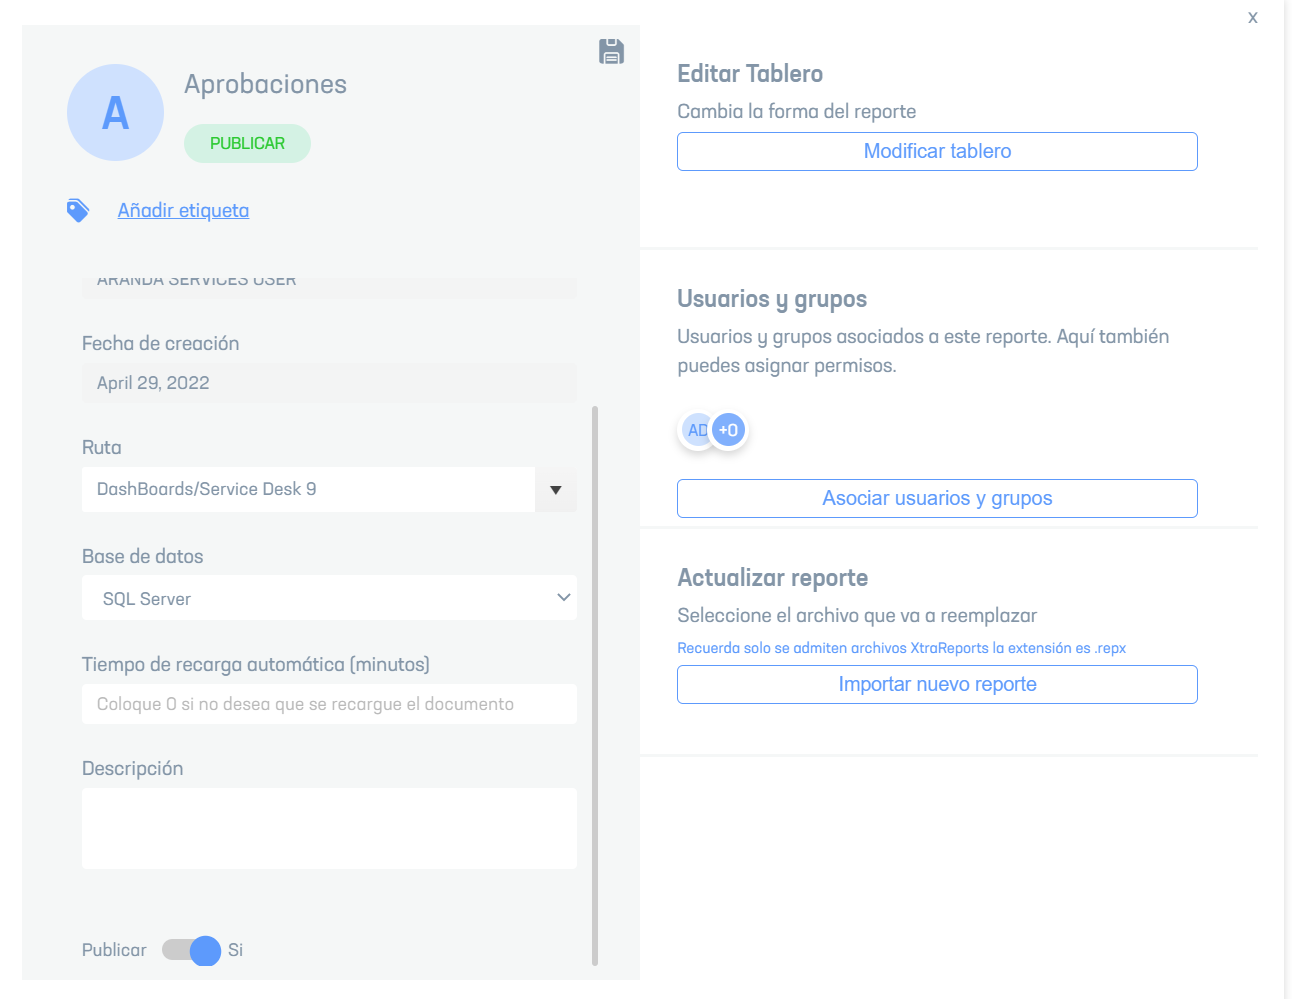
From the Header menu, select the New ; window is enabled Dashboard Detail where you will be able to fill in the basic dashboard information such as: Name, location path, database, enable location, and configure dashboard.
Associate Users and Groups
⚐ Note: Permission association will be enabled, after the dashboard is created.
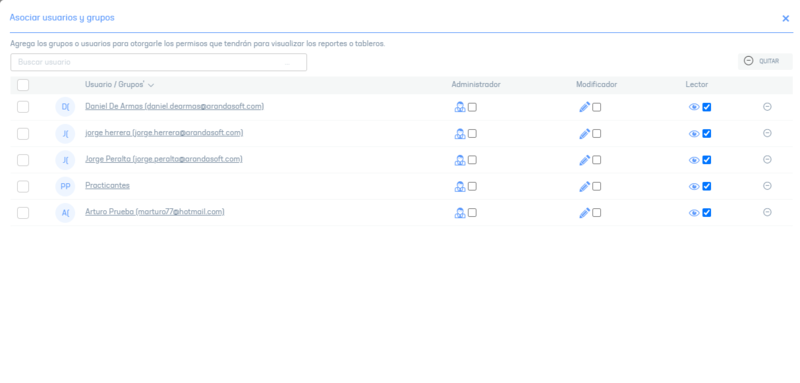
2. To associate permissions with the dashboard, in the dashboard detail window in the AQM configuration console, select the Associate; window is enabled Associate users or groups where you can search and associate the users who will have access permissions to the boards. These permissions must be pre-configured.
3. In the search field, enter a user’s name and add it to the list of records. For each user, you can enable or disable permissions to access reports. The available permissions are admin, reader, and editor.
Edit Boards
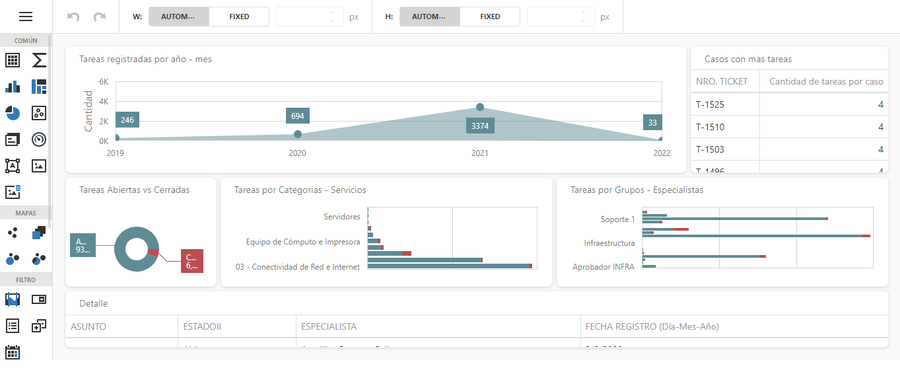
4. to edit a dashboard, in the information view of the AQM configuration console, select a record from the list of existing dashboards; window is enabled Dashboard Detail where you can modify the required information. When you select the Modify Dashboard you will be able to access the Dashboard Designer View Designer Boards .
⚐ Note: The Creation Date and Author fields of the board can be viewed when editing a board.
5. To delete one or more dashboards, in the information view, select a record from the list of existing dashboards and select the Eliminate to clear the associated information.
6. When you finish setting up a dashboard, click Save in the Detail View of the AQM Configuration Console, to confirm the changes made.
Bulk Board Loading
1. To export the dashboard information, go to the AQM configuration console, in the Application from the main menu, select the Boards and in the information view, select the Export This option will allow you to export the information with data for updating and/or creating dashboards.
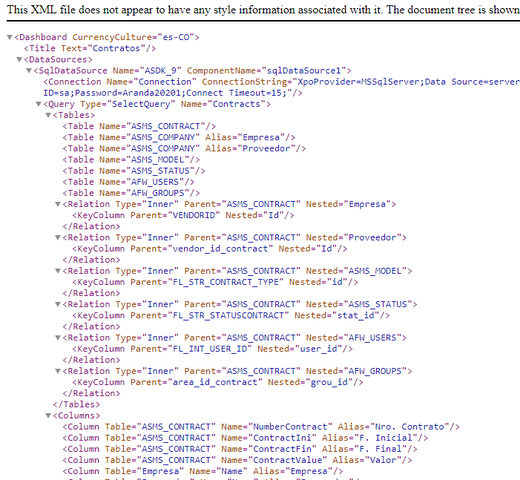
3. A file in XML format will be downloaded, which includes all the information associated with the selected board.
Import Dashboard Format
⚐ Note: The import will parse the names of the data sources within the report definition to match the AQM data sources; If you can’t find the names, you can assign an existing data source to it.
1. Once the form has been completed, enter the AQM configuration console, in the section Administration from the main menu, select the Boards and in the information view, select the import.
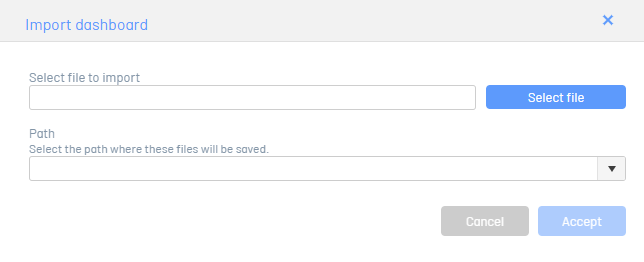
2. In the Import Dashboard window, upload the file and select a path to save the dashboard.
3. If the dashboard you’re trying to import doesn’t find data sources, assign it an existing data source.
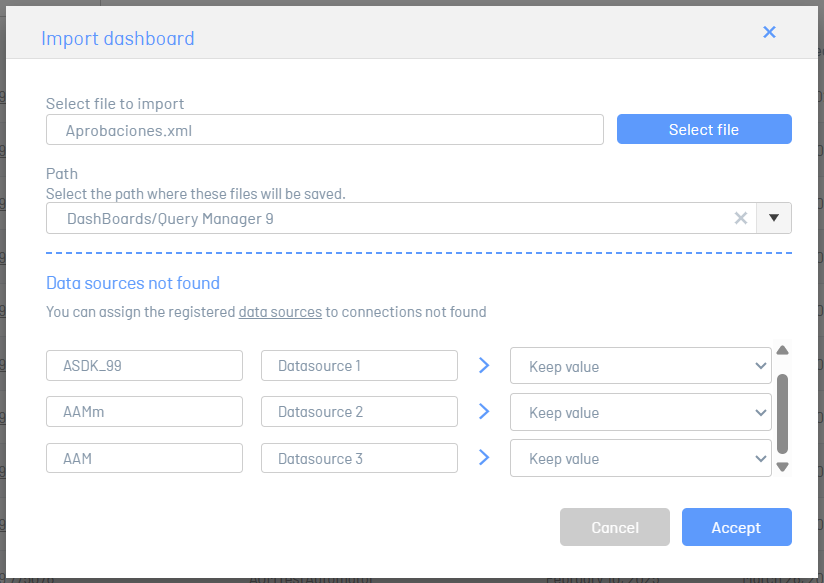
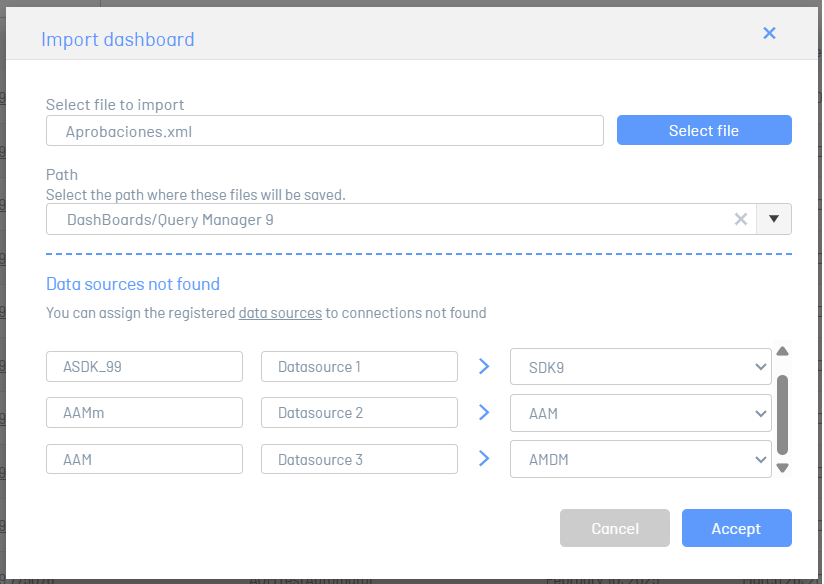
4. Click the Accept.
5. When the import is complete, at the bottom of the screen you will be able to see the confirmation of the process.
Update Dashboard Format
1. Enter the AQM configuration console, in the Administration from the main menu, select the Boards.
2. Select the name of the dashboard that you need to update to enable the detail view.
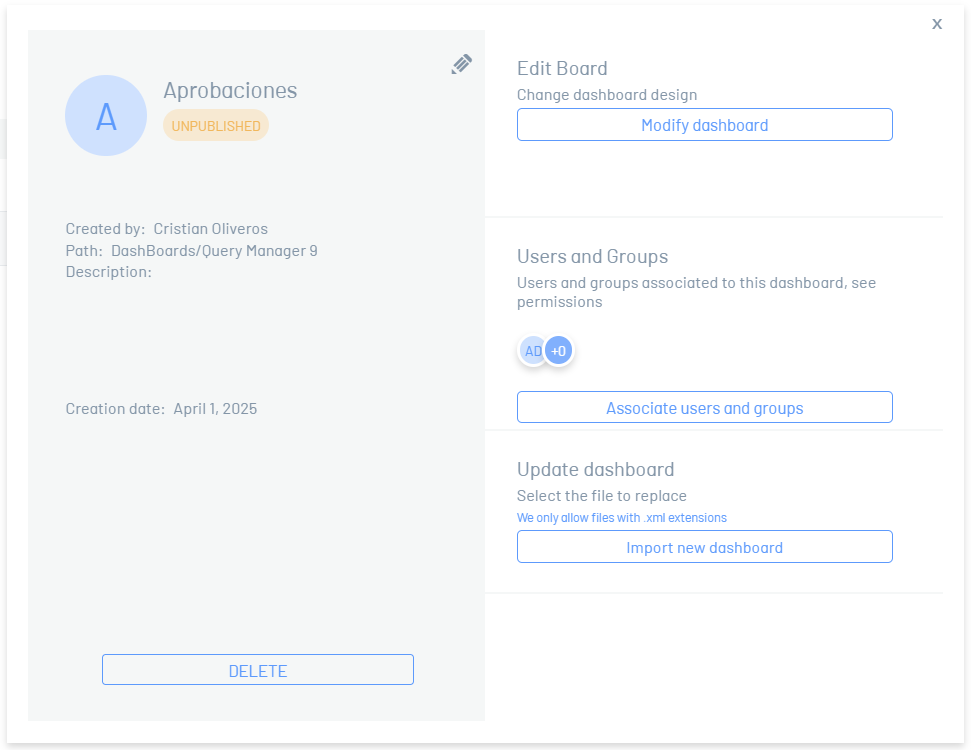
3. Click the Import New Board and upload the file.
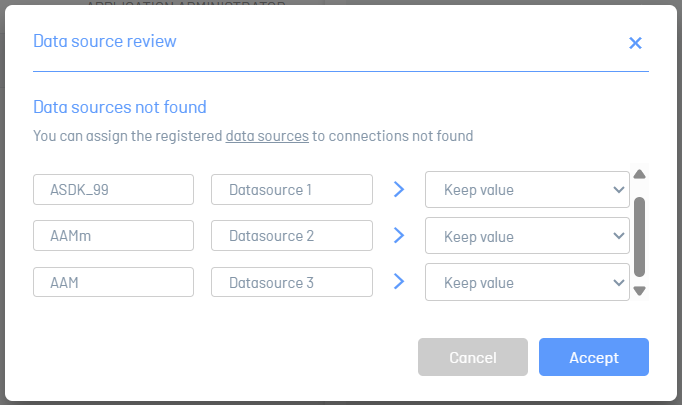
4. If the dashboard you’re trying to import can’t find the data sources, assign it an existing data source.
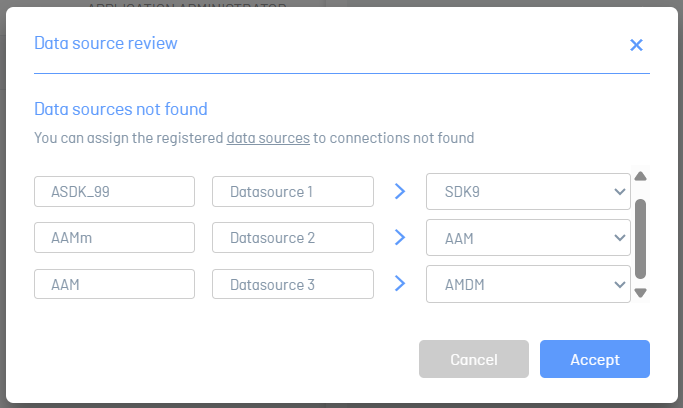
5. Click the Accept.
6. When the import is complete, at the bottom of the screen you will be able to see the confirmation of the process.
Change data sources
You can change the data sources of your dashboards by following the steps below:
1. Click the ellipsis  before the name of a board and select the Change data sources.

2. In the Change Data Sources menu, the list of existing data sources in the application is displayed; Select the data source you want to change.

3. Save the changes by clicking the Accept