
View my support sessions
1. Log in to the AVS website with a user with a specialist role, in the Access from the main menu select the option My Support Sessions. Here you can view the Devices in control, which correspond to the list of devices with support sessions created.
2. In the Devices in control You will be able to filter information associated with the device in session and delete existing support sessions.
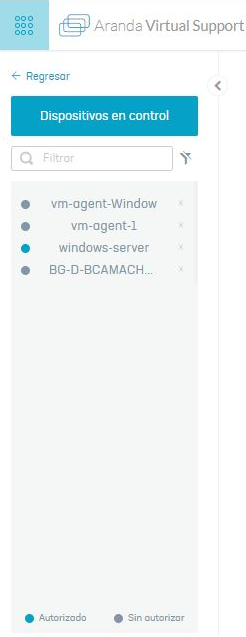
In the search field, you can filter device information with data such as device name, serial number, operating system, or model. The following image shows a filter using the device model:

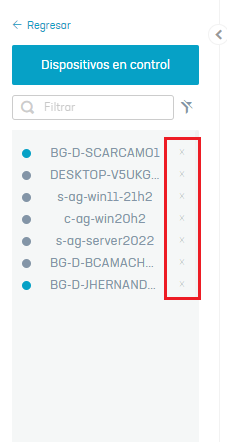
From this menu you can also delete a support session, by clicking on the x icon, as shown in the following image:
Considerations for creating a support session
A support session can be established for all workstations linked to the AVS agent. If a workstation’s device is turned off, the device will be observed in an idle state. Support sessions can be created for active or inactive devices.
Create a support session
3. To create a support session, log in to the AVS website with a user with a specialist role; in the information view of My Devices You will be able to view the list of devices found. Select a device without a support session, in the information view click the CREATE SUPPORT SESSION.

4. A confirmation window is displayed to create the support session, when you click on yes, the message is received The session was successfully created.
⚐ Notes:
- When selecting a device with a support session created, the Log in to the support session
- In case the client releases their IP address or uses the ipconfig/release command after creating the support session, it will not be possible to take remote control of the workstation, nor transfer files to and from the specialist, because the connection is lost. To resume the process, the customer must restart the machine and the specialist must reconnect.
Authorize the Support Session
5. If the device is active and the connection is valid, another confirmation message is displayed requesting the entry of the authorization password.
.png)
⚐ Notes:
- If the device is idle, you will not receive the confirmation message requesting password entry to authorize the support session.
- The authorization password can be either the fixed password or the one-time password that is entered in the workstation agent settings.
6. If the password is correct and the session is authorized, the window is enabled Support Session with basic device information and actions that can be performed during the support session (Take Remote Control, Request Authorization, Delete Session, Deauthorize Support Session, Transfer Files)
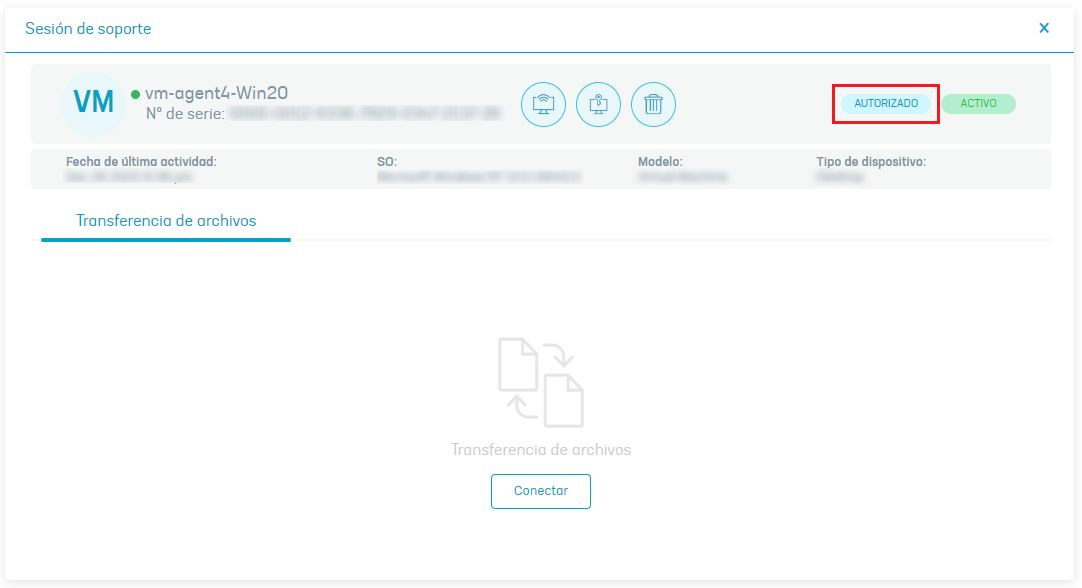
Basic device information
In the support session you will be able to view the following device features:
| Datum | Description |
|---|---|
| Name | Device Name |
| Serial Number | Unique code for device identification |
| Date of last activity | Last date and time the agent checked in |
| Operating system | Device operating system, can be: Windows |
| Model | The device model |
| Device Type | Device type, can be: Desktop or server |
Actions allowed in a support session
At any time during the support session, the specialist may perform the following actions:
| Icon | Action | Description |
|---|---|---|
 |
Take Remote Control | The specialist will be able to take remote control of the selected workstation. The device must be active and the support session authorized. |
 |
Request Authorization | This action allows you to generate authorization for the support session. By activating this option, you will be able to enter the respective password. For authorization to be given, the device must be active. If the device is inactive, the request authorization button will be locked. |
 |
Delete Session | This action deletes the support session. |
 |
Deauthorize Session | This action deauthorizes the support session, terminating ongoing file transfers and closing the remote control session if it is active. |
| File Transfer | It is only enabled for Windows workstations. This action allows you to initiate the bidirectional transfer of files between devices (workstation and specialist). |
7. Authorization of a support session expires after four (4) hours (default) or according to the configured custom time (View Support Session Customization. To reauthorize the session, click the Request Authorization icon.
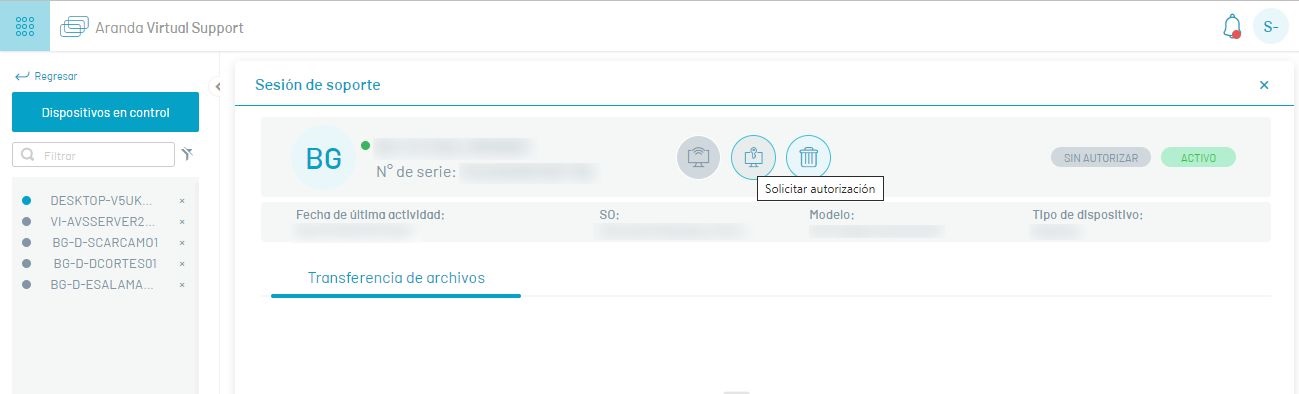
The following image represents the different states in which a support session can be found:
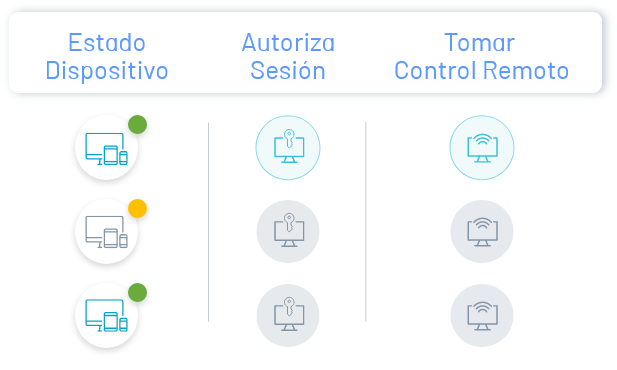
These statuses define whether remote control and file transfer tasks can be set.