1. To configure the sending of scheduled notifications, enter the ASMS administration console, in the section Catalog and Portfolio of Services from the main menu, select the Scheduled Notifications. Define a project, and in the information view, select the **New and in the detail view fill in the required information.
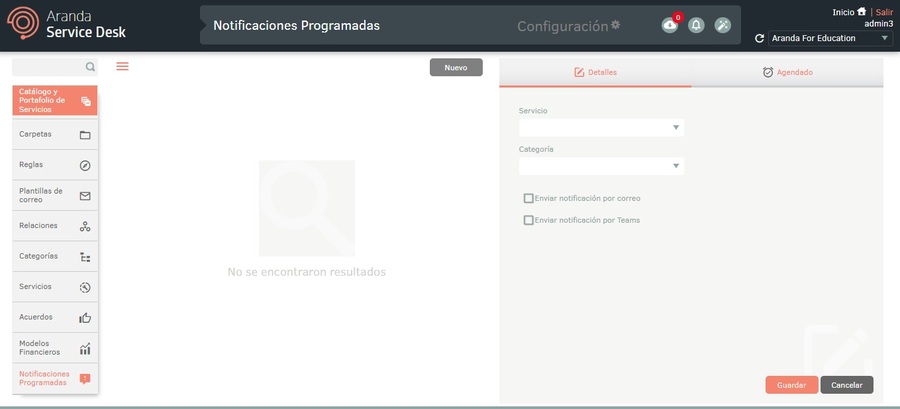
2. In the Scheduled Notifications Detail View in the ASMS Management Console, select the Details, where you can define the following fields:
| Field | Description |
|---|---|
| Service | Mandatory field type list that allows you to select the service to be used for the creation of the case. |
| Category | Mandatory field type list that allows you to select the category to be used (the active categories associated with the service are listed). |
| Send notification by Teams | Checking this box enables the following fields: - Title: Fill in the title of the notification. - Description: Fill out the notification description. - Button Text: Fill in the button text. - Image: Select an image for notification sending. (Icon size 450 x 250 px, jpg, jpge, png, gif format) |
3. In the Scheduled Notifications Detail View in the ASMS Management Console, select the *Programming**, where you can define the following fields:
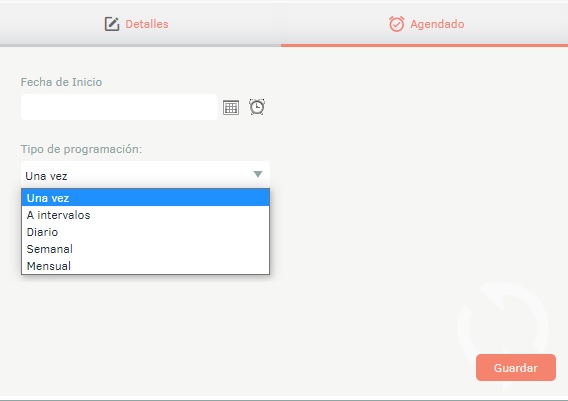
| Field | Description |
|---|---|
| Start Date | Set the date and time when you want the notification to start. |
| Programming Type | The options are: - Once: The notification is only sent once on the defined start date. - On and off: Notification delivery is executed at user-defined minute intervals. - Journal: The notification is sent at user-defined intervals of days. - Weekly: The notification is sent at user-defined intervals of weeks. - Monthly: The notification is sent at user-defined intervals of months. |
| End date | Set the date and time when user synchronization will be suspended. |
4. When saving the configuration, if any of the required fields is not filled in, the corresponding error is generated indicating the name of the field not filled in.
⚐ Note:
-The notification will be sent only to users who are associated with the service.
- The notification will be sent only to users who install the bot and execute the bot’s commands (except for the help command).
5. Once the schedule conditions are met, the notification will be sent to the Teams bot as follows:
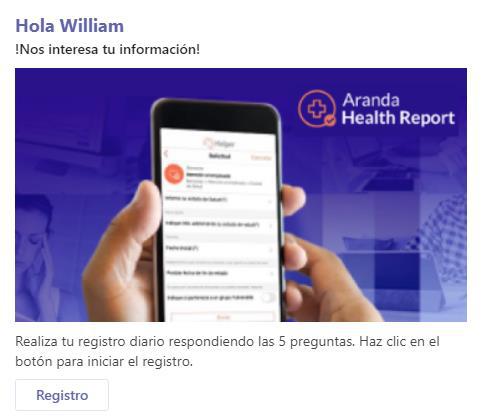
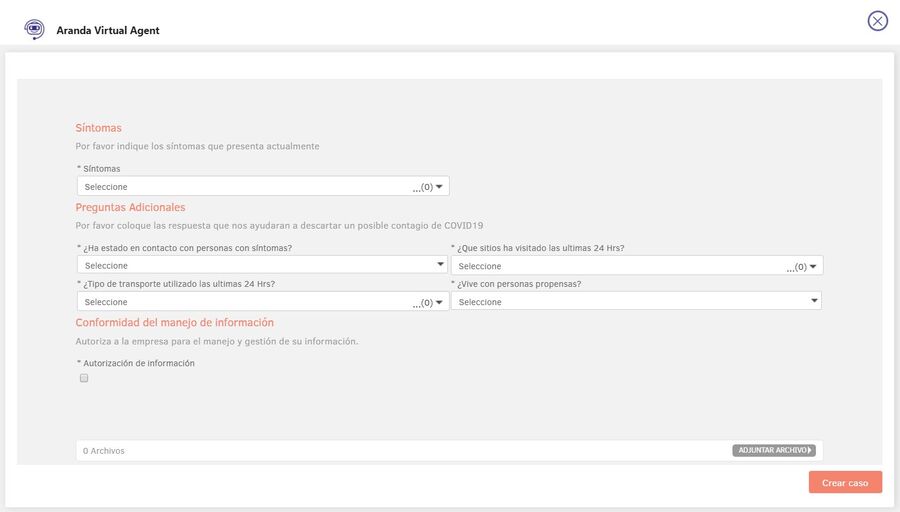
6. By clicking on “Registration”, a pop-up window is displayed with the case creation form based on the service and category selected in the settings.