Manual categorization
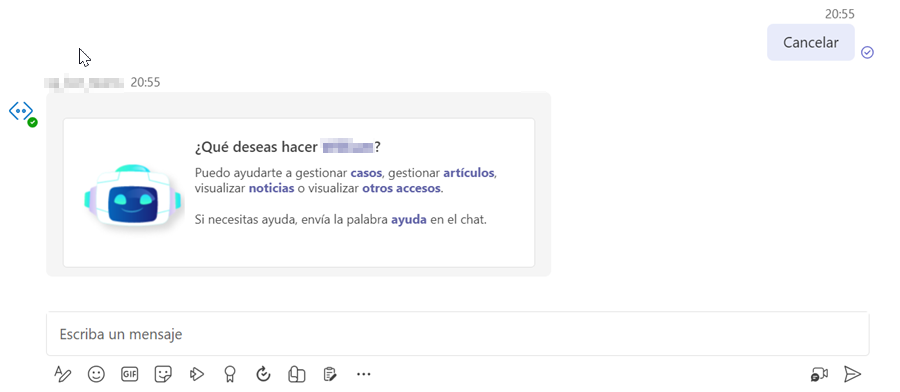
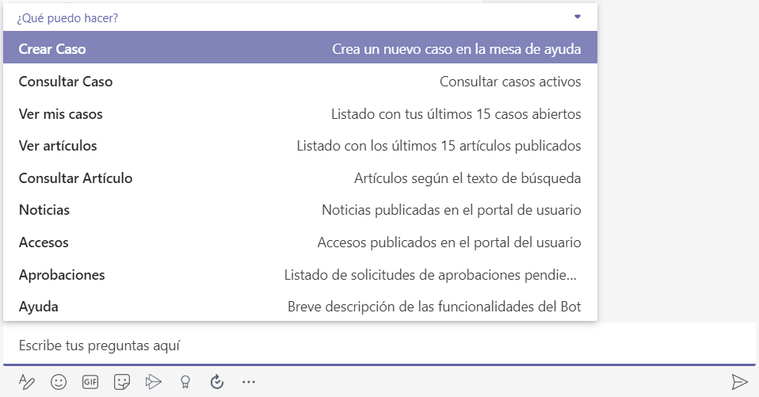
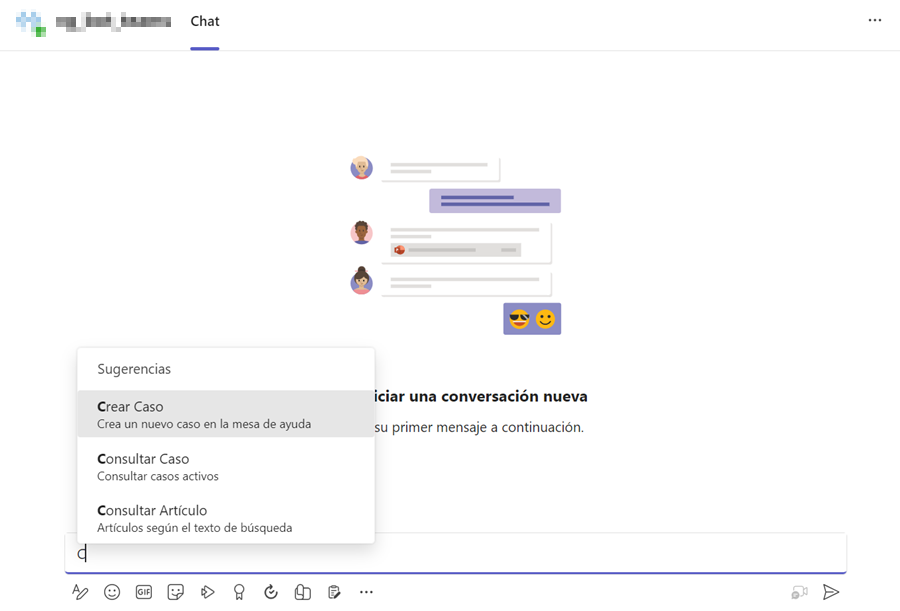
1. From the channel or chat authorized for this use, invoke the bot by typing “@Aranda Virtual Agent”, a drop-down menu will appear where you can select the option Create Case.
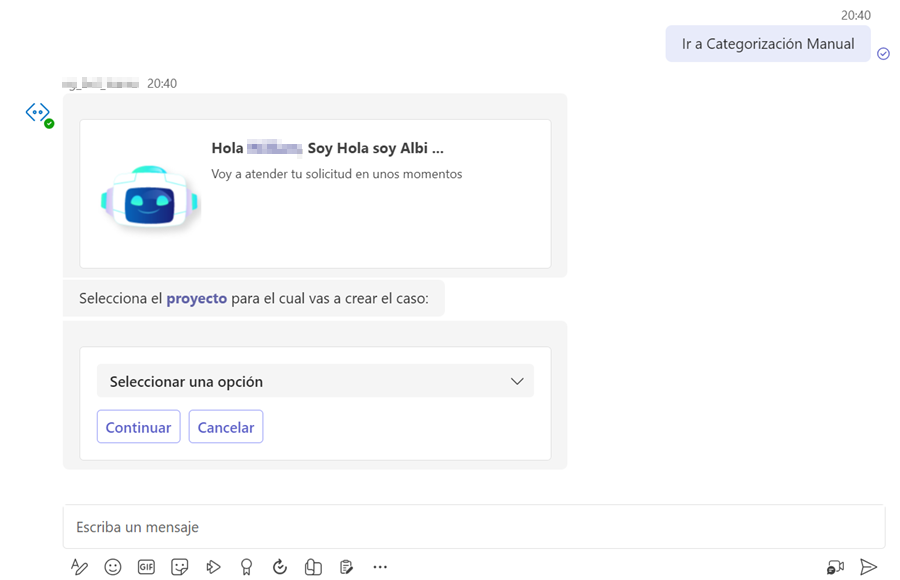
Alternatively, you can type “@Aranda Virtual Agent create case” and send the message to the conversation. The bot will display a greeting message and prompt you to select a Project.
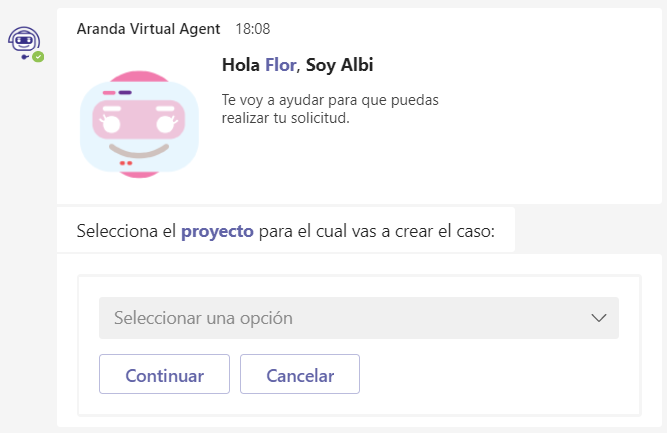
2. Select the Project and click Continue. The bot will prompt you to select a Service Group or a Service.
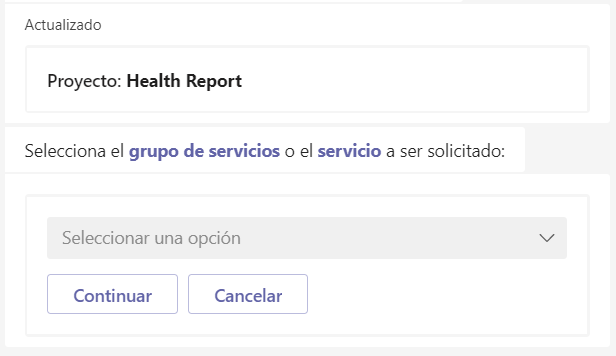
When selecting groups of services and services, if there are more than 100 records to list, a maximum of 100 records are listed and the displayed message informs about them.
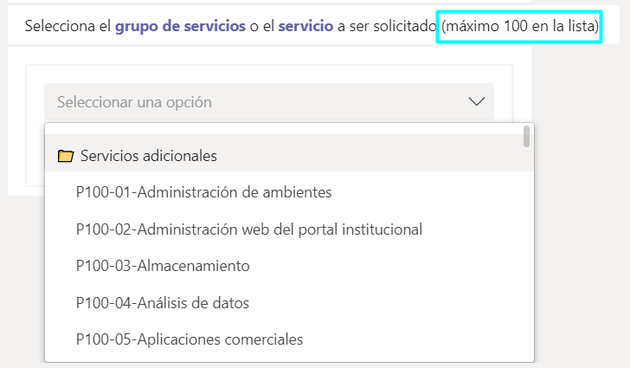
If there are more than 100 records to list, a maximum of 100 records are listed and the displayed message informs about it.
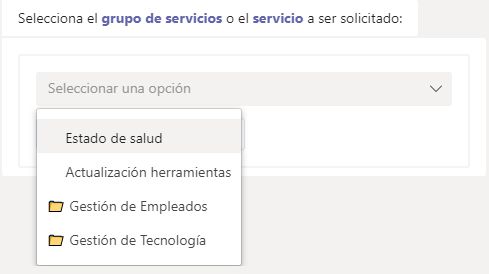
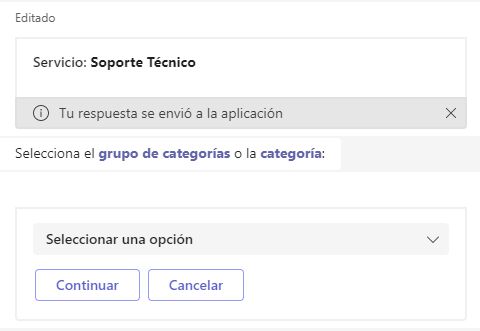
3. Select the Service Group or the Service and click Continue (If you select a service group, you must continue selecting until you reach a service.) The bot will prompt you to select a Category.
⚐ Note: If the user is associated with a single project and service, this information is automatically selected.
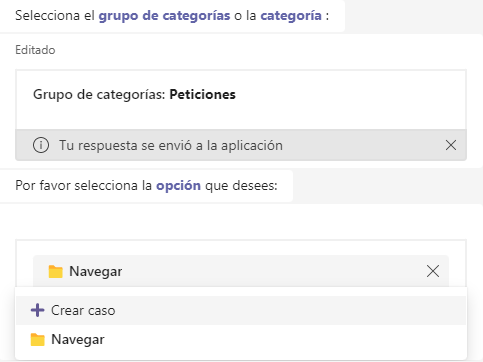
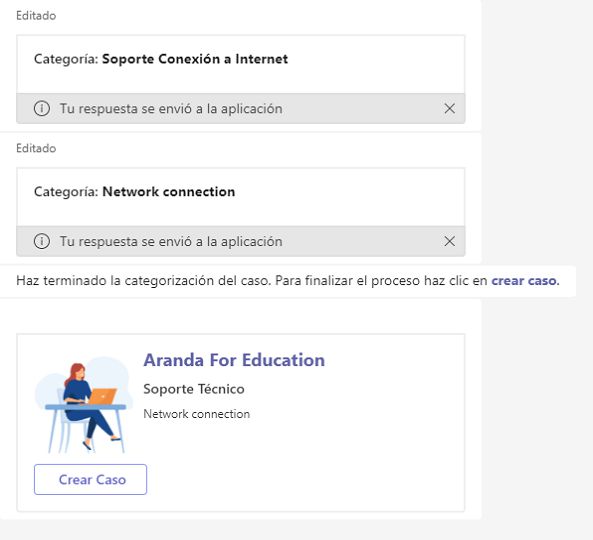
4. Select the Category Group or the category and click Continue (If you select a category group, you must continue selecting until you reach a category.) The Bot will prompt you to click Continue.
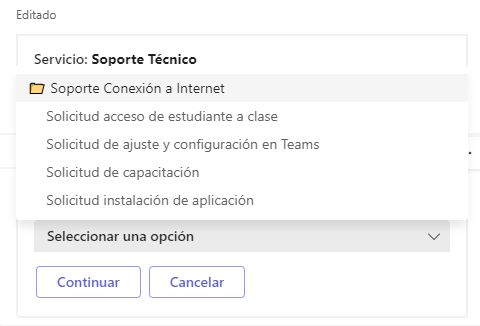
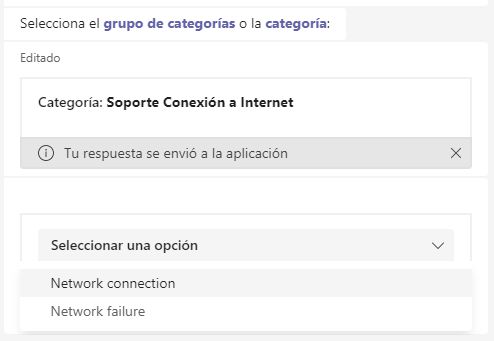
If the defined category has a related operating model, it is active and with subcategories
associated, the user will be able to view and choose between two options; Continue exploring the tree
of categories or create a case about the selected category.
5. Select the Category and click Continue. At this point, two scenarios may arise:
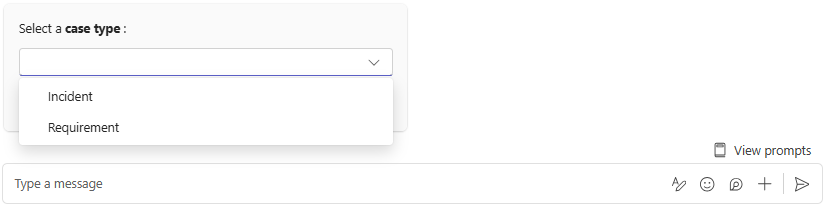
With additional field request and missing interface enabled
If the bot customization option is enabled Prompt the user for additional missing fields View Custom Bot Settings, the bot will prompt the user to select the case type, in case the category is associated with more than one type.
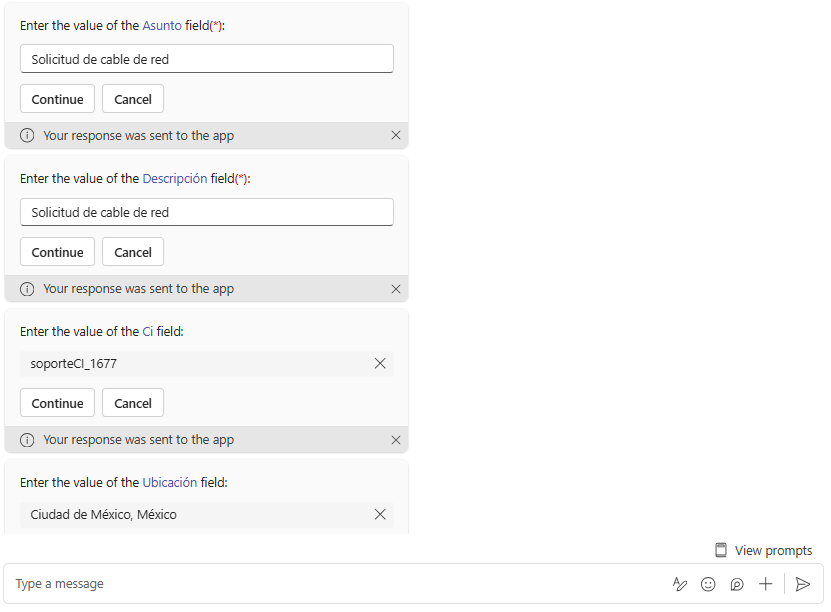
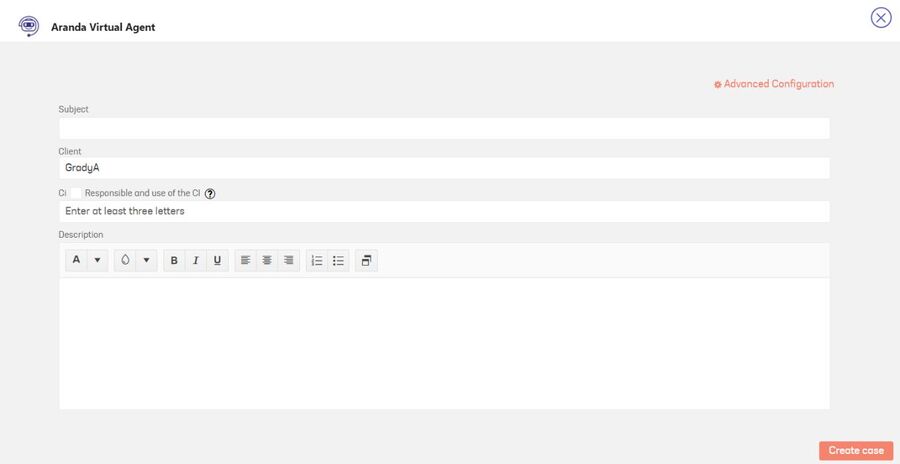
Once the case type is selected, the bot will sequentially prompt for the interface fields (CI, subject, description, and location), as well as the additional fields enabled for the category. This request will depend on the visibility, editing, and enforcement settings defined for each field.
⚐ Note: Aranda Virtual Agent will not request the additional or interface fields in the following cases:
- If there are additional fields configured as dependent and that are required for the category.
- If there are additional file-type fields that are required.
- If the total number of fields (between interface and additional) exceeds 12 fields for the category.
Once all the fields have been filled in, a card will be displayed with a summary of the information entered and three action buttons:
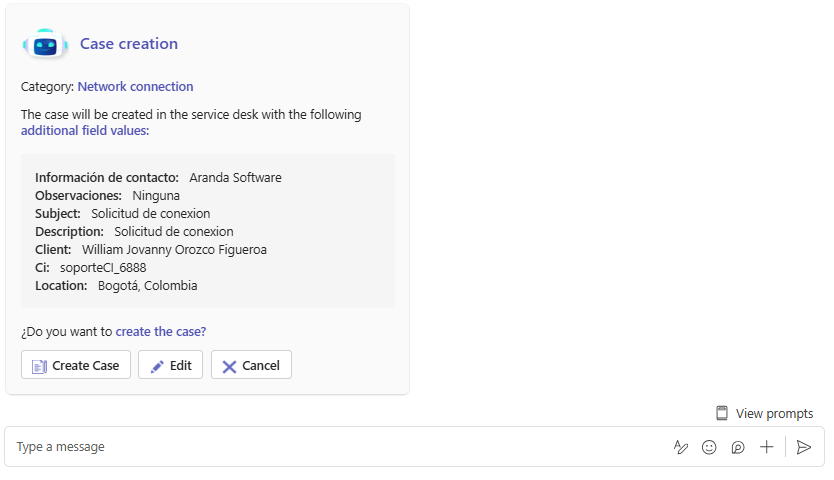
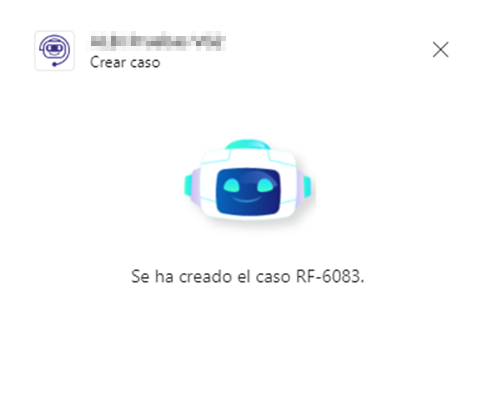
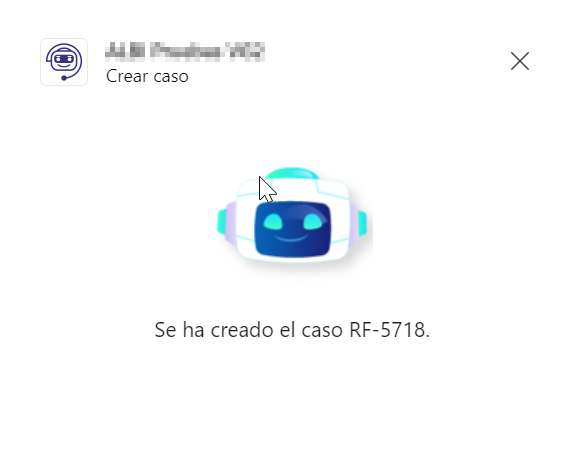
Create Case: Clicking will create the case and the bot returns the request number.

Edit: In case you wish to modify any value of the information filled out, clicking on this button will present a new option to access the case creation form.
Cancel: Cancels the case creation process and redirects the user to startup.

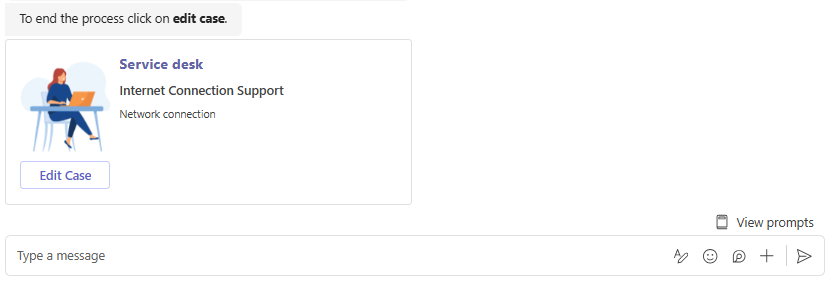
No request for additional fields and missing interface enabled
The bot will display a message with the summary of the information selected for the case creation (Project, Service, Category) and a button to access the user console and complete the case creation.
6. Click Create Case. If you have enabled the option to create cases using Adaptvie cards in the
Bot Customization View Custom Bot Settings and enabled the interface field ‘CI’ for the model in the Admin console
(ASMSAdministrator), a window will be displayed where you can select whether you want to filter the assigned CIs based on their responsibility and usage.

7. Subsequently, click the Following to enable the form that will allow you to create the case through the Adaptive Card.
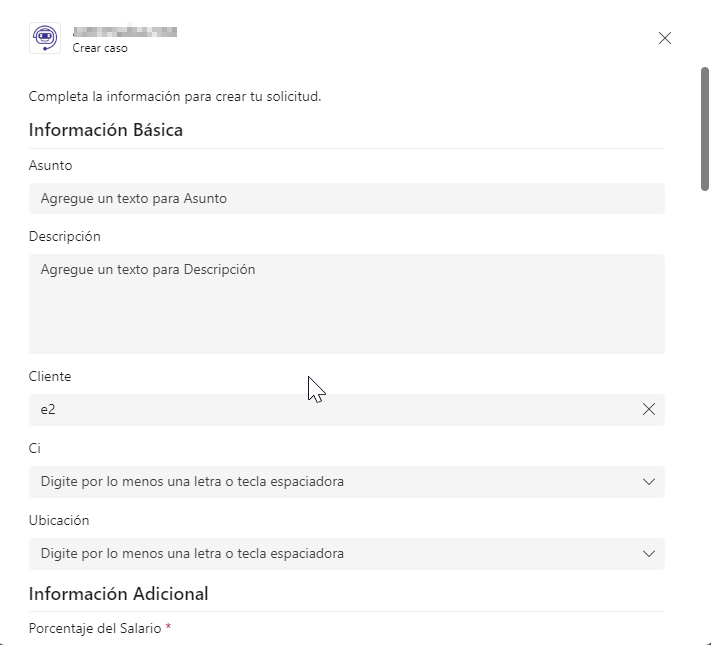
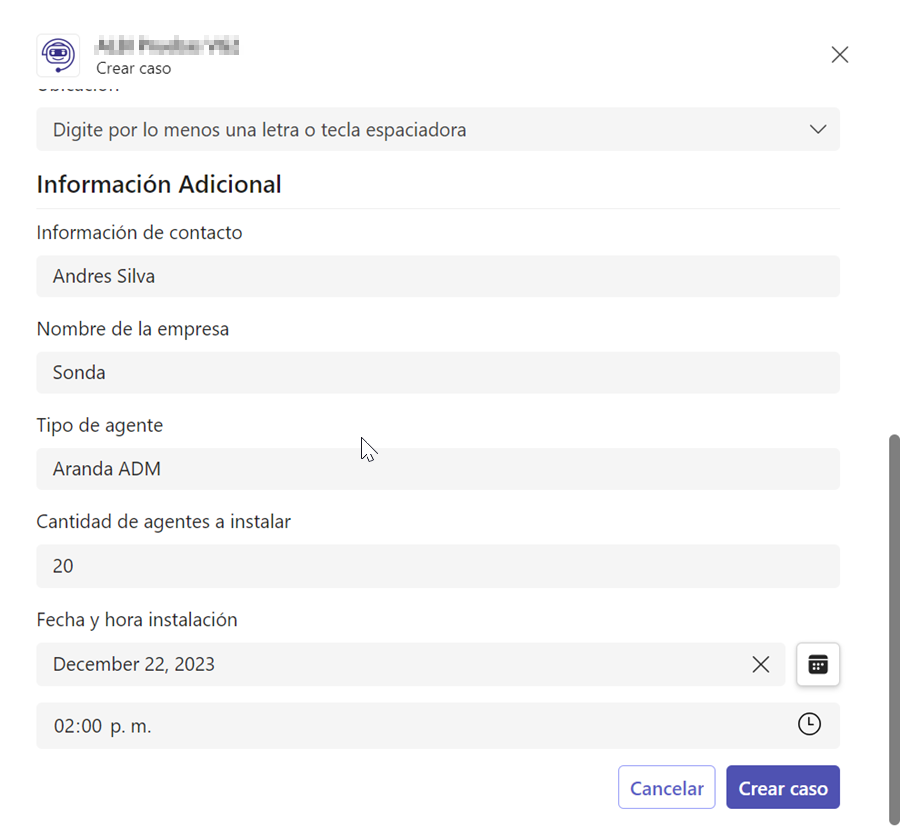
8. Enter the necessary information in the form and select Create Case. Once the process is complete, a confirmation message will be displayed indicating the successful creation of the case.
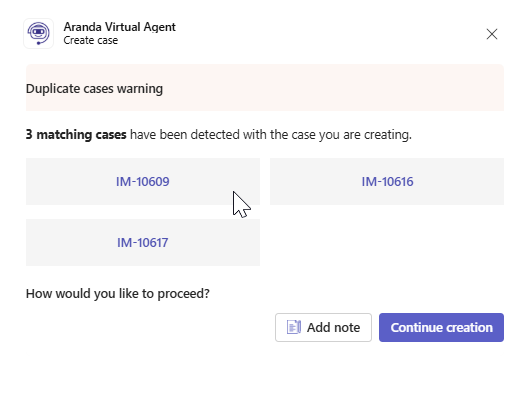
Identification of duplicate cases
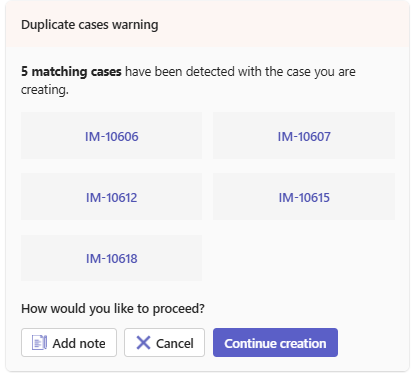
If the functionality Identification of duplicate cases is enabled on the admin site; see Identification of duplicate cases , and the criteria for detecting duplicates are met, a warning window is enabled.
This window will display the case IDs identified as potential duplicates, along with two options:
- Add Note: Allows you to add a note to cases previously created and detected as duplicates.
- Continue Creation: Allows you to continue with the creation of the new case, ignoring the warning.
Remarks: In the case of Microsoft Teams, it is important to note that it has a predetermined time for the connection.
If you experience stuttering or slowness in ASMS, you may see the error message
“You can’t connect with the app. Try again.” However, the case may have been created correctly.
9. In situations where you have an additional field of required file type or do not have adaptive card case creation enabled in bot customization View Custom Bot Settings, the case creation form will be submitted as follows:
Automatic categorization
Automatic categorization of cases requires having the option enabled Enable automatic categorization in the customization of the bot. View Custom Bot Settings
Preconditions for Extraction of Additional Fields
- The following table details the data types that are authorized for extracting values for additional fields.
| Allowed | Not allowed |
|---|---|
| Short text | File |
| Time and date | Link |
| Paragraph | Position |
| False or True | Multiple Choice |
| Whole | Button |
| Decimal | |
| Date | |
| Time | |
| Coin | |
| Tree | |
| List | |
| Catalog (list) | |
| Catalog (tree) |
- Extraction or request of values for additional fields will not be carried out if the category on which the case is classified has 12 or more additional fields enabled of the allowed types.
- In the event that the category on which the request is classified has mandatory interface fields other than “subject” and “description”, the extraction and request of values for additional fields will not be executed.
- In situations where there are additional fields of disallowed types and these are mandatory for the category to which the case is classified, the extraction and request of additional fields will not be carried out.
- If an additional field such as list and/or tree has more than 100 values associated with it, the extraction of values for that field will be discarded.
Case creation
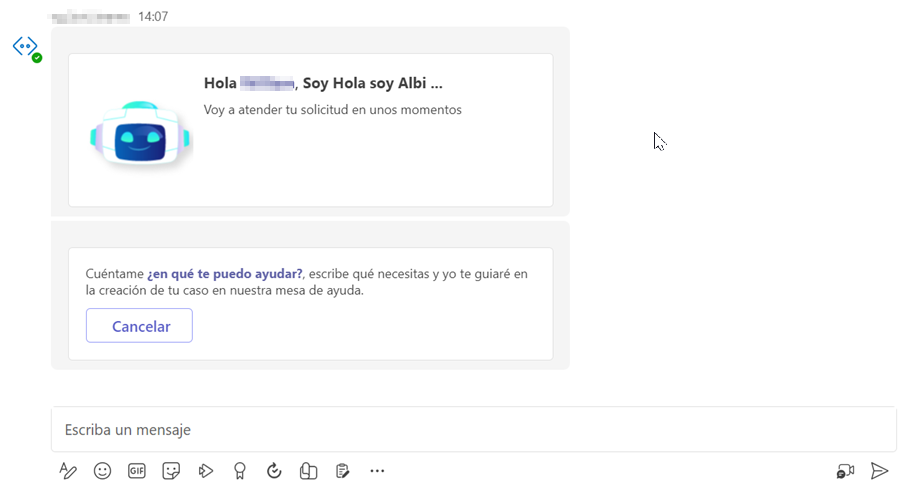
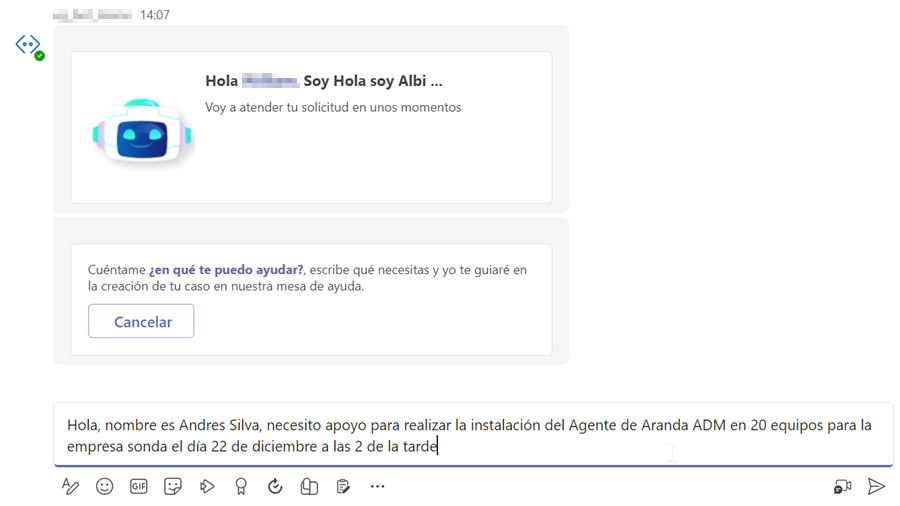
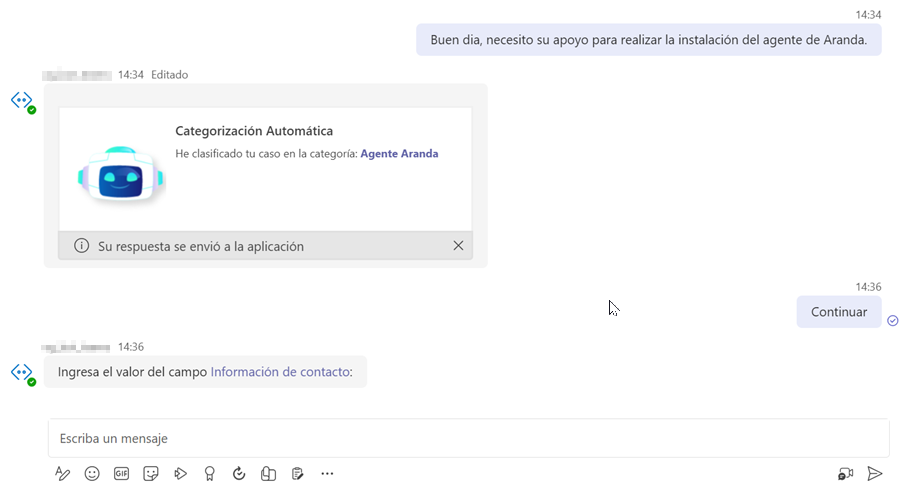
1. From the channel or chat authorized for this use, invoke the bot by typing the command Create Case.
2. The bot will display a greeting message and prompt you to type in the request.
3. Type in the request and send the message.
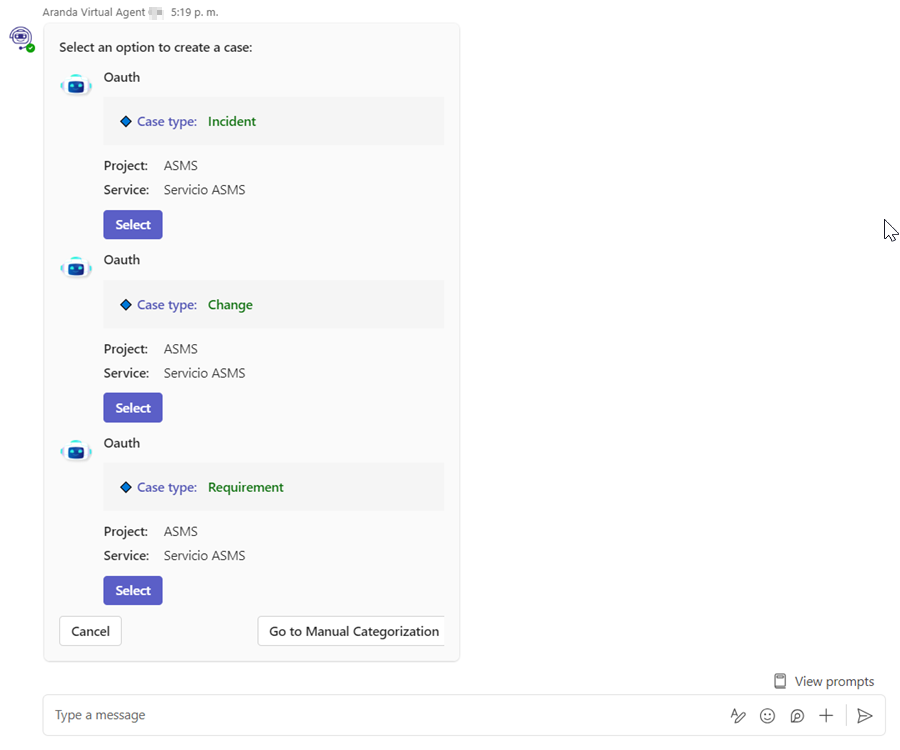
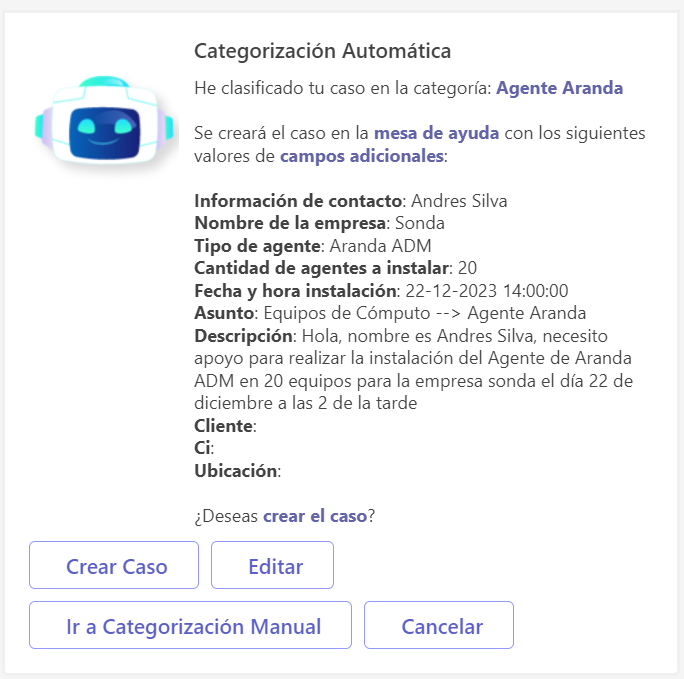
4. The bot evaluates the request sent by the user and automatically classifies the case.

If auto-categorization is configured with the model type wizard and the bot identifies more than one category to classify the case, up to three category options will be presented, with the case type, for the user to choose the most appropriate one.
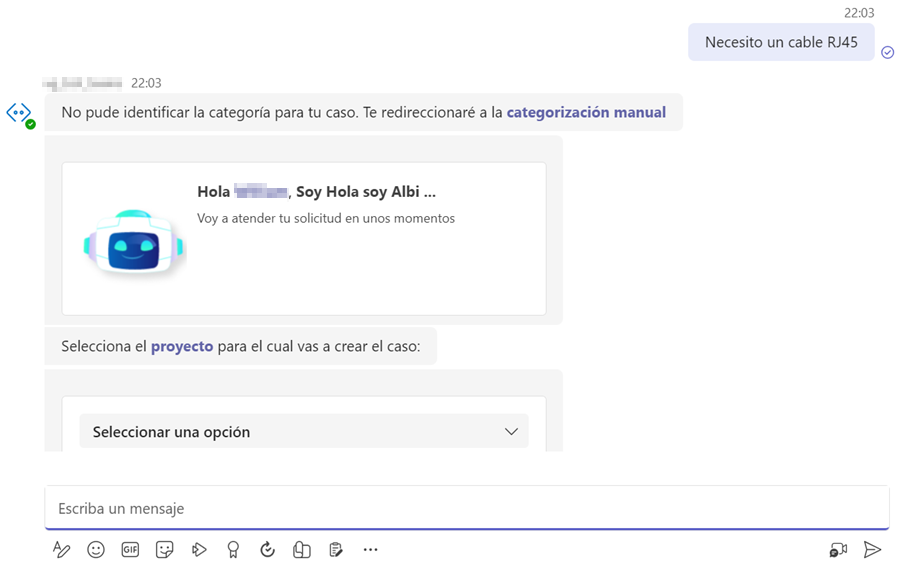
If the bot fails to interpret the request sent by the user, it will redirect them to manual categorization.
Remarks
- If the “Extraction of additional fields” is activated in the bot’s custom configuration and it is possible to extract all the values necessary for the creation of the case, a card will be presented that will summarize the extracted information.
- In the event that it is not possible to extract all the values necessary for the creation of the case, and if the function Prompt the user for additional missing fields enabled, the bot will display the Continue button and clicking will prompt the user to complete the corresponding values for the additional fields of type allowed.
5. After categorizing the request and filling in the values for the additional fields, four buttons will be displayed:
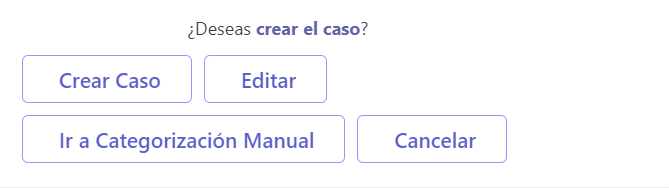
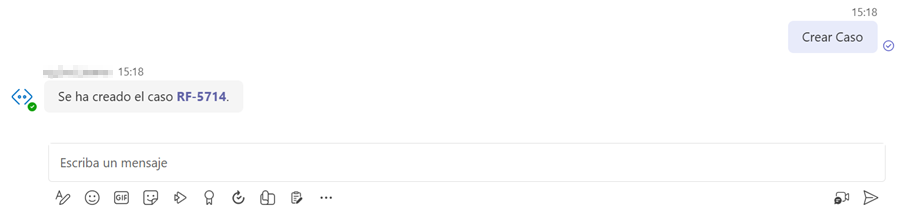
Create Case:
Clicking will create the case and the bot will return the request number.
If the functionality Identification of duplicate cases is enabled on the admin site; see Identification of duplicate cases , and the criteria for detecting duplicates are met, a warning message appears.
This message will display the case IDs identified as potential duplicates, along with three options:
- Add Note: Allows you to add a note to previously created cases, detected as duplicates.
- Cancel: Cancels the interaction with the Create Case command and returns the initial message.
- Continue Creation: Allows you to continue with the creation of the new case, ignoring the warning.
Edit
In case you want to modify any value of the extracted information, clicking on this button will present a new option to access to the edition of the case.
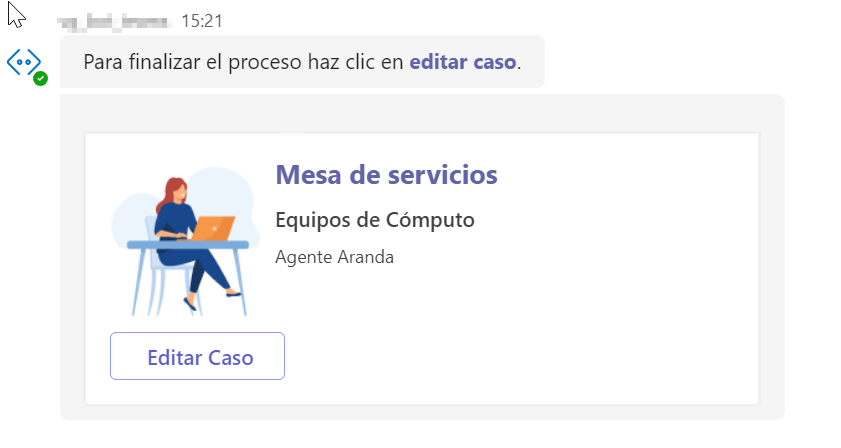
Click Edit Case. A card will be displayed with the form containing all the extracted information.
Make any necessary modifications. By clicking the Create Case The request will be generated and the corresponding identifier will be provided.
Go to Manual Categorization
If the request submitted by the user was not classified in the appropriate category, click on this button to perform the recategorization of the case manually.
Cancel:
If you don’t want to proceed with the case creation, click this button, the bot will automatically redirect you to startup.