
Service configuration
To configure the Aranda Virtual Agent service, consider the following steps:
1. Portal Access
Access the configuration portal from your web browser using the link below:
https://albi.arandasoft.com/
—
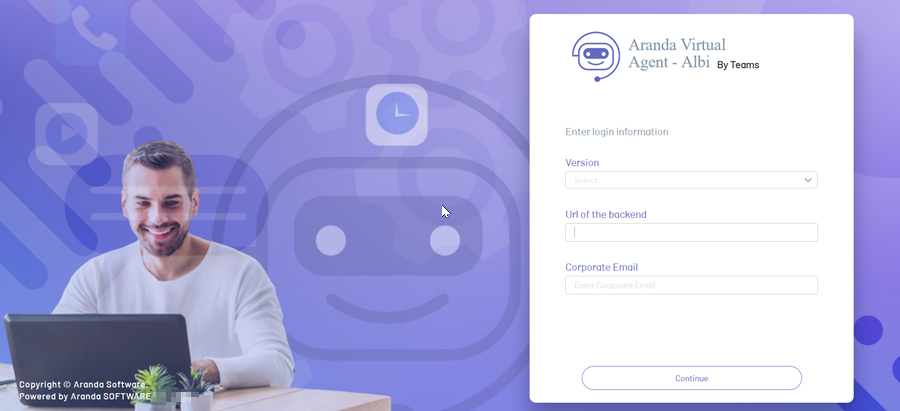
2. Authentication
On the initial screen, fill in the requested fields and click Continue.
| Field | Description |
|---|---|
| Version | Select V9. |
| Backend URL | URL of the user’s site. |
| Corporate email | Client’s corporate email (format usuario@dominio). This data is used to extract the domain required for the bot configuration. |
On the next screen, enter your login credentials and click Enter.
| Field | Description |
|---|---|
| User | tmanager |
| Password | Key defined for the user tmanager. |

⚐ Note: If the environment to be configured has the functionality of reCAPTCHA On the admin site, it will automatically be displayed on the authentication screen. For more information, see the reCAPTCHA ↪ configuration.
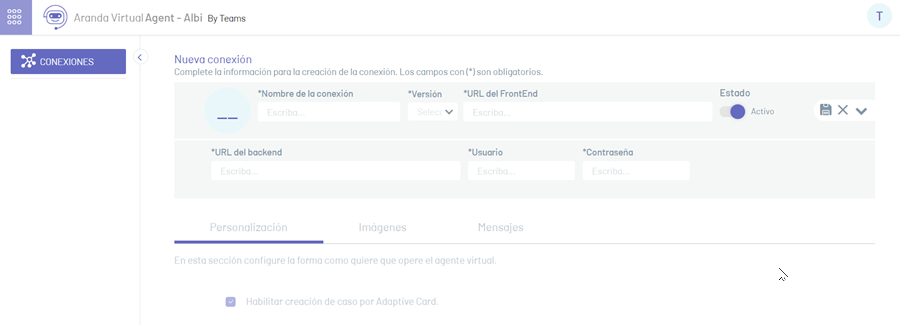
3. Creating the Connection
Once authenticated, the connection configuration form will be displayed. Complete the requested fields and click Save.
| Field | Description |
|---|---|
| Connection Name | Name that identifies the configured connection. |
| Version | Select Version 9. If the environment has reCAPTCHA, the Integration token. This token must be pre-generated with the user TEAMS CLIENT and register in this field. See the Configuring ↪ integration tokens |
| Backend URL | URL of the user’s site. |
| User | User TEAMS CLIENT (tclient). This field will not be displayed if the environment has reCAPTCHA functionality enabled and the configuration is done using an integration token. |
| Password | User Password TEAMS CLIENT. This field is hidden when the configuration is done using the integration token. |
| State | Check this option to activate the connection. |
4. Confirmation
Once the connection is saved, the system will display a confirmation message and the following tabs will be enabled:
- Customization
- Imagery
- Messages
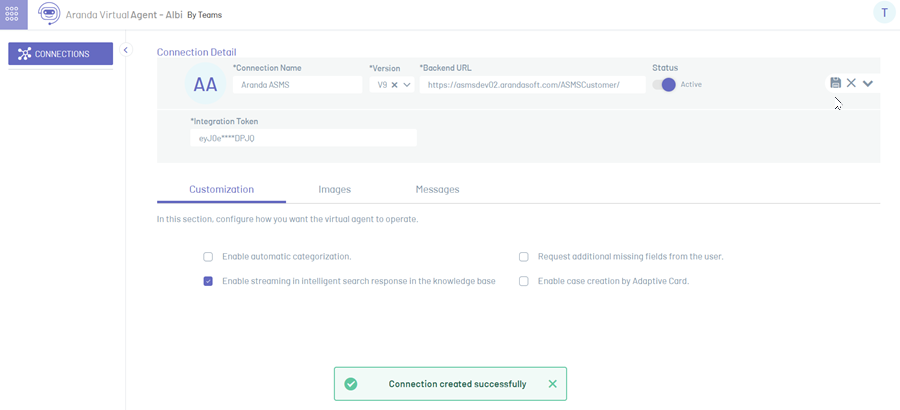
From these sections you can continue with the visual and functional configuration of Aranda Virtual Agent.