
Visual and functional configuration of Aranda Virtual Agent
These sections describe the configuration of the visual and functional options of the Aranda Virtual Agent, which allow you to define images, default messages, and bot behavior during case creation, including the use of artificial intelligence capabilities.
Bot customization
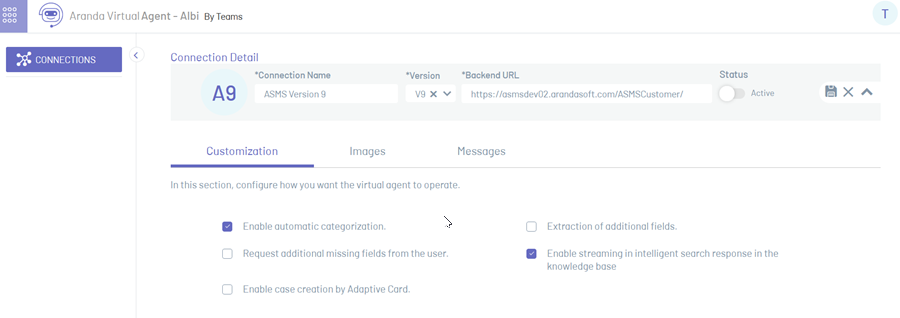
From the Customization It is possible to configure the general behavior of the virtual agent during interaction with users, as well as define the use of artificial intelligence functionalities and additional options for case creation.
In the customization tab, two configuration groups are highlighted:
- AI Feature Configurations: Options related to automatic categorization, information extraction, and smart responses.
- Other customization settings: Options that control how the bot requests information and creates cases.
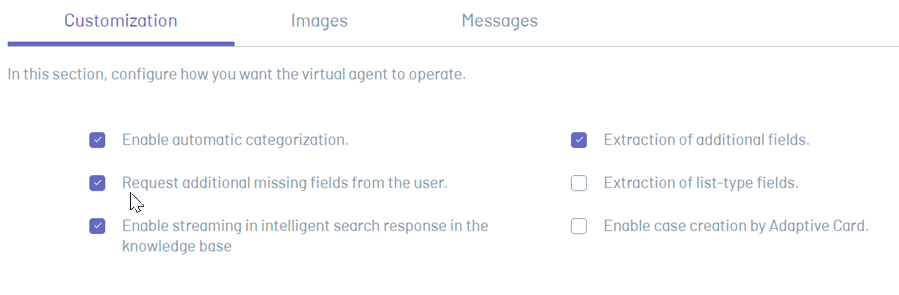
AI Feature Configurations
This section configures bot behavior during case creation and management using artificial intelligence capabilities.
For the correct functioning of these functionalities, it is essential that the Endpoints and corresponding actions are pre-configured in the Admin console. For more details, see the AI Settings.
1. Enable automatic categorization
When you enable this option, the bot will analyze the information entered by the user and automatically categorize the case during its creation.
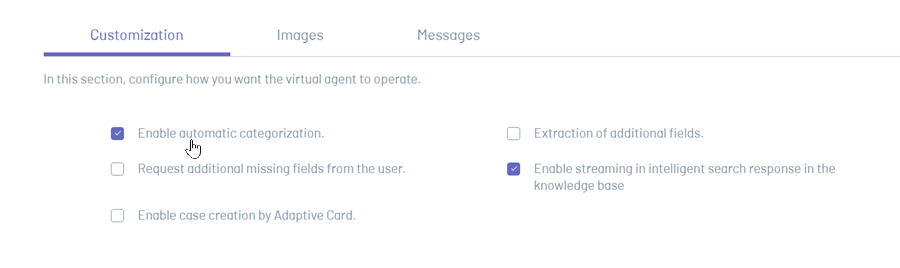
When you enable this functionality, the option Extracting additional fields.
2. Extracting additional fields
This option allows the bot to automatically identify and extract values for additional fields from the request submitted by the user.
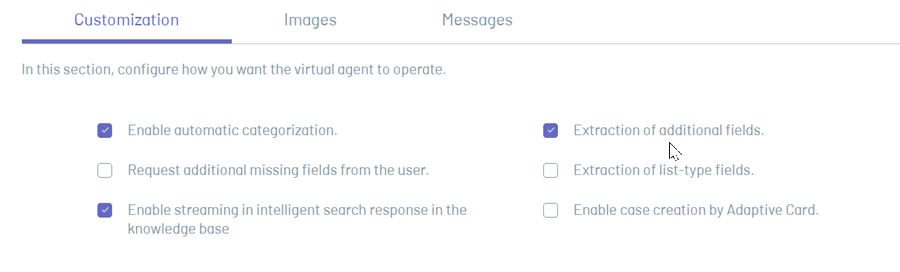
When you enable this functionality, the option Extracting List-Type Fields.
3. Extracting List-Type Fields
Allows the bot to extract values corresponding to additional fields type List and tree, provided that such information is present in the user’s request.
4. Enable streaming in Smart Search responses in the knowledge base
This option allows you to enable the progressive display of the responses generated by the intelligent article search, simulating a real-time typing effect.
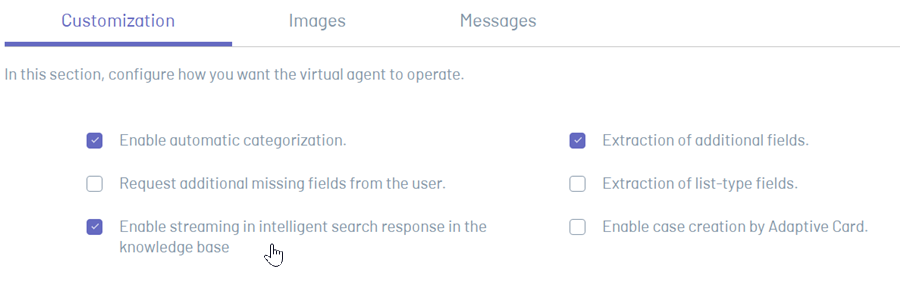
Apply to the command Consult Article and improves the user experience when consulting information.
Other customization settings
The following options are part of the overall customization of the bot and do not depend directly on AI capabilities.
1. Prompt the user for additional missing fields.
Enable this option if you want the bot to prompt the user for additional fields that could not be automatically identified during case creation.
This functionality applies to:
- The creation of cases by manual categorization.
- The creation of cases by automatic categorization.
2. Enable case creation by Adaptive Card.
When you enable this option, your bot will allow case creation using Adaptive Cards.
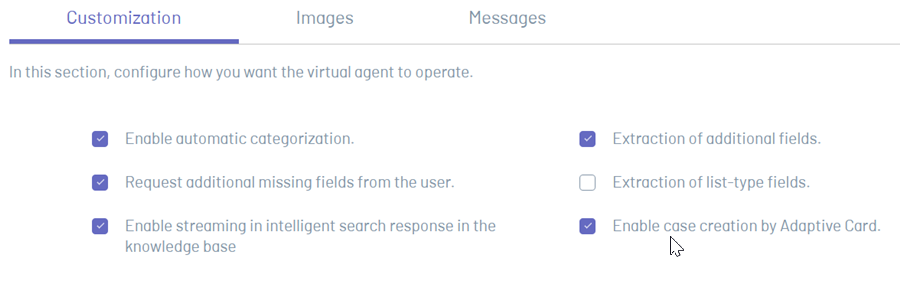
This functionality optimizes the case creation process, guiding the user in a structured way and reducing errors in the filling out of information.
Modify images
This section allows you to customize the images that your bot uses for actions and reactions within the configured connection.
Actions Section
Allows you to configure the images associated with the bot’s actions:
- Create Case: URL of the image that will be displayed in the case creation card.
- News: URL of the image that will be displayed when viewing news.
1. Enter the URLs in the fields Create Case and News. Images will be automatically validated when you lose focus on the field.
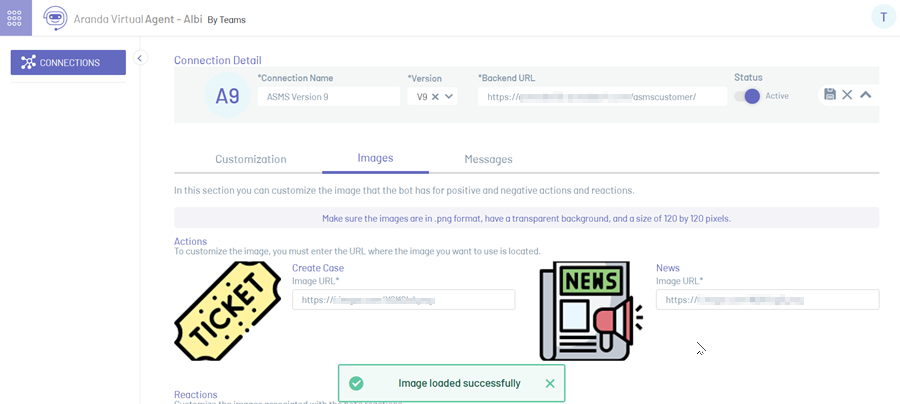
If the URLs are valid and accessible, the image preview will be displayed and saved automatically.
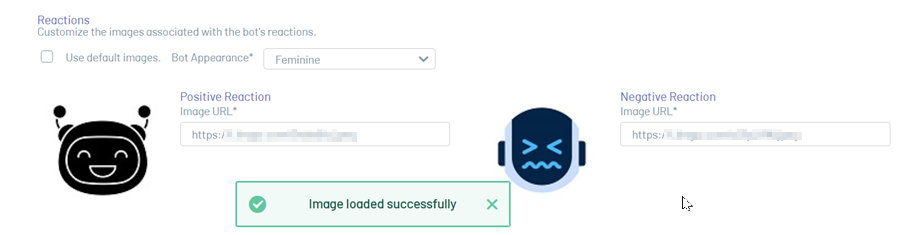
Reactions Section
Allows you to configure the images that your bot will use as a visual response.
Available elements:
- Positive reaction: URL of the image for positive responses.
- Negative reaction: URL of the image for negative responses.
- Use the default images: Checkbox.
-
Bot appearance: Drop-down list with options:
- Female
- Male
1. Check the box Use the default images.
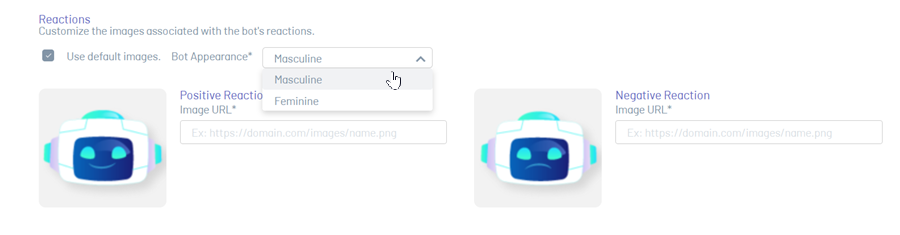
Enabling this option disables the reaction URL fields and only allows you to select the bot’s appearance (Male or Female), which will automatically update the images.
2. If you want to use custom images for positive and negative reactions, uncheck the checkbox Use the bot’s default images; this will enable fields to enter custom image URLs.
⚐ Note: Keep the following considerations in mind when configuring bot images:
- Images must be PNG, transparent background, and size 120 × 120 pixels.
- The URL must be public and accessible; If the image does not load, it will not be saved.
- The image is automatically validated and saved when you leave the field (when you lose focus).
- If the URL or size is incorrect, a message will be displayed and you need to correct the image before proceeding.
- If no custom images are configured, the system will automatically use the bot’s default images.
Set up messages
This tab configures the texts that the bot will display during interaction with users.
1. Go into the connection settings and select the Messages.
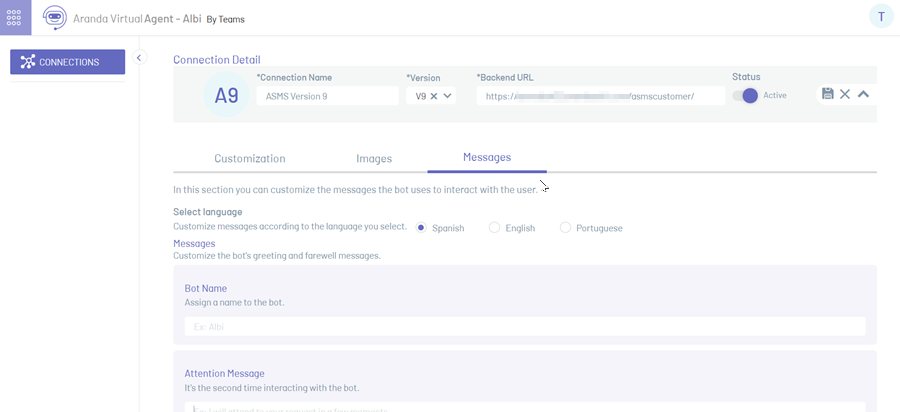
2. At the top is the Select language, where you can choose the display language of the messages. Then, enter the bot’s name, attention message, and goodbye message based on customization needs; Changes are automatically saved when you lose focus on the field.
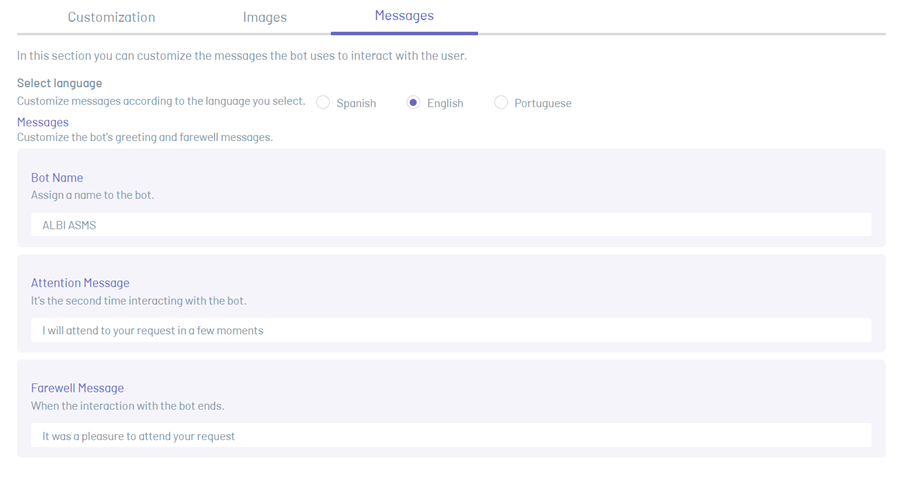
⚐ Note: If the fields (Bot Name, Attention Message, and Farewell Message) are left empty, the system will automatically use the default values that the bot comes preconfigured.