
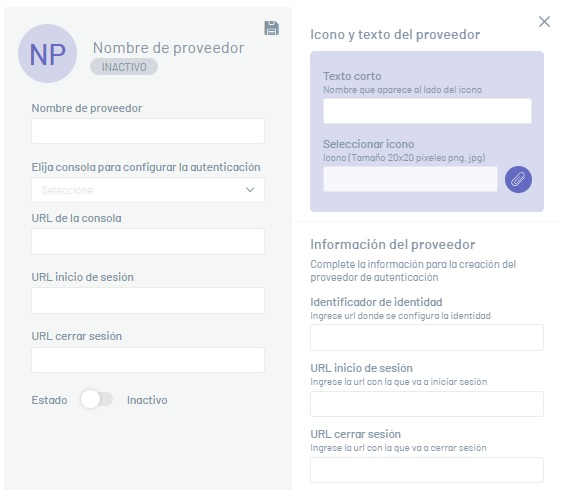
1. To create a new third-party vendor, in the vendor information view, click the New.
⚐ Note: There is no restriction on creating external providers with duplicate information, as many as necessary can be created.
⚠ Important: Products that have authentication consoles such as ASMS, the New will be disabled until you select an authentication console in the box Authentication console.
Basic Facts
2. In the window that is enabled, you will be able to fill in the basic data of the external provider such as provider name, console URL, login URL, logout URL, status, icon and text of the provider, among others.
Each of the third-party vendor fields must take into account the Specifications for Fields
⚐ Notes:
- The fields Login URL and URL log out have auto-complete functionality and are based on the information provided in the field Console URL.
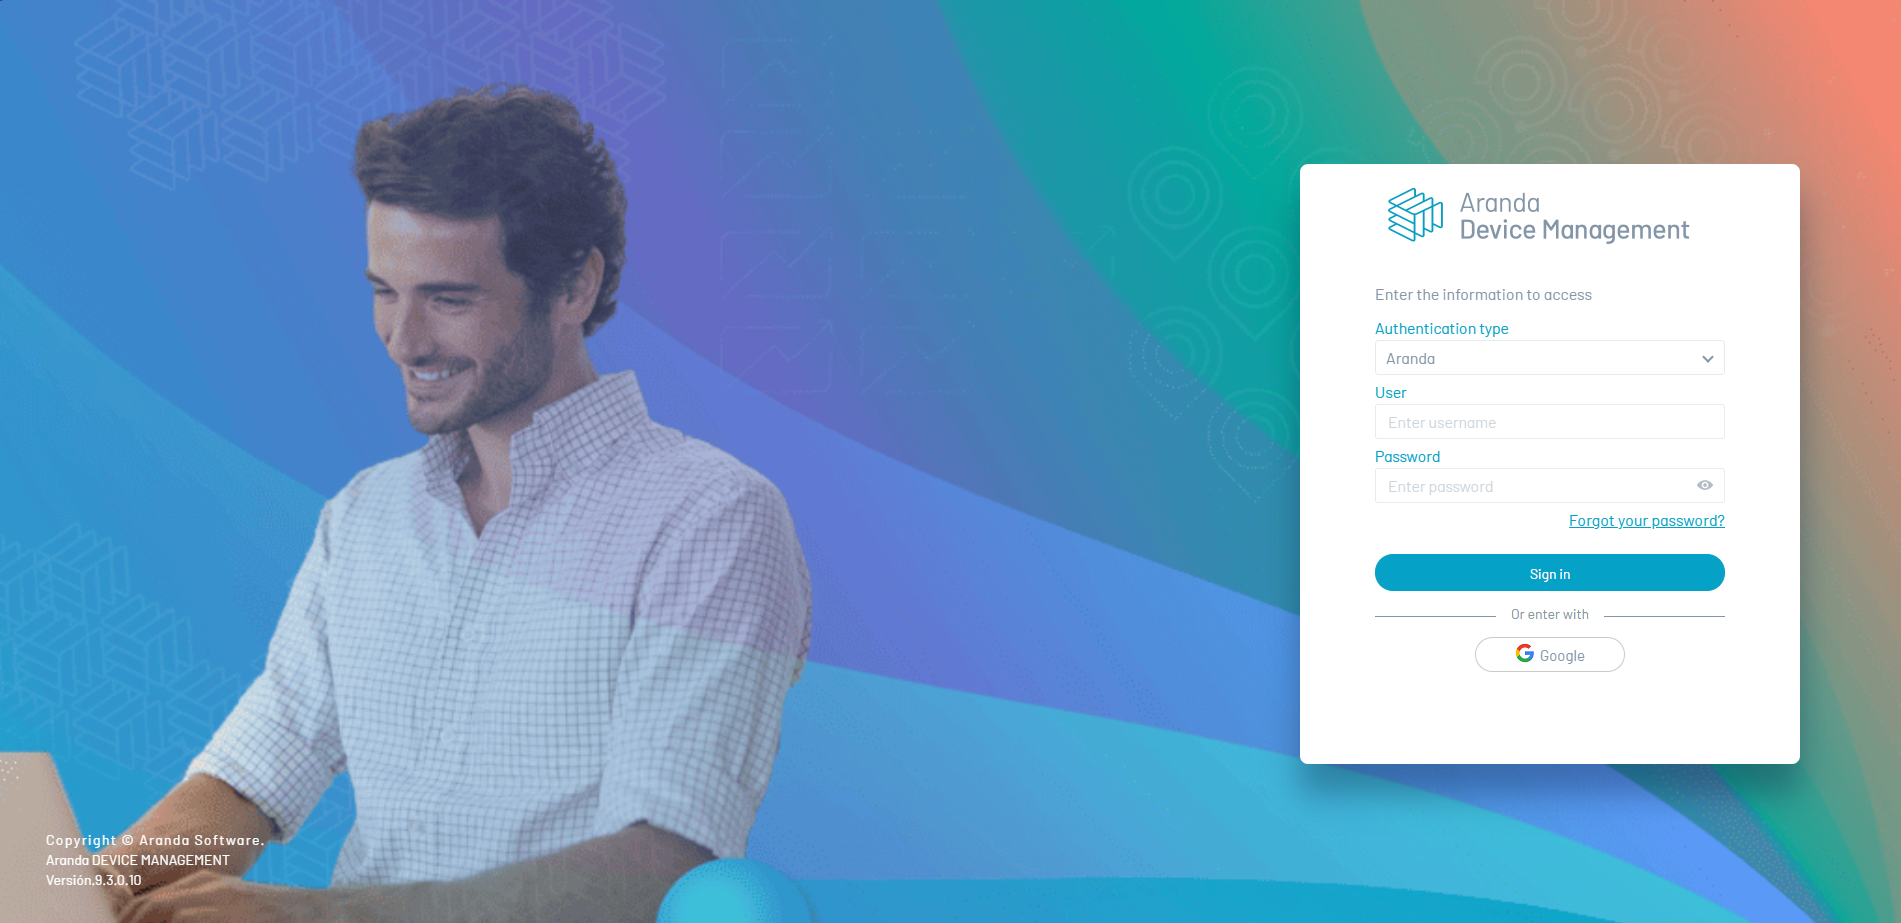
3. When you finish setting up provider authentication, click the Save.
⚐ Notes:
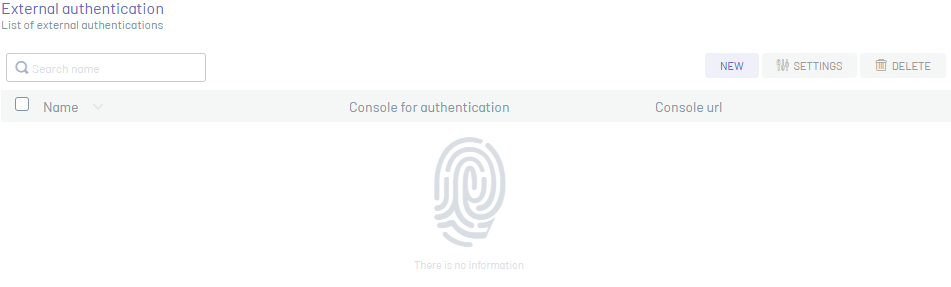
- If the configuration is successful, in the external vendor view you can view the records of the last vendors created.
- On the home screen and access to the required application, you will be able to display the icon with the name given to the external provider.
⚐ Notes:
- The email with which the authentication is carried out from the external provider is used as the user’s identification and must be registered in the respective application.
- In order for the website to authenticate the user, the user must be imported or created before performing the external authentication configuration.
- To authenticate local users, the username must match the email.