
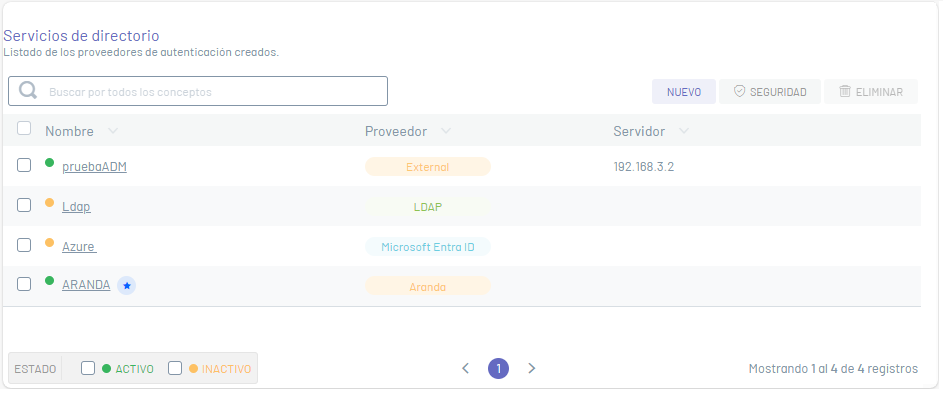
1. In the directory server information view, select the New.
Basic Facts
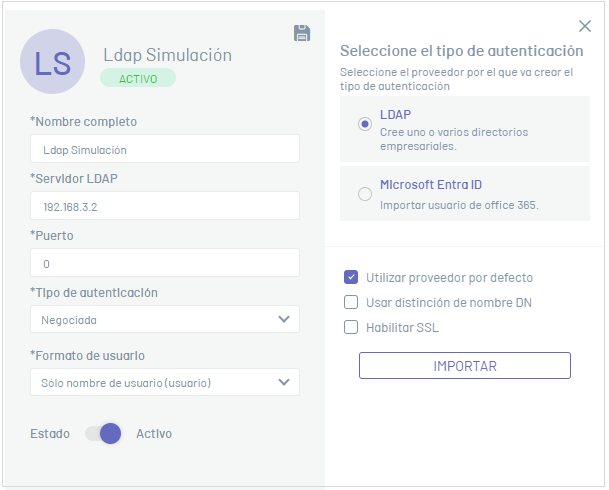
2. In the window that is enabled you will be able to fill in the basic information required to establish the connection with your directory server such as name, server, port, type of authentication, providers, among others.
Each of the directory services fields must take into account the Specifications for Common Fields
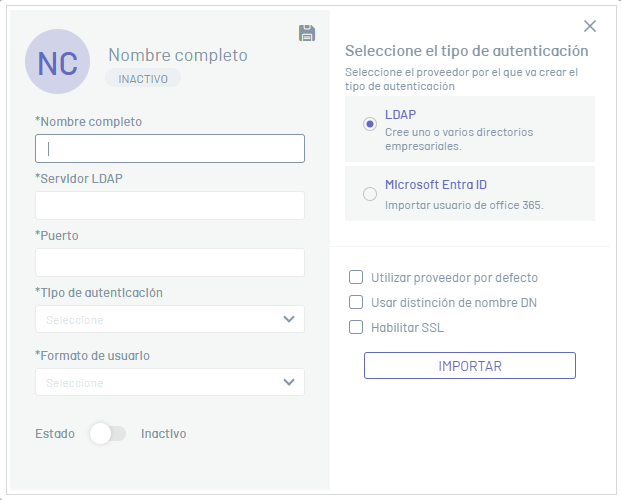
Authentication Type
4. In the Authentication Type, you can set the provider type for authentication:
- LDAP: It is a standard application protocol for queries, which can store, manage, protect and authenticate user information.
- Microsoft EntraID: Microsoft’s cloud-based identity management service, from which Office 365 users can be imported.
LDAP Provider
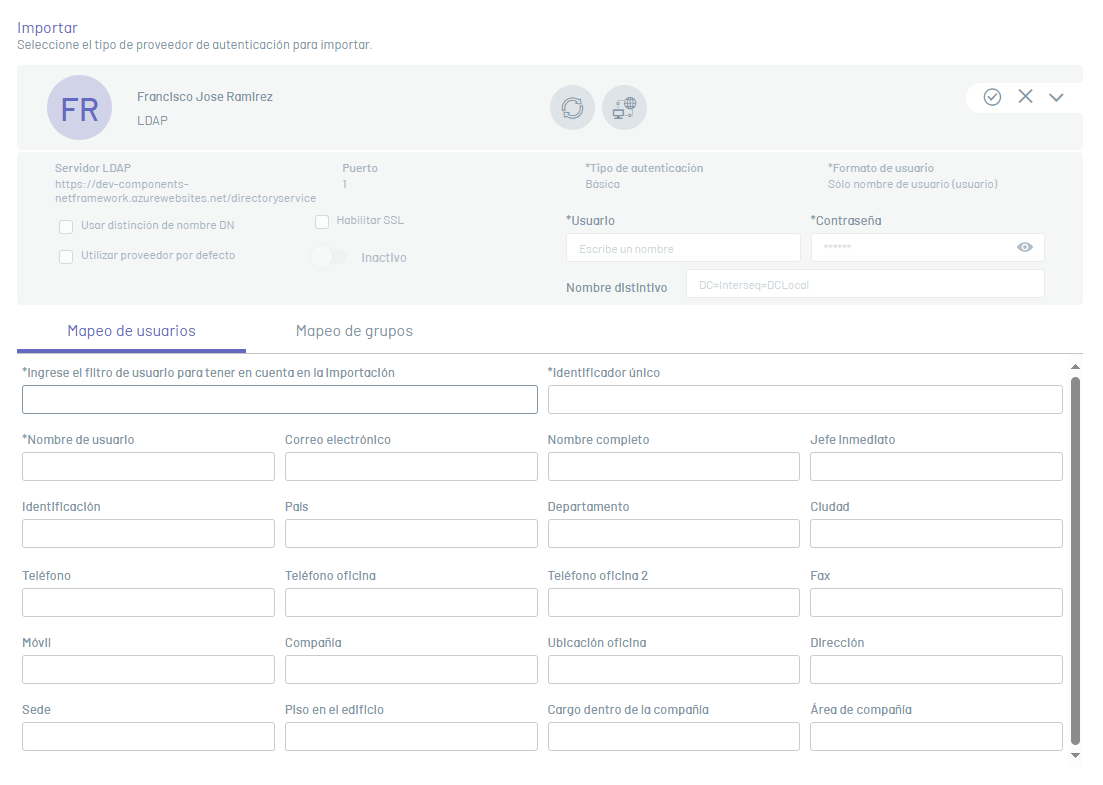
5. In the Vendor Detail view, click the IMPORT; window is enabled Import where you will be able to enter the necessary data for synchronization. In the LDAP Business Directory Basic Information, enter the username and password data.
⚐ Note:
- For active directories configured with OpenLDAP, fill in the Distinguished Name field.
- Check out some filters example for LDAP
In the Mappings tabs, you can specify the corresponding naming attributes for each field, and filters must comply with LDAP syntax to synchronize the information.
On the User Mapping the mandatory fields to be registered are: User filter to take into account in the import, unique identifier and username.
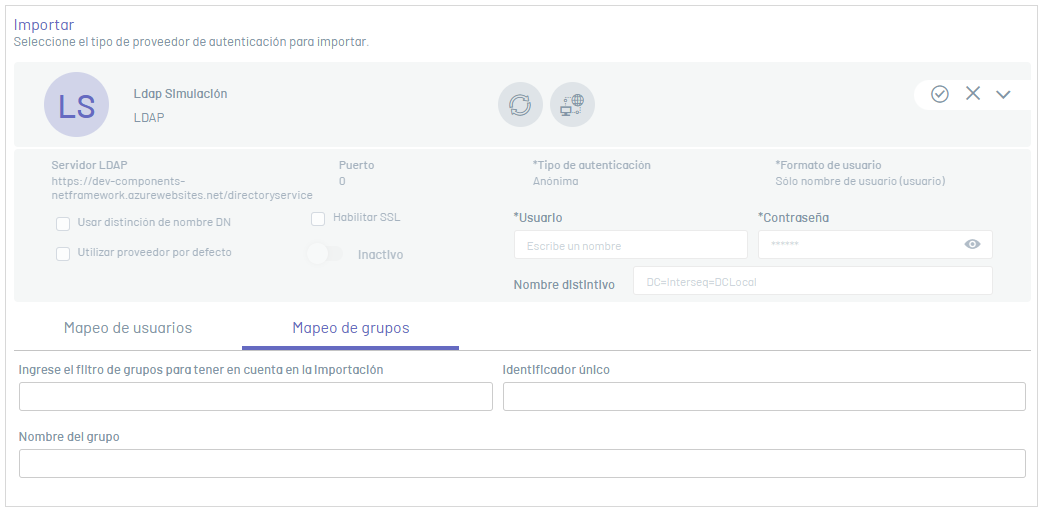
On the Group Mapping (user groups) if you enter any value in the field “Enter the group filter to take into account in the import”, the fields “Unique identifier” and “group name” become mandatory.
6. When registering the fields, click on the Test Connection  . If the connection was successful, you will be able to view the message: The information is complete, you can now finish the import and the continuation of the process is authorized.
7. When you finish recording the information, click the Sync  and in the window that is enabled, turn on synchronization.
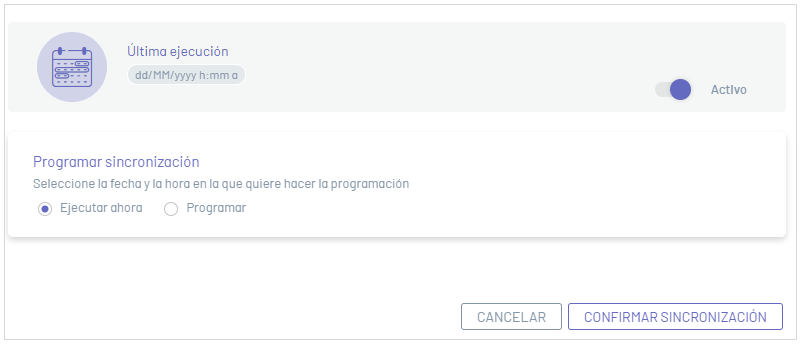
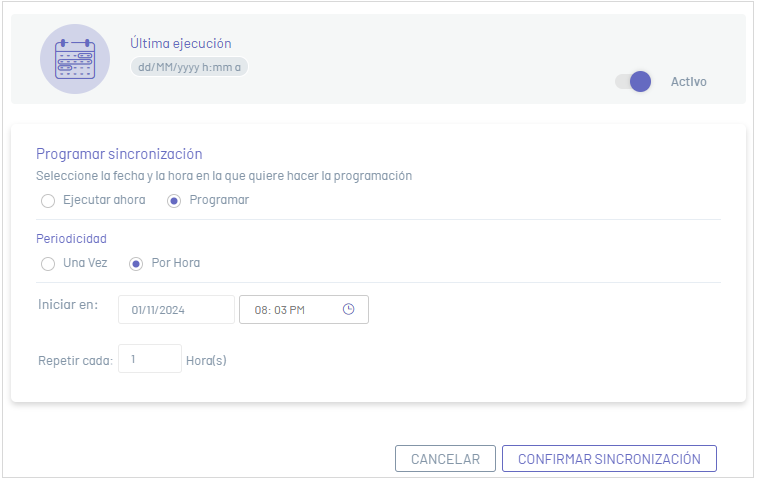
8. Synchronization can be manual (immediately) or it can be automatically scheduled once or every few hours to update new users. After selecting the sync type and performing the settings, click the CONFIRM SYNCHRONIZATION.
9. When you finish configuring the LDAP directory, in the Import window, click the confirmation button  and in the LDAP Basic Configuration window, click Save
  .
.
10. Once the synchronization is complete, the administrator will be able to assign the respective roles to the synchronized users.
Microsoft EntraID Provider
1. In the provider detail view, enter the full name of the directory you want to sync and click the IMPORT; window is enabled Import where you will be able to enter the necessary data for synchronization. In the basic directory information, enter the authority URL, client ID, and client secret supplied by Microsoft EntraID.
On the User Mapping the mandatory fields to be registered are:User filter for import, unique identifier and Username.
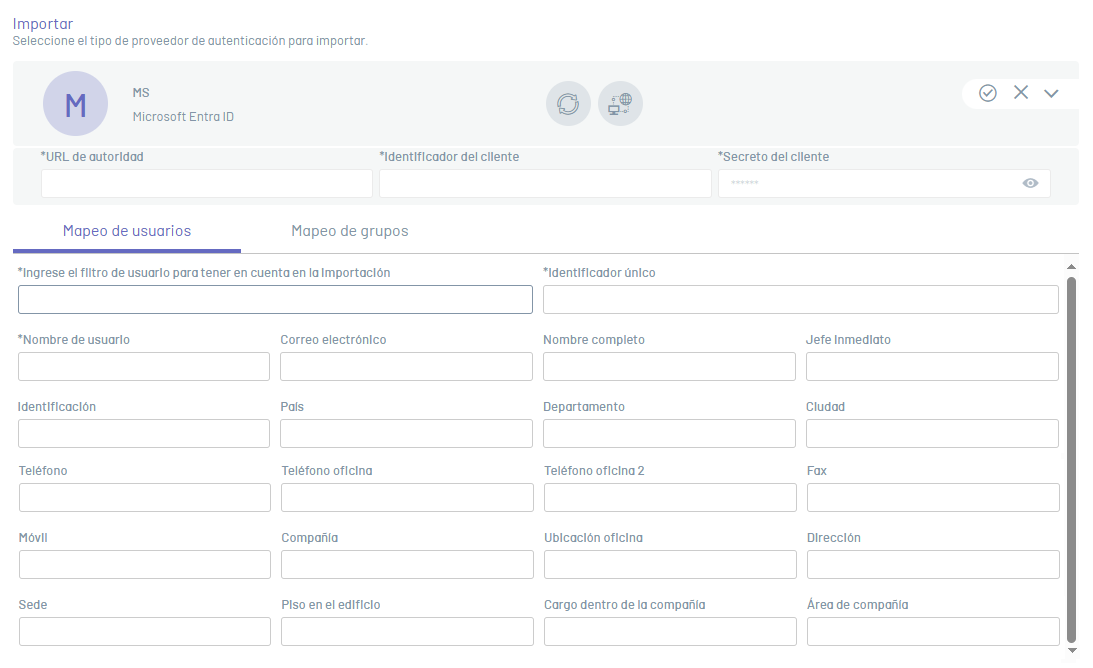
On the Group Mapping (user groups) if you enter any value in the field “Enter the group filter to take into account in the import”, the fields “Unique identifier” and “group name” become mandatory.

For information about user filters and attributes for field mapping, you can consult Microsoft’s documentation at the following links:
User and group filter
User fields
Group Fields
⚐ Note:
- Check out some filters and Field Mapping Microsoft EntraID example
- Learn how to create your app Microsoft Enter ID
6. When registering the fields, click on the Test Connection . If the connection was successful, you will be able to view the message: The information is complete, you can now finish the import and the continuation of the process is authorized.
7. When you finish recording the information, click the Sync and in the window that is enabled, turn on synchronization.
8. Synchronization can be manual (immediately) or can be scheduled automatically once or every few hours. After selecting the sync type and performing the settings, click the CONFIRM SYNCHRONIZATION.
9. When you finish setting up the Microsoft Enter ID directory in the Import window, click the confirmation button and in the basic vendor configuration window, click Save .
⚠ Important: The Microsoft Entra ID provider only allows synchronization of users and groups of users, it does not apply to be used as an authentication provider, so it always remains in an Inactive state. To access the Aranda product website using the users of this type of directory, the external authenticity (SAML) must be configured.