
Basic Facts
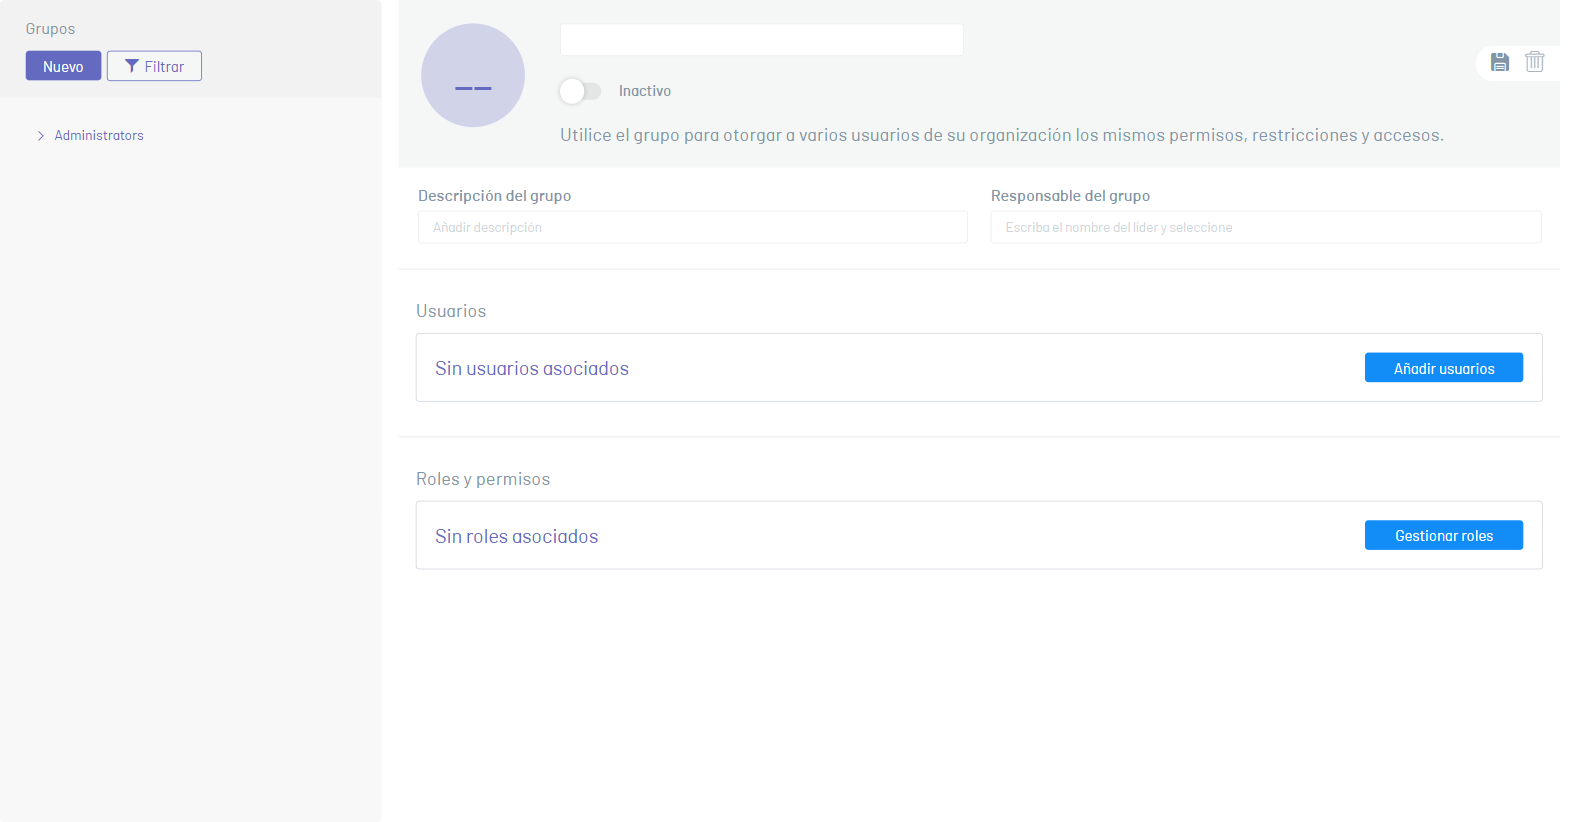
1. For the creation of a group without any higher hierarchy, it must be located at the root of the tree; In the information view, you can view the form to fill in the required information (basic information, associate users and roles).
2. If the group to be created must belong to another group, click on the required parent group and click on the New and fill in the required information. Each of the fields in the group must take into account the Specifications for Common Fields.
⚐ Note:
- Imported groups cannot be created as it is information collected from the service directory.
- You can create as many subgroups as you need. Subgroups (child groups) do not inherit users or roles from the parent group (parent group).
- Two groups cannot have the same name if they are at the same hierarchy level.
3. When you finish setting up the new group, click the Save  to confirm the changes made.
4. Once the user group has been created, the message confirming the creation of the group will be displayed and its location will be displayed in the tree.
Associate and disassociate users with the group
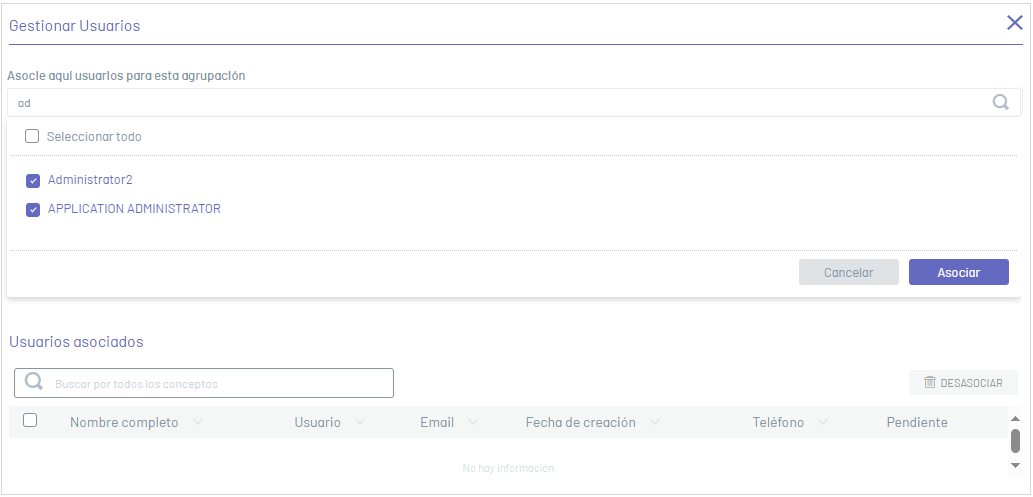
6. To add users, in the information view of a user group, in the Users section, select the Add users.

7. The window is enabled Manage Users, where you can view and add the required users for the defined group. In the search field to associate users, enter the name of the required user and from the list of results select the user to add.
8. When finished, click on the Associate.
⚐ Notes:
- In the search field for associating users, the users who are active will appear. The added users will be left with the roles of the group.
- Once associated, users are left in a state Earring until the group is saved
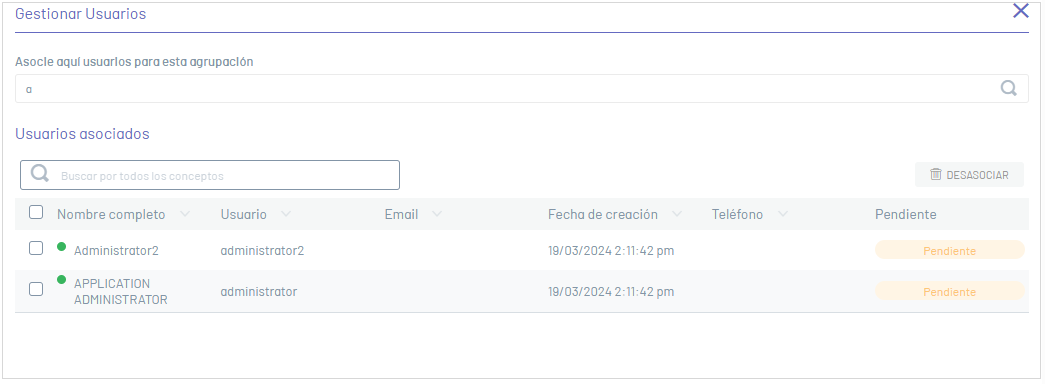
9. To remove a user from a group, in the Manage Users Select one or more records from the list of users and click the Disassociate. Confirm that you want to disassociate users by clicking the Accept.
Associating and Disassociating Roles
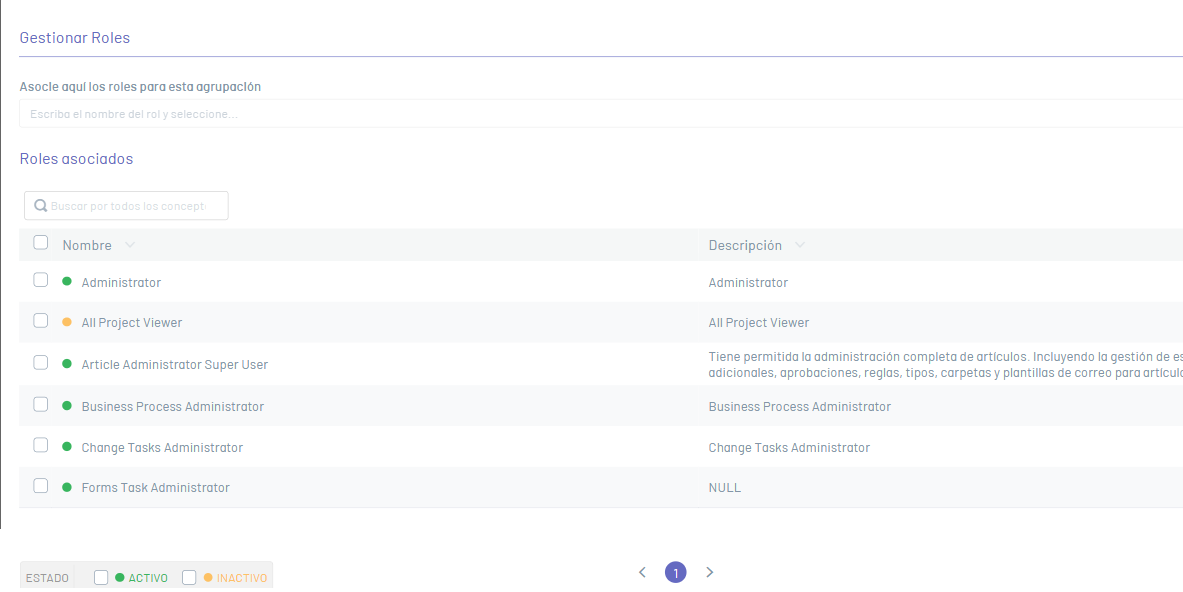
10. To add roles, in the information view of a user group, in the Roles and Permissions section, select the Manage Roles.
11. The window is enabled Manage Roles, where you can view and add the required roles for the defined group. In the search field to associate roles, enter the name of the required role and from the list of results select the role to add.
⚐ Note: In the search field for associating roles, only active roles will appear.
12. When finished, click Associate.
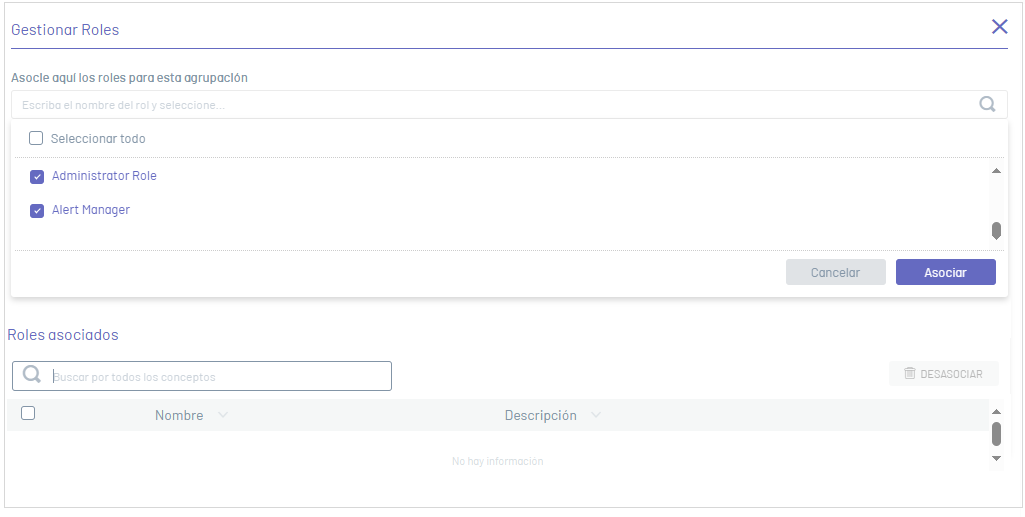
⚐ Note: The status of the role is pending until the changes are saved.
13. To detach roles from a group, in the Manage Roles Select one or more records from the list of roles and click the Disassociate. Confirm that you want to disassociate users by clicking the Accept.
14. When you finish setting up the new group, click the Save to confirm the changes made.