Aranda Datasafe uses Teams to organize its devices into groups.
Each team has one:
- Policy: Defines when devices on your computer will be backed up, as well as what migration and data loss prevention settings the devices will use.
- Repository: Defines where backup data for your team’s devices will be stored.
When you create a team, you choose a policy and a repository. You can also edit a Team to rename it or associate it with a different Policy or repository.
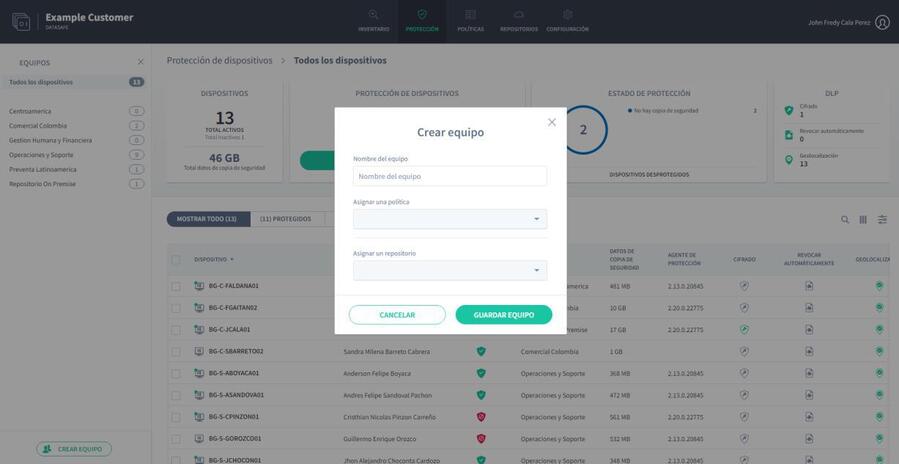
Create a team
You can create a new team and then assign it a policy and repository. When your computer is set up, you can assign it to your devices.
You should create a new team if:
- There are no teams in Aranda Datasafe
- Existing computers don’t meet your requirements, for example, they don’t use data theft prevention, but you need it for your devices.
- Existing teams back up to a repository that isn’t suitable for their devices.
To create a team:
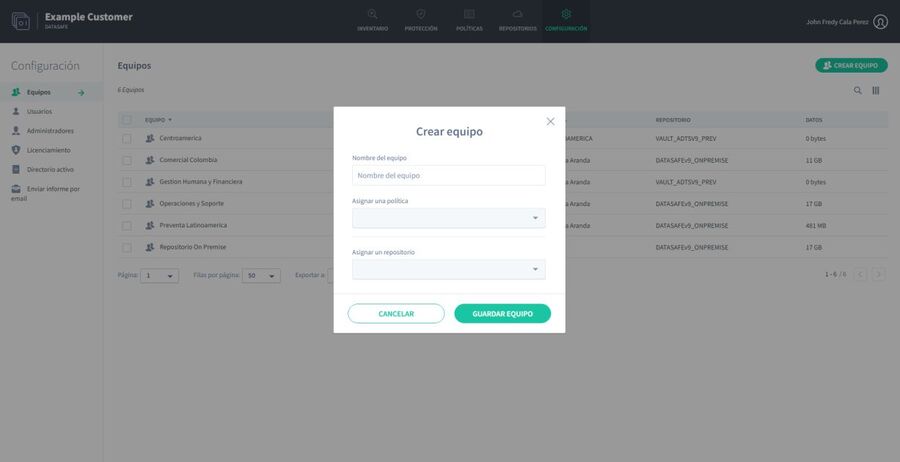
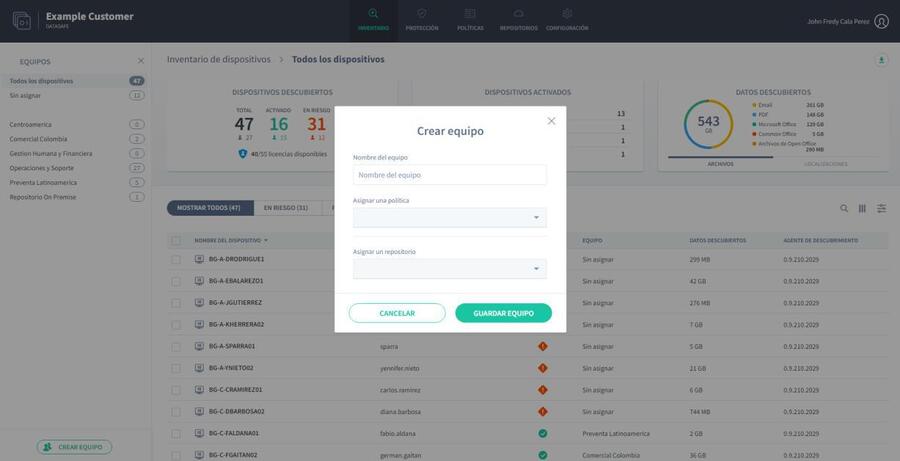
1. There are three ways to create a team: from the Inventory page, the Protection page, or from the Teams section on the Settings page. Then you can:
Click on Inventory.
or:
Click on Protection.
or:
Click on Settings and use the Computers section.
2. Click Create Equipment (lower-left corner of the Inventory or Protection screen, upper-right corner on the Computers - Settings page).
3. Enter a name for the new team.
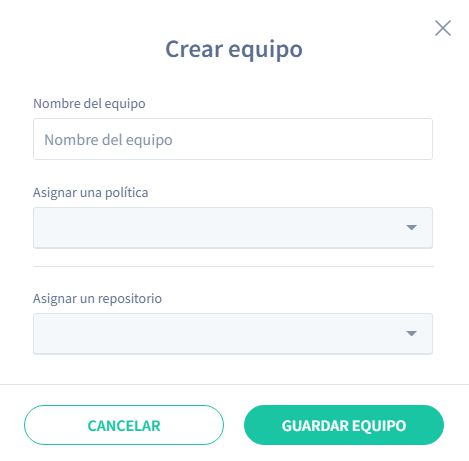
4. Use the Assign a Policy combo box to choose the Policy for the team. All devices on your Computer will use the settings defined in the Policy (backup scheduling, data loss prevention settings, etc.).
5. Use the Assign a repository combo box to choose the storage area that will be used to store backup data for devices on your computer.
6. Click Save Equipment.
Your new equipment appears in the Equipment section of the Inventory page and the Protection page. It also appears in the list of devices on the Settings page).
7. Repeat steps 2 through 6 inclusive to create as many new computers as you need.
Creating a team from inventory:
Creating a team from the Protection page:
Creating a team from the Settings page: