
There are two types of users known in AEMM; console users and mobile users. Console users are those who can intervene and monitor mobile devices that are registered in the console, and mobile users are those who are linked in the console with their mobile device but never have direct management in the console.
List of Users
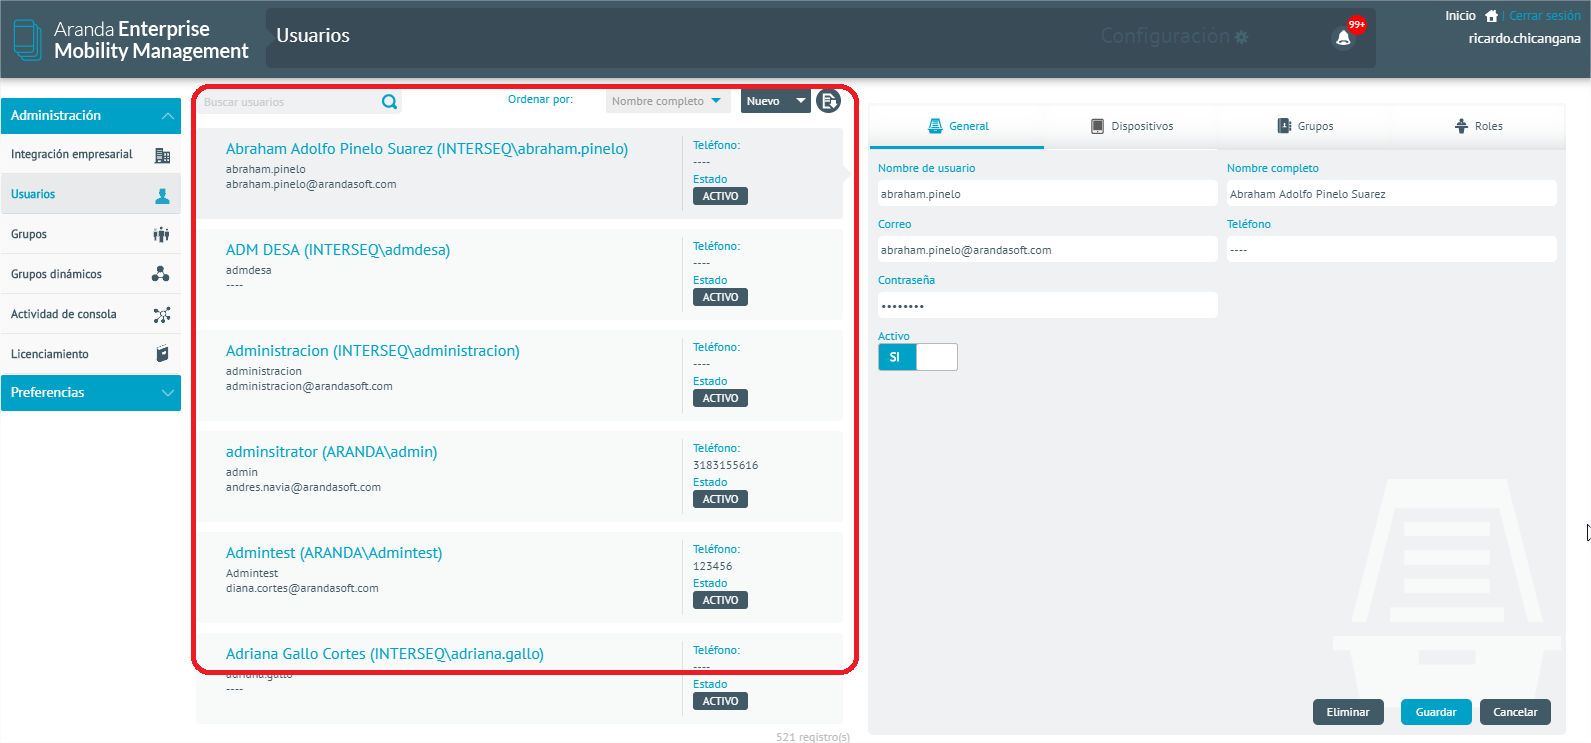
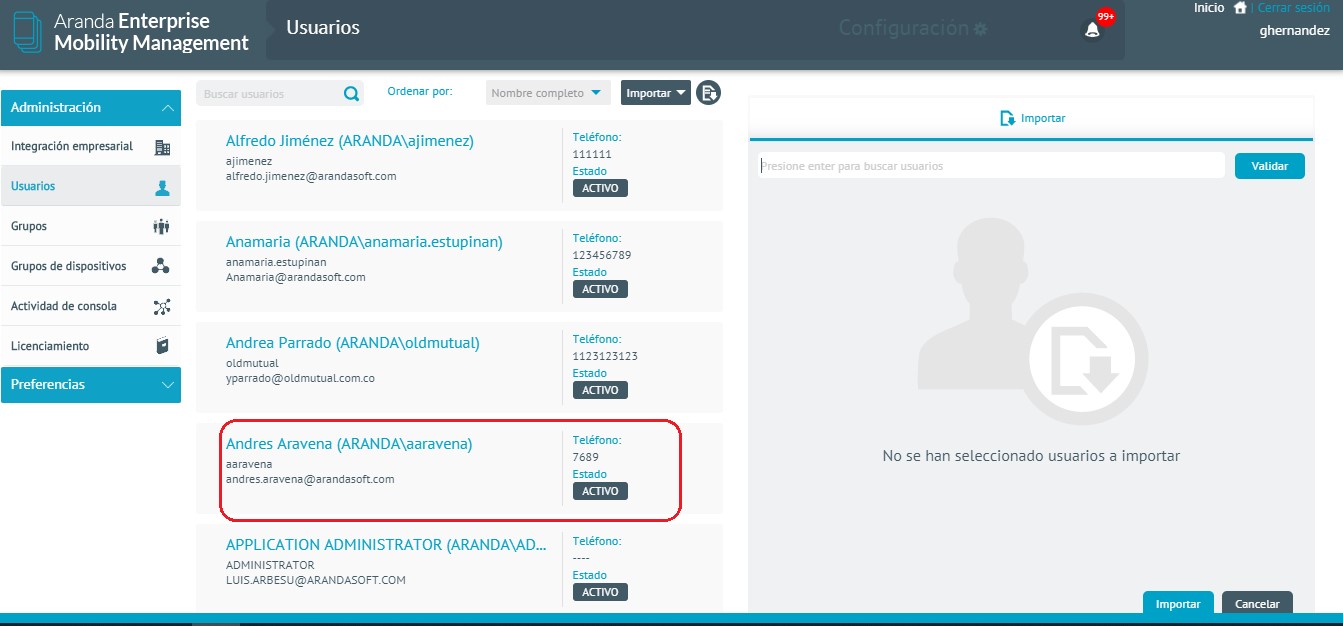
When accessing the users section, a paginated list with infinite scroll of the existing users in the system is presented.
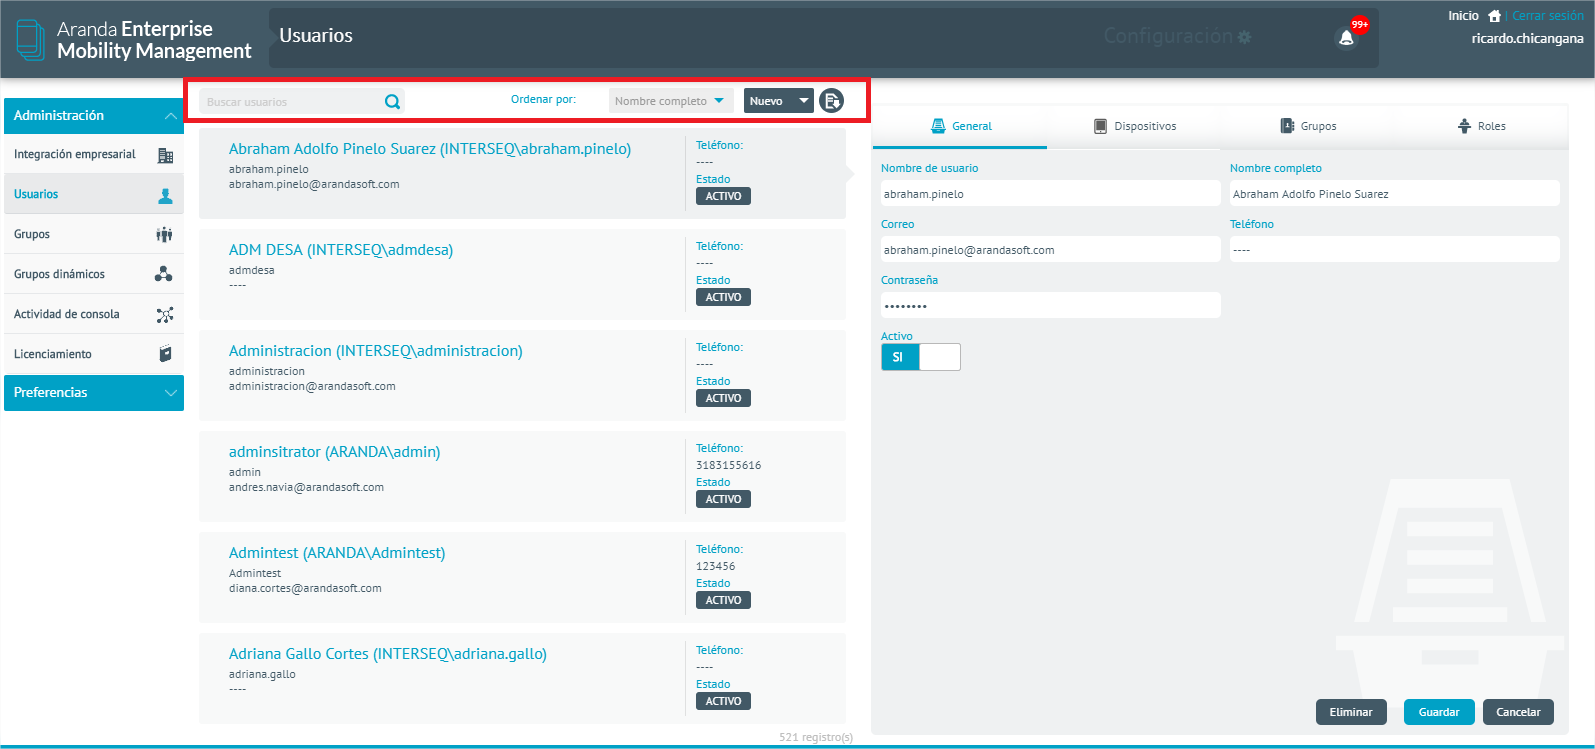
At the top of the list are the following controls:
| Controls | Description |
|---|---|
| Search: | It allows basic search for users, by their username or their full name. |
| Ordination: | Allows you to sort the list by the fields; full name, username and email; in an ascending and descending manner. |
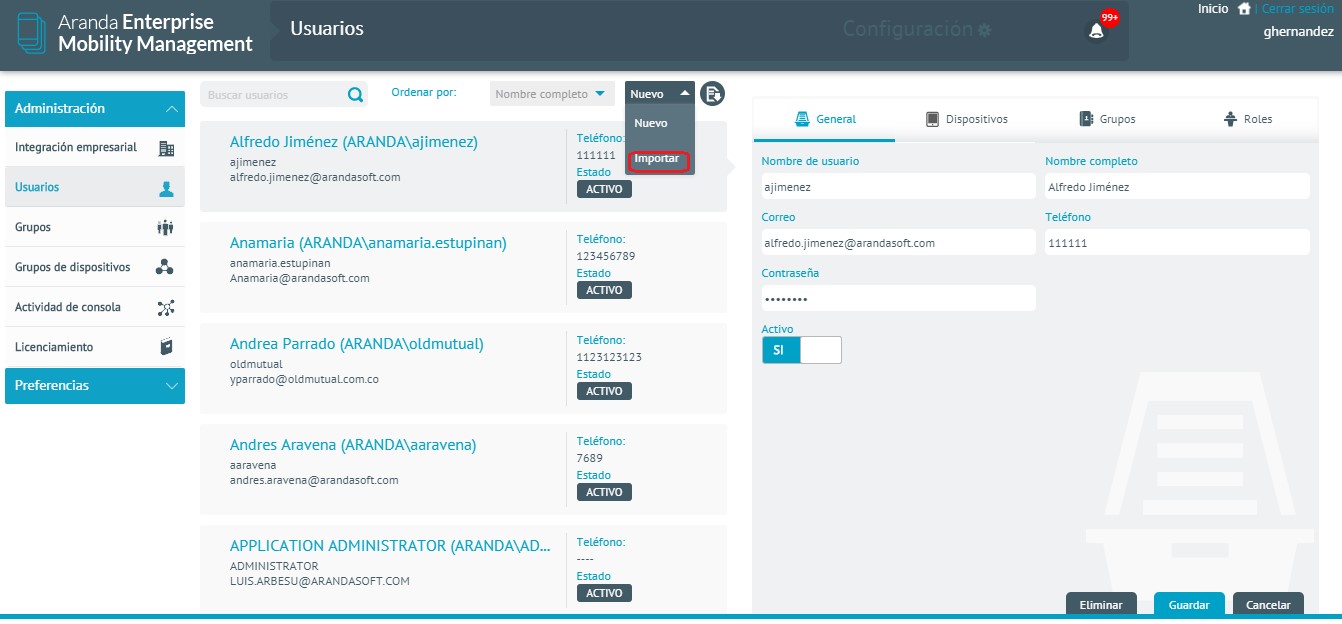
| New: | It allows the creation and import of new users. |
| Export: | Allows the export of the list to a downloadable Excel file. |
For each user, a record is presented in the list that contains the following information:
| Fields | Description |
|---|---|
| Full name: | User’s full name |
| Username: | Username used to authenticate to the system. |
| Mail: | User email, used to send system notifications. |
| Telephone: | User’s phone number. |
| State: | The user’s status before the system can be Active or Inactive. |

New User Creation
Console users are created as local users and are required when they are not obtained from the active directory, this type of user is allowed to make modifications to their information.
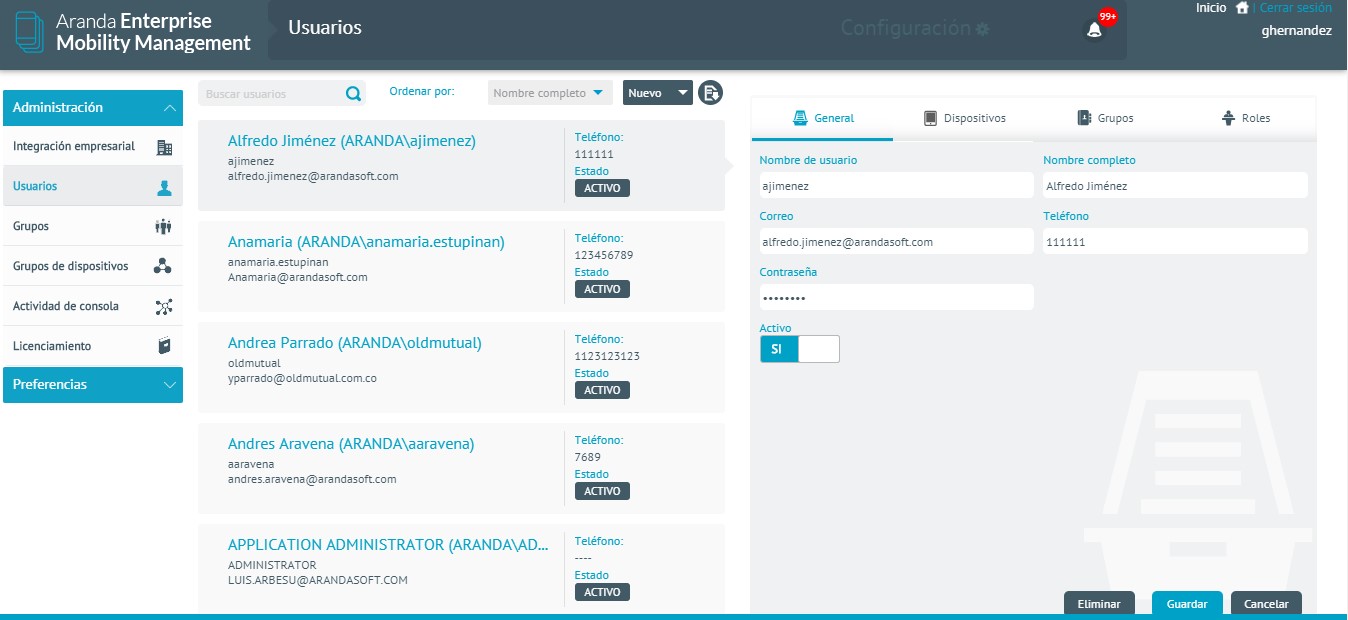
To create a user, go to configuration > then to Users and click New
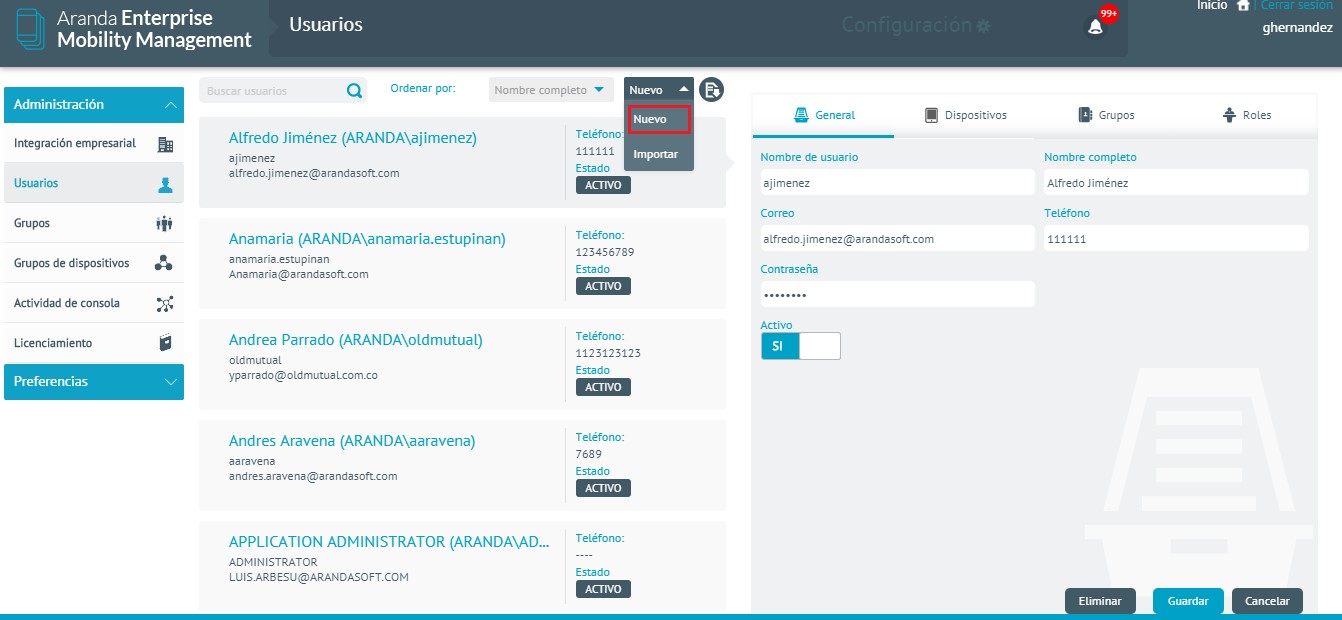
Enter the required information:
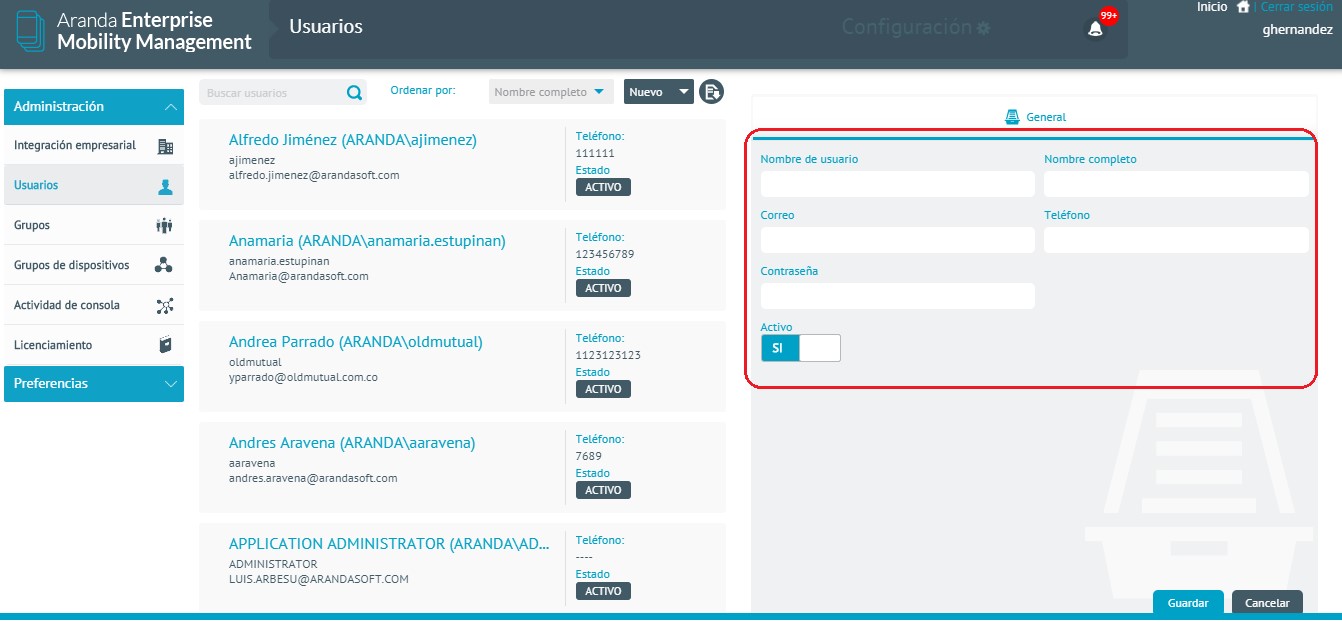
Click Save
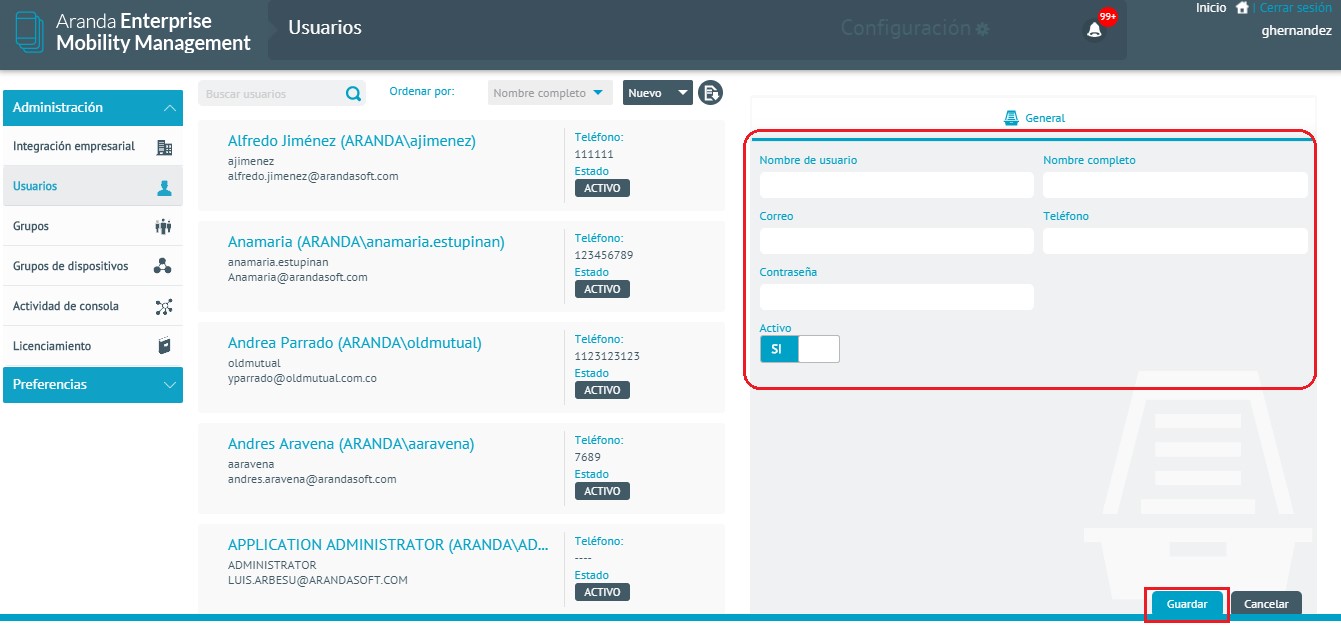
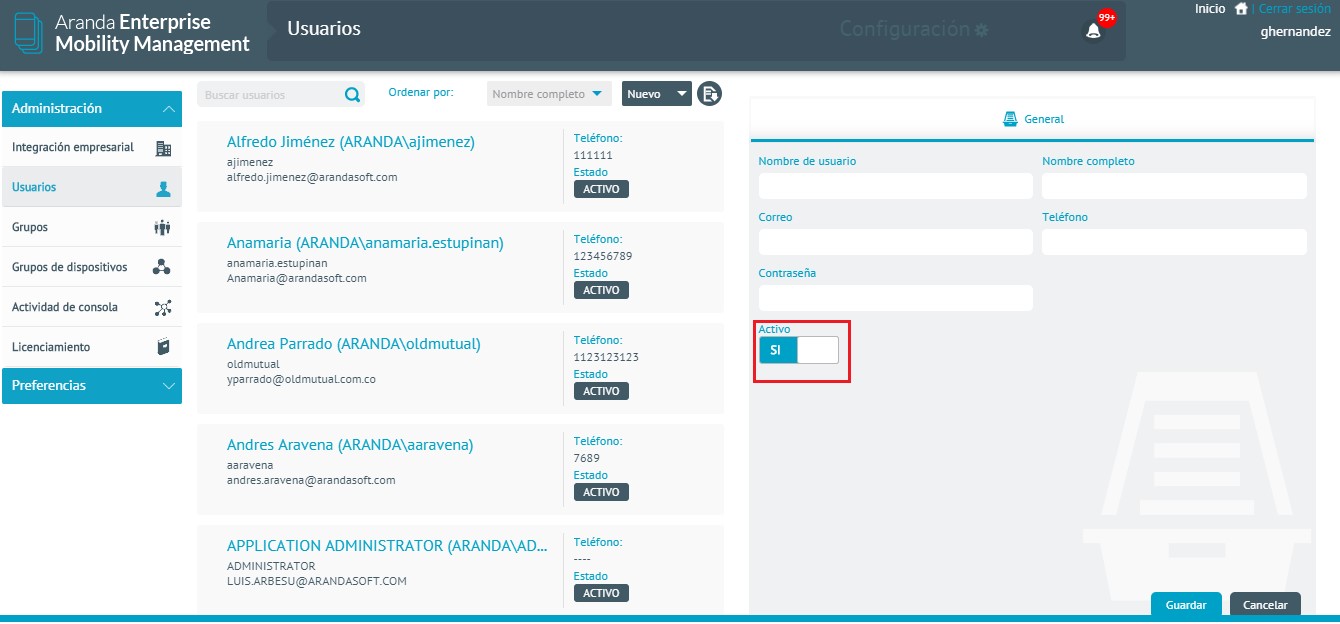
Users can be stored as active and inactive. (If the user is is idle has no interaction with any process)
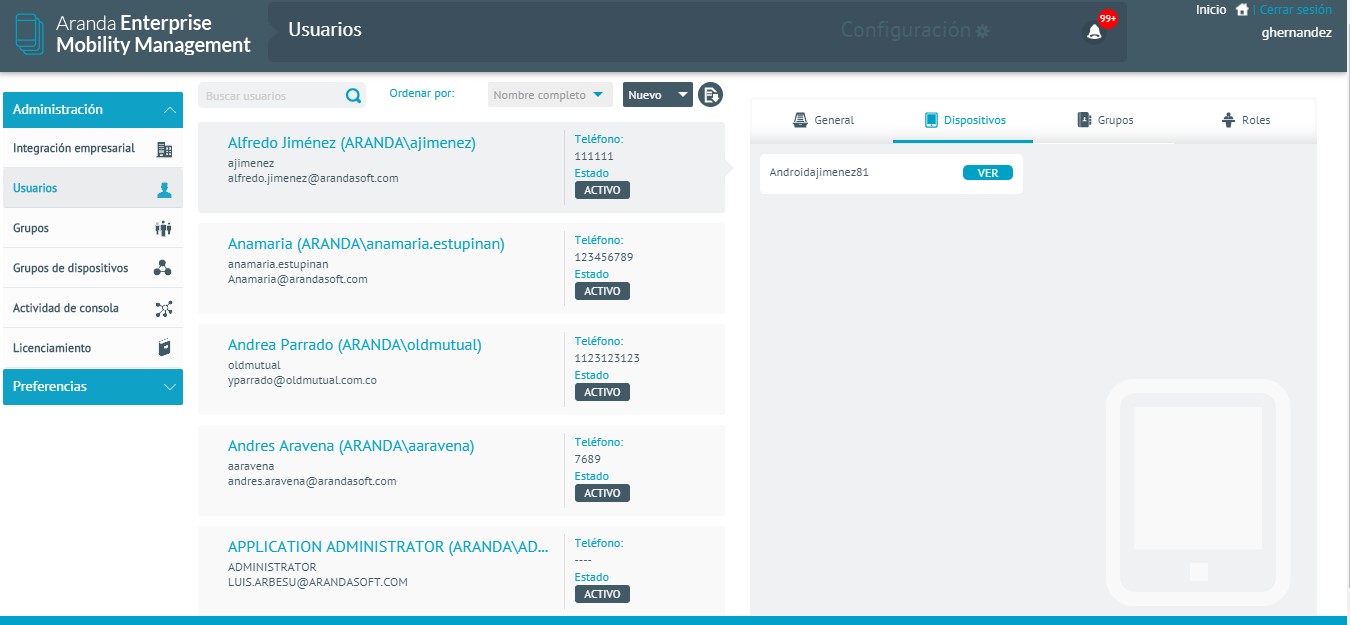
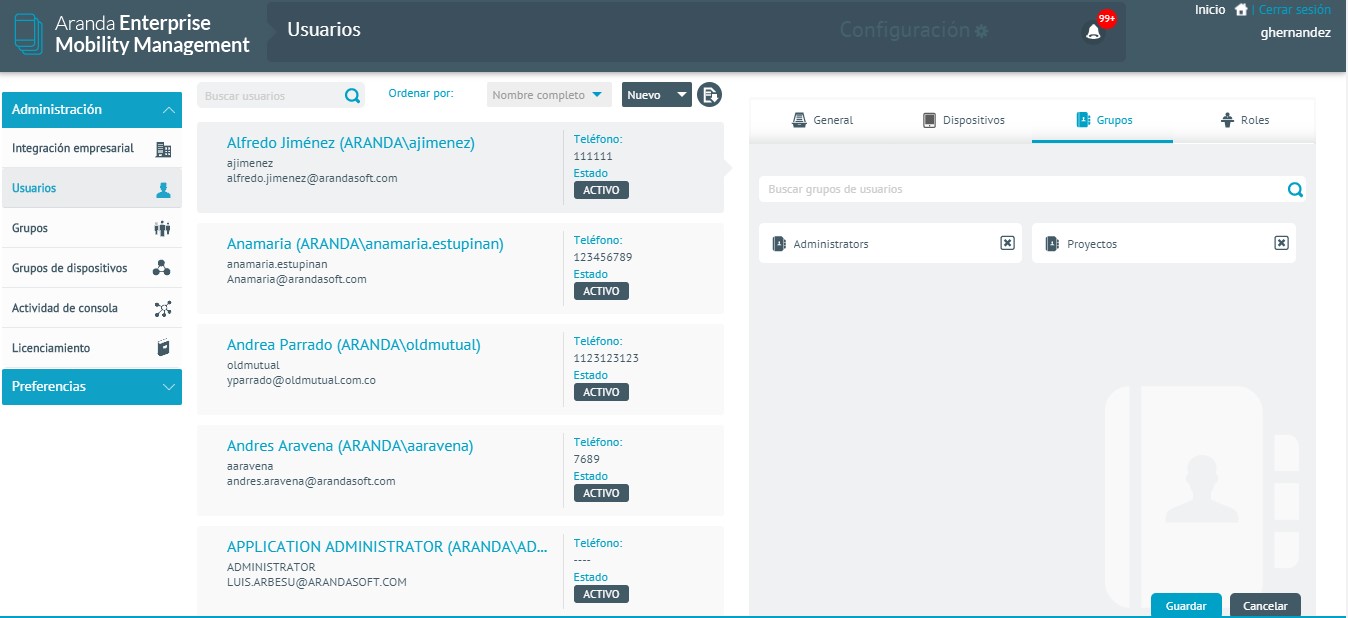
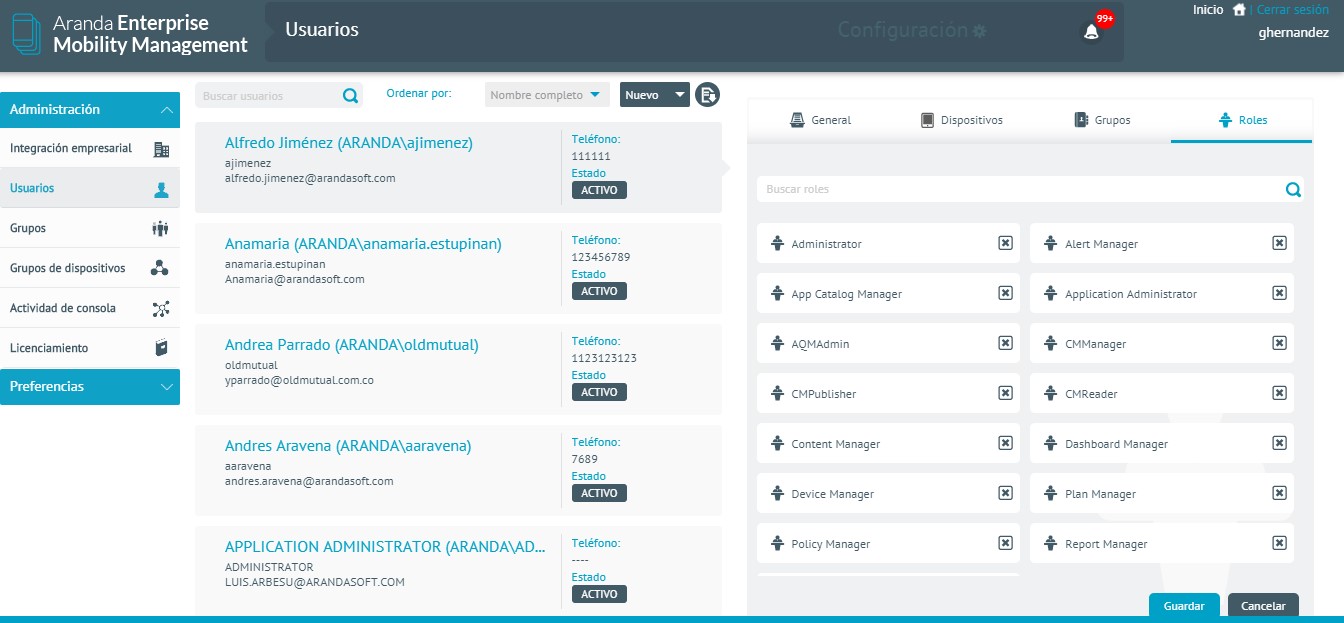
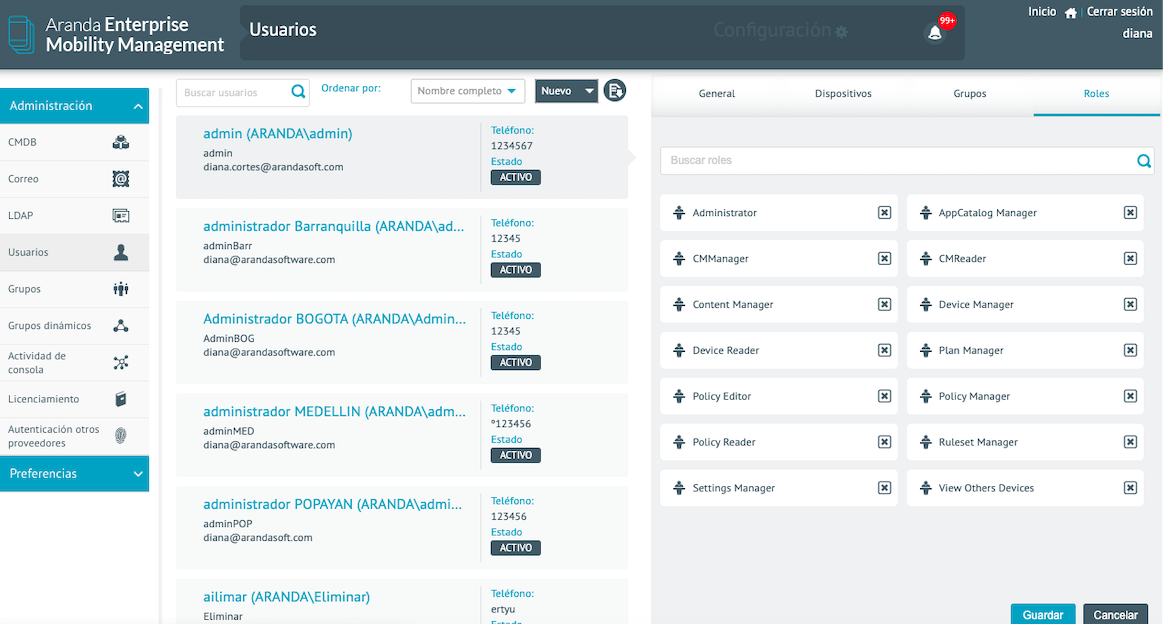
In the detail of each user you can find the sections of General, Devices, Groups, and Roles described below.
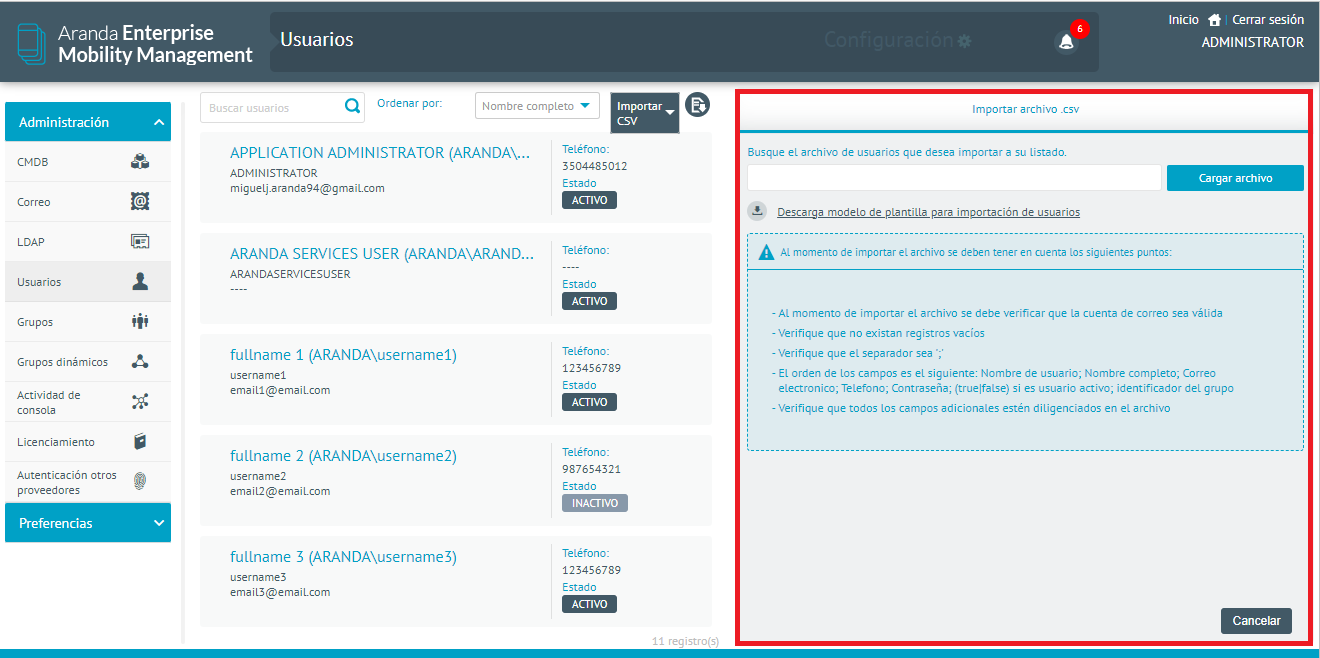
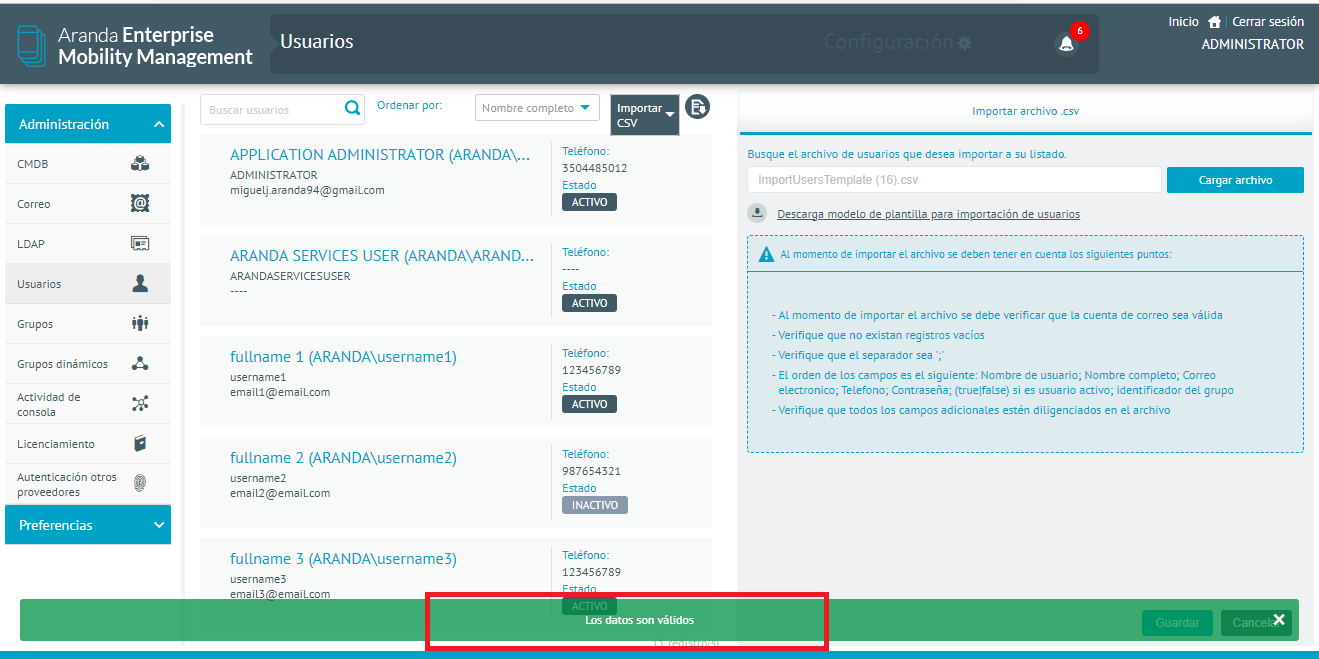
Bulk user creation
-
For bulk user creation, log in to the AEMM Admin Console, in the Administration section of the main menu, select the Users option; In the information view, select the Import CSV.
-
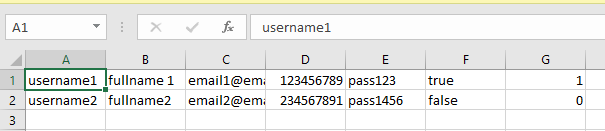
This action downloads a .csv file that will serve as a guide template for completing the information required for import.
-
In the Import Users detail view, select the Upload File button to upload the updated file.
-
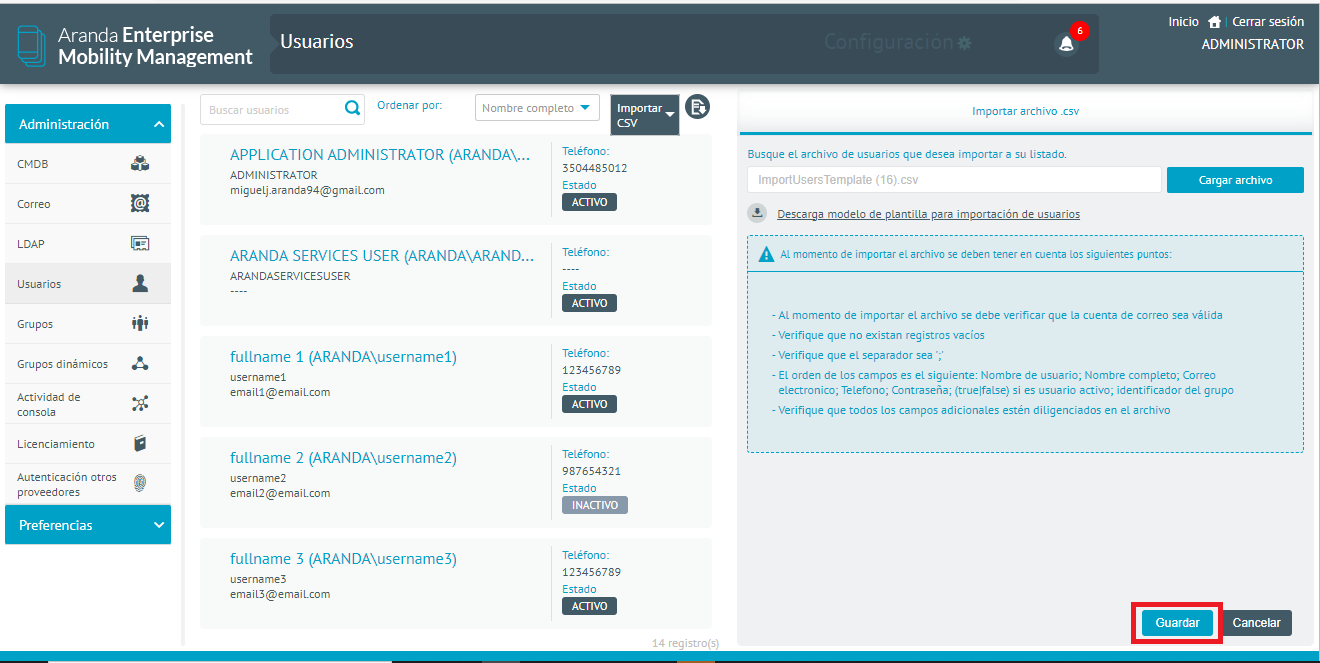
After validating the file, click the save button.
-
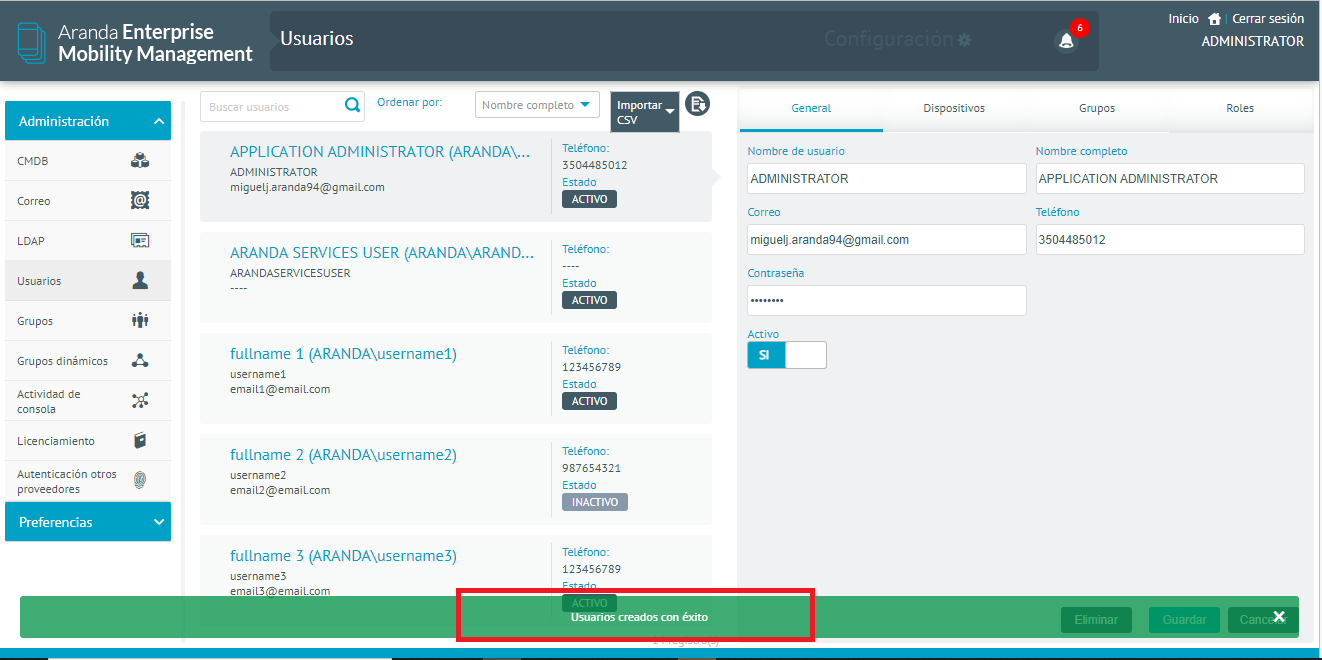
At the end of the process, you will be able to see a message indicating the success of the process.
General
Information such as username, full name, email, telephone, and password. The user can only be deleted if the user is not deleted is associated with groups.
Devices
The devices that the user has linked are displayed.
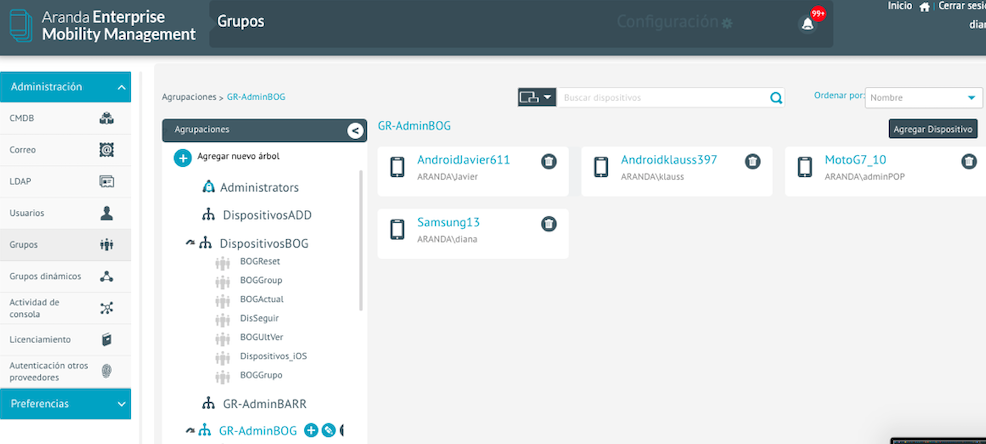
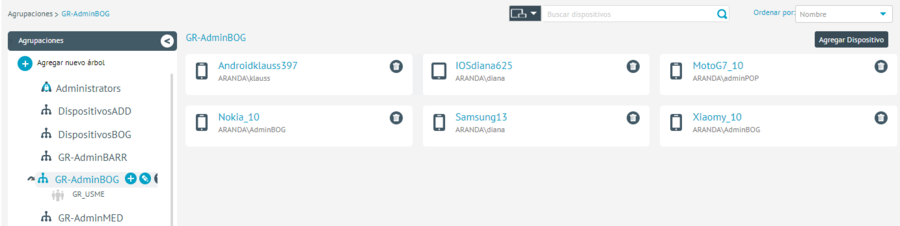
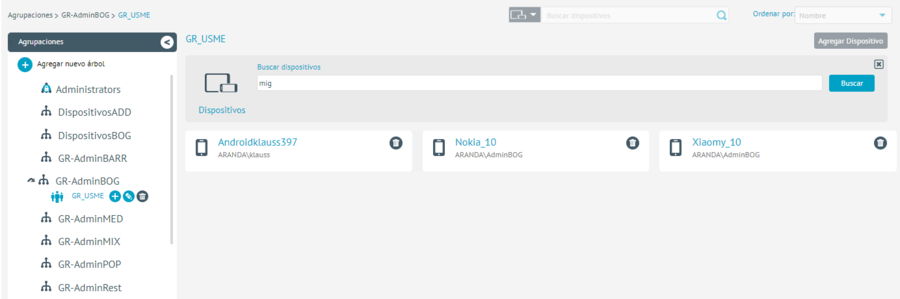
User groups
It contains the groups to which the user is associated.
Roles
Indicates the roles or permissions the user has for access to the console. There are 11 types of roles.
Users can also be classified as local and directory users active (For more information, please refer to the Error! The Origin of the reference. Enterprise Directory Settings).
Security and access control using roles
Description of the different types of Roles
Description
For the use and administration of the web console, a set of Default roles that allow you to segment the different functionalities available within the console, creating the ability to allow or restrict access to each of them. There are 12 types of roles:
| Roles | Description |
|---|---|
| Device Manager: | Device Manager, has permissions to view, edit, and send commands to devices. |
| Device Reader: | Device Viewer, has permissions to view information about devices. |
| Policy Manager: | Policy Manager, you have permissions to create, view, edit, delete, and apply policies. |
| Policy Editor: | Policy Editor, has permissions to view and edit policies. |
| Policy Reader: | Policy Viewer, has permissions to view policy information. |
| Ruleset Manager: | Rule Set Manager, has permissions to create, view, edit, and delete rule sets. |
| AppCatalog Manager: | App Catalog Manager, has permissions to import, view, and delete apps from the catalog. |
| Content Manager: | Content manager, has permissions to create, view, edit and delete content. |
| Plan Manager: | Consumption Plan Manager, has permissions to create, view, edit, delete, and apply consumption plans. |
| Settings Manager: | Configuration Manager, has permissions to edit and apply system configurations. |
| Administrator: | General administrator of the application, has all the permissions of the previous roles. |
| View Others Devices: | Permission that allows the user to view all devices or only the associated group; With this role, you can list all the devices associated with the group/user or segment the data visualization if required, applying specific management actions to each of them. To make use of this role, see the Configuring View Other Devices. |
Each role is assigned a set of permissions that restrict or allow the
access to each functionality, the way to associate these behaviors with the
users of the platform is through the relationship that can be established
between users and roles, or between roles and user groups (the
which in turn are made up of users who inherit the roles of the group or
groups to which they belong).
For the assignment or modification of the roles that a user has, there are 2 Forms:
Assign them to the user directly, or assign them to a group of users and have them the user belongs to the group.
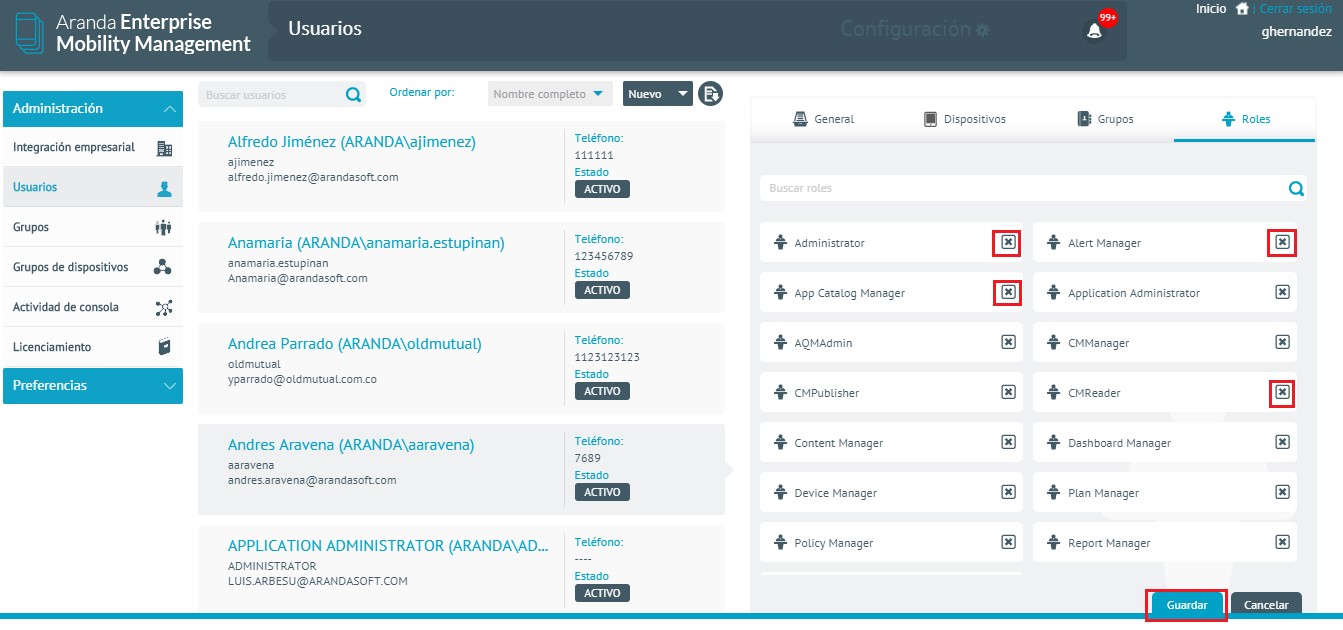
Assigning roles to a user
Enter the configuration at the top right of the console.

Then enter the General from the Left menu and then to Users.
Select the user by clicking on the list of users, if necessary you can search or sort the list of users to facilitate the location of the user to whom you want to assign the roles, then click on the Roles in the right pane.
In the search box you can enter the search text to get the role to be assigned to the user, repeat this procedure for each role and then click on the Save.
To remove a role from a user, it can be deleted by clicking on the right icon of each role associated with the user and then clicking on the Save in the right pane.
Assigning roles to a user group
Assigning roles to a user group is done from the user groups section of the configuration interface. Users who belong to a user group inherit their roles (they are even displayed to the user in the Roles in an additive way with the roles that have been directly associated with the user) however the roles of a group are not inherited by the sub-groups contained in it.
Select the group to which the roles are to be added and click Edit.
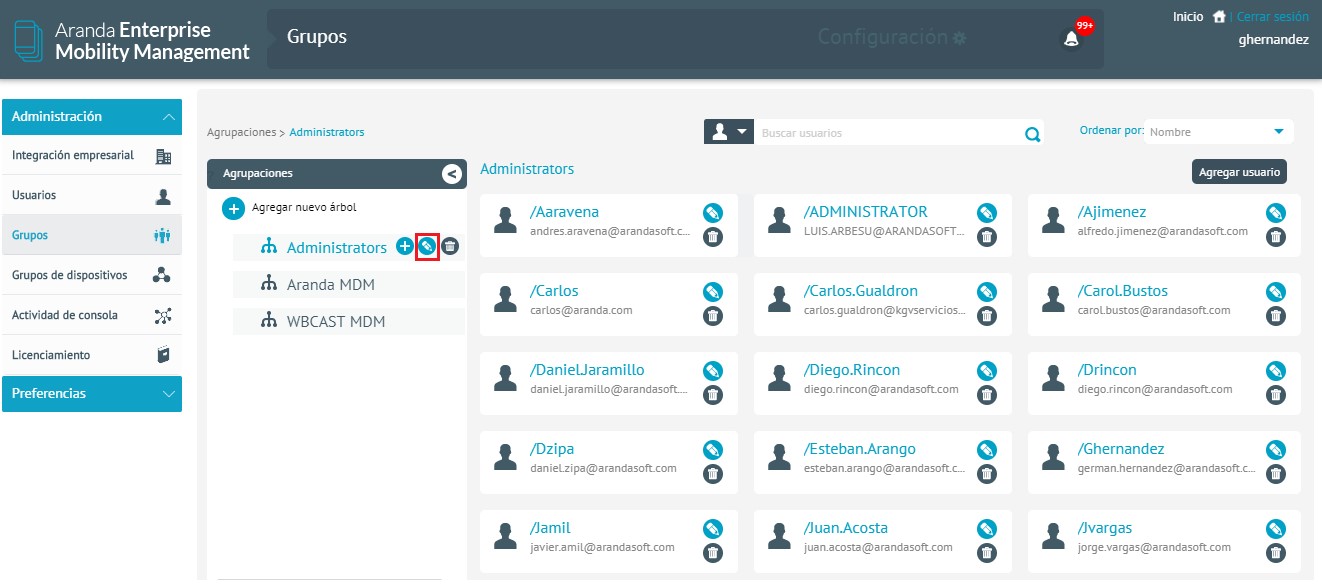
Select the roles to be added and click Save.
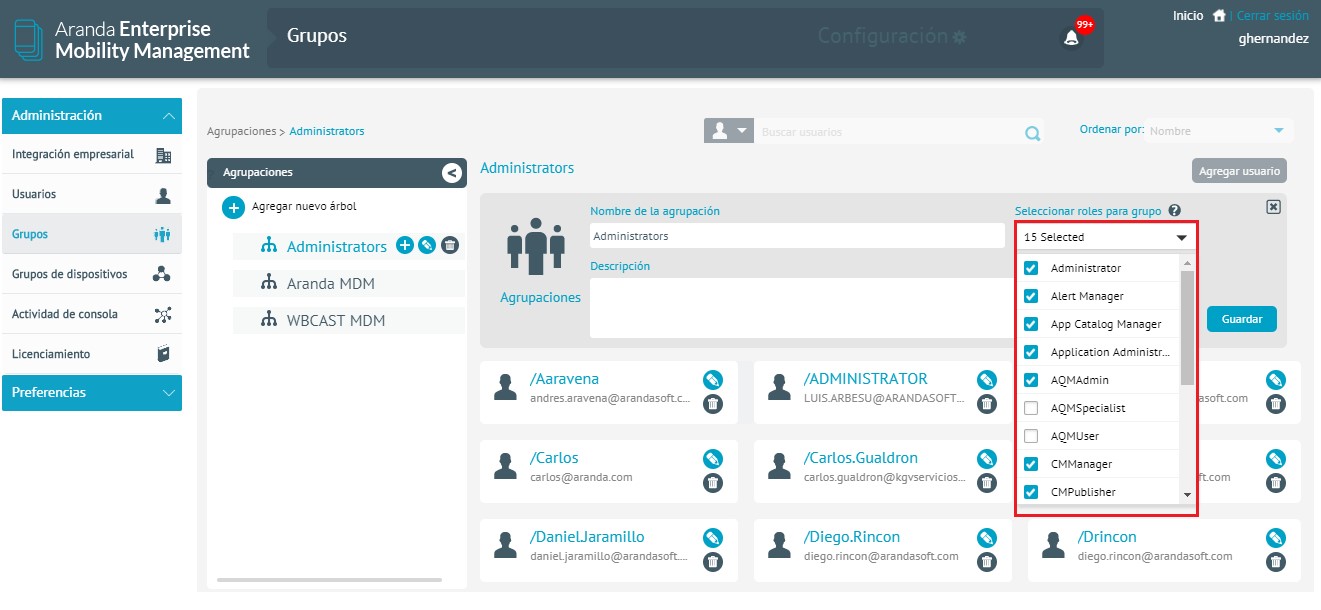
To remove a role from a group, you must click Edit.
Remove the Check check box for the role you want to remove, and then remove Click Save.
⚐ Note: The action of assigning roles to a group is only possible in groups created in the AEMM console. Groups imported in Active Directory sync will not be able to manage roles. The administrator should keep in mind that when creating a default group, the View other divices role check is to display all the data.
Configuring View Others Devices
Description: The console administrator will be able to configure the display of the devices that the user can manage from AEMM. You will be able to configure restrictions to disable full viewing of all devices, segment viewing according to need, as well as grant full viewing permission for linked devices. The step by step is described below:
- Configuration of users by groups:
If the administrator requires the console user to view all devices, you should be aware of:
- When creating a group, turn off the “View Other Devices” role
- Associate the users and/or devices you will have access to manage to the group; Thus, the user will only be able to perform management actions on the configured devices:
- Association by user: When you associate a user with the group, automatically, the devices linked or associated with the user are part of the group.
- In the Users menu, when selecting a user, in the Devices section you will be able to view the devices linked to the user and/or that are under your responsibility.
- Associate the user with a group to restrict the display of the data:
By default, the devices that are under the user’s responsibility are associated with the group, that is:
3- Association by device: The device is directly associated with the group.
- Configuration to users without restriction:
If the administrator requires the console user to view all devices, the following should be considered:
- When you create a group, the system automatically activates the “View Others Devices” role
- When you create a user and associate administrator role, you associate all roles to view and perform actions.
| Roles | Item permissions |
Importing Users
Log in to Users and select Import
Enter and select the username (users who are already imported are accompanied by a box in the image).
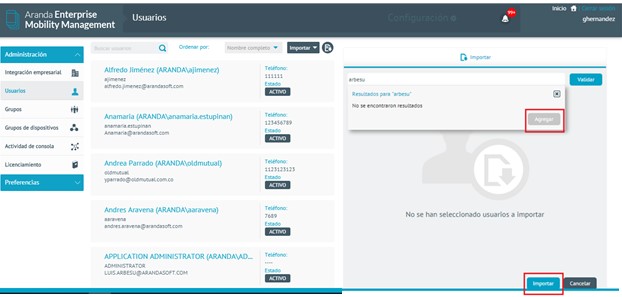
Click on the option Import.
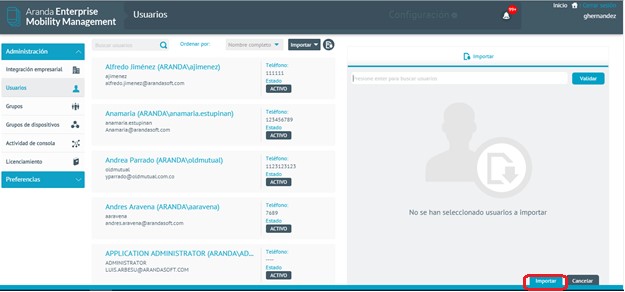
The user is successfully imported.
User Status
A user or group can have two states (Active and Inactive), if the user or group is inactive it has no interaction with any process in AEMM.
Inactive User: If the user belongs to Active Directory, it is not possible to make changes to the status.
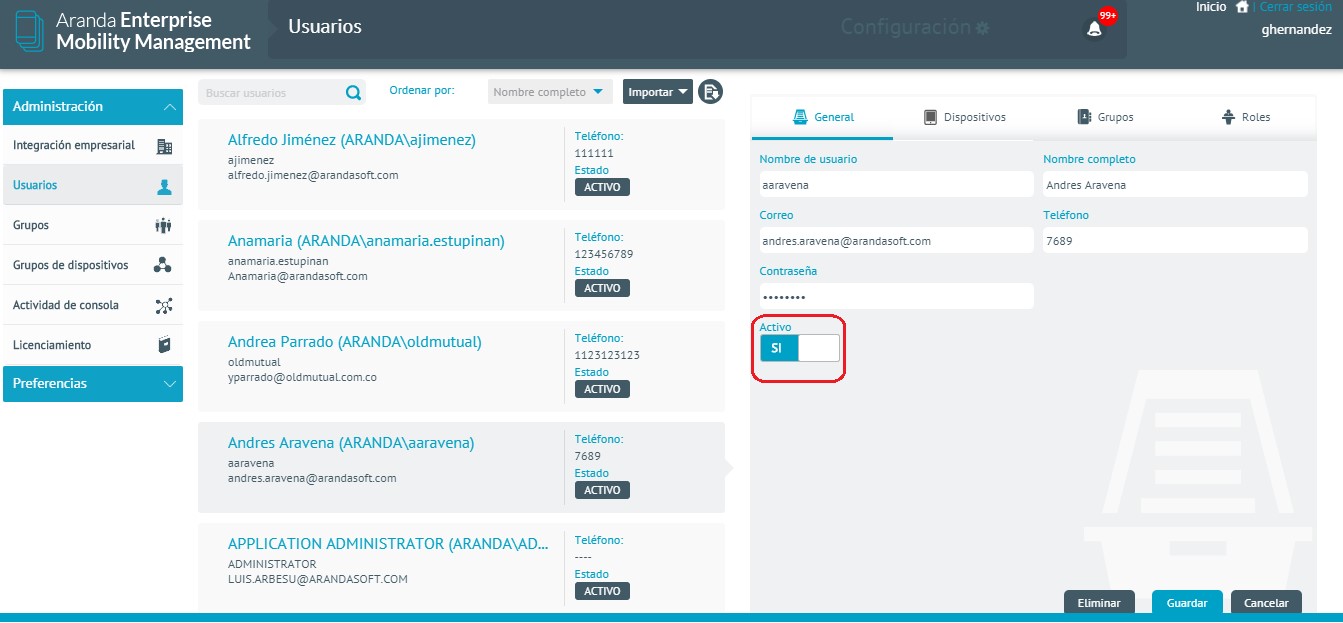
If the user is listed as a local user, they can change their status.