
AEMM provides a mechanism to use external URIs to store installation files to provide faster download speed and availability for mobile devices.
The following is an example of creating and using an external URI using a Microsoft Azure storage account as a store.
Preconditions:
- An active account with an available balance in Microsoft Azure
- APK file of the app in question
- Application Package Name
File upload and publishing process to Microsoft Azure
- Log in to Microsoft Azure (https://portal.azure.com/#home)
- Click on the option to create a resource.
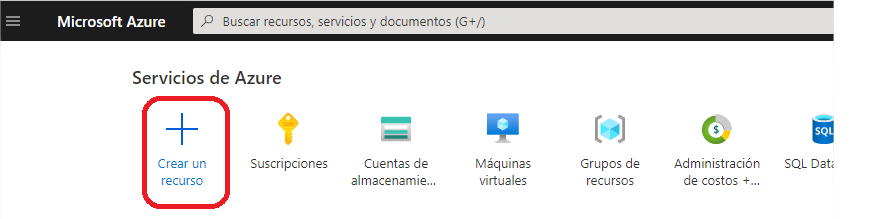
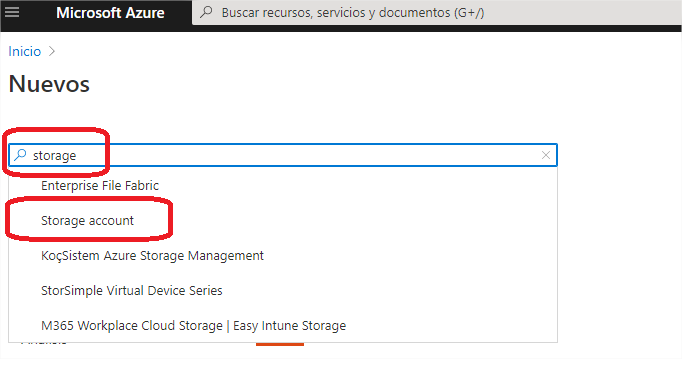
- Type the word “storage” into the resource search bar, then click “Storage Account.”
- Click on “Create”.

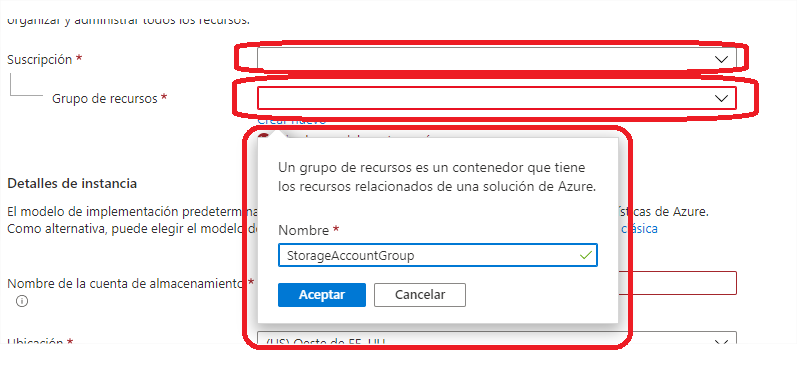
- Choose the subscription and choose or create a resource group.
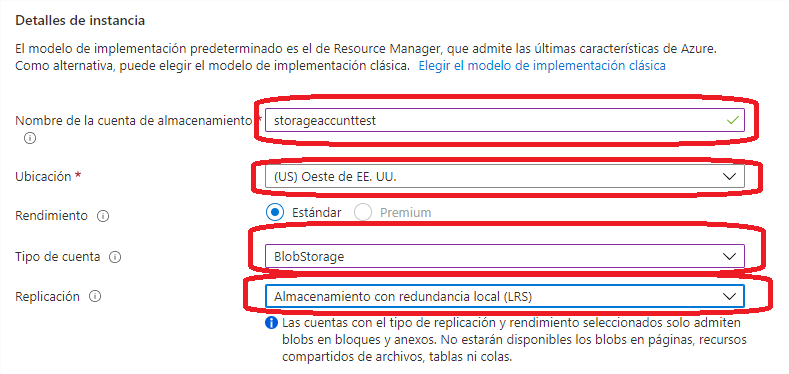
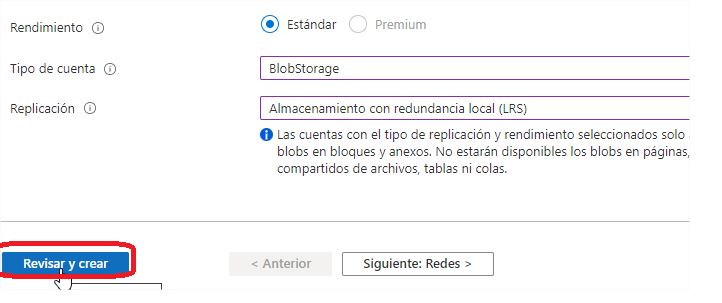
- Type in the name of the storage account, choose the location or simply leave it at the default, in the account type choose “BlobStorage”, and finally choose locally redundant replication (cheaper option), or choose the replication type at your convenience.
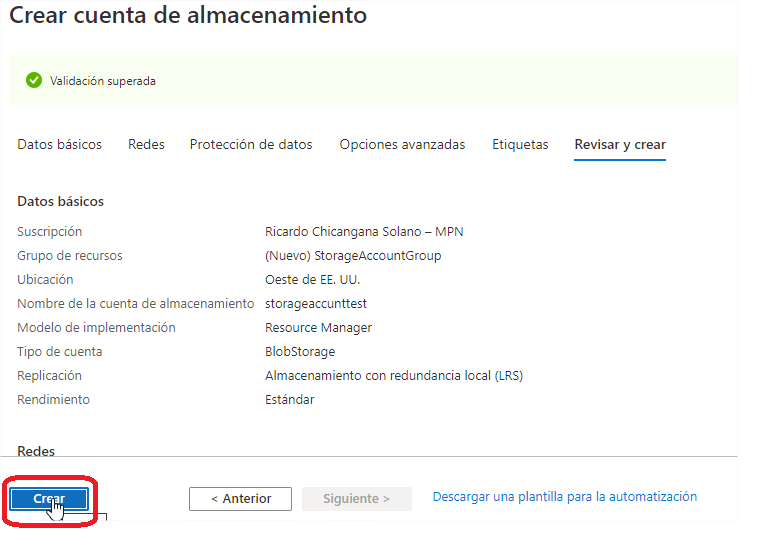
- Click “Review and Create.”
- Click “Create”.
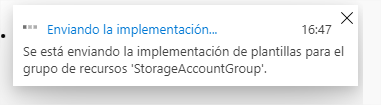
- Wait for the resource to be created.
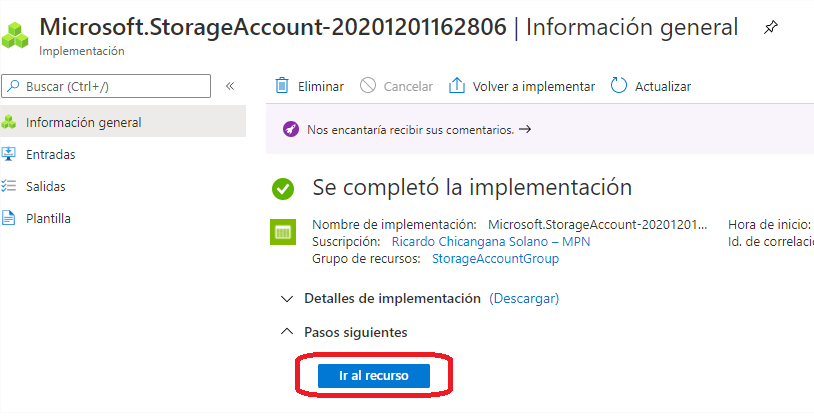
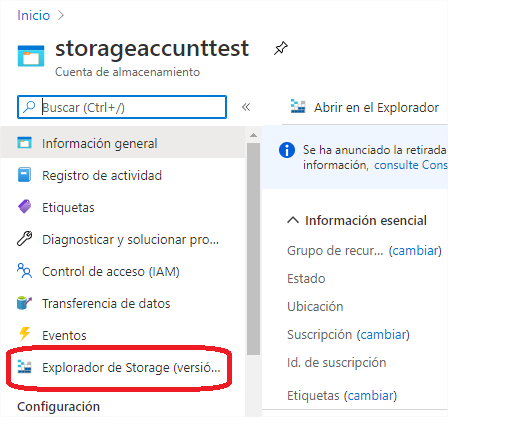
- Once the resource is created, click on “Go to Resource”.
- In the resource interface, click on “Storage Explorer”.
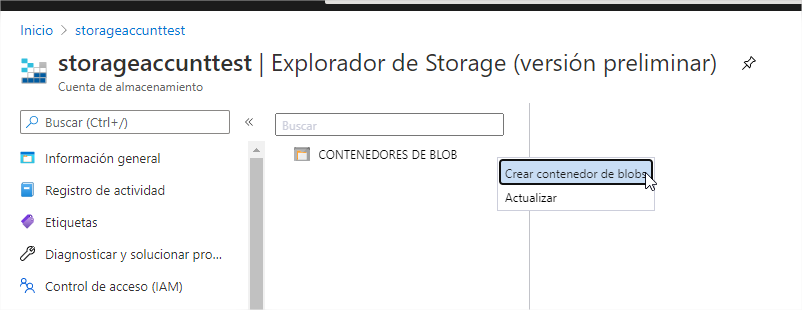
- Once in the browser, right-click on “BLOB CONTAINERS”, then in the pop-up menu click on “Create blob container”.
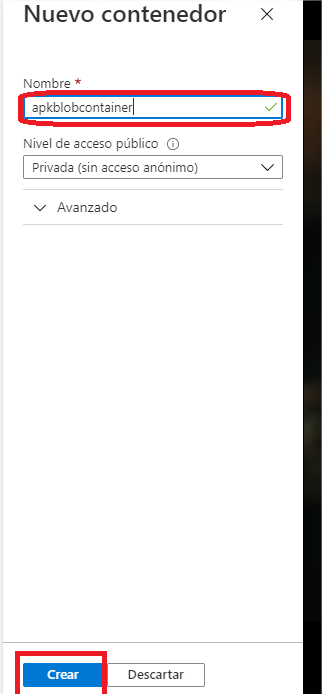
Ingrese el nombre del nuevo contenedor y luego haga clic en “Crear”
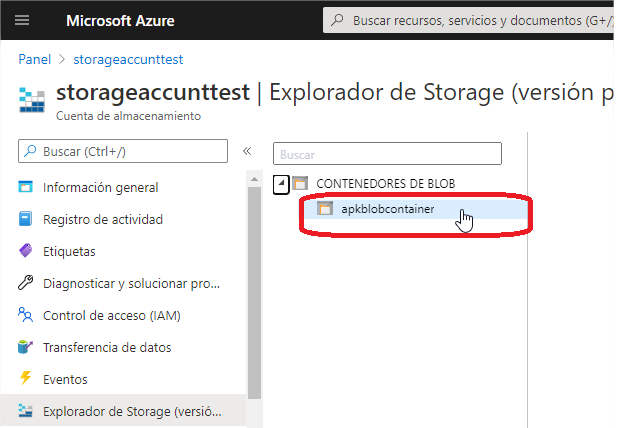
- If necessary, refresh the page to display the newly created container. Then expand the container tree and click on the one that was just created.
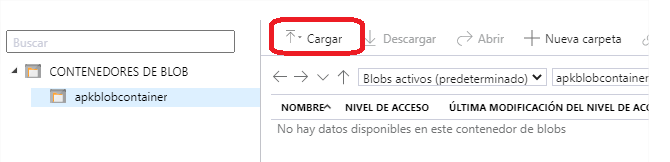
- Click “Upload”.
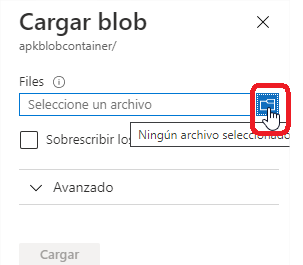
- Click the file icon.
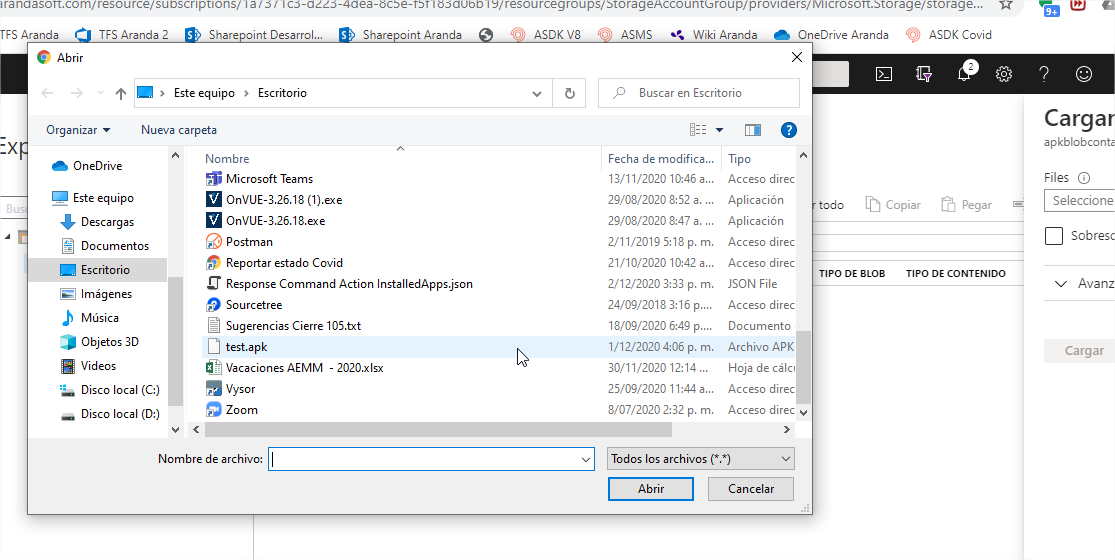
- Locate and choose the specific APK or IPA file.
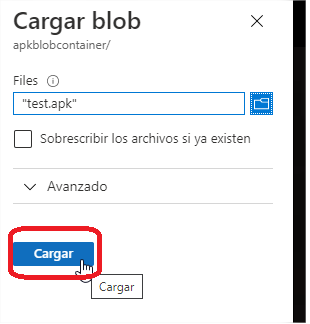
- Click “Upload”.
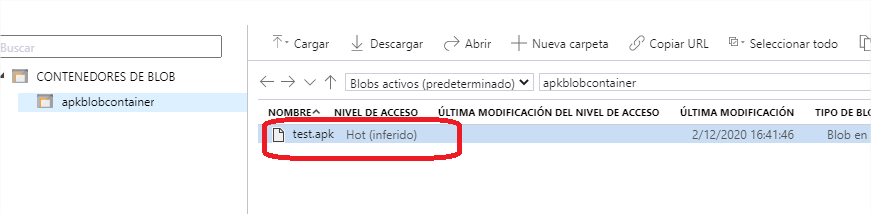
- Once the file upload is complete, it will appear in the browser.
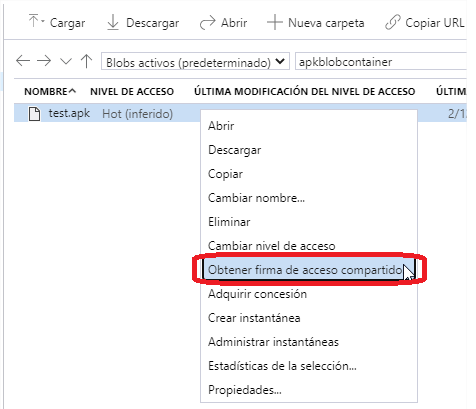
- Right-click on the uploaded file and then click “Get Shared Access Signature”.
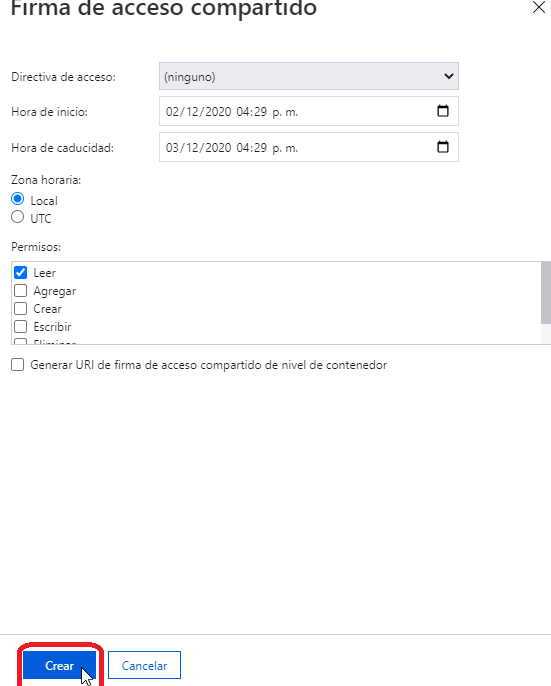
- Click on “Create”, taking into account the expiration of the link, since when the link expires it will be necessary to create a new link.
- Click Copy from the URI section.
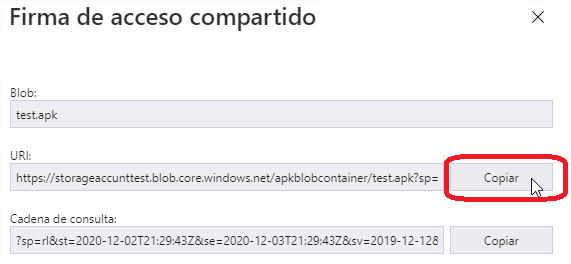
- Open a browser and paste the copied URI in the address section and check that the file download is done correctly.

Using the Uri Created in Microsoft Azure as an External Application URL
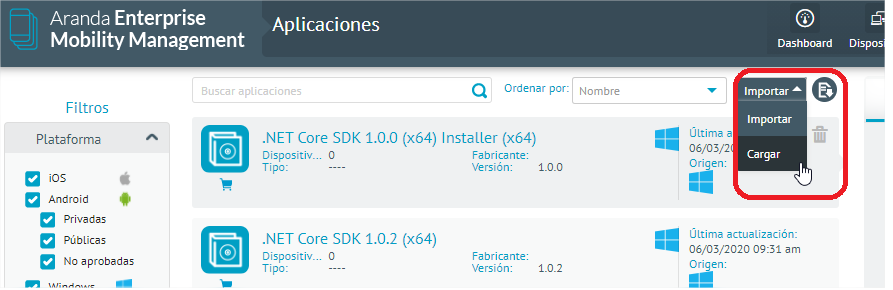
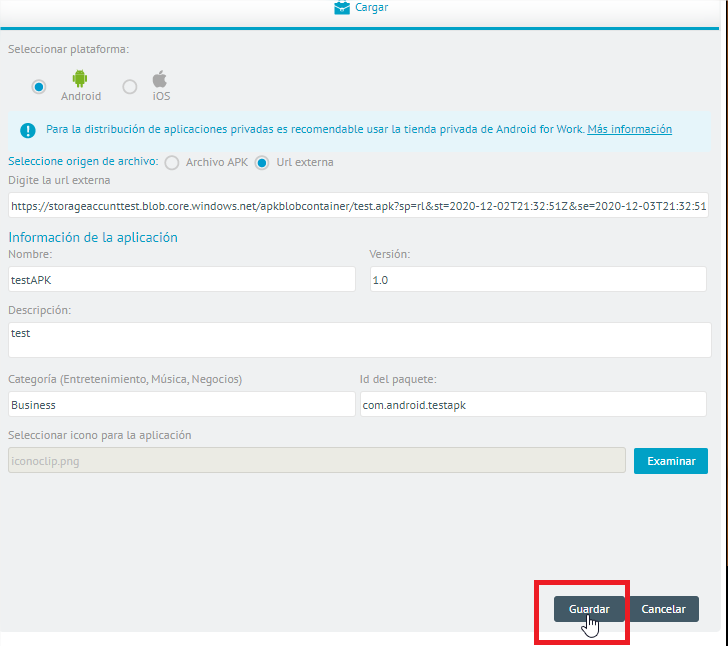
- Enter the AEMM console and go to the applications section, then click on the “Upload” option from the “Import” menu.
- Once in the details section, choose the source of the file as “External URL”.
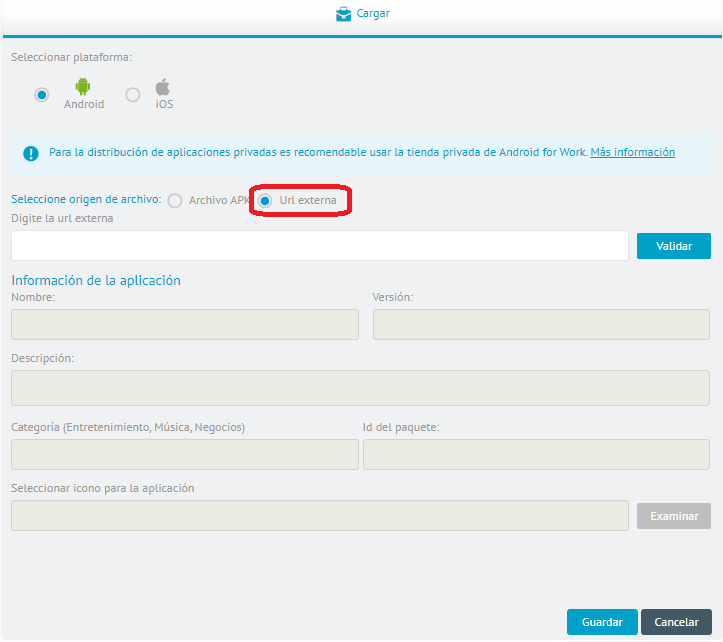
- Subsequently, paste the URI obtained in Azure, then click on the “Validate” button to proceed with the respective validation of the entered url and the upload of the data that can be extracted from the file uploaded to the url.
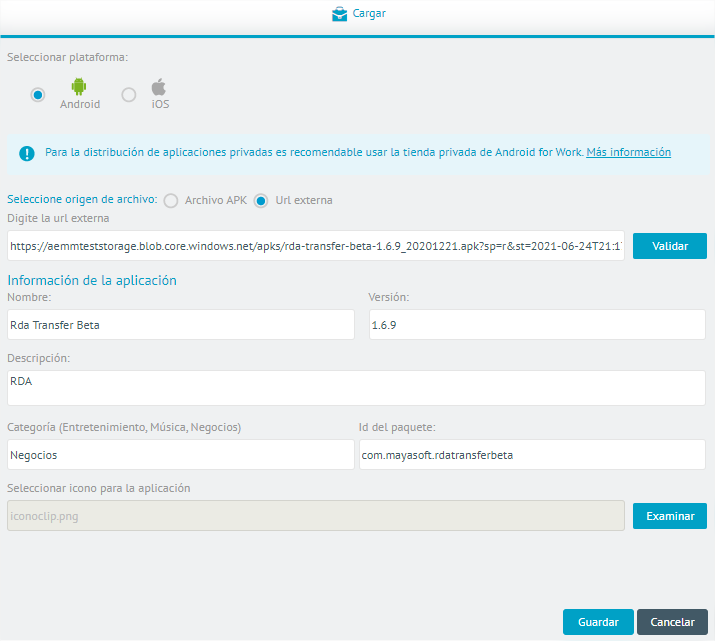
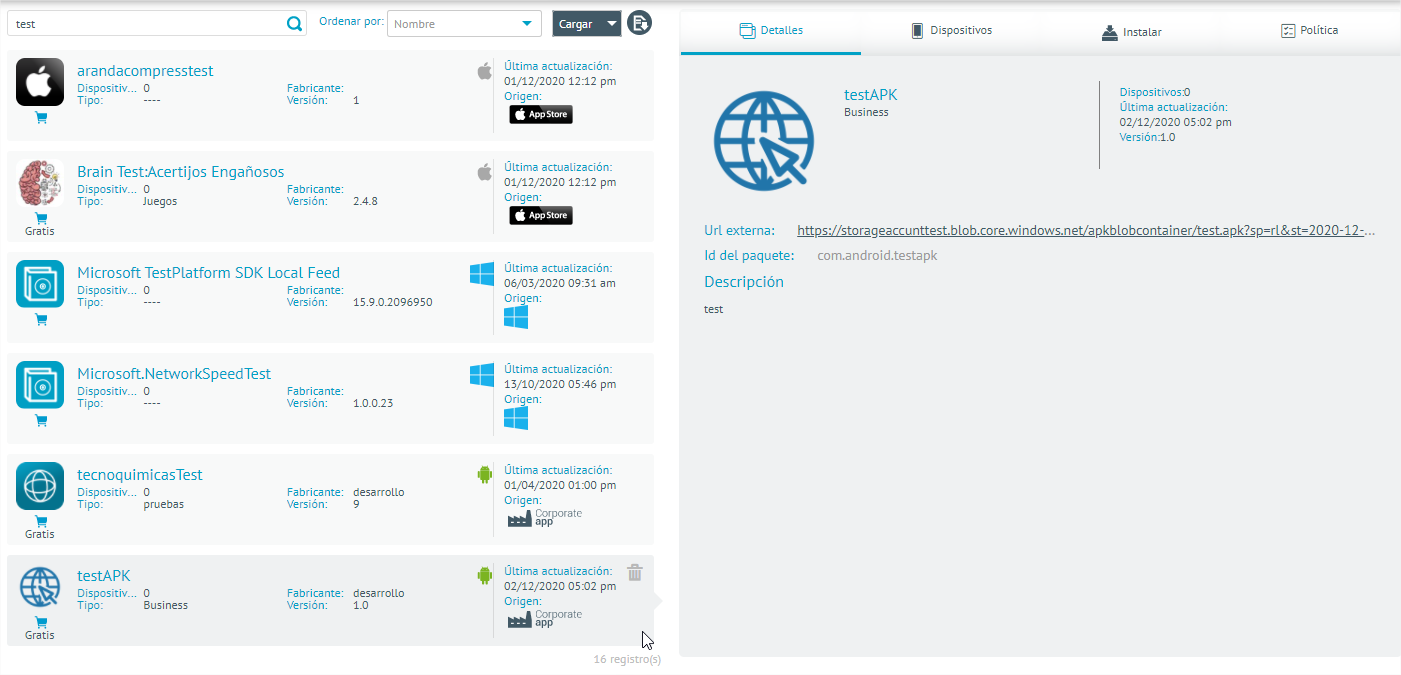
- Once the url has been successfully validated, the name, version and id data of the package will be loaded. Proceed to fill in the description data, category and select an icon for the application. Finally, click “Save” to add the app to the catalog.
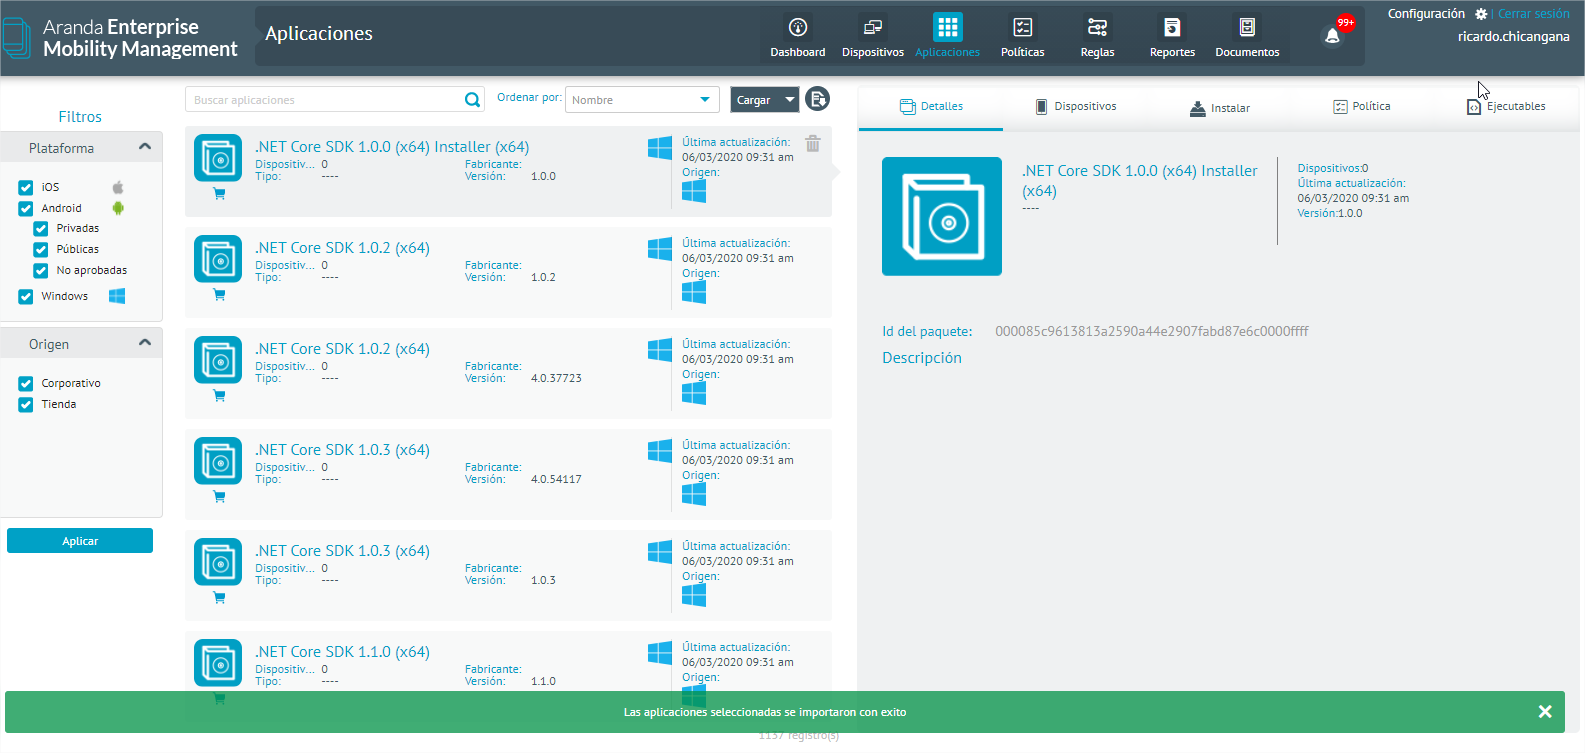
- After this process is done, you can find the created application and start its installation in the same applications section or be added as a required application in a policy.
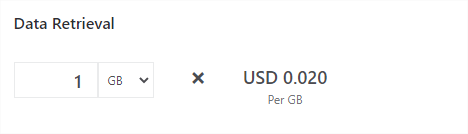
Costs
Taking the Microsoft Azure Pricing Calculator (https://azure.microsoft.com/es-mx/pricing/ alculator) as a reference, the approximate costs for each 1 GB of accumulated downloads on the file(s) is
US$0.02
In addition to the above, the approximate cost per 1000 reading operations is calculated at
US$0.5
