
Module for Apple Business Manager (ABM):
You can find the ABM functionality in the tool’s settings where you can link the AEMM device management console with the Apple Business Manager program, managing devices with the iOS operating system for the program described.
Linking AEMM to Apple Business Manager
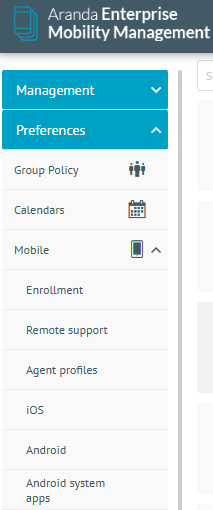
To access the Apple Business Manager settings in the AEMM console, go to the Configuration, and from the main menu select the Preferences. From the drop-down sub menu, select the option Mobile, and in the following menu select the ios.
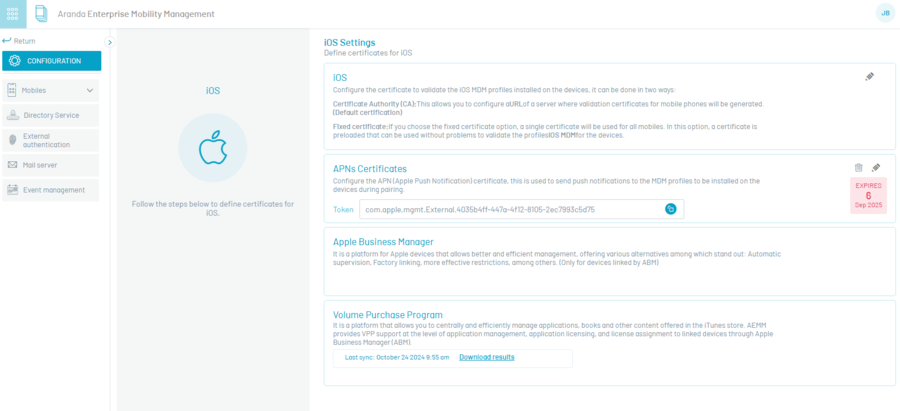
In the iOS device settings window, click the NEW on the Apple Business Manager tab
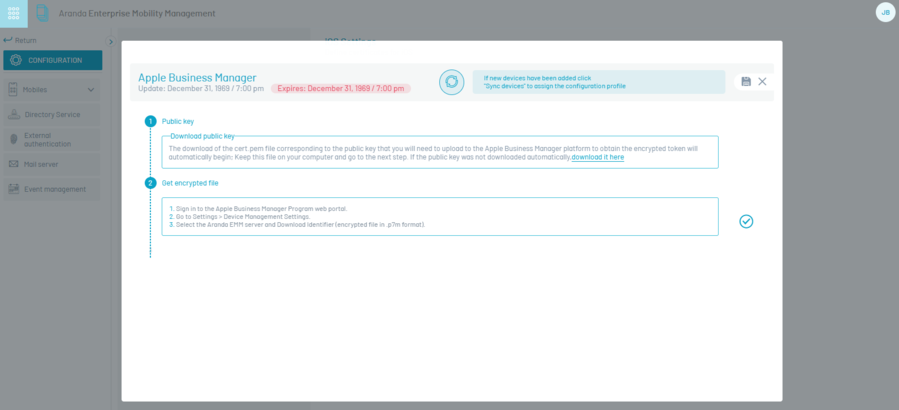
The setup process consists of three steps:
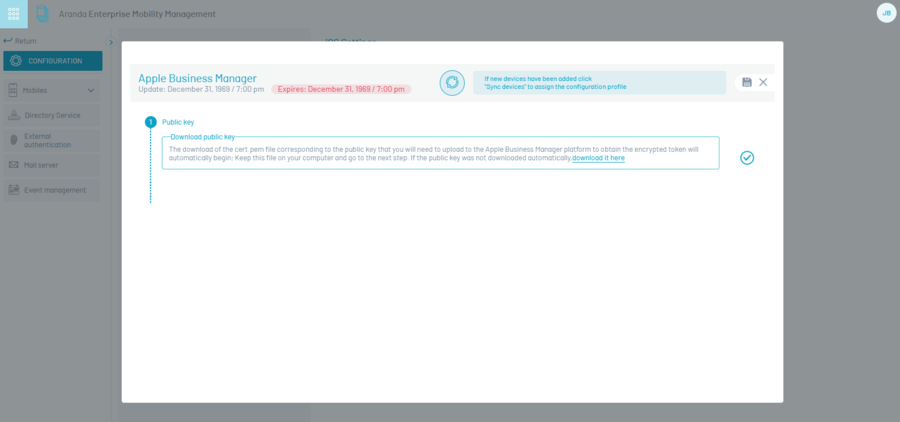
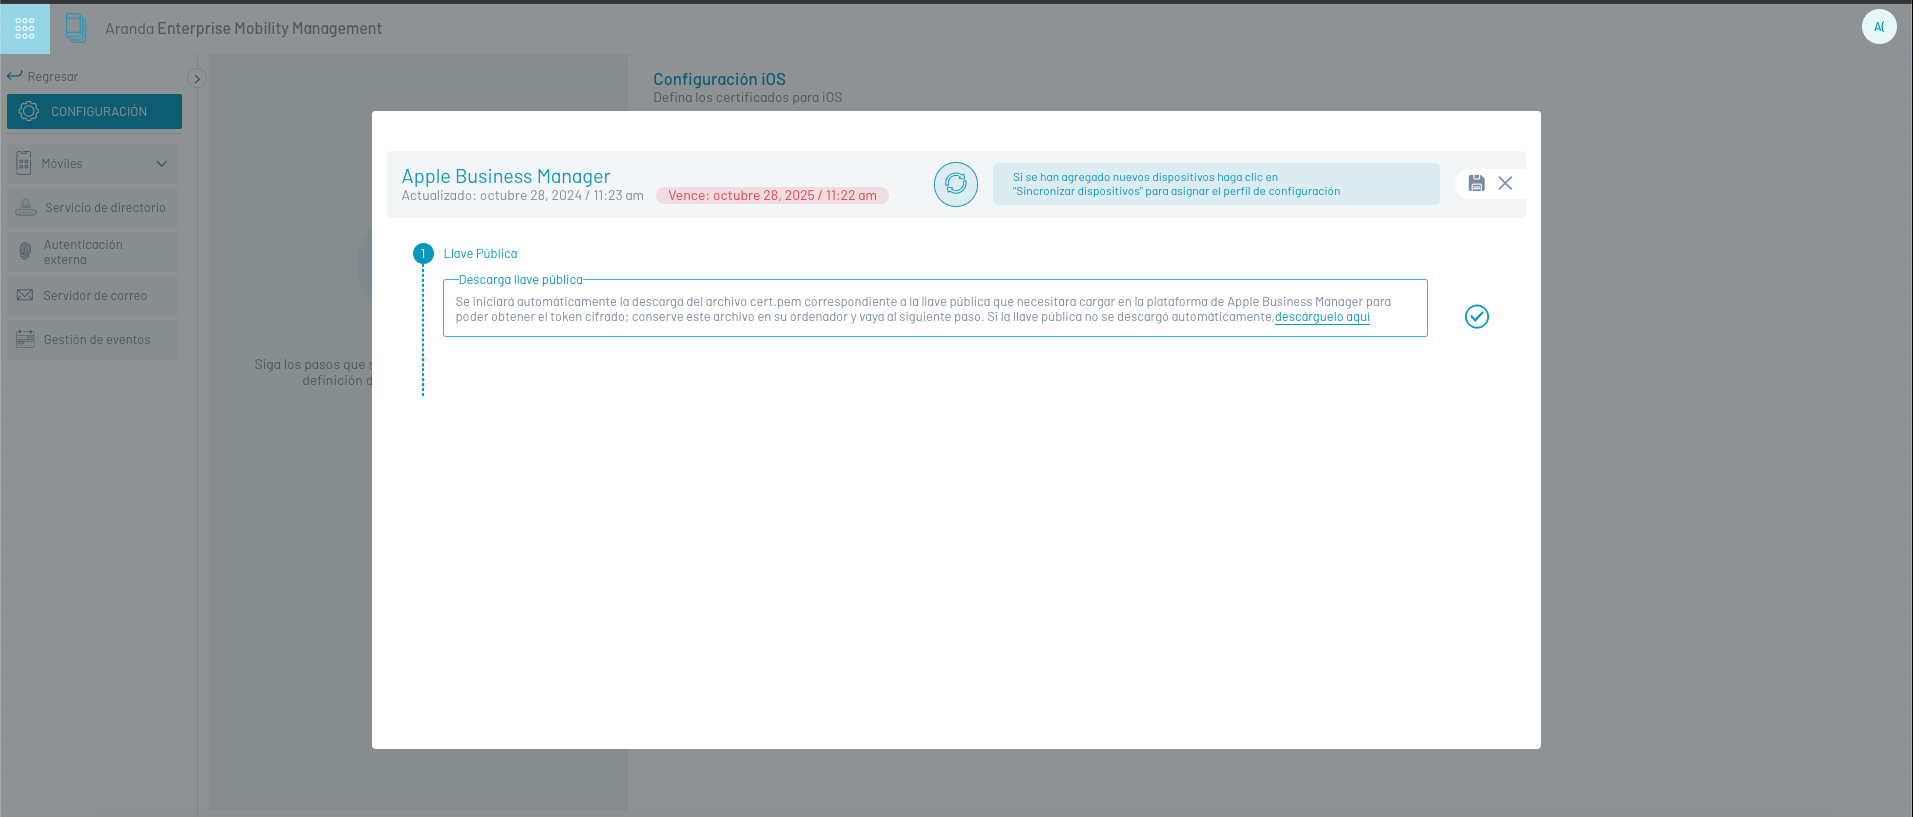
1. The first step is to download the public key from the AEMM console. The download will start automatically; If it doesn’t start, click the download option.
The MDM file will be downloaded_ Aranda Software Corp_Certificate.pem, save it in a safe place and click Next.
2. The second step will give you the corresponding instructions to link the AEMM console with the public key downloaded in the previous step, in the Apple Business Manager Admin console.
Log in to ABM https://business.apple.com/
After you perform the process in the Apple Business Manager Admin console, click Next.
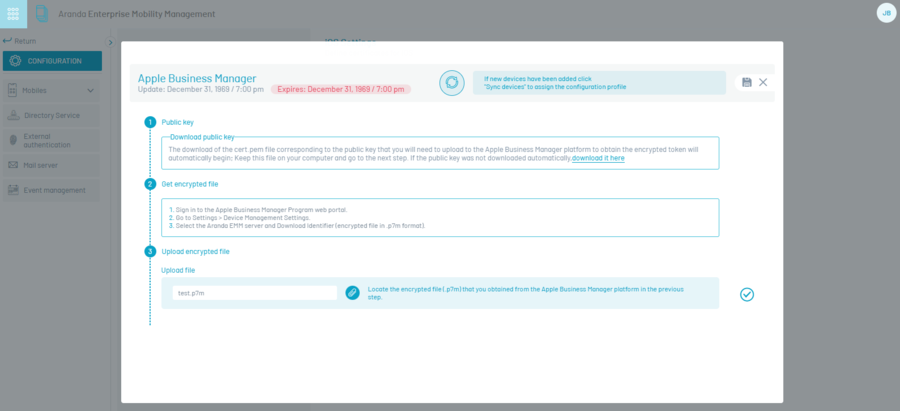
3. The third step is to upload the .p7m extension file downloaded from the Apple Business Manager Admin console to the AEMM console. Click on the Select File button and upload the .p7m extension file After selecting the file, click on the Upload Encrypted File button.
Finally, the console will show that the link between the AEMM console and Apple Business Manager was successfully completed.
Device Linking
There are two ways to add devices to the ABM Management Console: an automatic way that is used when the devices have been purchased under the ABM program and you have the purchase ID or the reseller ID and with this the devices of that purchase are associated with the ABM console; and the other way is manual, adding device by device when they were not purchased under the program.
Pairing via Apple Configurator 2
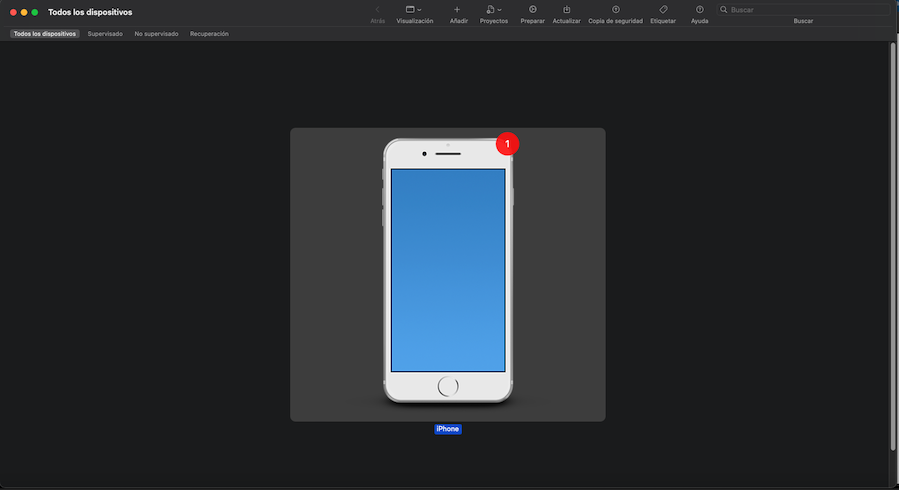
This guide explains how to manually use the Apple Configurator 2 program from a Mac, connecting the device via its USB cable to the computer. Select the device in the Apple Configurator and select the Prepare option.
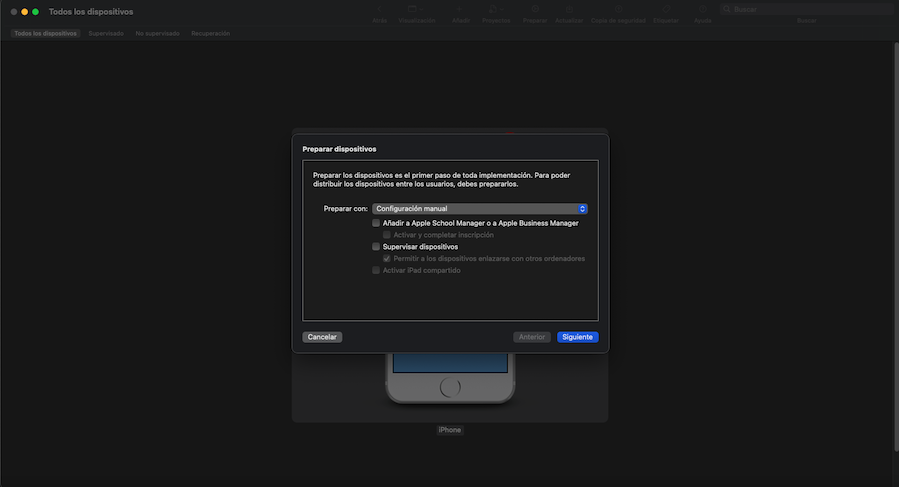
Select the options as shown in the following image and click Next:
In the next window, enter the name and URL of enrollment in the customer’s ABM program, in case you do not know this information, type a name and a URL that refer to the company so that Apple Configurator will automatically search for you among those enrolled in the program. For the example, in this guide we searched for the inscription that Aranda has with ABM. Click Next.

The program searches for matches with enrollees, select the one you think corresponds, and then click Next.
The next screen is not relevant, click Next.
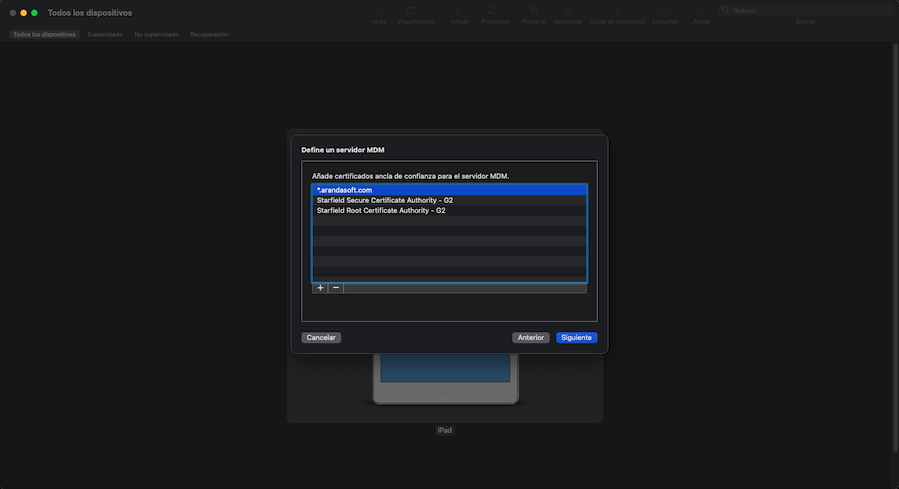
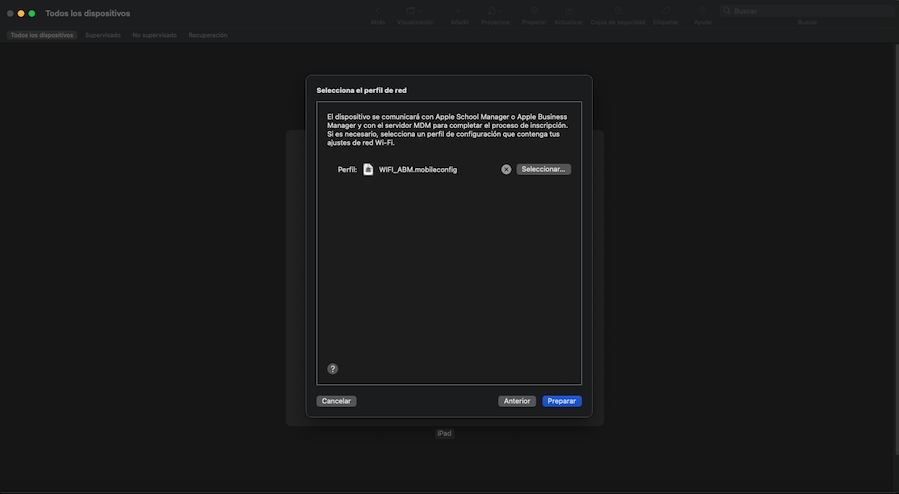
In the next window, it’s important to create a WiFi profile and upload it because your device needs internet to communicate with the device enrollment program. To create a profile, the same Apple Configurator gives the option in the menu File New Profile and there the form for the Wifi is filled, then go to File Save. Load the WiFi profile and choose the Prepare option. Wait until the program completes the preparation steps.
The other devices can be connected to the Mac, since the Apple Configurator is already configured, just click Next without configuring anything else.
After the Apple configurator2 process is finished, go back to the ABM platform, and in the Settings option, look for Apple Configurator2 in the list of MDM servers to confirm the number of devices that were added with Apple configurator2.
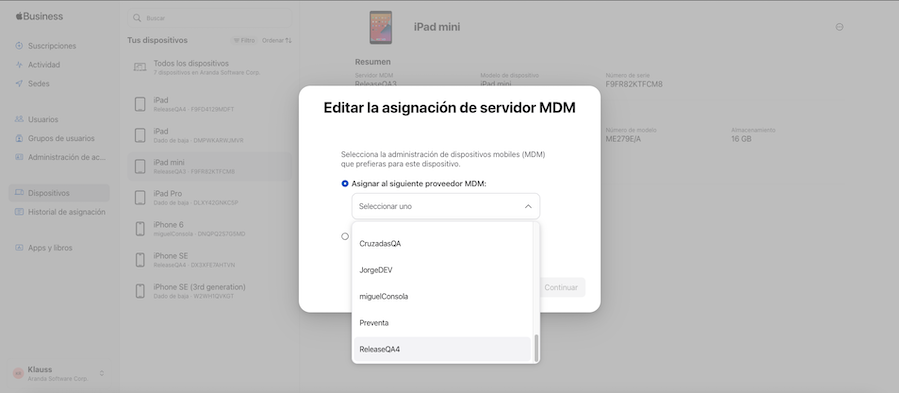
Go to the Device Assignment option to assign the device(s) to the MDM, in this case to AEMM Test. Write the serials for the devices directly or upload the list of serials using a CSV file. Click OK.
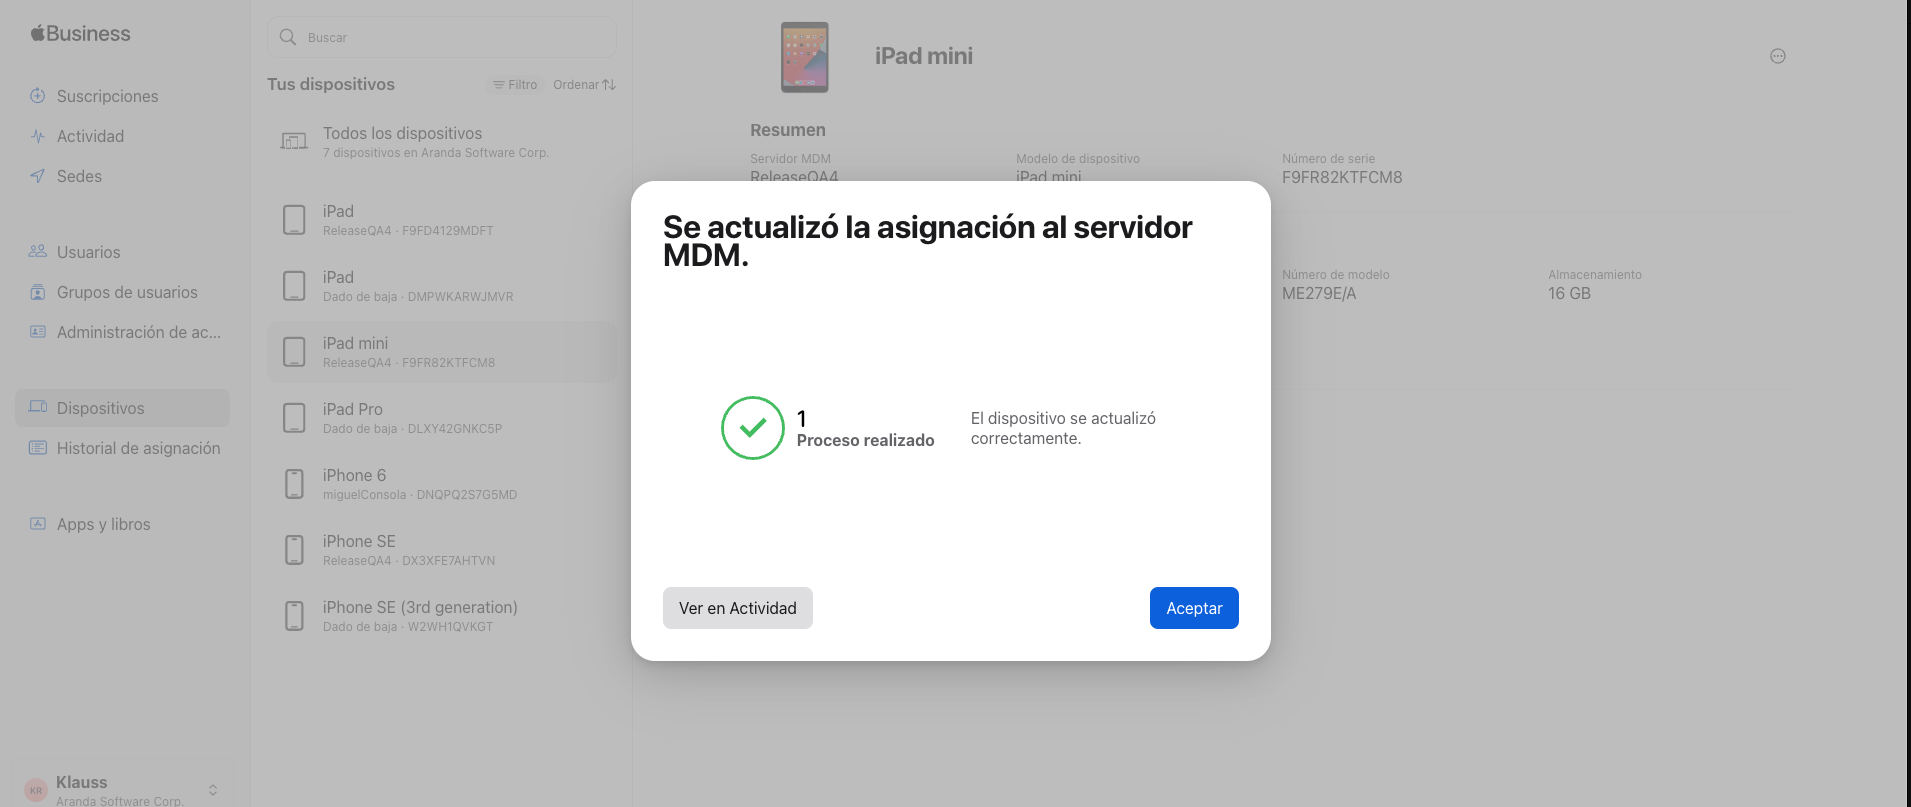
After the process in the Apple Business Manager Admin Console, go to the Apple Business Manager Settings window in the AEMM console (Settings Preferences Mobile iOS Tab Apple Business Manager) and click the Sync Devices button).
3) Device Pairing Process
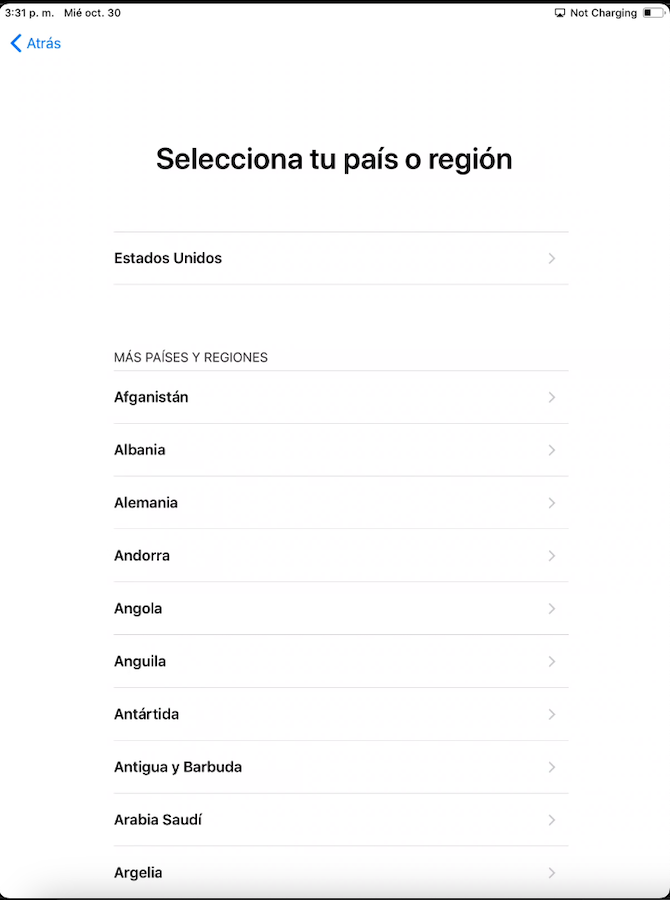
As the device is in factory reset conditions, select the desired language and the Country/Region -> select from the option below.
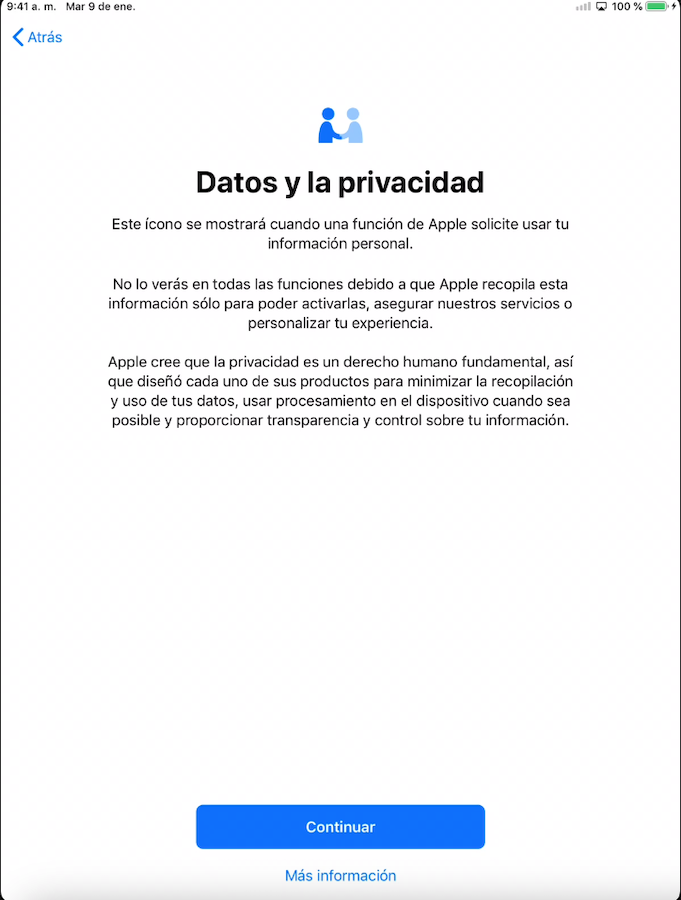
Perform the WiFi settings -> Select from the next option -> Data and Privacy will be displayed, select the Continue button.
You will immediately see the Remote Administration screen, where the administrator company and the authorization of permissions on the device appear. Click Next.
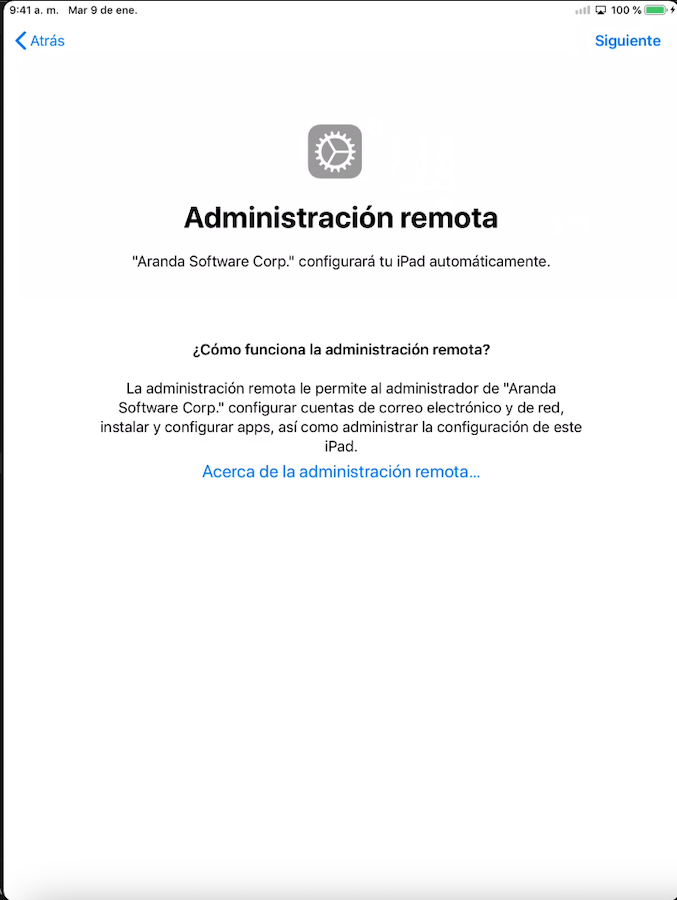
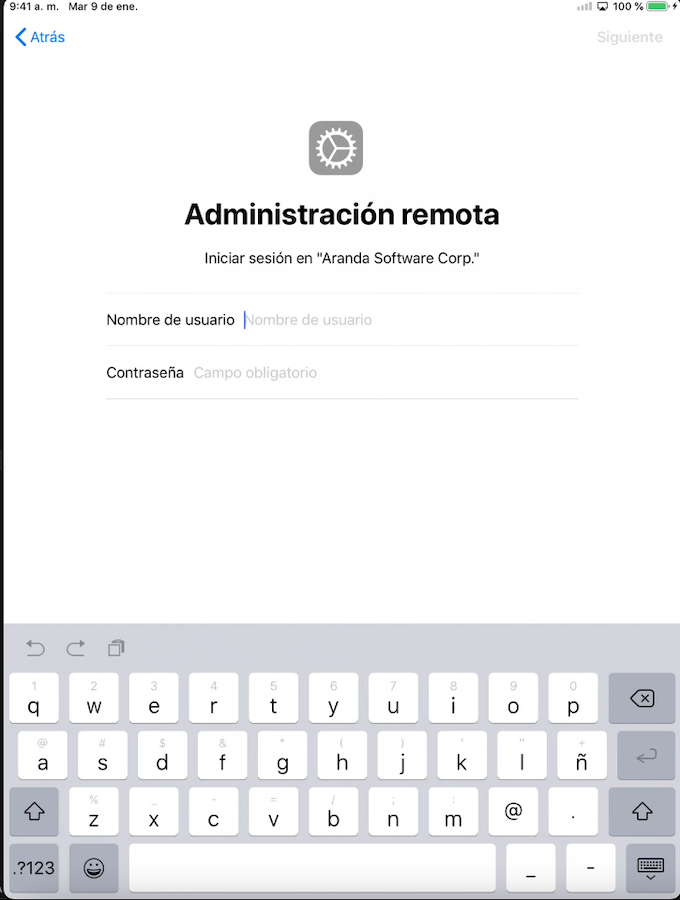
On the Remote Administration login screen enter the username and password.
If your connection is successful, you will see the message “Installing Software Settings” (which is installing the Aranda profile).
If your connection fails, the system informs you of the possible cause (incorrect entry of user data, failed connection, among others).
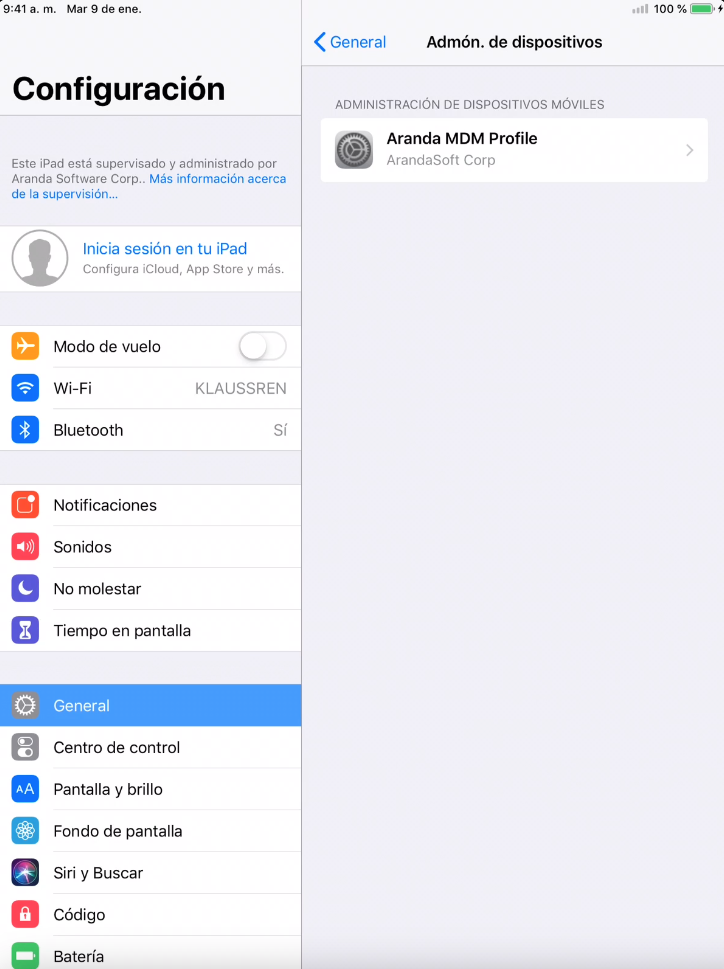
When you finish the configuration and installation of Aranda Software, continue with the configuration required by the device, when you finish said installation you must go to Configuration-> General-> Profile, in order to verify the installation of the agent.
Upon completion of the process on the device, you will be able to see the linked device in the AEMM console in the Devices list.
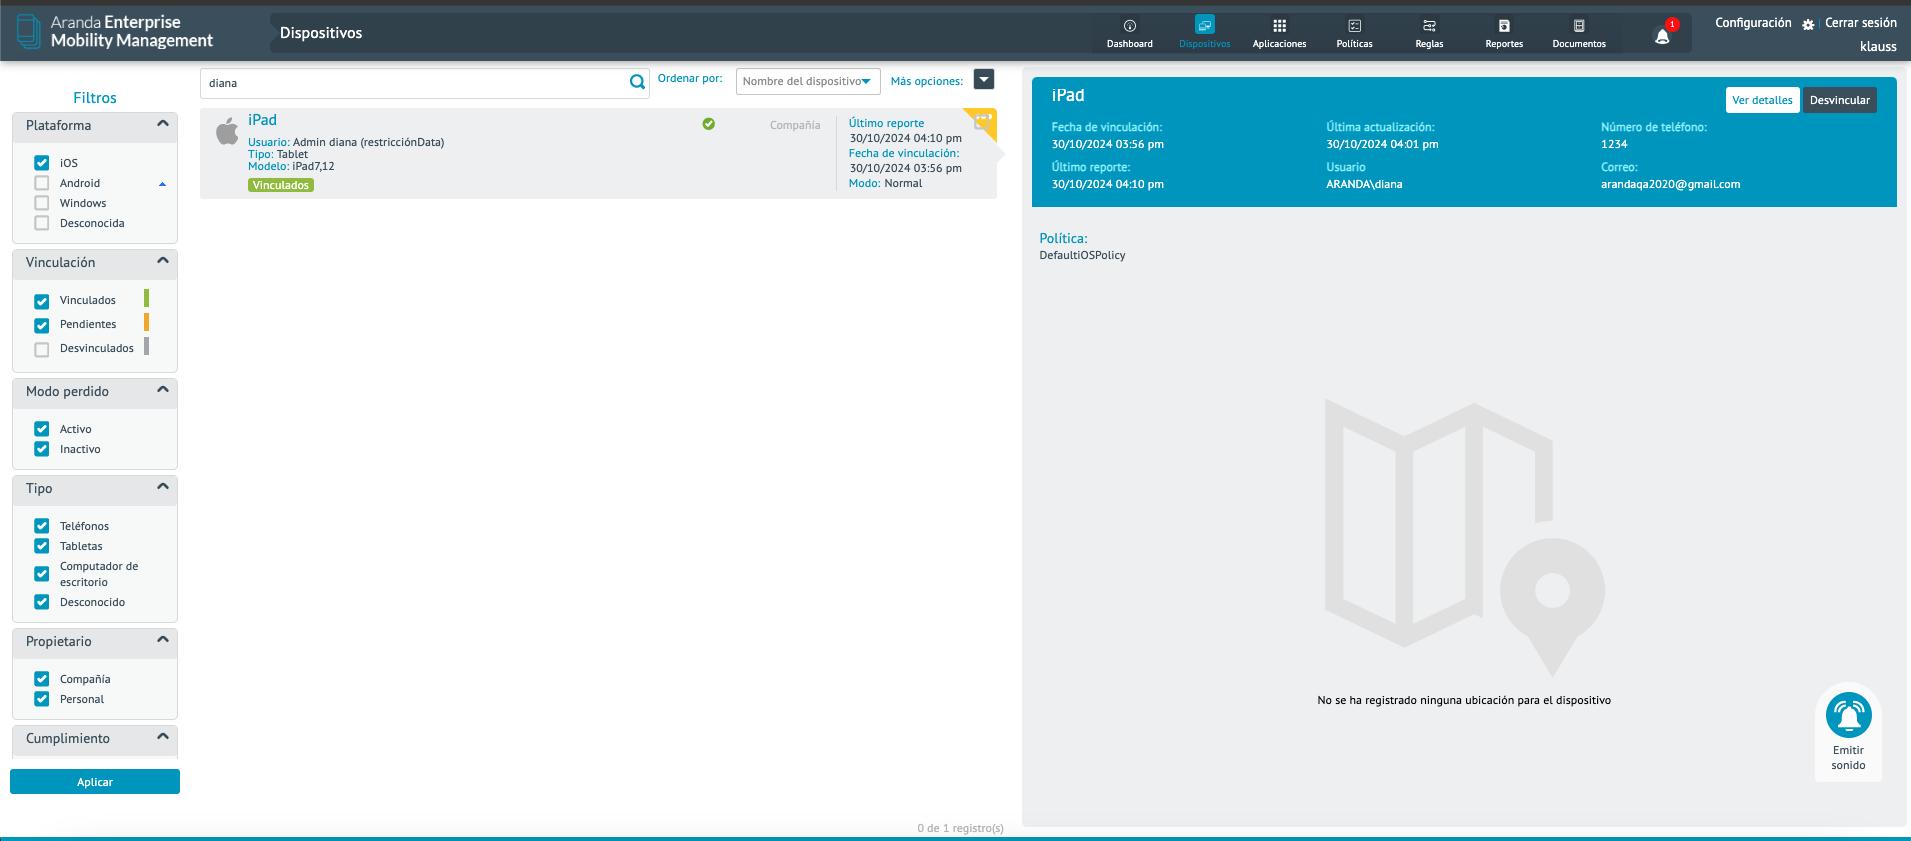
In this list you will see a yellow mark, which indicates that the device is linked to the console through the installation of the profile, but it needs the installation of the agent.
When entering the device linked by ABM, in the activities tab you will be able to observe the execution of commands and in the pending commands option there will be some that have not been executed, the latter will be executed when the agent is installed and thus finish the linking process correctly.
Note: Before sending to install the agent from the console, validate that the configuration command was successfully processed