


iOS Settings
In this section, you can configure the corresponding options for iOS platform device management
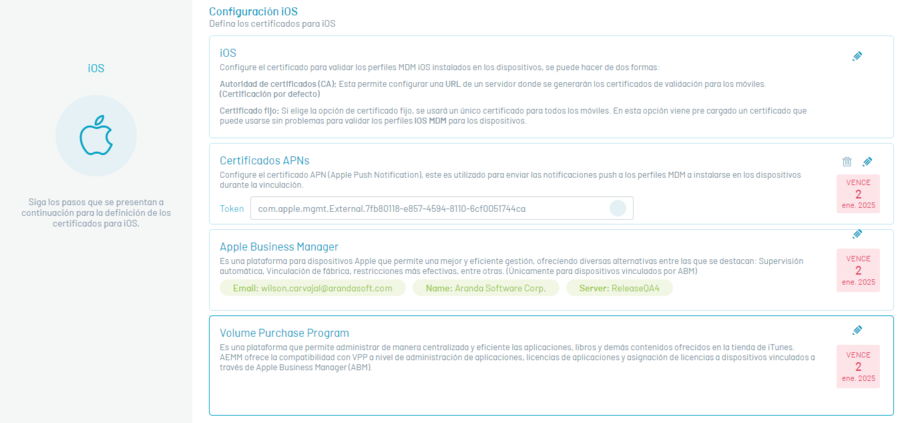
“iOS” section
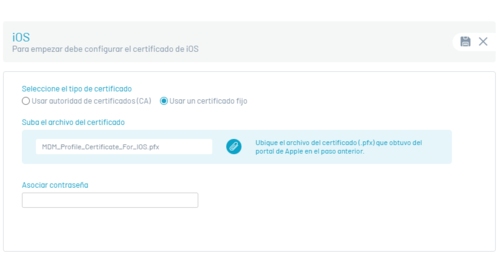
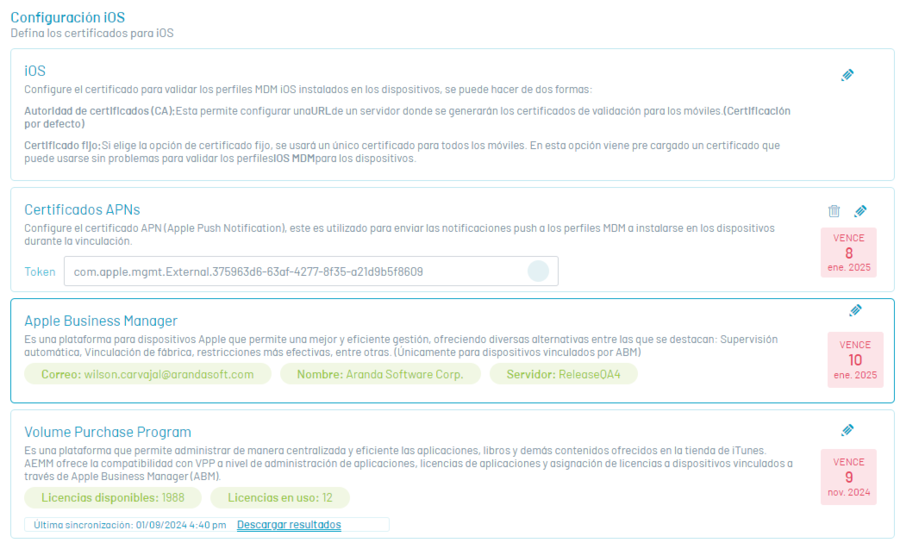
In this section, you can configure the certificate with which the iOS MDM profiles installed on the devices will be validated. To perform the configuration, click on the Edit option (pencil icon) to display the window where you can configure the certificate in two ways:
| Fields | Description |
|---|---|
| Using Certificate Authority (CA): | This option allows you to configure a URL of a server where validation certificates will be generated for mobiles. |
| Fixed certificate: | If you choose the fixed certificate option, a single certificate will be used for all mobiles. A certificate comes preloaded in this option that can be seamlessly used to validate iOS MDM profiles for devices. |
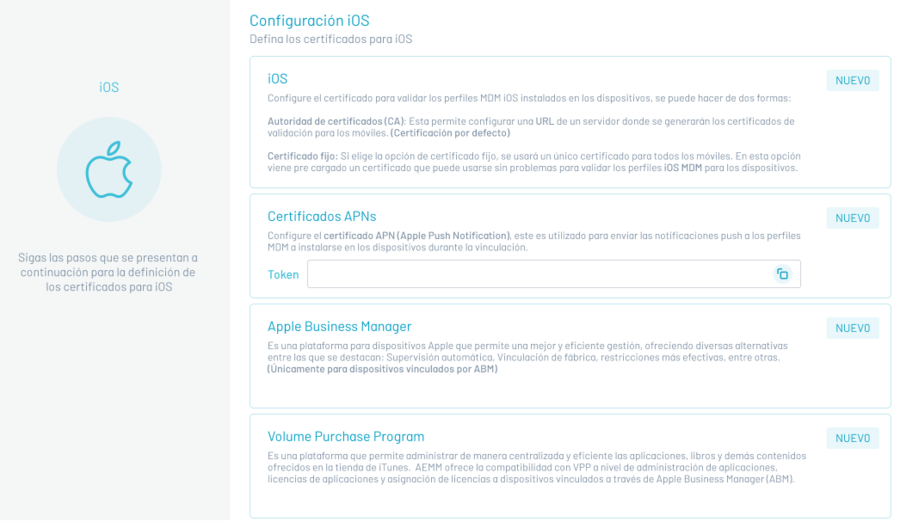
APNs Certificate Section
In this section you will be able to configure the APN (Apple Push Notification) certificate, used to send push notifications to MDM profiles to be installed on devices during pairing. To perform the configuration, follow these steps:
Creating a New APN Certificate
Log in to APNs certificate and click New
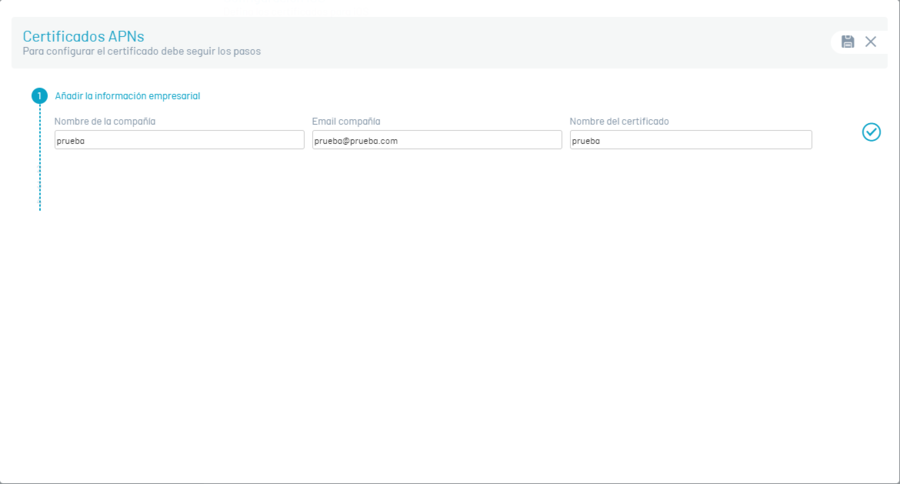
Enter the name and email of the company, plus the name of the certificate and then click on Continue (check icon).
The CSR file that you need to save is then automatically downloaded. This CSR file changes each time this process is performed; it is recommended that you complete the APN configuration process with the same CSR file.
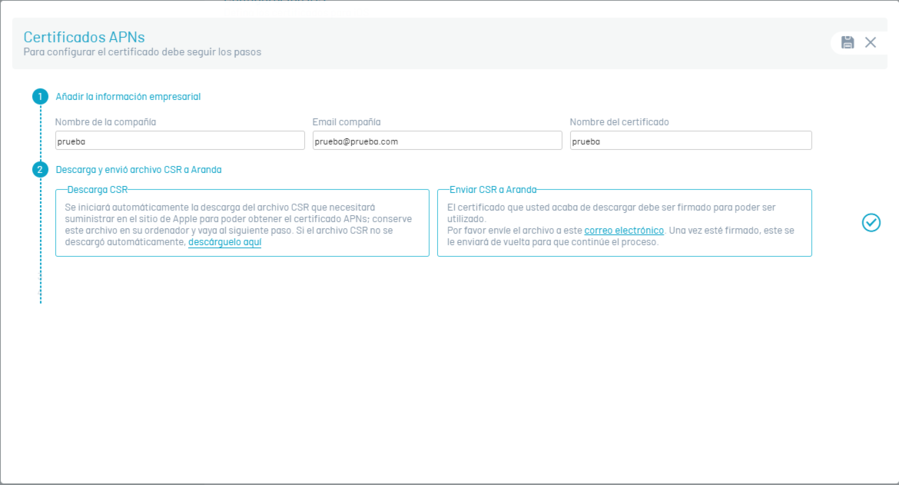
Send the CSR file to your representative in Aranda via email and click on the check icon corresponding to step 2.
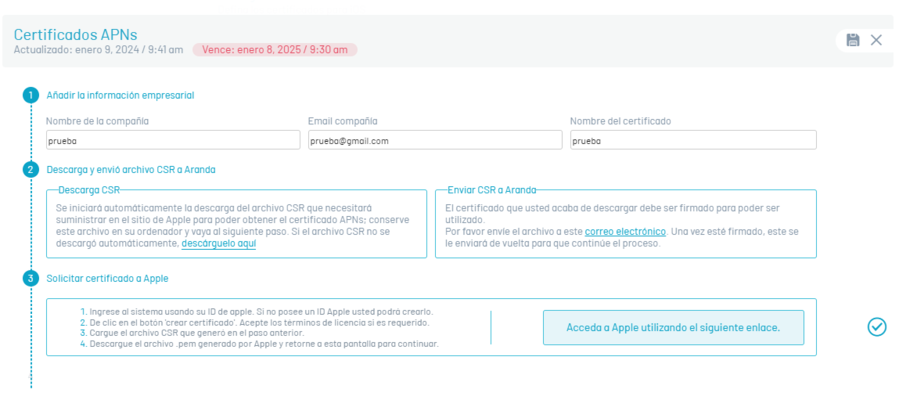
Go to the Apple page to generate the APNs certificate
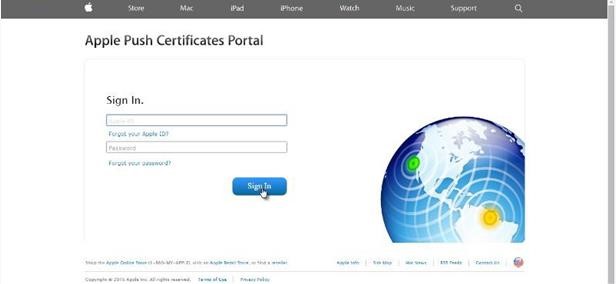
Enter your Apple ID and password
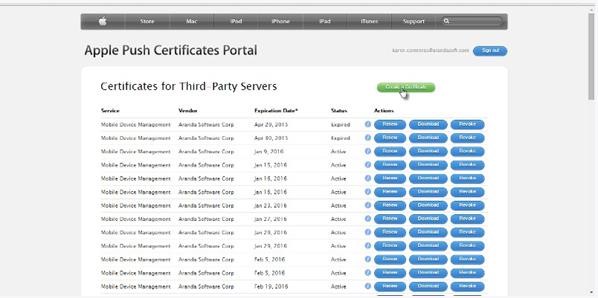
Click on the option Create certificate
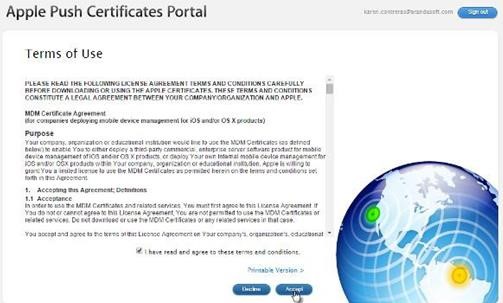
Agree to terms and conditions.
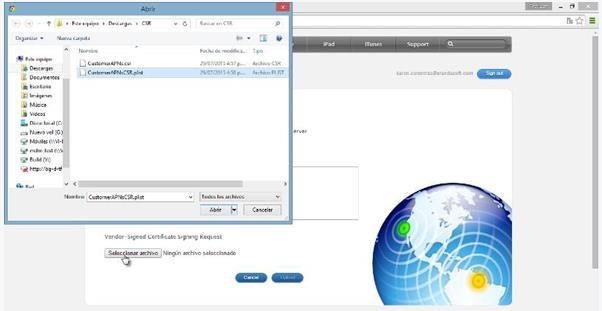
Select the “PLIST” file, which you received by email from the representative in Aranda.
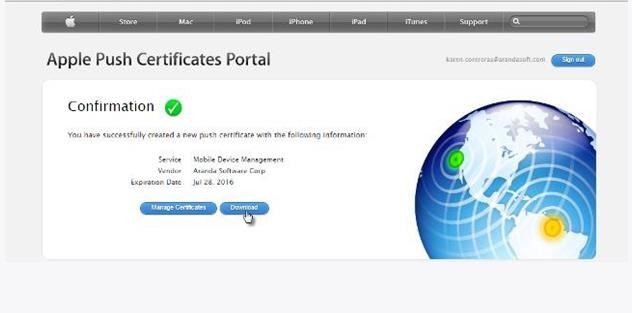
Write a brief description of the certificate being created, with the goal of identifying it in the future. Download and save the PEM file that is generated.
Continue within the console and then click on the check icon corresponding to step 1 and attach the “PEM” file that was generated in the previous step.
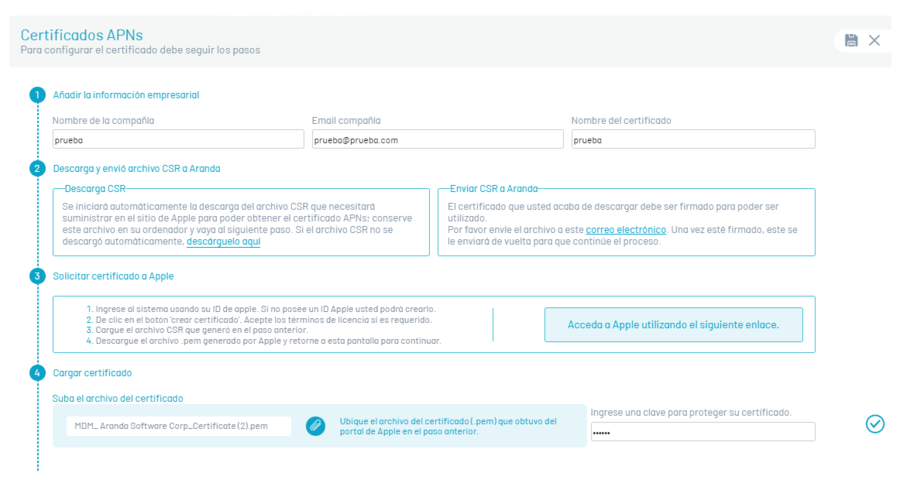
In the Upload Certificate Click on the check icon corresponding to step 4.
The certificate must be successfully uploaded.
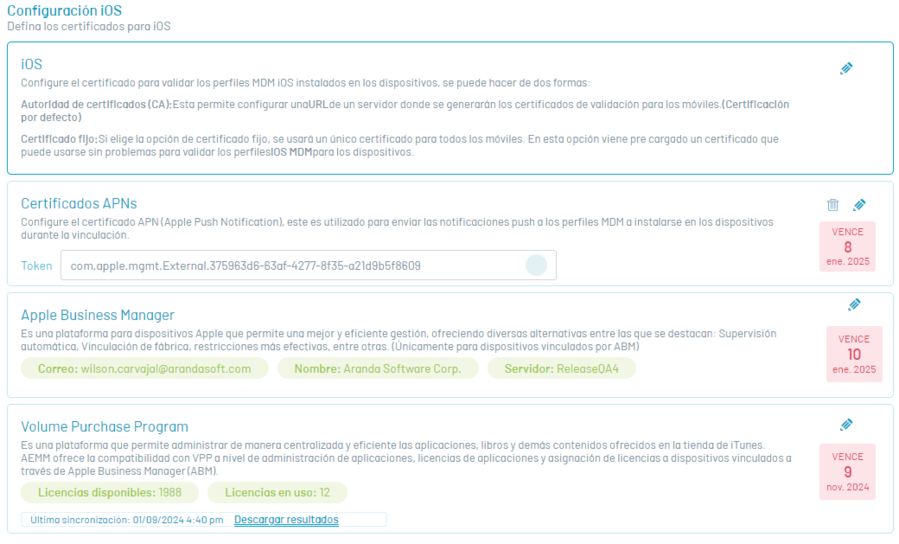
The certificate created and uploaded to the AEMM server will be valid for one year, counted from its generation on Apple’s APN Push Notification platform.
This certificate is associated with subsequent bindings of iOS platform devices as it cannot be replaced with a new certificate, which would result in the isolation of the devices from the AEMM server and their consequent inability to receive and process commands.
This created certificate has to be renewed before its expiration and for such when it is created a system alert is placed that makes a reminder one month before the expiration of the certificate.
If the renewal procedure is not done in time, it will cause an effect similar to that of changing the certificate for a new one, which is the total and irreversible isolation of the devices already linked and that use this APN certificate.
The following section details the APN certificate renewal process.
Renewing a previously created APN certificate
Run the first 5 steps of the above process (Creating a New APN Certificate) and then do the following:
Once on Apple’s APN platform, locate the certificate record in question and click “Renew.” To identify the record in question, you can use the short description entered at the time of its creation, this in case you have more than one record in your APN account.
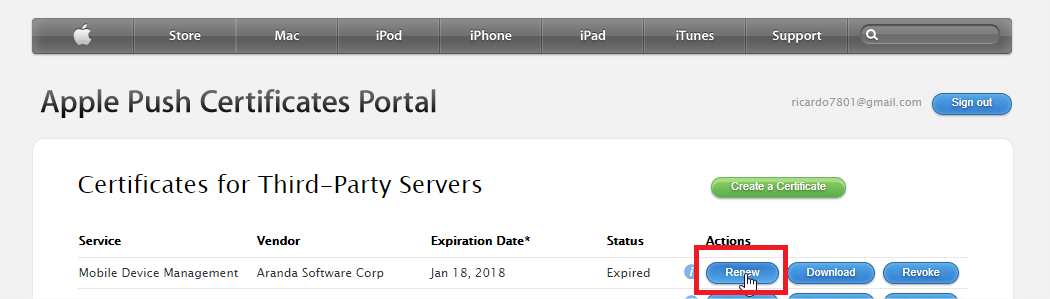
Next, execute steps h, i, j, k, l, m of the previous numeral, to complete the process.
The renewed certificate will have the same validity period of 1 year and must also be renewed before it expires, so as not to reach the consequences already described.
APN Certificate Validation
In the APN renewal (update) process, the configured APN must match the new APN file to be updated and you can view it from the Apple console where you created and renewed the certificate (https://identity.apple.com/pushcert/ ). In authentication, enter the same email with which the certificate was created.
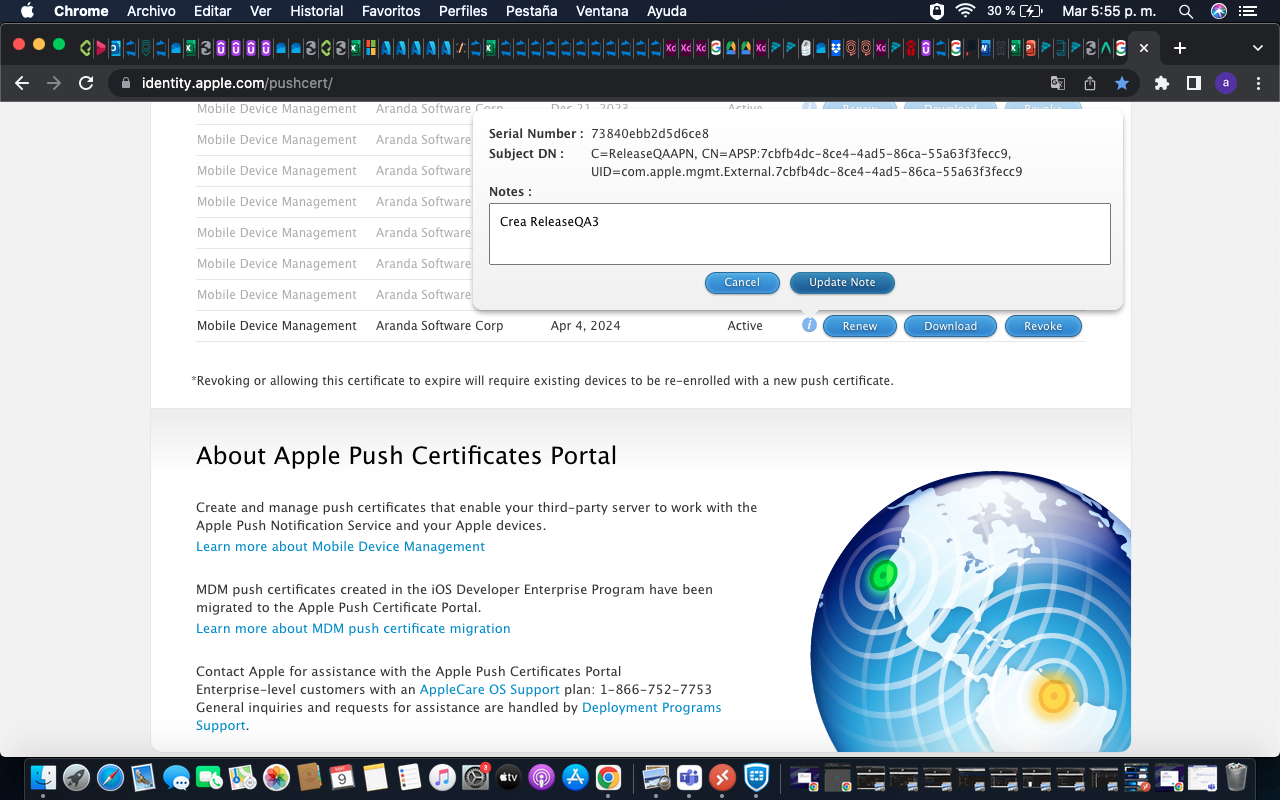
When you select the record, in the information icon, it will show you the following data: serial number and subject DN; the latter item in the UID tag: (com.apple.mgmtExternal.XXXX, as shown in the image)
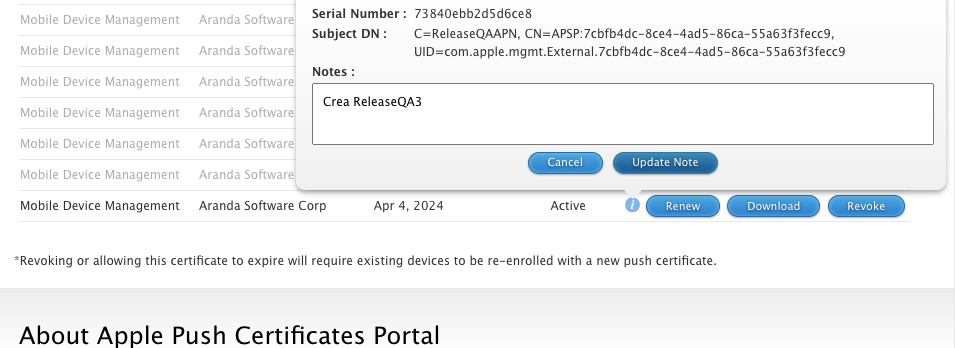
This information must match the profile information found on the linked devices, as described below:
1- Select a linked device before performing the APN update.
2- On the device go to the settings option ->Device Management and VPN->Aranda MDM Profile-> More details-> Mobile device management-> Topic1
Viewing the APN theme on iOS devices
| Field | Description |
|---|---|
| Settings | 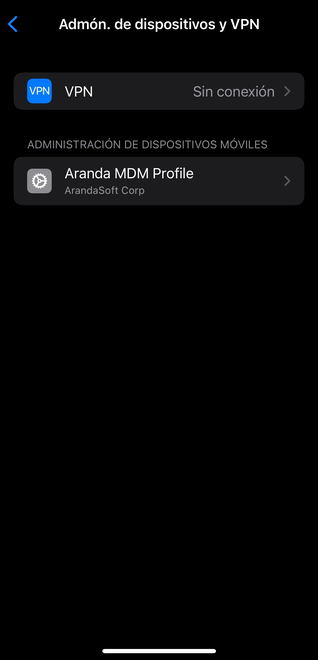 |
| Settings | 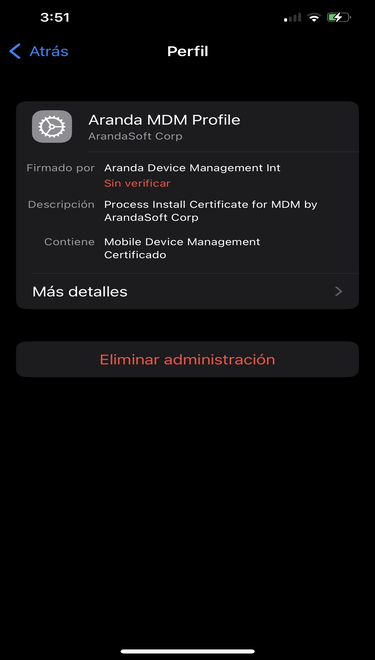 |
| Settings | 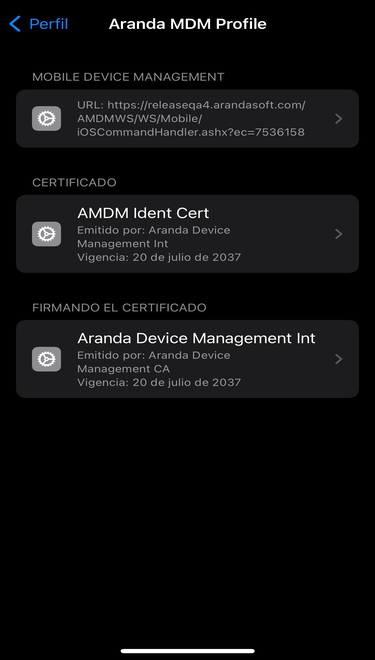 |
| Settings | 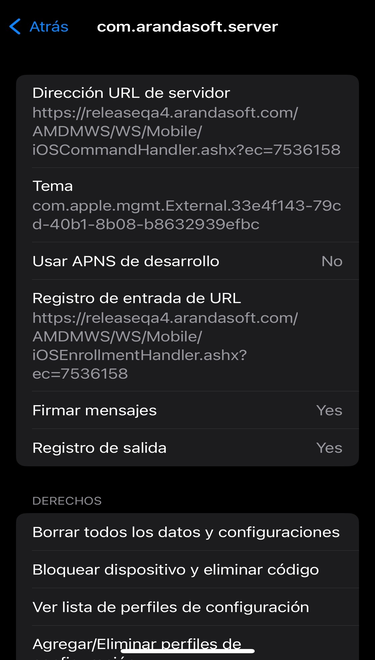 |
Apple Business Manager (ABM) section
Apple Business Manager is a platform for Apple devices that allows better and efficient management, offering various alternatives among which are: Automatic supervision, Factory linking, more effective restrictions, among others.
To activate this functionality, it is necessary to have a current account on the Apple Business Manager platform (https://business.apple.com/) and perform the following steps:
Navigate to the Apple Business Manager section and click New
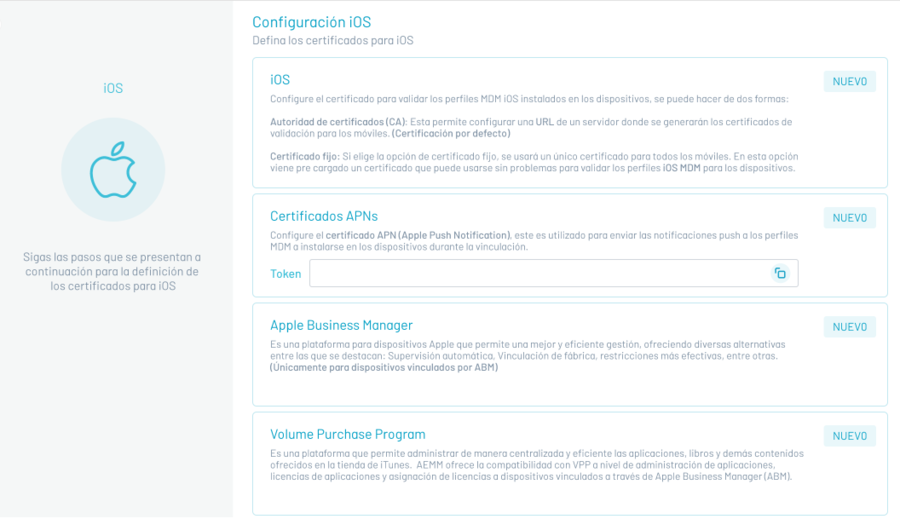
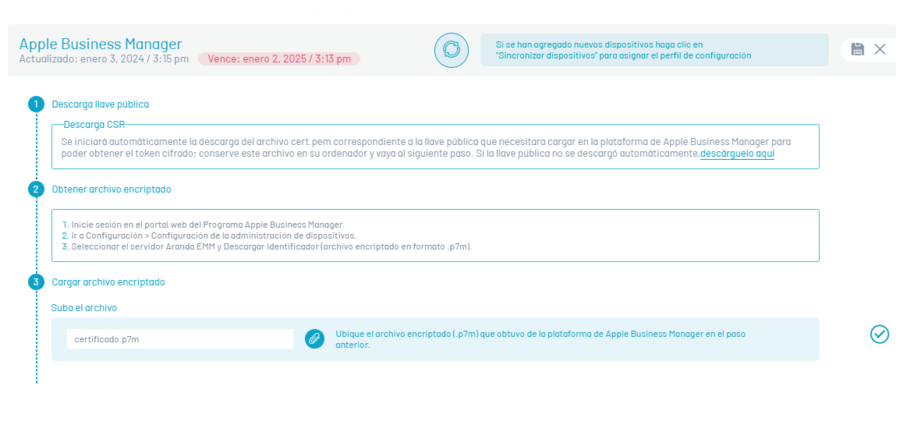
Save the cert.pem file that will uniquely identify the AEMM server instance. Save it in a safe place and click on the check icon corresponding to step 1.
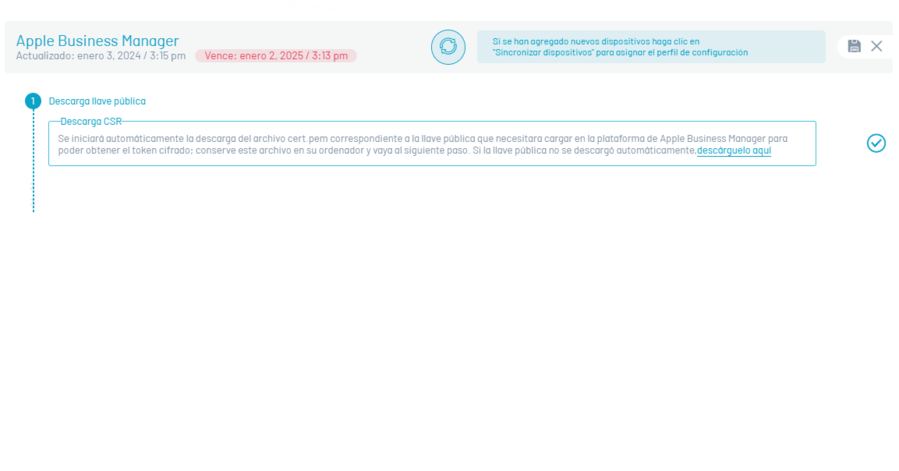
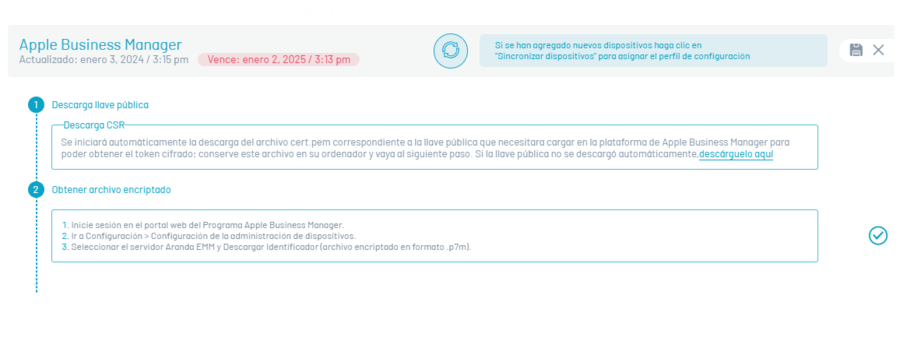
The following are instructions for pairing the AEMM console with the public key downloaded in the previous step in the Apple Business Manager Admin Console.
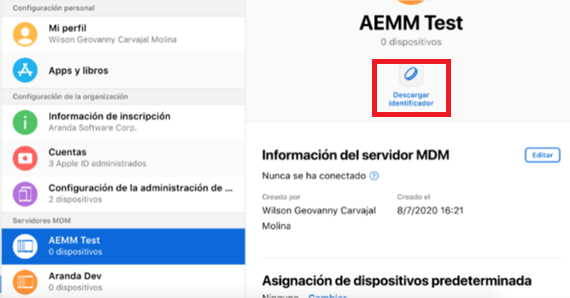
Select Save and to finish downloading the file with extension p7m in the Download identifier.
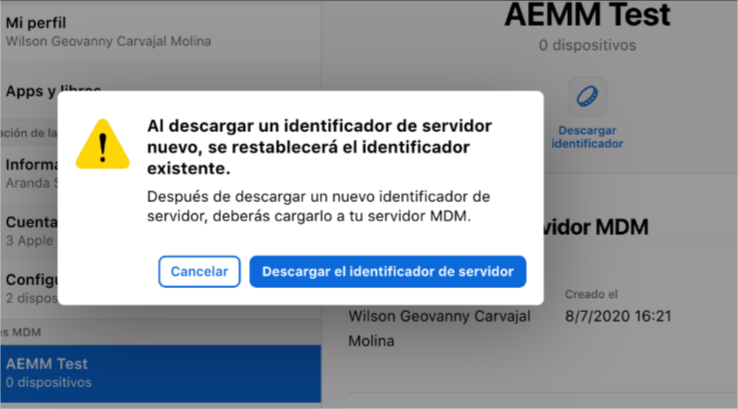
In the AEMM console, click the check icon for step 2 and upload the p7m extension file downloaded from the Apple Business Manager Admin console to the AEMM console. Upload the p7m extension file.
After selecting the file, click on the check, corresponding to step 3.
Volume Purchase Program (VPP) Section
Apple’s Volume Purchase Program is a platform that allows you to centrally and efficiently manage the applications, books, and other content offered in the iTunes store.
AEMM offers VPP support at the application management level, application licensing, and assigning licenses to linked devices through Apple Business Manager (ABM).
To link the AEMM server with VPP, perform the following actions:
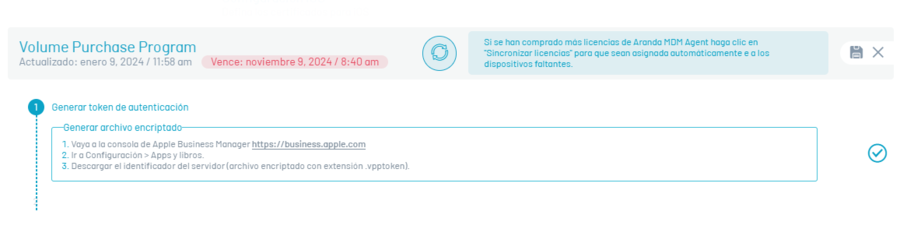
In the Volume Purchase Program section, click New
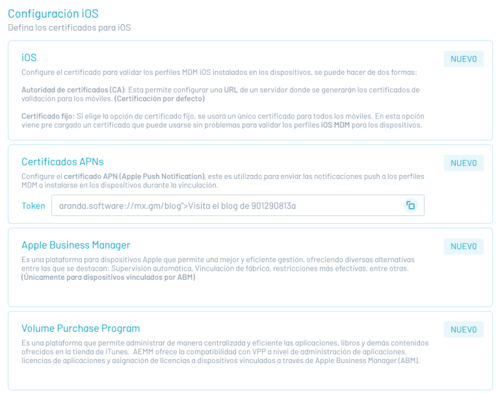
According to the instructions presented, enter the Apple Business Manager console, to generate the authentication token.
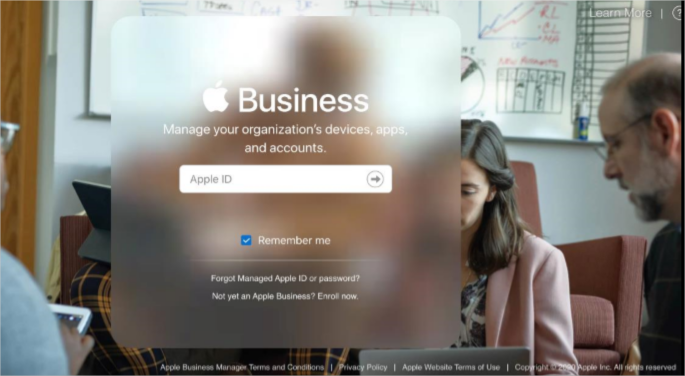
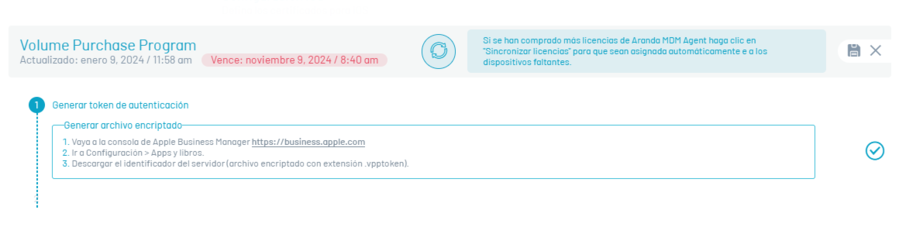
Once inside the ABM Management Console, go to the option Configuration > Apps & Books, there you will see the identification of the configured servers; Click Download.
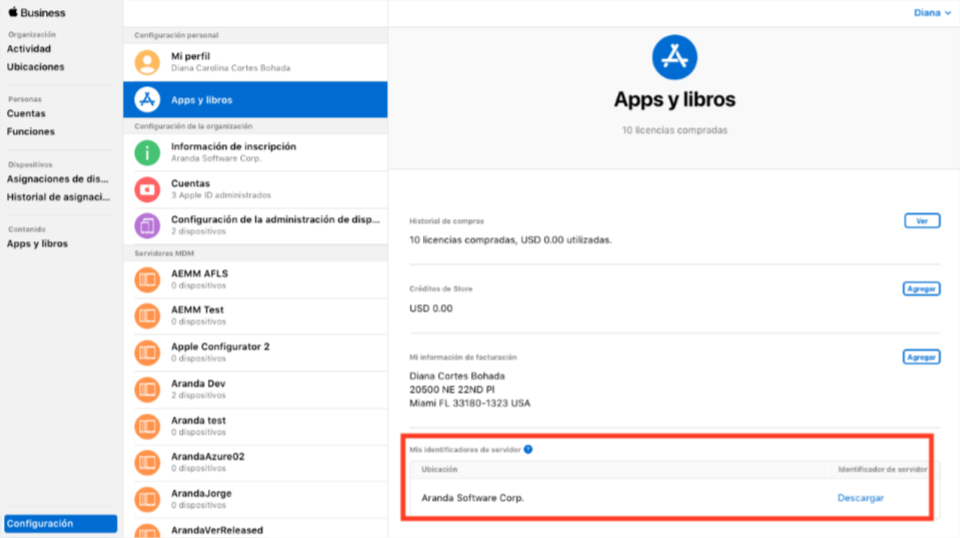
Save the downloaded file to a safe place, log in to the AEMM console, and click the check icon for step 1.
Upload the downloaded ABM console file from the previous step, click the button, and upload the file.
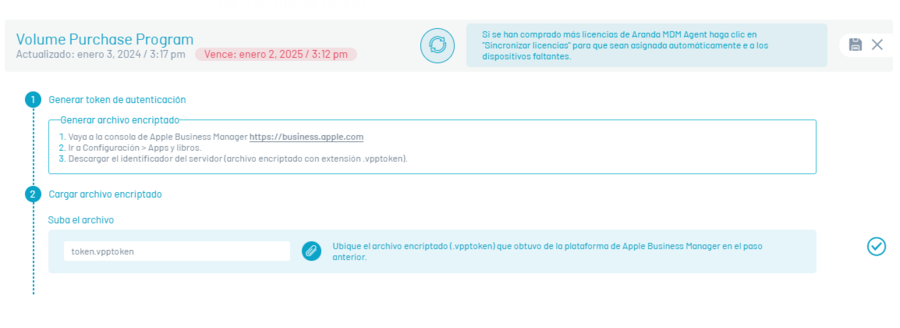
Click on the check icon corresponding to step 2 to finish the process.
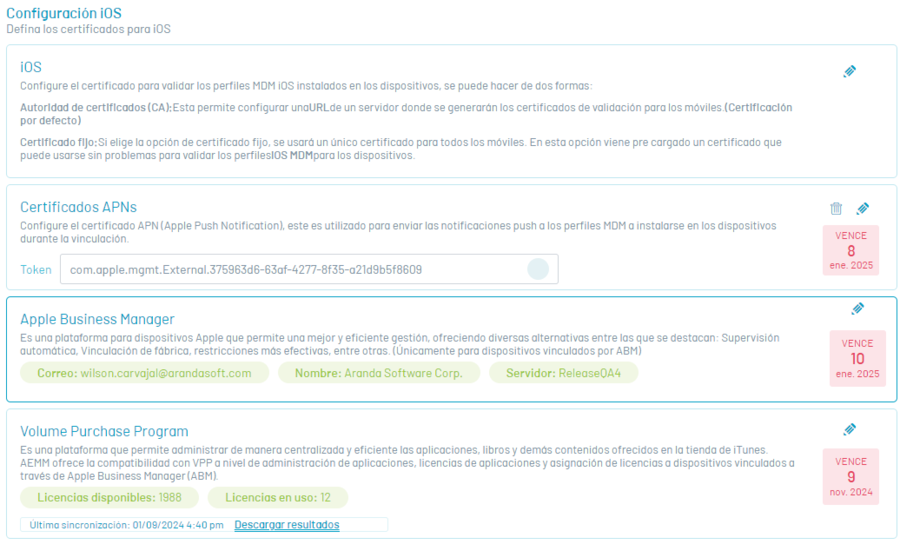
To perform the license synchronization process, in the Volume Purchase Program Click the Edit and in the window that is enabled, click on the Sync licenses. The system will automatically assign AEMM Agent for iOS licenses to devices that are linked by ABM.
Finally, you will see data corresponding to Aranda EMM licenses, such as their status (available and in use), the date of enrollment of the VPP and their expiration. Remember that the licenses have a duration of 1 year.
There is also an option to download a results file, which indicates which devices have been assigned the license and which have not.
On AEMM console:
On ABM console – VPP
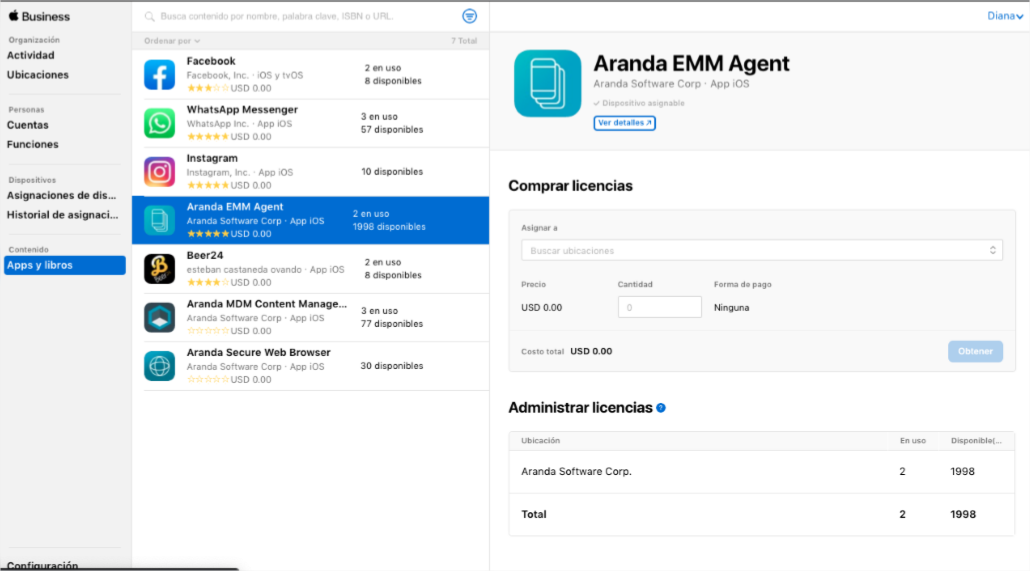
Things to keep in mind:
- Before synchronization is performed, licenses must be available from the application of Aranda EMM in ABM for devices that are going to assign.
- The Aranda EMM Agent application must be imported into the applications from the AEMM console.