⚐ Note: The additional fields only apply to Windows operating systems of any version.
Create Additional Fields
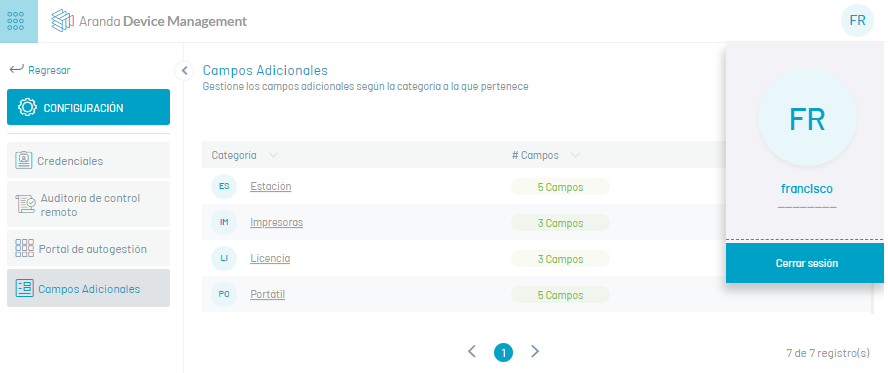
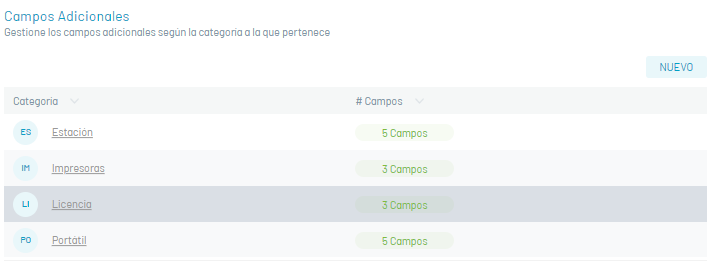
1. To configure the additional fields, go to the Settings view of the ADM Management Console, in the ADM section of the main menu select the option Additional Fields.
2. In the Additional Fields information view, you can view the created field records. Select the New

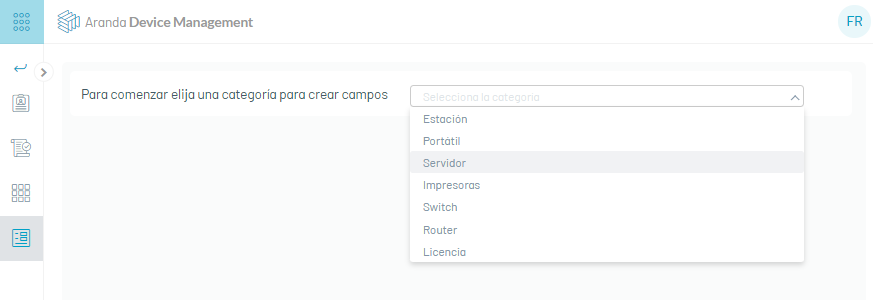
3. In the Fields information view, select the category (station, laptop, server, printers, switch, router, or licenses) for which you are creating the additional field(s).
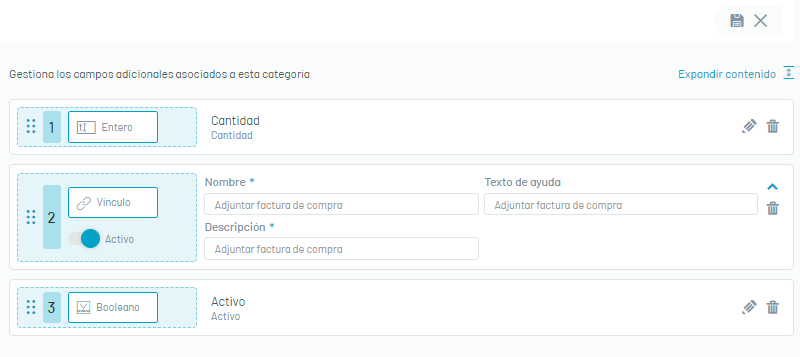
4. In the Field Type section, arrest the field required to the workspace and manage the additional fields associated with this category.
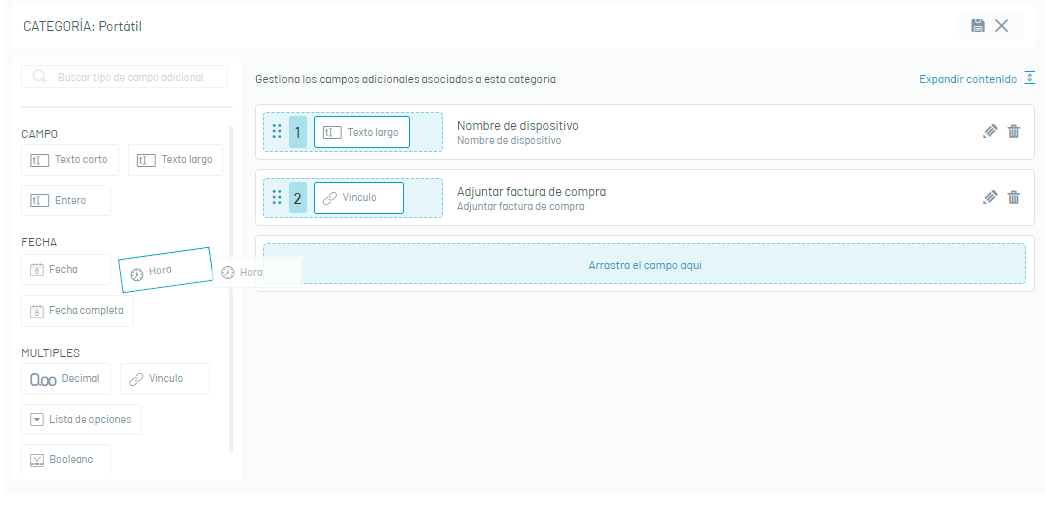
| Field Type | Description |
|---|---|
| Short text | Short text string with a maximum length of 55 characters |
| Whole | Numerical value |
| Full Date | Date in dd/MM/yyyy format HH:mm |
| Hour | Time in HH:mm format |
| Date | Date in dd/MM/yyyy format |
| List of options | Display a list of options with selection of a single option |
| Long text | Text block with a maximum length of 255 characters |
| Boolean | Active/Inactive Statuses |
| Decimal | Numeric value with decimal separator |
| Link | Navigation Link |
5. When the setup is complete, click  Save.
Save.
6. You can click on the Get out; You will be able to display a message indicating that you are about to exit the editing of additional fields, the unsaved changes will be lost. Click the Accept to save the additional fields created for the category.
Resources for Fields
In the additional field information view, the following resources are available to you:
| Resource | Description | Icon |
|---|---|---|
| Expand Content | Expand the fields to view the information. |  |
| Collapse Content | Collapse fields to hide information. |  |
| Displace | If you want to change the order of the fields, you can do so by moving the field |  |
| Get out | To exit the screen click on the X button, |  |
Edit Additional Fields
7. In the Additional Fields Information view, select a record from a created category.
8. In the detail view, click the Edit  and modify the required information (fields).
9. When you finish editing the field, click the Save to confirm the changes made.
Delete Additional Fields
10. In the Additional Fields Information view, select a record from a created category.
11. In the detail view, click the Eliminate  to delete the required field. You will be able to see the message “You are deleting a field associated with this category, once you make this change the configuration will be lost.”; click Accept.
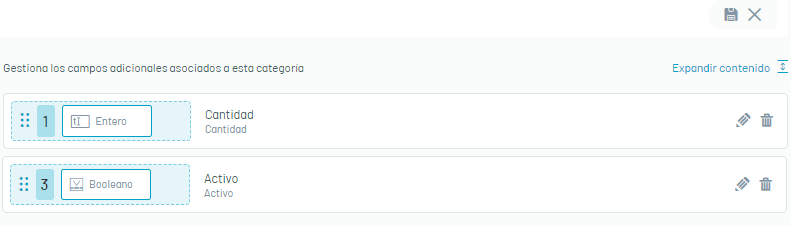
12. Click on the Save to confirm the changes made and delete the field.
Return
13. To return to the ADM Management Console, from the main menu of the Additional Fields view, select the Return
14. To exit the additional fields view, in the header menu, select the user profile and click Close Assignment