
⚐ Note: If you have passwords for discovery by (ssh) created in lower versions of ADM 9.21.0, you must update the password type to ssh for the correct operation of discovery by this protocol, since the new password types were included in version 9.21.0.
Set up Discovery
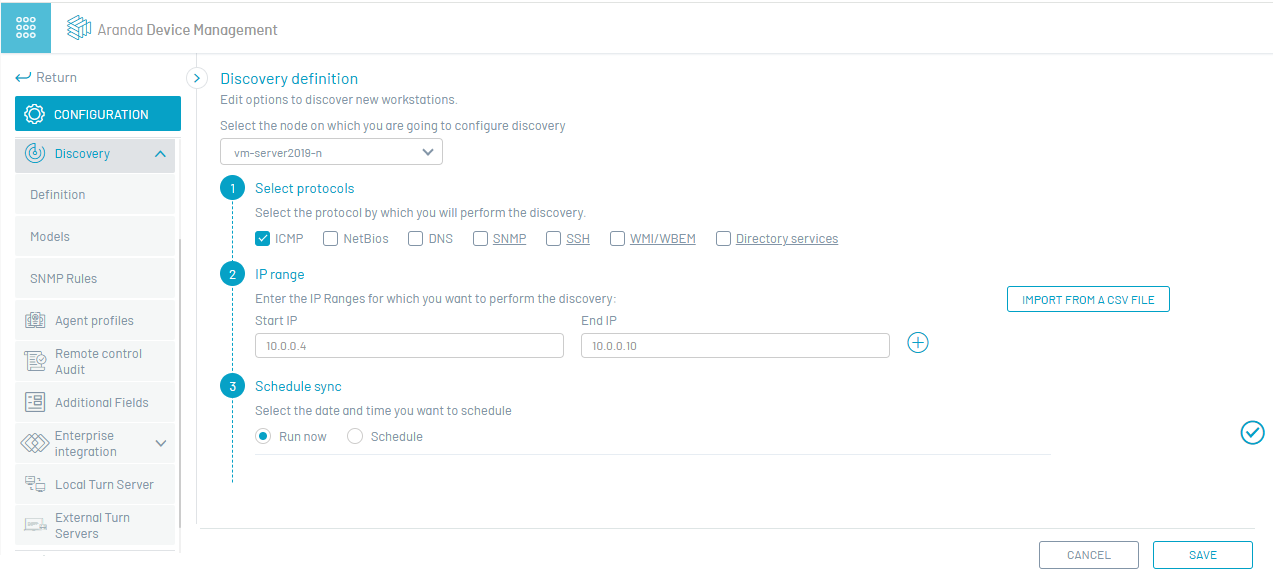
1. To configure device discovery by definition, go to the Settings view of the ADM Management Console, in the ADM section of the main menu select the option Discovery and Definition. In the information view, you can see the steps to discover the devices.
⚐ Note: In case the list of nodes is disabled, it is because the repserver to which it should point has not been configured in the discovery agent.
- If the device mapping is saved and the mapping information in the service directory is subsequently updated, the mapped information will be removed from the device filters and the device mapping will need to be reconfigured.
Node
2. To start, select the node on which you are going to configure the new discovery.
Discovery Protocol
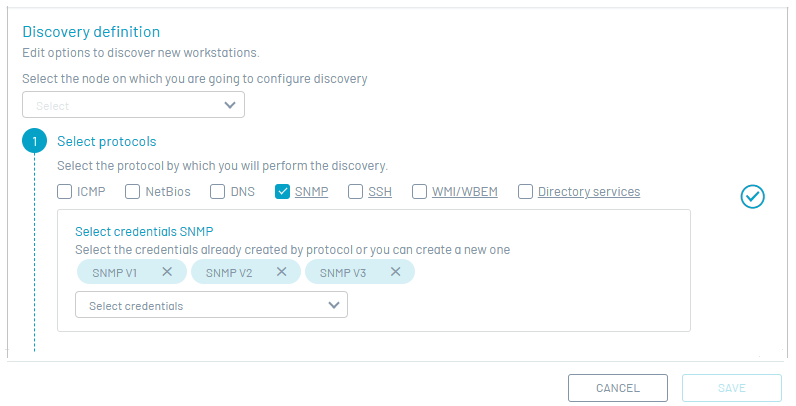
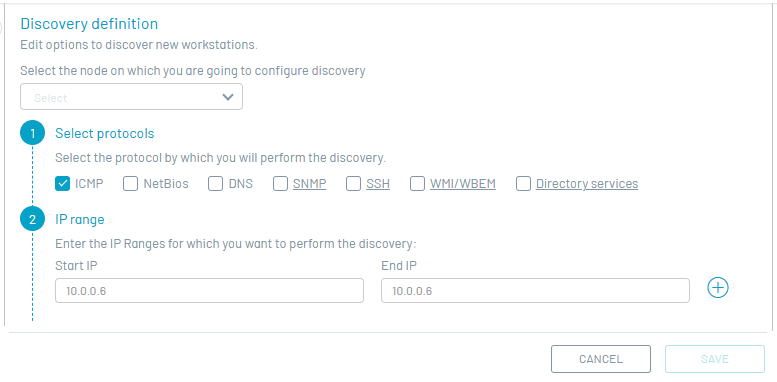
3. In the step 1 Define a discovery protocol. Device discovery is performed by the following protocols: ICMP, NetBIOS, DNS, SNMP, SSH, WMI/WBEM).
Protocolos de Descubrimiento
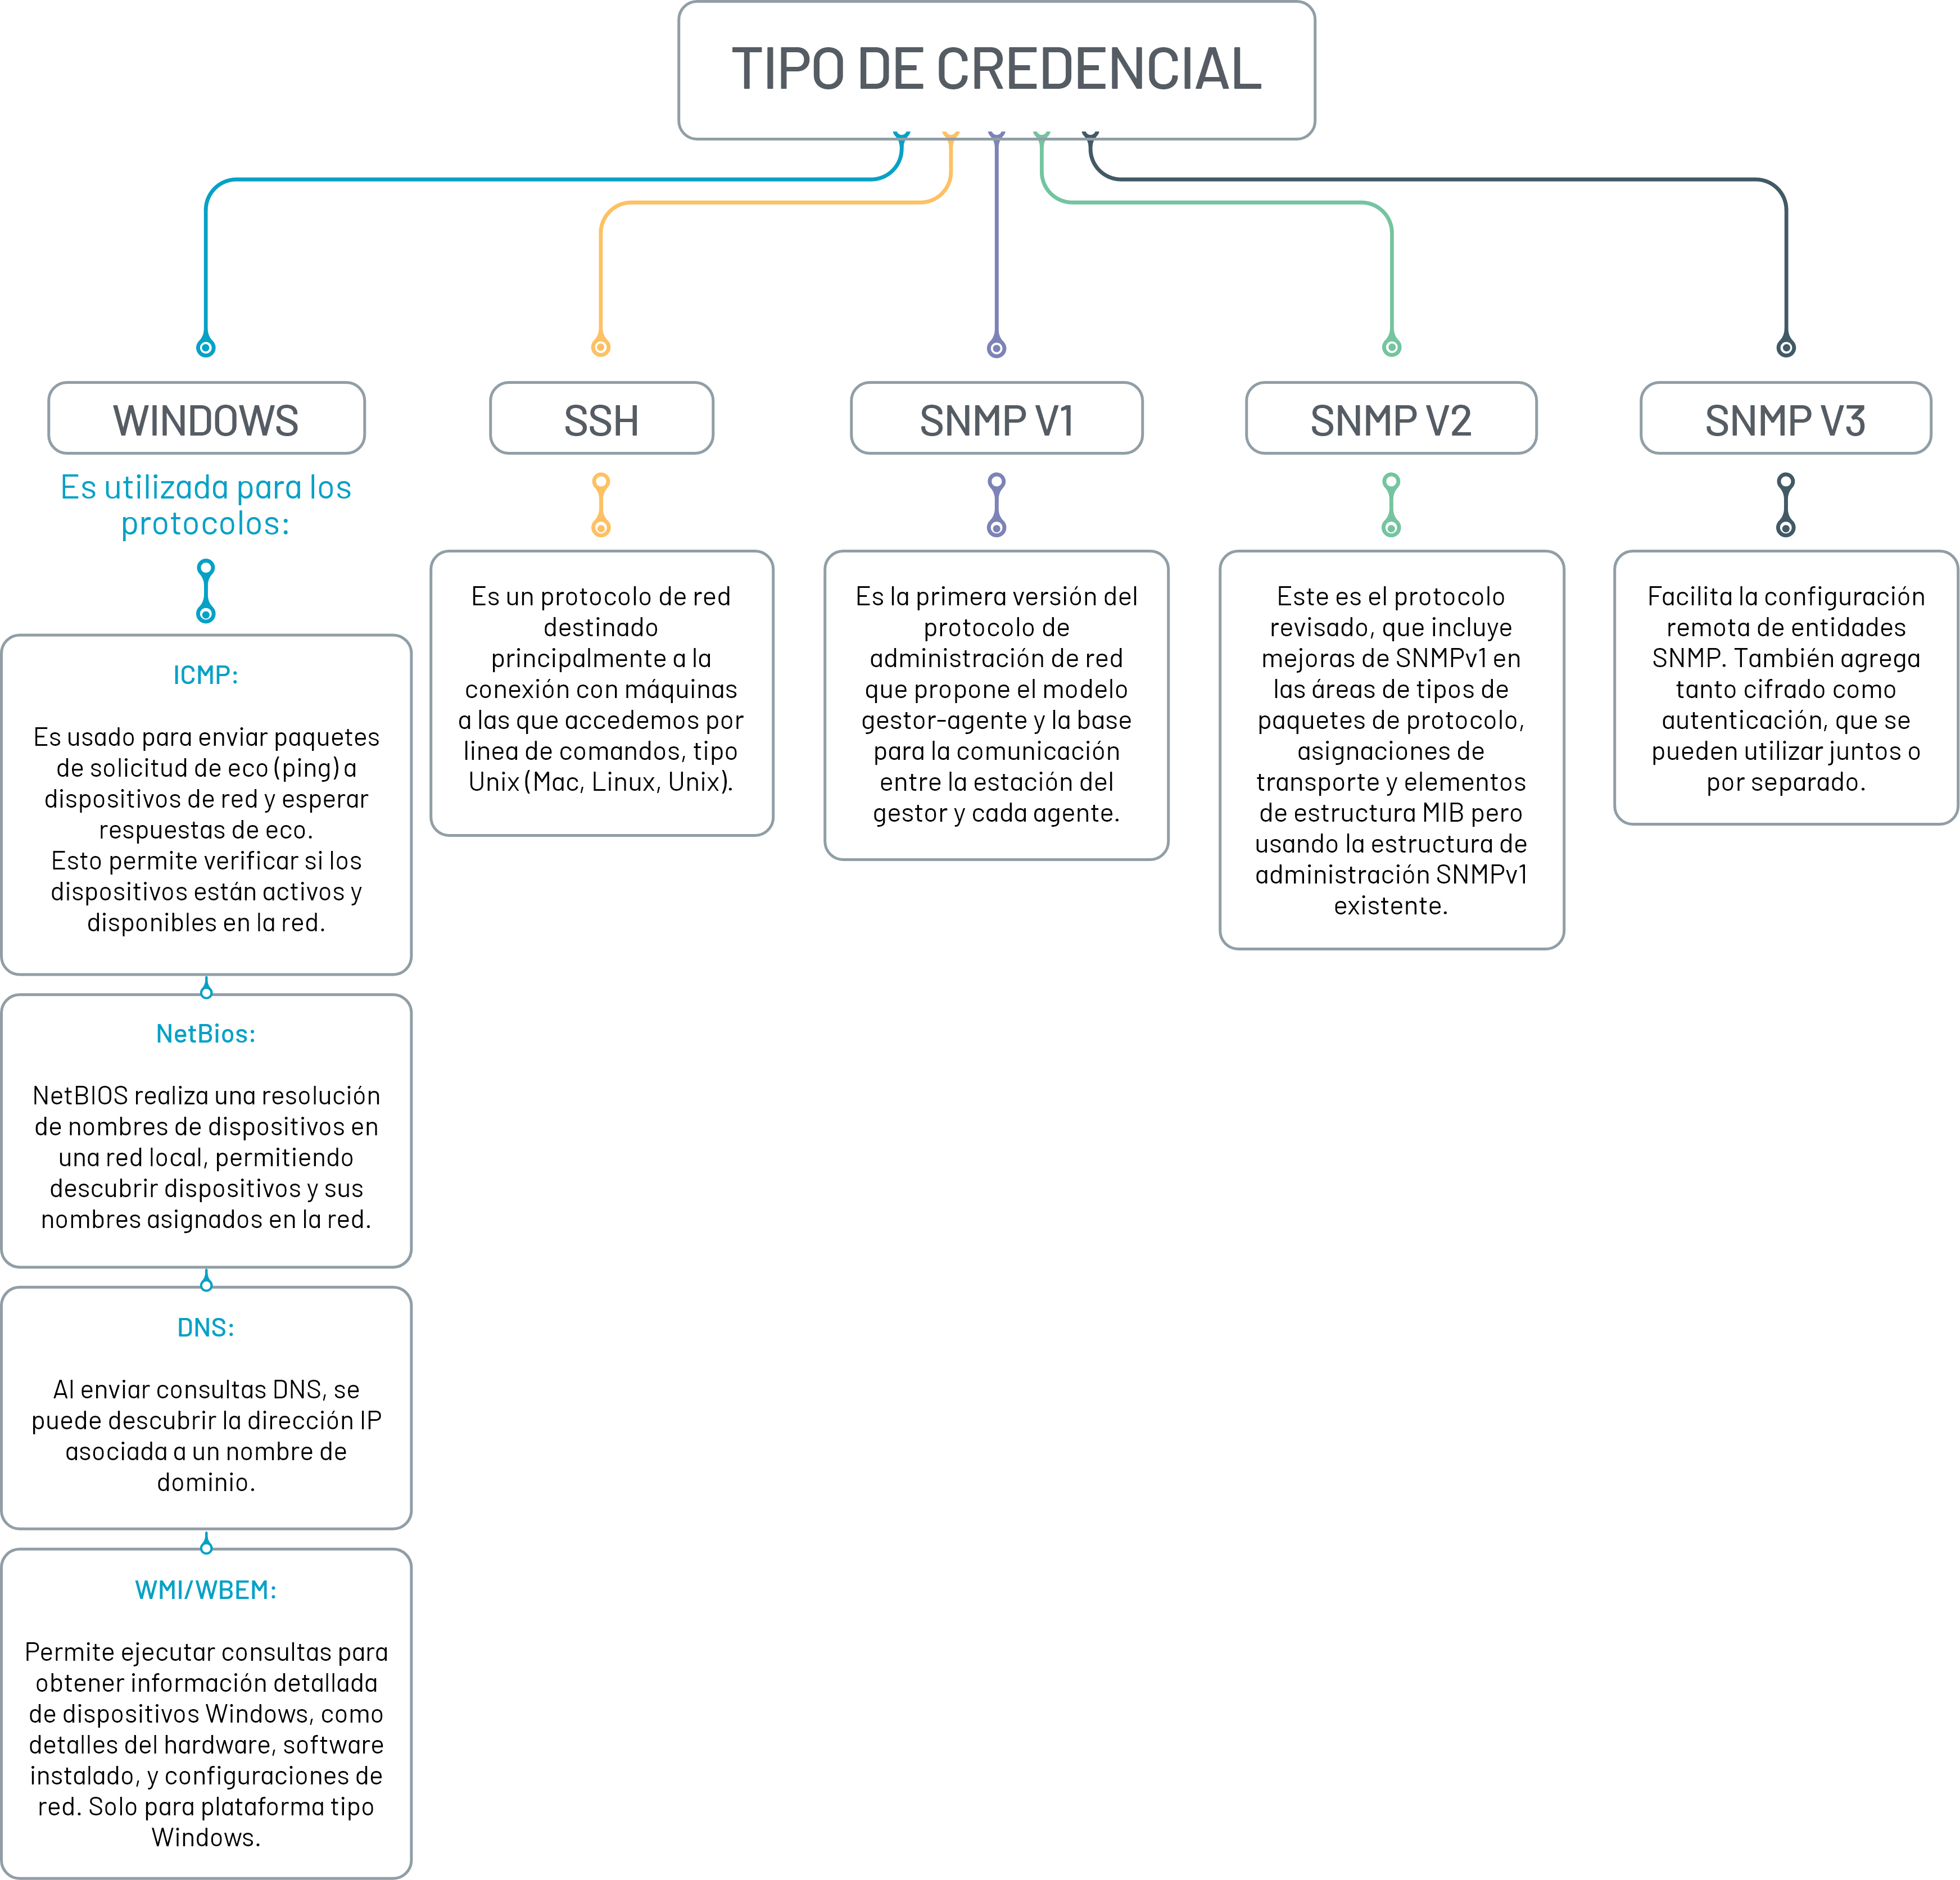
⚐ Note: - If you select ICMP, NetBios, DNS protocols, it will not prompt for credentials.
- if SNMP, SSH or WMI/WBEM protocols are selected, credentials are prompted
4. If you define the protocol type Directory Services Select the directory service by authentication type LDAP by which you want to perform the discovery of the active directory.
For more information, see the Management Directory ↪ Services.
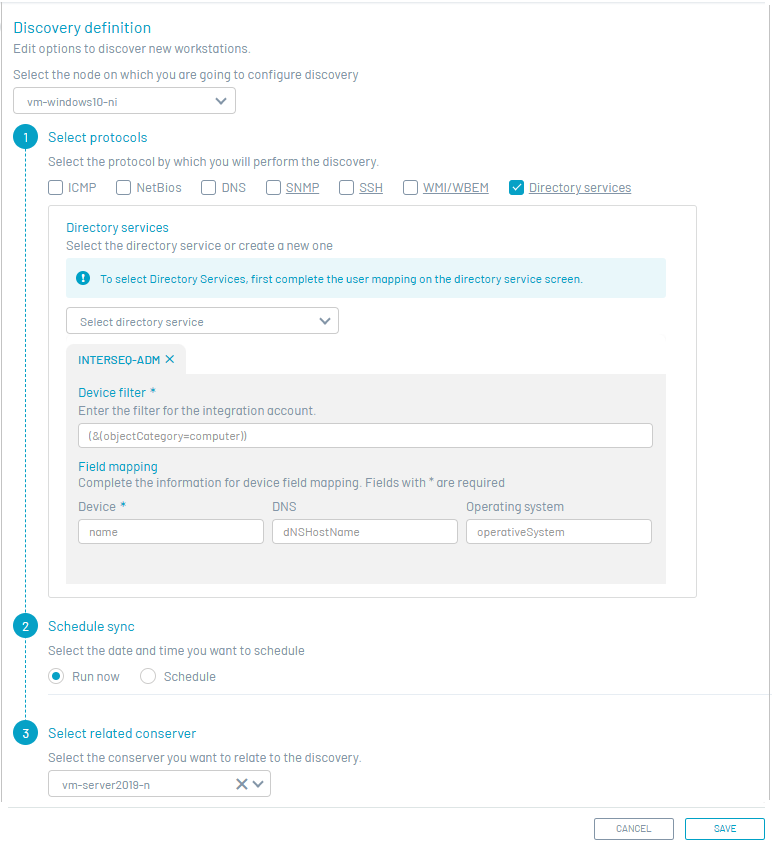
LDAP Directory Services/Sample Device Filters
| Filter | Example |
|---|---|
| Filter to sync all devices | (&(objectCategory=computer)). |
LDAP Directory Services/Example Mapping Fields
| Field | Name |
|---|---|
| Device | name. |
| DNS | dNSHostName. |
| Operating system | operativeSystem. |
⚐ Note: For the active directory, the ip range section is not enabled.
- To select Directory Services, user mapping must first be completed on the Directory Service screen.
5. When defining the protocol, click the Confirmation  to enable the next section.
IP Range
6. In the step 2 you will be able to enter the range of IPs required, like this:
- Manual Way: Enter the range of IPs required.
- Importing a CSV file: IP ranges must contain two comma-separated IP addresses: the start IP and the end IP (example: 10.0.0.6, 10.0.0.6).
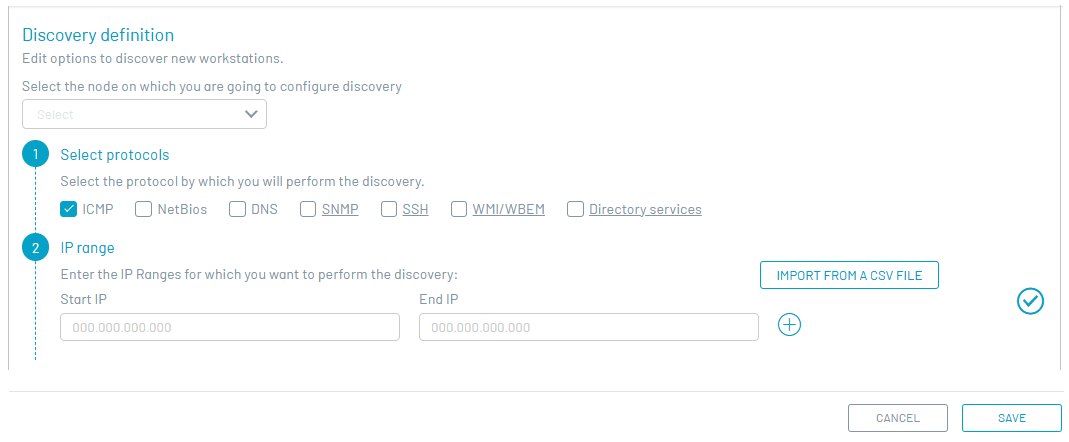
7. When defining the IP range, click the Confirmation to enable the next section.
Schedule Sync
8. In the step 3 Schedule synchronization for device discovery, running the action immediately or defining the recurrence (once, hourly, weekly) and setting the date and time when you want to schedule discovery
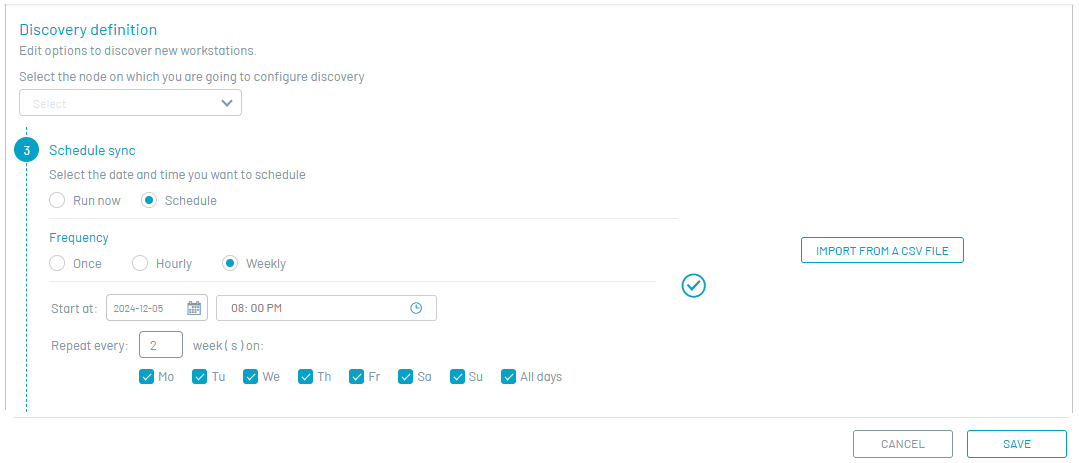
9. When scheduling the sync, click the Confirmation to enable the next section.
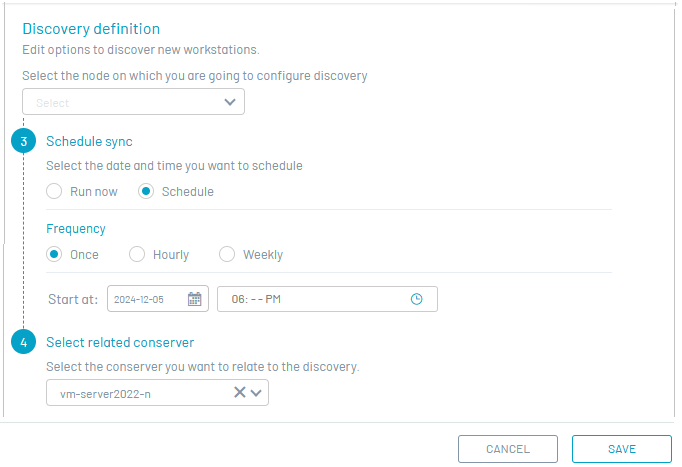
Select Related Shelf (Optional)
10. In the step 4 Select the conserver you want to relate to discovery in case you need to send an agent distribution to the devices later.
⚐ Note : If the preserve is not entered, the agent distribution to that device cannot be performed and you would have to rediscover the device.
11. When you’re done setting up device discovery by definition, click the  Save to confirm the changes made.
⚐ Notes:
- In the Inventory Management module you will be able to View all discovered devices during ADM setup.
- If the same device is discovered by a different protocol, it will be displayed as duplicated in the list.
⚐ Note:
- In the Inventory Management module you will be able to view the Detail of discovered devices, with SNMP protocol Configured.