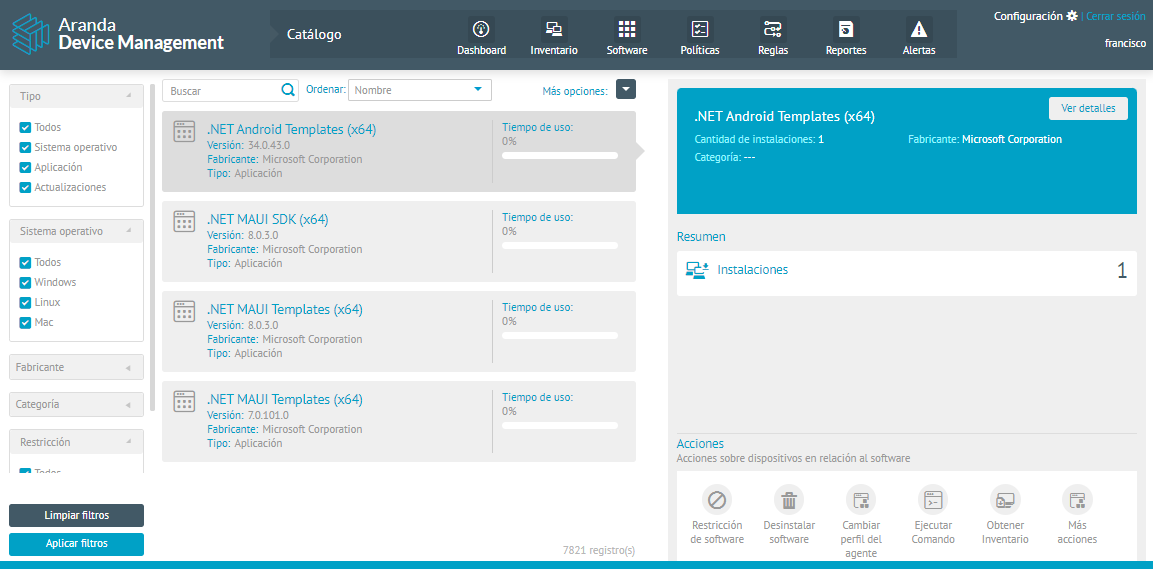
1. In the detail view of the selected software, you can view the detailed information of the installed software and the available actions grouped in the software, Device Groups, and Cis tabs.
Software
2. The left panel of the screen presents the relevant information from the software. In this section you will find the Software Detail  , which allows you to view extended and software-specific information, generated based on the search performed by the AI module and is only available after configuring the AI and AI Actions endpoints. For more information, see AI Configuration.
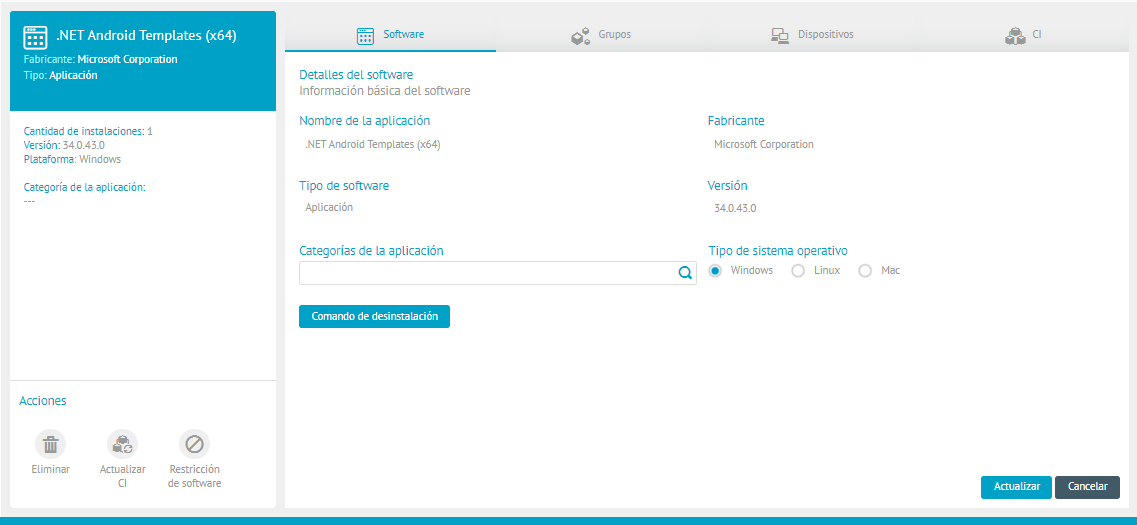
On the Software tab, you can view the basic information of the created software, update the operating system type, and access the option Uninstall Command to uninstall the software from the catalog. When the setting is complete, click Update.
Groups
3. On the Groups tab, you can define the rules and criteria for groupings by application. The grouping categories are:
⚐ Note: The association of licenses and the counting of the use of the software is done by means of these groupings or items of the software catalog. The user will be able to create their own rules according to the classification needs of their organization.
Software Bundles
4. When selecting the Software Bundles You can create the grouping with the desired criteria. These rules define the grouping of all software according to its name. Software bundles are used to make it easier to assign licenses, organize different versions of the same software, or block access to software pools.
5. By clicking the New, you can create groupings by Parameter, Manufacturer, and Version Number criteria.
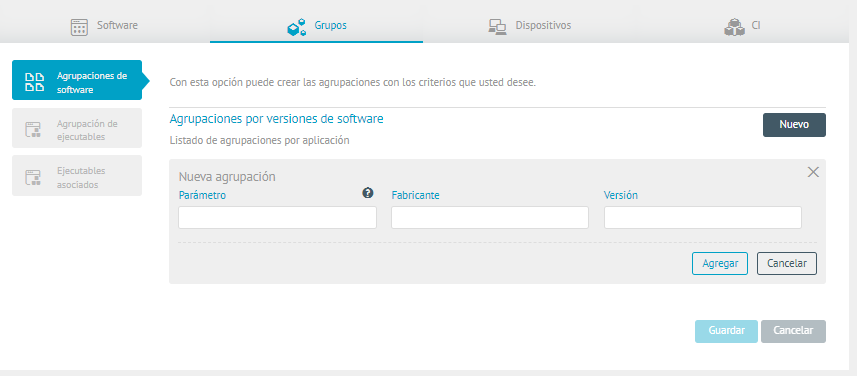
⚐ Use of Wild Cards: Use wildcards for the grouping as follows:
{ * value to look for } => It will bring up the values that end with the content entered.
{ value to look for * } => It will bring up the values that start with the content entered.
{ * value to look for * } => It will bring the values they contain with the content entered.
⚐ Example: Microsoft Visual Studio*. All software that meets the defined criteria is considered part of that group, Microsoft Visual Studio 2017, Microsoft Visual Studio 2015, Microsoft Visual Studio Premium 2012.
6. When you complete the grouping information, click Add and Save.
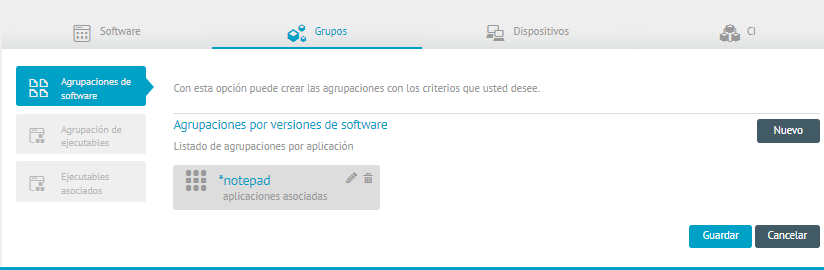
⚐ Note:Only devices that have the ASM product license associated with them are considered in the licensing module.
Executable Clusters
7. When selecting the Executable Clusters You can create groupings of multiple executable files by the desired criteria. These rules define the grouping of all software based on the executable files identified in the inventory by name.
8. By clicking the New, you can create groupings by criteria such as software, Manufacturer, and Version number.
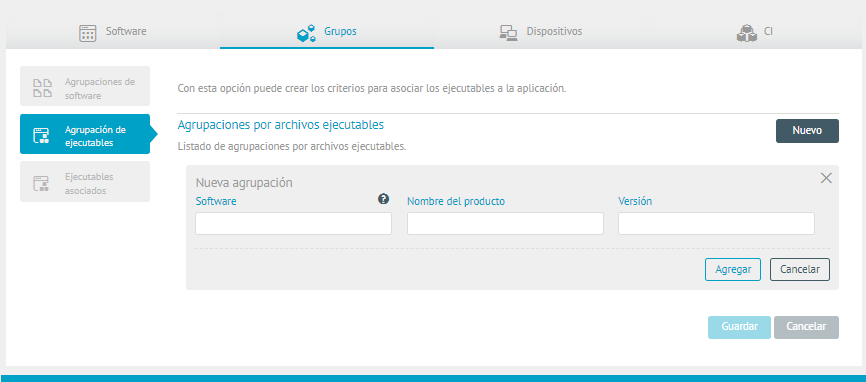
⚐ Use of Wild Cards: Use wildcards for the grouping as follows:
{ * value to look for } => It will bring up the values that end with the content entered.
{ value to look for * } => It will bring up the values that start with the content entered.
{ * value to look for * } => It will bring the values they contain with the content entered.
⚐ Example: Office = winword.exe, Excel.exe, powerpnt.exe All software that contains the defined executable files is considered to be part of that group.
⚐ Note: It is important to enter the version and Verify that the product is associated with only one executable, since leaving the version open can associate more executables and generate inconsistencies in the measurement.
9. When you complete the grouping information, click Add and Save, verifying that the executable is associated with the software.
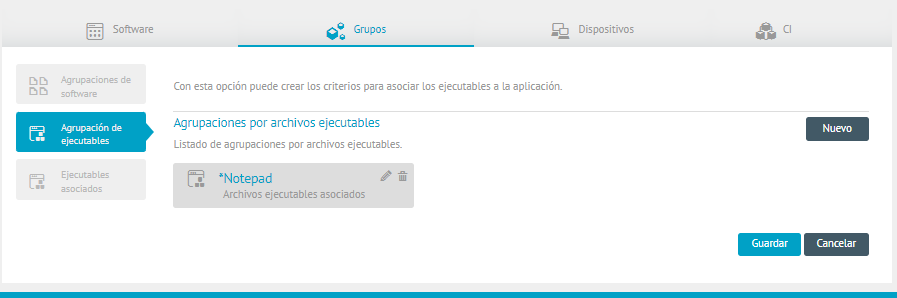
⚐ Nota: Por regla de negocio, no es posible agrupar ejecutables cuando ya existe una agrupación de software.
Associated executables
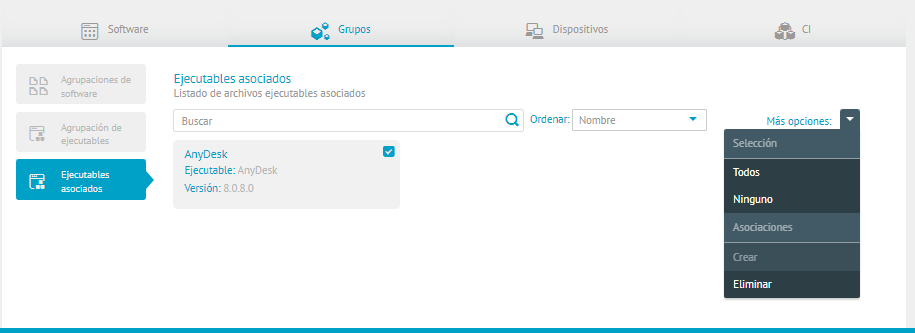
10. When selecting the Associated Executables you will be able to view and sort the executable files grouped above; You can also create or delete files until you achieve the desired grouping.
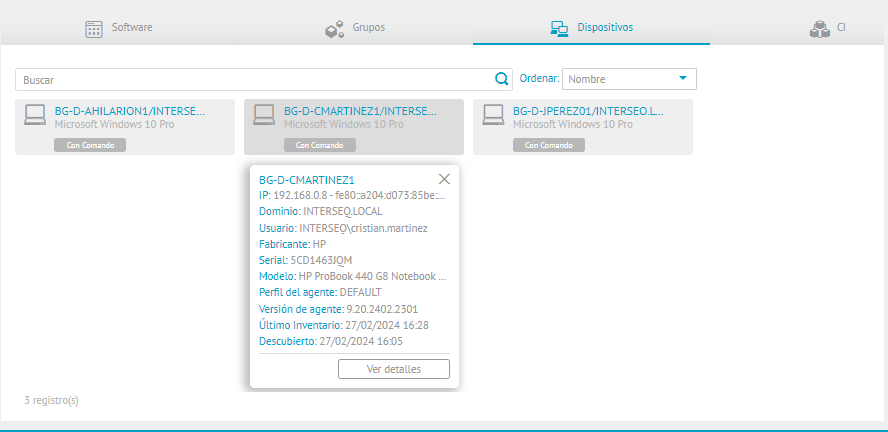
Devices
11. On the Devices You will be able to view the list of licensed and unlicensed devices where the selected software is installed. Here it is possible to associate and unassociate licenses on each device. You can also perform the search for a specific device.
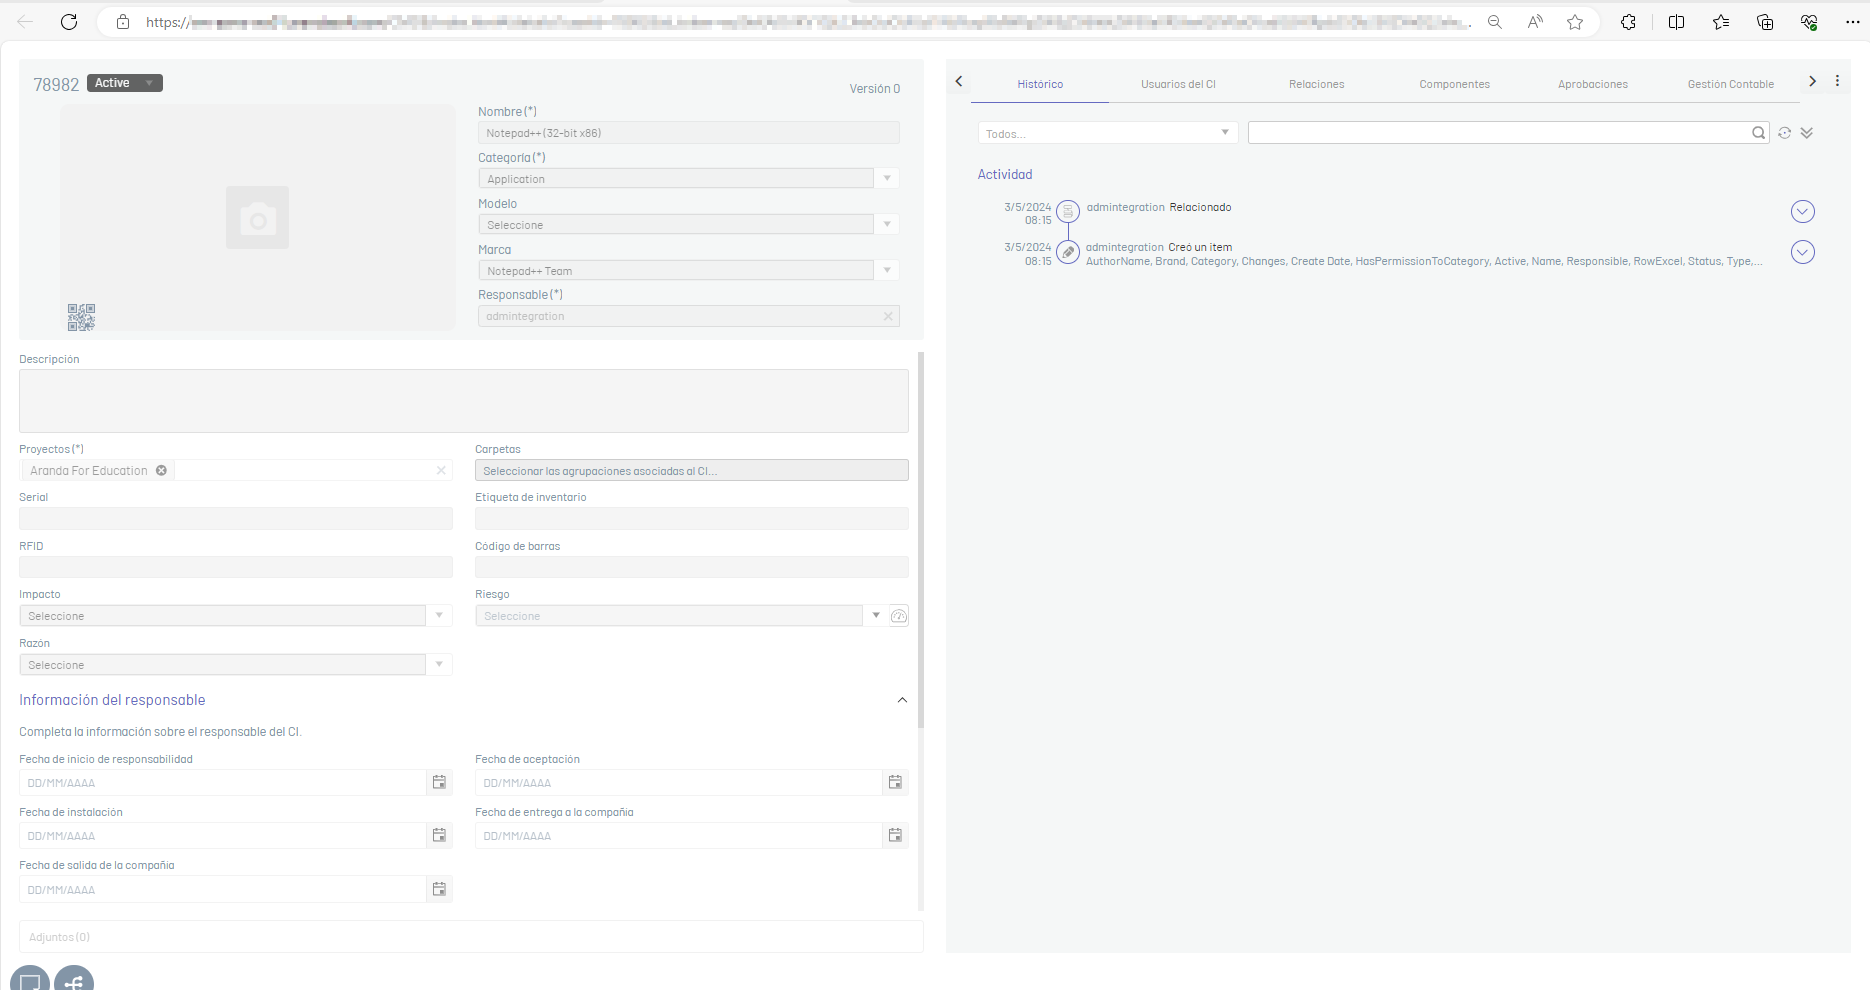
CI of a CMDB 8 and CMDB 9 Software Versions 7.2.0 and 9.8.0
12. On the CI, if the CI has not been synchronized, a watermark will appear indicating: “The CI has not been synchronized in the CMDB”. To synchronize it, you need to click on the action button Update CI.
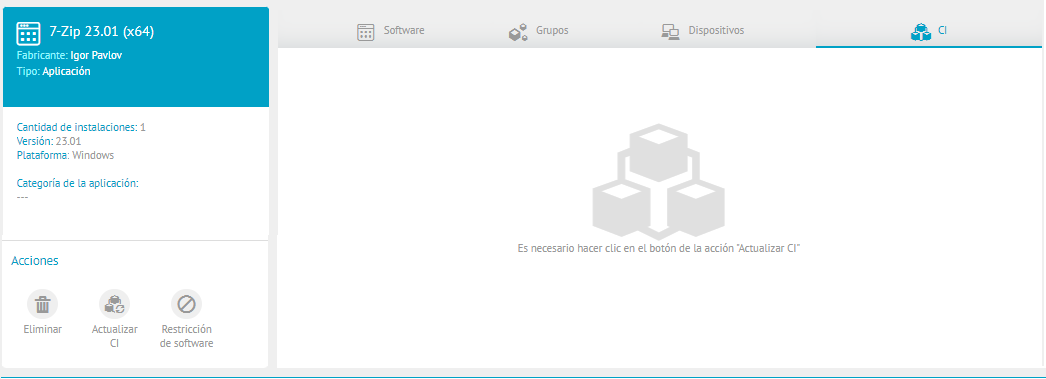
13. In the Software Details section, in the Actions, click the Update CI.  .
.
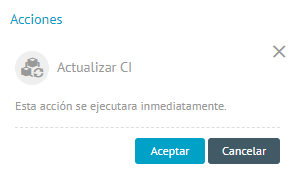
14. In the confirmation options, click Accept
15. After confirming on the CI tab, the updated information of the software CI fields previously configured in the CMDB is enabled. In addition, a success message will be displayed when the query has been successful.

CI of a CMDB 9 Software (New Model)
16. On the CI, if the CI has not been synchronized, a watermark will appear indicating: “The CI has not been synchronized in the CMDB”. To synchronize it, you need to click on the action button Update CI.
17. In the Software Details section, in the Actions, click the Update CI. .
18. In the confirmation options, click Accept
19. After confirming on the CI tab, the updated information of the software CI fields previously configured in the CMDB is enabled. In addition, a success message will be displayed when the query has been successful.
If you have trouble viewing the content, you can click on the “Click here” option, it will redirect you to the page where you can see the updated information of the device CI fields previously configured in the CMDB.