
User Groups
⚐ Notes: In the User Groups module, you can configure user groups to manage their roles and permissions. User groups
Device Groups
⚐ IMPORTANT:
- If prior to ADM version 9.24.1 you managed user group and/or device relationships for remote takeover, please note the following: Migrating relationships to device groups
In this module, you can configure device group association, with permissions assigned to user groups. You can also enable the ADM security feature, which allows you to restrict the visibility of computers (PCs, servers, network computers) in the list of ADM devices according to the different groups of people accessing ADM, to ensure that each person in the organization accessing ADM can only consult the computers they should access.
Segmenting device visibility by group is a security solution for organizations with high information access requirements and geographically dispersed teams.
You will be able to segment the visibility of devices by creating a Role with the “manage all devices” permission disabled and then assigning this Role to the corresponding user groups.Roles and Permissions.
⚐ Notes:
- The Permit Manage all devices will always be active by default on all Roles, as a result, all devices can be viewed and managed.
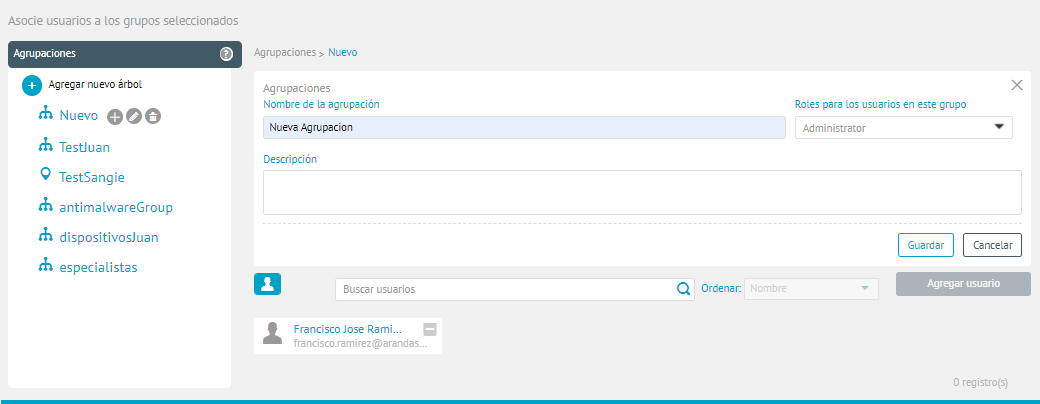
Create Group
1. To create a device group, go to the configuration view of the ADM web console, in the General from the main menu, select the Groups and Devices.
2. Click Newicon, fill in the name of the group, and click Save. A message will appear confirming the creation of the group.
⚐ Notes:
- Imported groups cannot be created as it is information collected from the service directory.
- You can create as many subgroups as you need. Subgroups (child groups) do not inherit permissions and devices from the (parent group).
- Two groups cannot have the same name if they are at the same hierarchy level.
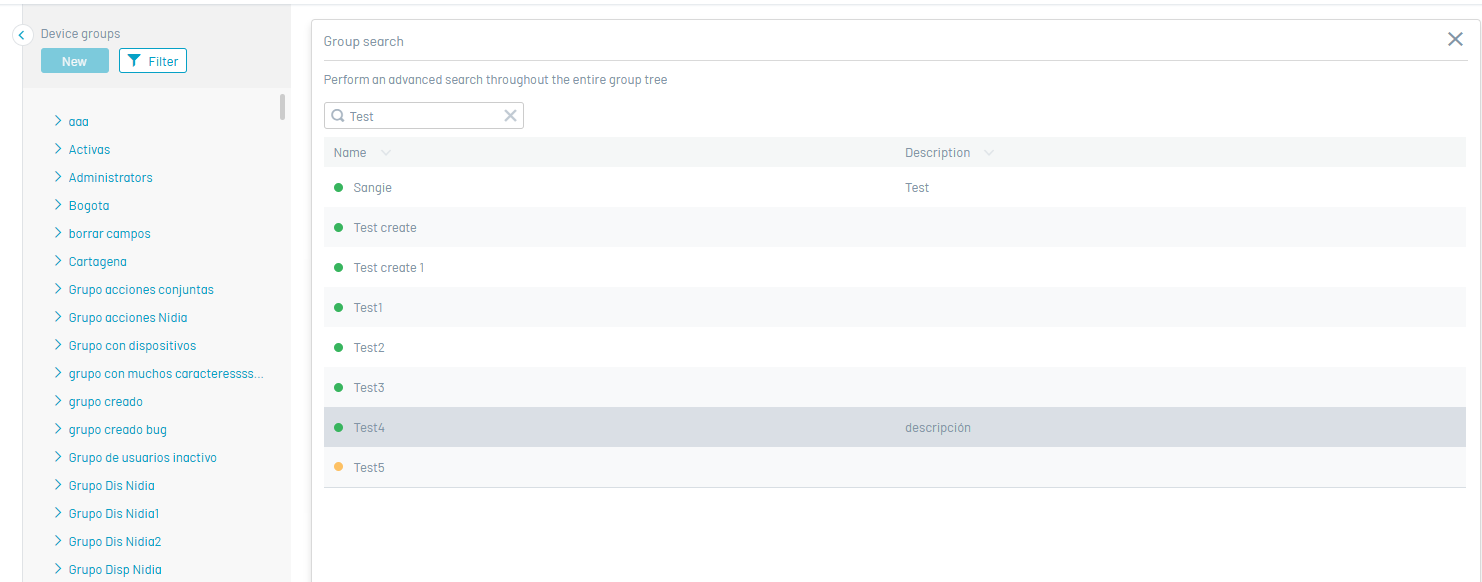
Group and device filters
1. group filtering can be performed by clicking,  and displays a modal where the search engine allows you to filter by Name or Description
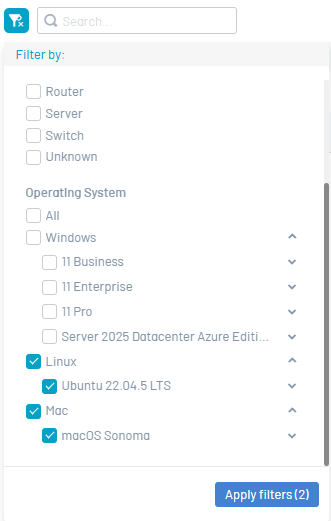
2. To filter by device, you can identify whether it is associated or disassociated with a group.
Filtering can be done using one or more criteria, depending on the need.
To activate a criterion, select the checkbox.
Here’s an example that uses multiple filters:
Actions by Cluster Root Node
3. In the information view of the Devices grouping tree, select an existing root node this will allow editing the group,
The window where you can modify the related information Group Name is enabled, when finished click on Save 
4. To modify a group or subgroup, in the device group information view, select a record from the grouping tree; You will be able to view the group details and modify the required information.
5.To create a subgroup, click New. A window will be enabled where you can fill in the required information, such as the name of the subgroup.
Fill out the Name field, and when you’re done, click Save

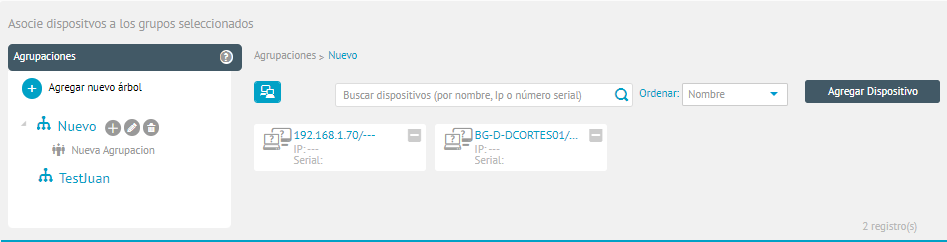
6. To associate devices to the created group, click the Associate Device
⚐ Note:
- Only the devices selected in the browser will be associated with the group.
7. When selecting the Delete Group  You will be able to see the following message: *Are you sure to delete the grouping and its groupings?, remember that this will also delete the users and devices associated with this group. By giving Accept The grouping and related information will be deleted.
Add device to a group
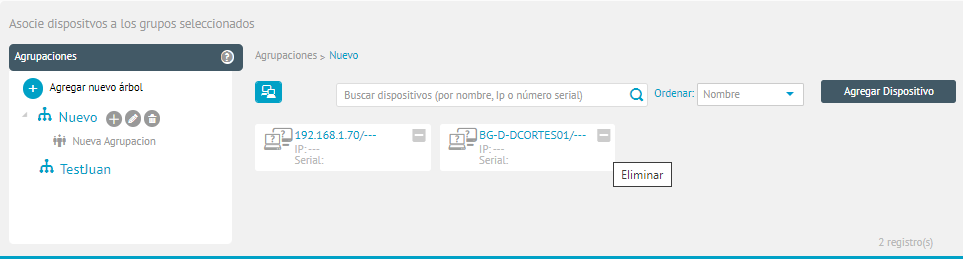
1. In the detail view of a root node or pool, you can include the devices to the defined group. When you activate the Associate Devices The Add window is enabled where you can view and select the required devices.
2. When you finish selecting the devices to be paired, click the Associate. You will be able to display a message confirming the addition of the device to the group.

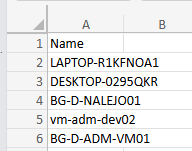
3. También podrá agregar masivamente dispositivos a través de un archivo con un solo clic en  Al hacerlo, se visualizará un modal desde el cual podrás descargar el archivo mediante el ícono
  En este archivo deberás registrar las direcciones de los dispositivos en la columna IP o Name, teniendo en cuenta las siguientes consideraciones:
⚐ Notes:
- It will only support column with Name or IP.
| Consideration | Wrong | Correct |
|---|---|---|
| Only the IP addresses v4 or v6 format and Name are supported, any other data will invalidate the file. | 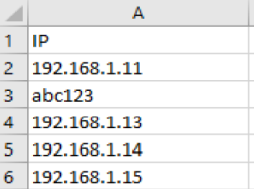 |
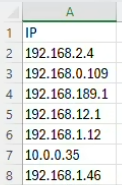 |
| The file does not allow mixing IP addresses v4 and v6 and Name. The IPs must be of the same type. | 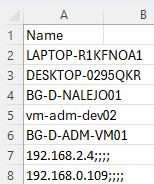 |
 |
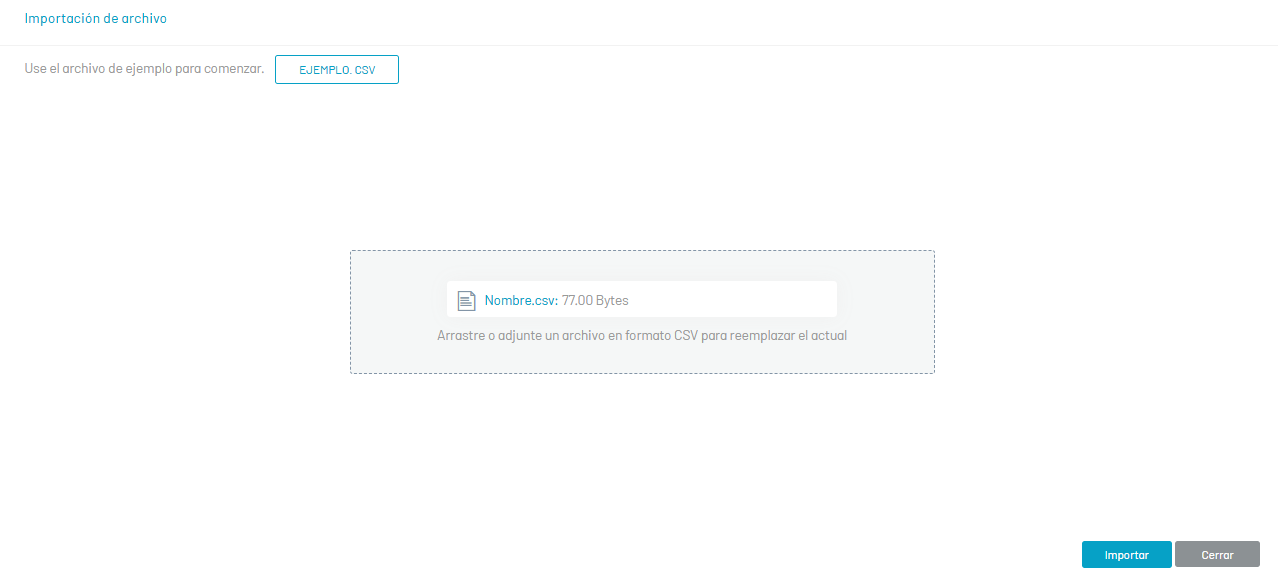
4. Once the template information is complete, drag or attach the file into the import modal and click 
Disassociate devices from a group
3. In the list of devices associated with a root node or pool, click Disassociate to remove the device. You will be able to view a message confirming the action. By clicking Accept The device will be removed from the group.
Add permissions to user groups
1. When you finish pairing devices, click the Manage permissions  the modal is displayed to Associate permission

| Permission | Description |
|---|---|
| Remote control | Actions -> Remote control. |
| ADM Actions | Actions -> Get Inventory Actions -> Update CI Actions -> Remove Device Actions -> Resolve conflicts More Actions -> Remove Device More actions -> Assign responsible user More actions -> Resolve conflicts More actions -> Update agent More shares -> Camb / act. Agent profile. |
| Remote Administration Actions | More actions -> Execute command More Actions -> Restart Device More Actions -> Turn Off Device More Actions -> Turn On Device More Actions -> Sync Clock More actions -> Erase file by extension More actions -> Send message |
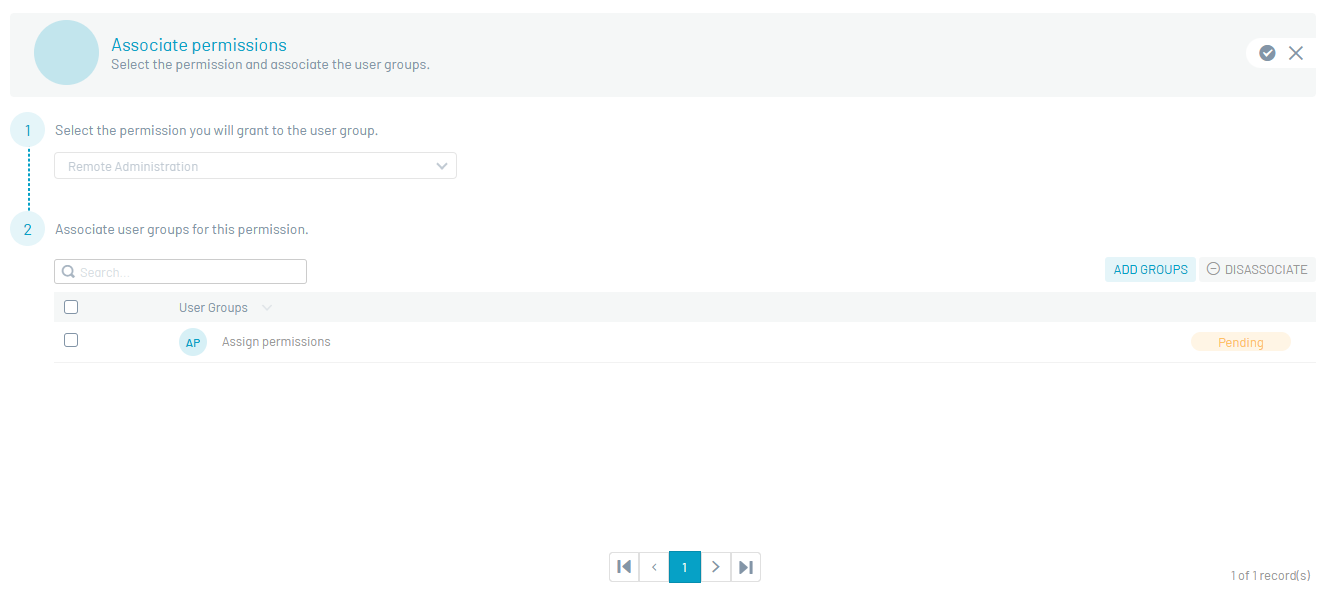
2. Click Associate permission, select the permission you want to grant to the user group; The list of available permissions is displayed, when associating the permission, click the  to confirm the association.
⚐ Notes:
- Permissions are not inherited in Subgroups.
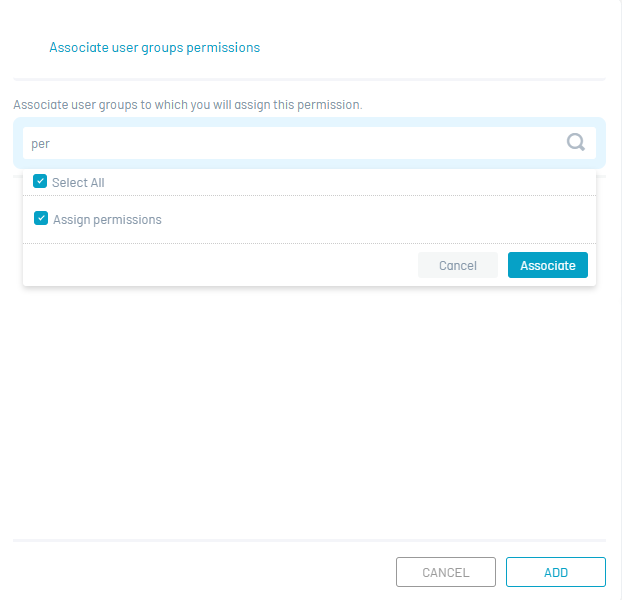
3. Associate the user group that will assign you the permission by clicking ADD GROUPS
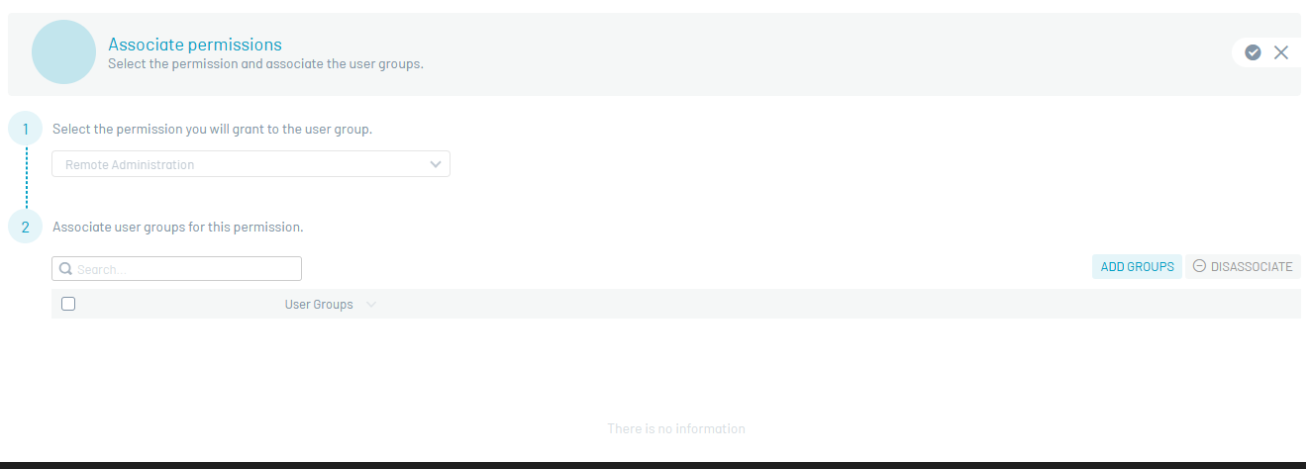
4. In the search field you can add the user groups by clicking Associate and ADD
5. The created user group will be able to be displayed in pending status and the device groups are related to the user group and permissions assigned, the group will be displayed in the pending status Active.
6. Click the Save and you can view the association of user groups with assigned permissions.
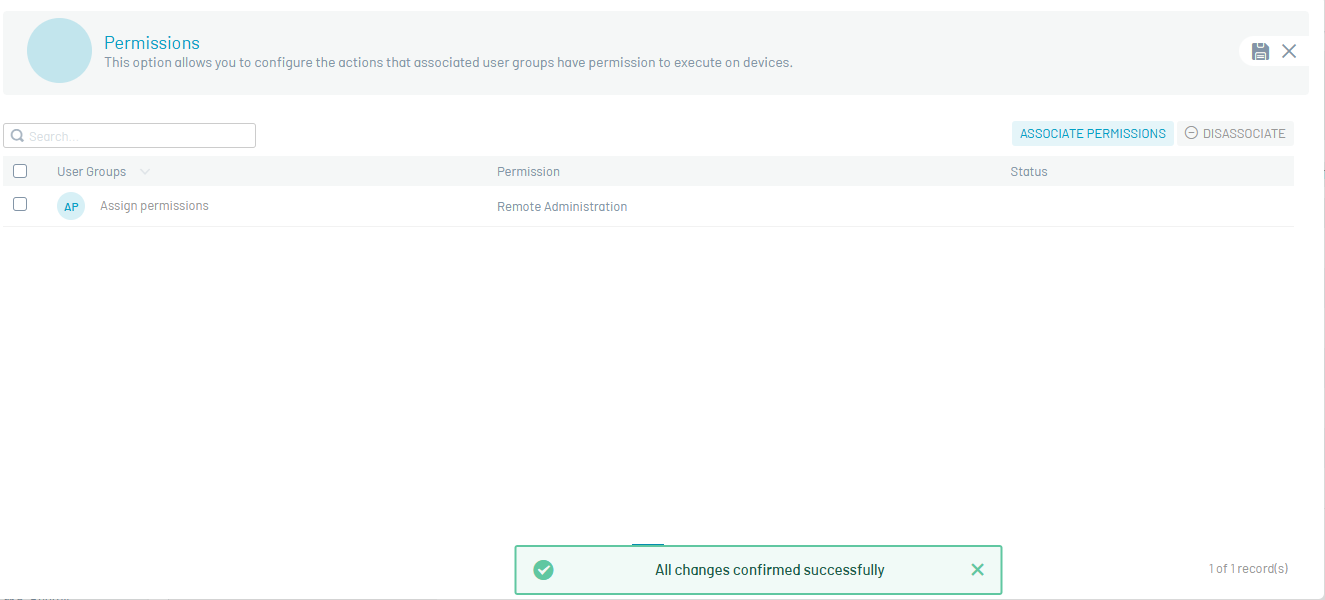
After you set up, if the associated user group has the “Manage All Devices” permission disabled in the Role Roles and Permissions, when entering the ADM website, only the devices belonging to that group will be displayed and the action defined in the device group permission can be executed.