Console Storage Providers
-
Enter the ADM management console, in the Settings section of the main menu, select the option Global Settings. In the information view, display the item Console Storage Providers.
In this section, you can configure the path to temporarily store the files.

-
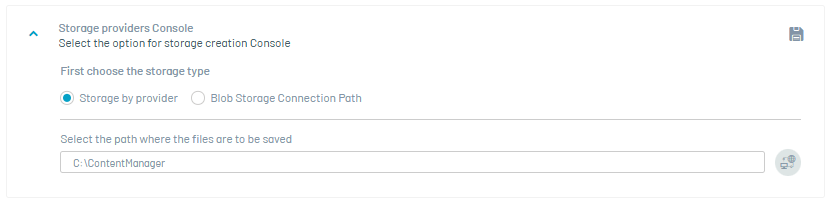
There are two types of storage: Provider Storage or Blob Storage Connection Path.
-
Storage by Provider: In this section, you will be able to configure storage using a local or remote provider.
-
Local Supplier: Enter the path where the files are temporarily stored. When logging the route, click on the Test Connection
 . If the connection was successful, you will be able to view the message: Successful connection test and the continuation of the process is authorized.
Click on the Save
 to confirm the changes made.
Example Supplier Route: C:\ContentManager
⚐ Note: This path must be accessible and properly configured to ensure data integrity and availability.
- In cloud deployments, this configuration will not be displayed {: #important} -
Blob Storage Connection Path: In this section, you can configure the path to store files temporarily and save them to the Blob Storage.
⚐ Note:
- The connection string is generated from a storage account created in Azure.
- Create a container to display all stored packages (software or agent) as well as the inventory of updates, software delivery, and patches.
-
On the Azure site, go to Settings and change the minimum TLS version, to version 1.2.
When registering the connection path, click on the Test Connection
If the connection was successful, you will be able to view the message: Successful connection test and the continuation of the process is authorized.Click Save
to confirm the configuration made.Example Connection String:: DefaultEndpointsProtocol=https; AccountName=blueberry; AccountKey=XXXXXXXXXXXXXXXXXXXXXXXXXXXXXXXXXXXXXXXXXXXXXXXX==; EndpointSuffix=core.windows.net

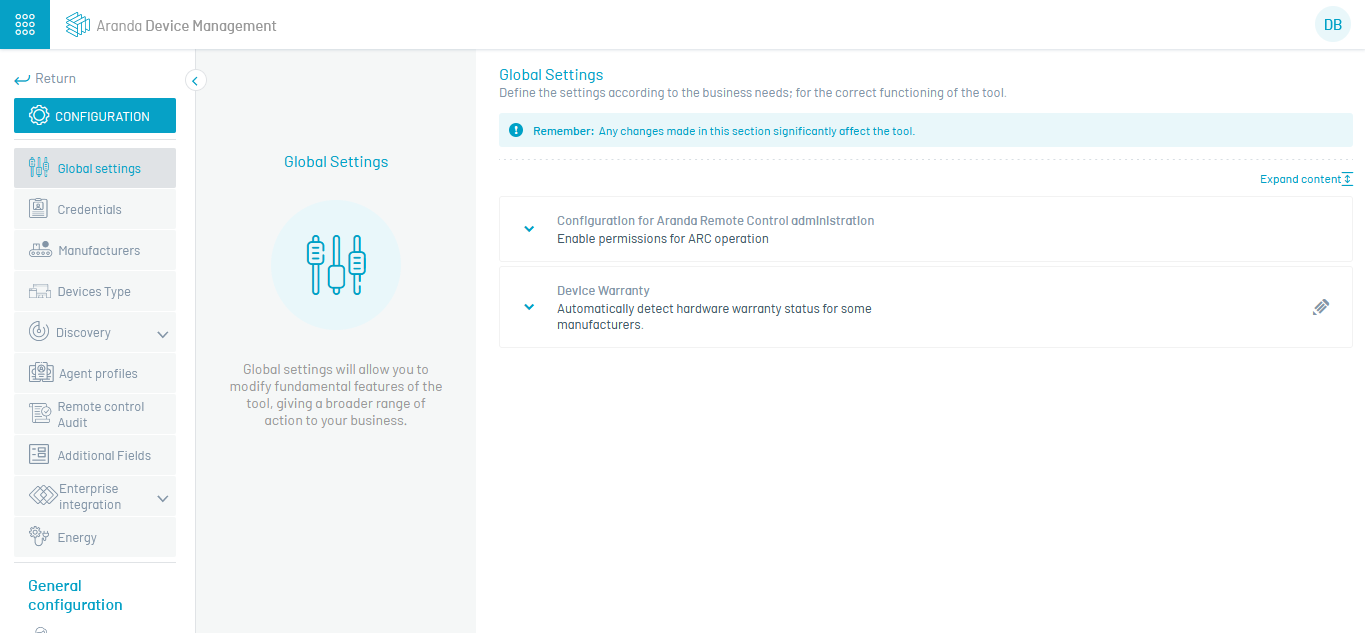
Configuration for Aranda Remote Control administration
-
Enter the ADM management console, in the Settings section of the main menu, select the option Global Settings. In the information view, display the item Configuration for Aranda Remote Control administration.
In this section, you will be able to enable the permissions required to access ARC services.

⚐ Note: - In cloud deployments, this field can only be viewed, but not edited.
{: #important}
-
Activate Aranda Remote Control: By enabling this functionality, you will be able to enjoy and access services, such as file transfer, auditing, and remote takeover.

Device notification
In this section, you will be able to configure the MQTT communication protocol.

Enter the IP address or domain of the device where the MQTT component is installed, followed by the connection port. Then, click on the Save to confirm the changes made.
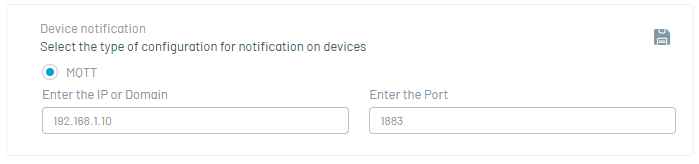
MQTT protocol example: 192.168.1.10:1883 or midominio.com:1883
⚐ Note: - The MQTT protocol is intended exclusively for use in on-premises environments, i.e. in physical facilities owned and controlled by the organization.
- In cloud deployments, this configuration will not be displayed.
⚐ Note: - This setting only applies to agents with version 9.23.2 or higher, for agents with older version, configure the Web.config of the Repserver site with the IP or domain of the device where the MQTT component is installed.
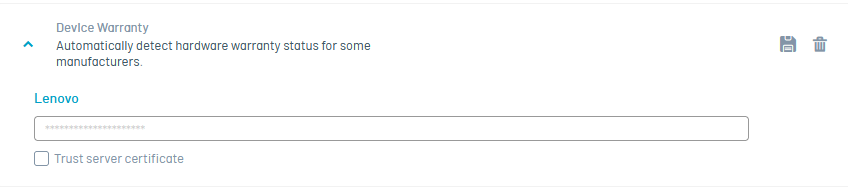
Lenovo Device Warranty Consultation Configuration
- Access the ADM Management Console. In the main menu, enter the Configuration and select the Global Settings.
- In the information view, display the item Device Warranty.
In this section, you can enable the Automatic detection of hardware warranty status for certain manufacturers.
For the specific case of Lenovo, enter a Valid token, supplied by the manufacturer or its authorised representative.
⚐ Note: When you enable this functionality, the system will automatically query the warranty status of each registered Lenovo device.
- The following data from Lenovo’s official source will be displayed:
- Warranty Start Date
- Expiration Date
- Current status, represented by color code:
- 🔴 Red: Expired Warranty
- 🟢 Green: Warranty in force
Once the token has been entered and the option enabled, you will be able to view this information from the functionality “View details” on branded managed devices Lenovo.