Project / Software Creation
1. To create a distribution project, go to the Home view of the ADM Management Console and select the Software from the Header menu. In the information view, display the list More options, New Project and click Software.

Basic Facts
2. In the window that is enabled in the General, configure in the Basic Data section Information such as: Name and description.

Package Distribution
3. In the Package Distribution, define the type of operating system on which you are going to distribute (Windows, Linux, or Mac), select the package, or create a new package by clicking Create Packages (see Creating Software Packages).
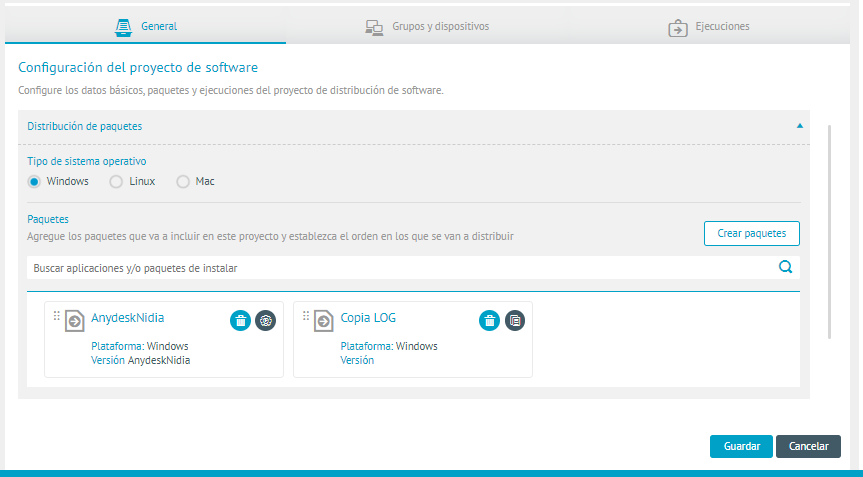
In software distributions, you can select packages created from three different actions:
- Execution: This type of action consists of running software on the devices. Configuring the silent installation command
- Copy: This type of action consists of copying any type of file or executable to the devices. When you select a copy package in the distribution project settings, indicate the path in which you want to save it.
⚐ Note: For Linux and Mac operating systems it is not possible to use environment variables as in Windows (%TEMP%, %USERPROFILE%); You must enter the exact path to which you want to copy the file.
- Registration keys: This type of action involves creating, updating, or deleting registry keys on devices. When you distribute the registry key, the agent opens the file and performs the corresponding action.
The ADM agent for Windows systems is compiled in x86 (32-bit) format to ensure compatibility on 64-bit or 32-bit computers. Therefore, some registry key distributions or file execution with extension (.BAT), by default, may behave differently in 64-bit environments.
To ensure consistent behavior, if your script (.bat) needs to make specific modifications to the registry or execute commands that depend on the architectural context (32-bit vs. 64-bit), you can extend the .bat with sections that contemplate the appropriate path and registry.
64-bit registry view (HKLM\SOFTWARE) or 32-bit view (HKLM\SOFTWARE\Wow6432Node) helps to avoid redirection errors, for this you should consider additional handling of %SystemRoot% and Sysnative in their scripts.
1) %SystemRoot%
Allows the rest of the path to be independent of the drive letter or machine-specific settings. When using %SystemRoot, ensures that the Windows registry is referenced from the correct location on the system.
2) Sysnative
Ensures that modifications are applied in the corresponding registry view (64-bit)
Example:
- 64-Bit Register Change
@echo off
%SystemRoot%\Sysnative\reg.exe ADD "HKLM\SOFTWARE\Example\v1.0" /v ExampleValue /t REG_DWORD /d 1 /f
echo.
echo Las claves de registro (vista de 64 bits) se agregaron correctamente.
- 32-Bit Register Change
@echo off
%SystemRoot%\reg.exe ADD "HKLM\SOFTWARE\Wow6432Node\Example\v1.0" /v ExampleValue /t REG_DWORD /d 1 /f
echo.
echo Las claves de registro (vista de 32 bits) se agregaron correctamente.
Credentials
4. In the Credentials, you can search for credentials that have already been created (Credentials), or you can add a new one by clicking Create Credential.
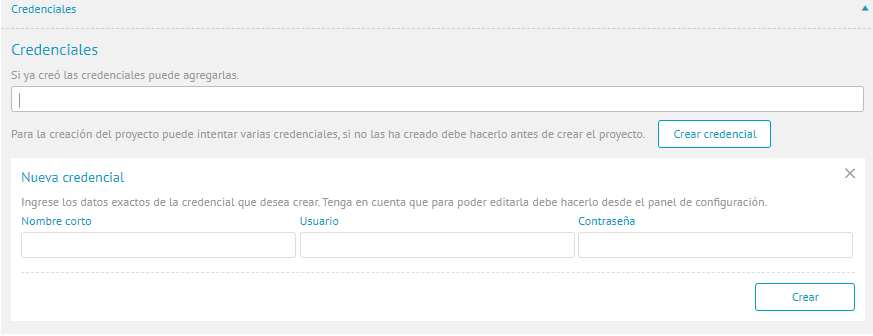
⚐ Note: Credentials must be created with the following structure: Domain\User. If the credentials do not include a domain, enter only the user and the machine’s hostname will be used internally. The commands are executed in the user’s security context and with the corresponding profile load. If the user does not have permissions to perform any action required by the command, the command will fail.
For Linux and Mac operating systems the section is locked, software type distributions will always run with the highest privileges.
Notifications
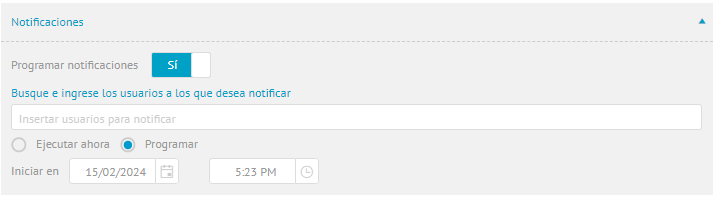
5. In the Notifications, schedule notifications to the users you require.
Device Groups
6. When you finish setting up the General, click Save to confirm changes made; in the Project Information View, Devices Group and Executions.
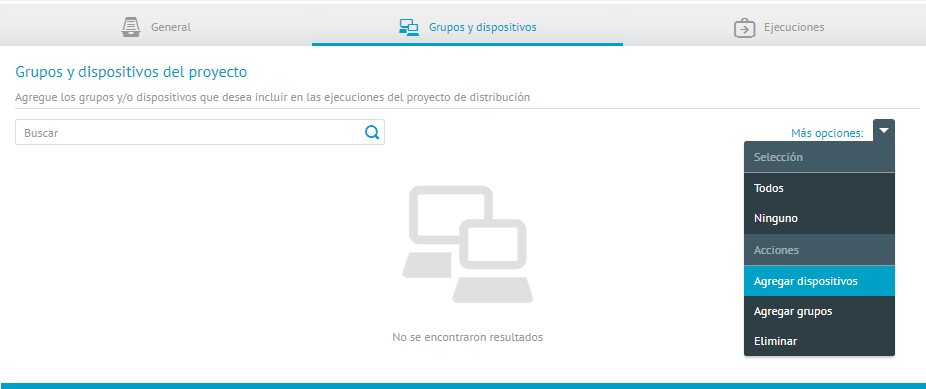
7. In the project view, select the Groups and Devices and on the list More options Select Add Devices.
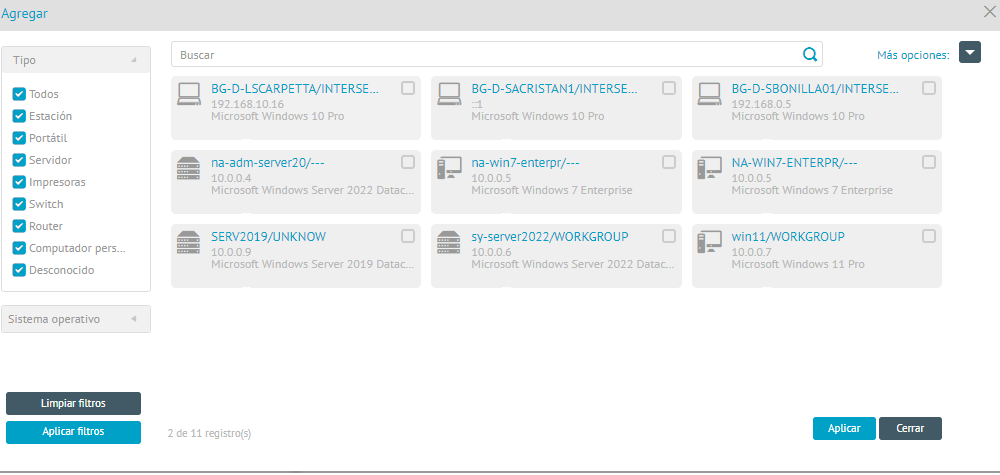
8. Select the devices where you want to do the distribution and click Apply.
Executions
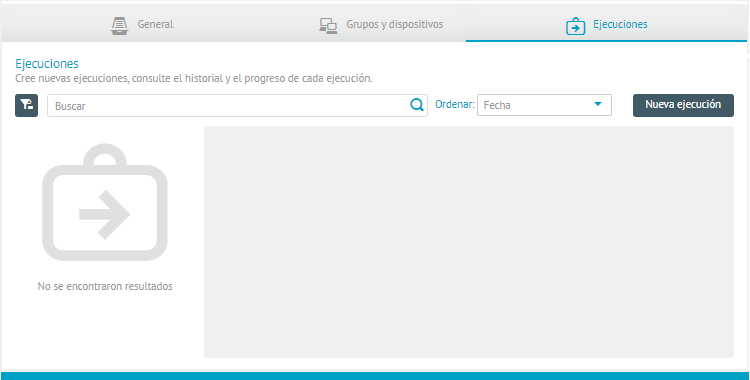
9. In the project view, select the Executions where you can view and generate the agent or software distribution. To do this, click on the New execution.
10. The respective window is enabled where you can add a name and schedule the new run.
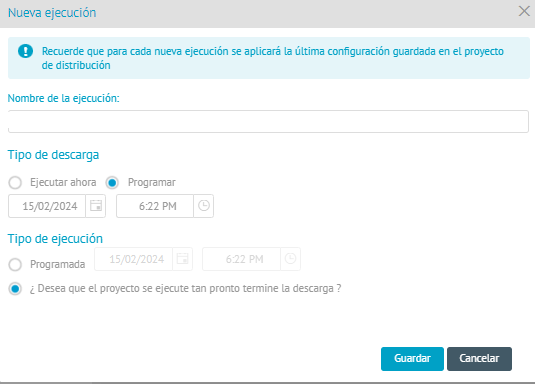
11. Al guardar, la ejecución nueva se genera en estado programada. En la pestaña Información visualizará un resumen del estado del paquete de ejecución.
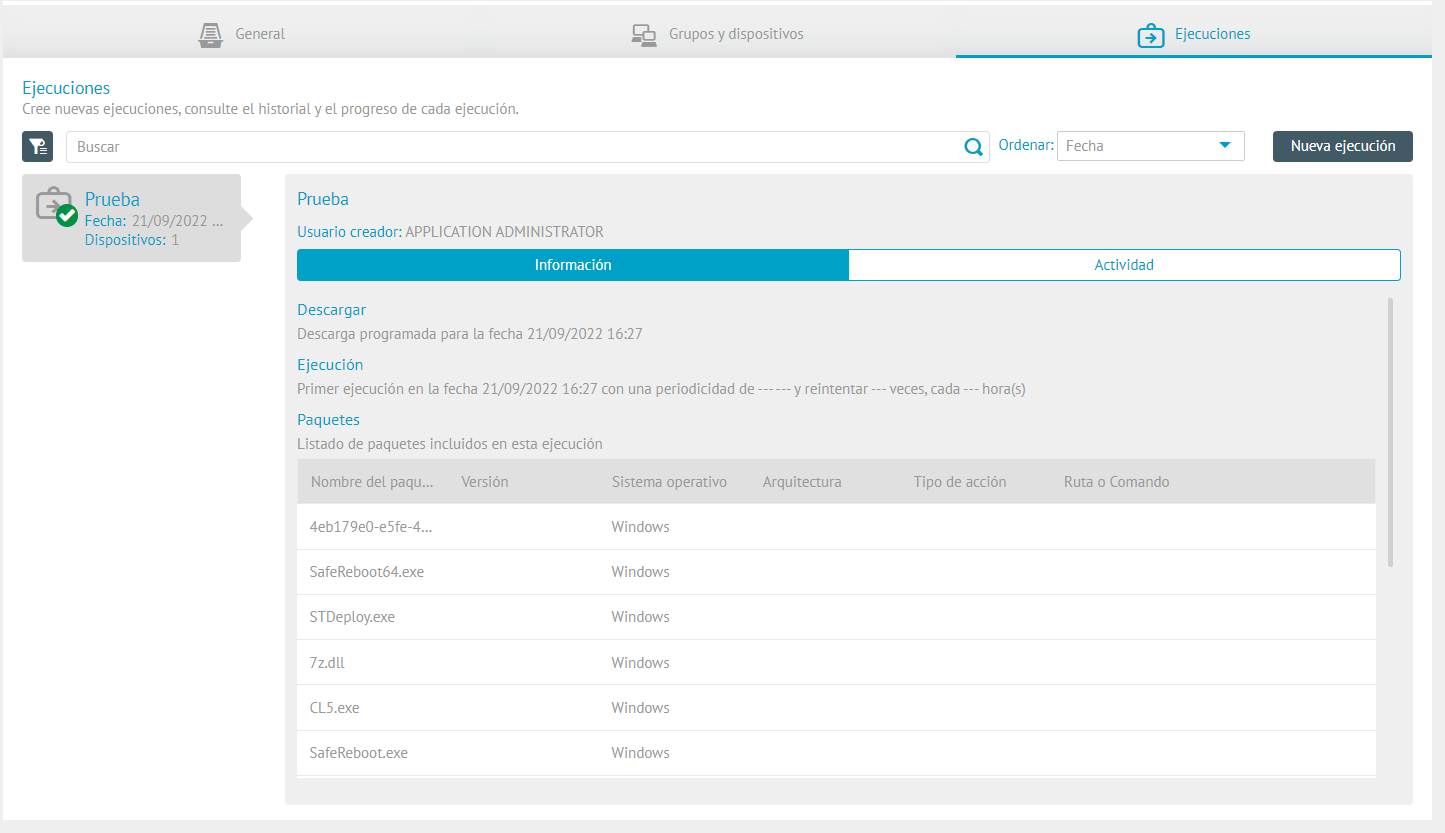
12. On the Activity The general information of the distribution and the progress of the execution will be displayed according to its status (scheduled, running or completed).
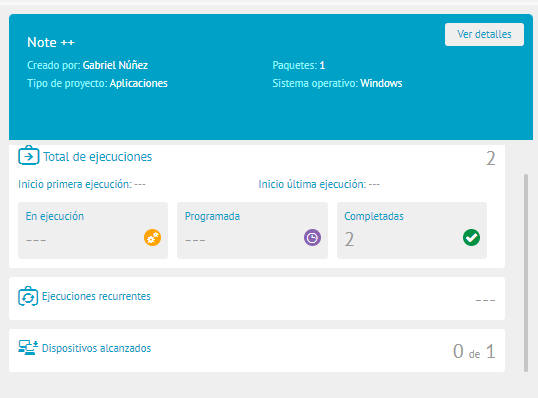
In the distribution project detail view, you can view the process summary with the total number of executions, recurring executions, and devices reached.

The following table outlines the possible Execution states by device within the distribution project.
| State | Explanation |
|---|---|
| ⬜ No notification | The device has not yet been notified about the execution. The timeout depends on the synchronization frequency configured in the agent profile. |
| 🟨 Pending execution | The device is pending installation. |
| 🟧 In Execution | Execution on the device is in progress. |
| 🟩 Executed | Execution on the device has completed successfully. |
| 🟥 Executed with errors | Execution on the device ended with errors. It is necessary to consult the detailed record of the execution to identify the failure. |
| 🟪 Discontinued | The execution on the device was interrupted by the system. |
| 🟩 Executed | Execution on the device has completed successfully. |
| ⬛ Cancelled | The execution on the device was canceled, it is possible that it is due to user intervention or expiration of the timeout when entering the “unnotified” state. |
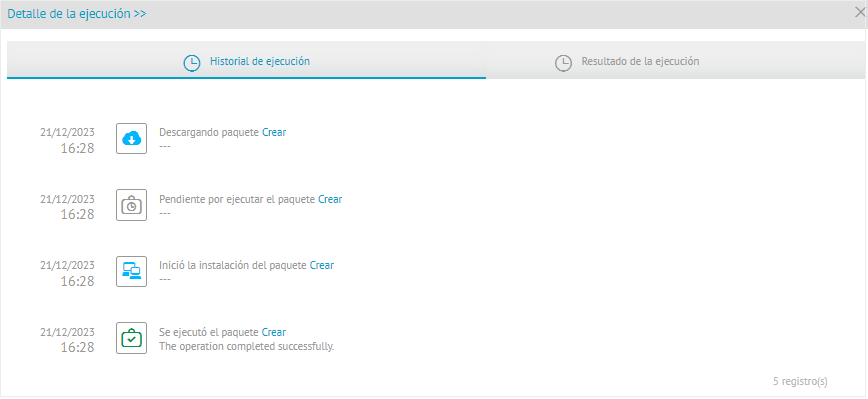
To view the execution history, click the  . A window will open showing the time and stage of execution and possible output messages.
The following table outlines the possible Per Packet States on Device Execution within the distribution project.
| State | Explanation |
|---|---|
| Awaiting download | The package is waiting to be downloaded. |
| Downloading | The package is downloading. |
| Downloaded | The package was downloaded successfully. |
| Download Error | An error occurred during the download of the package. |
| Maximum download errors | The package reached the maximum number of failed download attempts. |
| Awaiting execution | The packet is on hold for execution. |
| Running | The package is running. |
| Executed | The package was executed. |
| Executed with errors | The package was executed with errors. This can happen for a number of reasons, such as lack of permissions, locked files because they are in use, conflicts with previous versions of the software, or if the software was already present but the installer was unable to process it correctly. |
| Discontinued | The installation of the package was interrupted. |
| Canceled | The installation of the package was cancelled. |
| Omitted | The package was downloaded but not executed because the system confirmed that the software already exists on the computer and no action was required. |
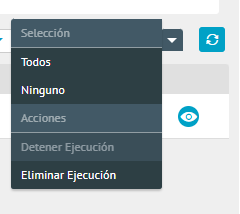
The drop-down menu More options It has two available actions:
- Stop Execution: If execution is in effect, it interrupts the distribution process.
- Delete Execution: removes the selected execution from the list.
⚐ Note: Ongoing executions can present the statuses of “running”, “scheduled” or “completed”, these statuses can be monitored in the solution and in this way, see how many devices have already been reached in the distribution project.