This functionality aims to integrate the Aranda SERVICE DESK (ASDK) and the Aranda FIELD SERVICE (AFLS) field work organization system, for customers who have both solutions.
Configuration for ASDK/AFLS Integration
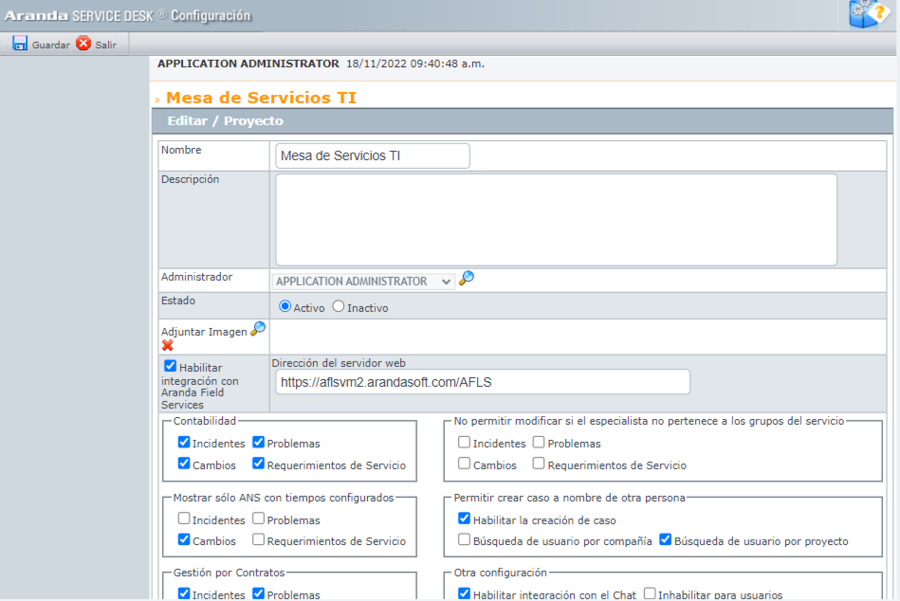
In the BASDK console, the Aranda FIELD SERVICE (AFLS) site path must be configured as a requirement to ensure integration, the Aranda SERVICE DESK environment must be navigable from the Aranda FIELD SERVICE environment and vice versa, the configuration procedure is as follows:
1. In the BASDK console, go to the Options menu> Projects.
2. Select the project to integrate ASDK/AFLS and edit it.
3. Enable the AFLS integration check.
4. Enter the URL of the Aranda FIELD SERVICE site.
5. Select the option Save.
AFLS Operation Integration Data Configuration
Data must be configured for integration with ASDK using the Web console, as follows:
1. In the Aranda FIELD SERVICE web console, in the header menu select the option Profile.
2. From the main menu select the Global Settings. In the Info View, turn on the Enable Editing and in the detail view, complete the Global Settings and Map Settings information for the selected profile.
When you enable the editing of global settings fields, a confirmation message is displayed to warn you of the changes to be made to the tool.
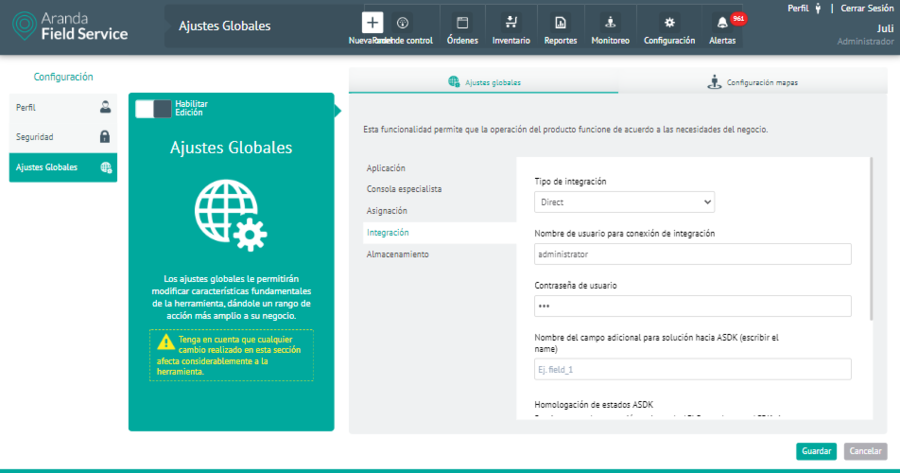
3. In the Global Settings Detail View in the AFLS web console, select the Global Settings, where you can set up the following information:
In the Integration tab, you will be able to display the following fields:
| Parameters | Description |
|---|---|
| Type of integration: | A drop-down list is displayed with the direct values (by default it is fed from metadata) or ESB |
| Username for integration connection: | ASDK administrator name, usually ADMINISTRATOR |
| User Password: | ASDK administrator password value is set (default empty) |
| Name of the additional field for solution to ASDK (write name): | Name of the additional field (unique_name) created in the AFLS model from which the information will be taken to populate the ASDK case solution field when the ASDK case is closed. |
| ASDK status approval: | Pairs separated by hyphen: AFLS sub-state ASDK task if it requires several separate by ; couples. Example: 1-23; 4-21; 5-29 |
| Homologation of AFLS states from ASDK: | Pairs separated by hyphen: ASDK task status - AFLS substate if you require several separate by ; couples. Example: 23-1; 21-4; 29-5 |
4. When you finish configuring the integration settings, click Save in the Detail View of the AFLS Configuration Console, to confirm the changes made.
Configuration for AFLS/ASDK Integration
1. To define the integration between AFLS and ASDK, go to the AFLS configuration console, in the Integration from the main menu, select the ASDK Service Desk and in the ASDK Service Desk Detail View, you can configure the following parameters taking into account the integration scheme:
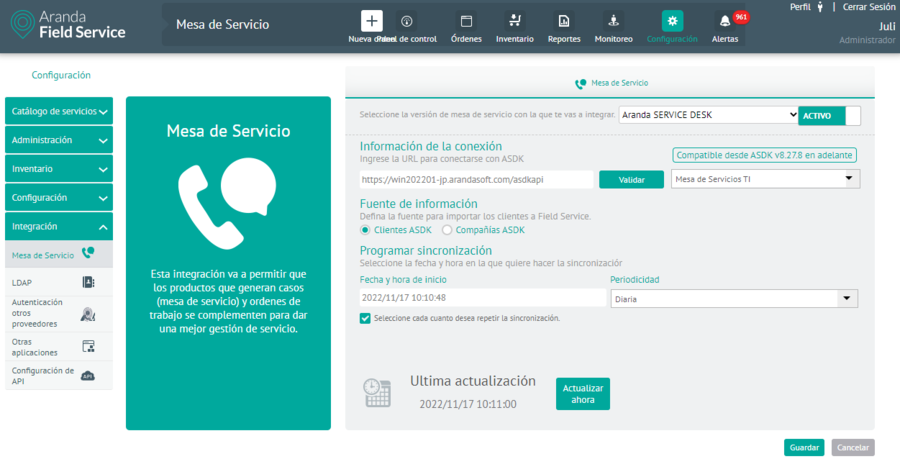
| Parameters | Description |
|---|---|
| Connection Information: | URL where the integration services exposed by ASDK are hosted. |
| Project: | Projects created in ASDKs, and available to migrate. |
| Source of Information: | It allows you to define the source to import the customers into Aranda FIELD SERVICE. |
| Start Date and Time: | Date and time at which the synchronization process with ASDK data (Companies, customers and dispatchers or specialists) begins. |
| Periodicity: | How often the synchronization is performed depends on this field, if a daily periodicity is chosen, the system will synchronize every day at the scheduled time in the date and start time field. |
| State: | Indicates whether the synchronization process should run or not. |
| Upgrade now: | It is a single execution button, if it is pressed the process will start the next minute. |
2. When you finish setting up the integration, click Save in the Detail View of the AFLS Configuration Console, to confirm the changes made.
Importing ASDK Companies to AFLS
AFLS runs a synchronization of the companies that are in the ASDK
1. To view the synchronized companies, go to the AFLS configuration console, in the section Administration from the main menu, select the Companies. In the information view, select an ASDK-synced company record, and in the Detail view, you can view the company fields that are synced:
- Company Name
- Company Code: Company NIT
- Contact Name
- Contact telephone number
- Contact email
- Address: standardized by Google’s address search control.
- State: Defines whether the status of the company is active or not.
For the import of companies to be successful, the following information must be filled out in ASDK:
-
Companies
- Name
- Alias
- Street address Google
- Telephone
Importing ASDK Customers to AFLS
AFLS runs a synchronization of the clients that are in the ASDK.
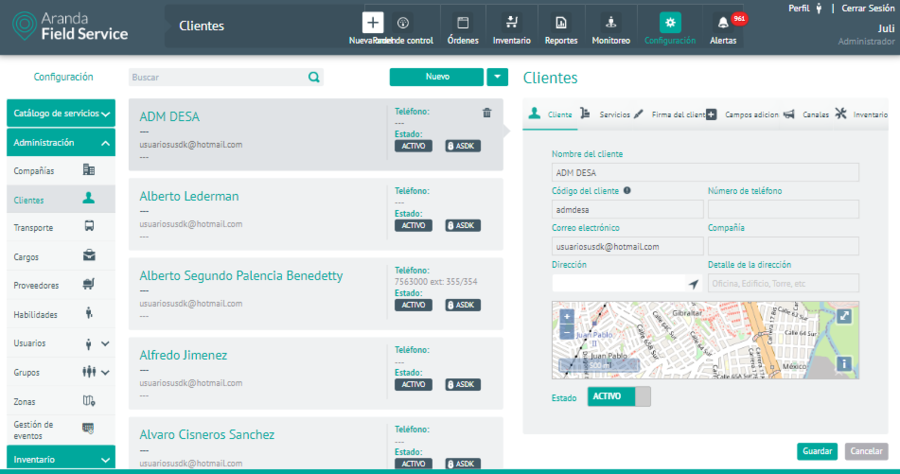
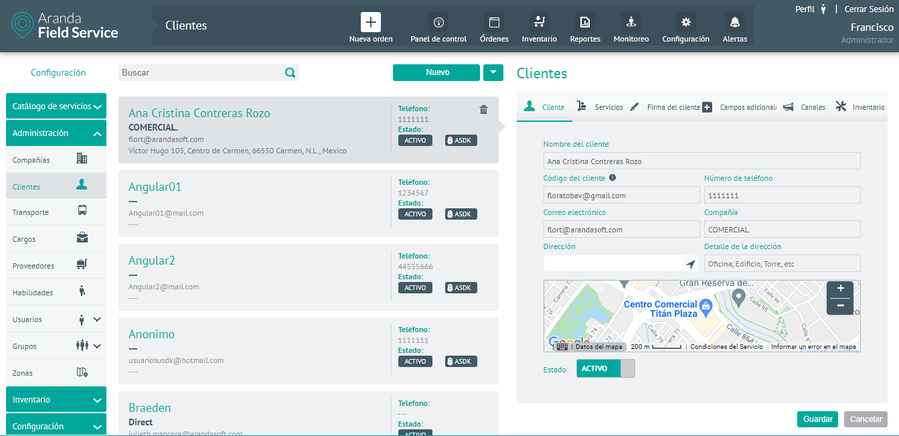
1. To view synchronized clients, go to the AFLS configuration console, in the section Administration from the main menu, select the Clients. In the information view, select an ASDK-synced customer record, and in the Detail view, you can display the fields of the customers that are synced:
- Client Name
- Customer Code: Customer’s identification number, NIT, or (unique) username.
- Phone Number
- Address: standardized by Google’s address search control.
- State: Defines whether the client’s status is active or not.
- Services: List of services associated with the client.
For the import of customers to be successful, the following information must be filled out in ASDK at least:
-
Clients
- Name
- Alias
- Street address Google
- Telephone
- Company
Importing ASDK Specialist Users as Dispatchers to AFLS
AFLS runs a synchronization of the specialists that are in ASDK, the fields that are synchronized are:
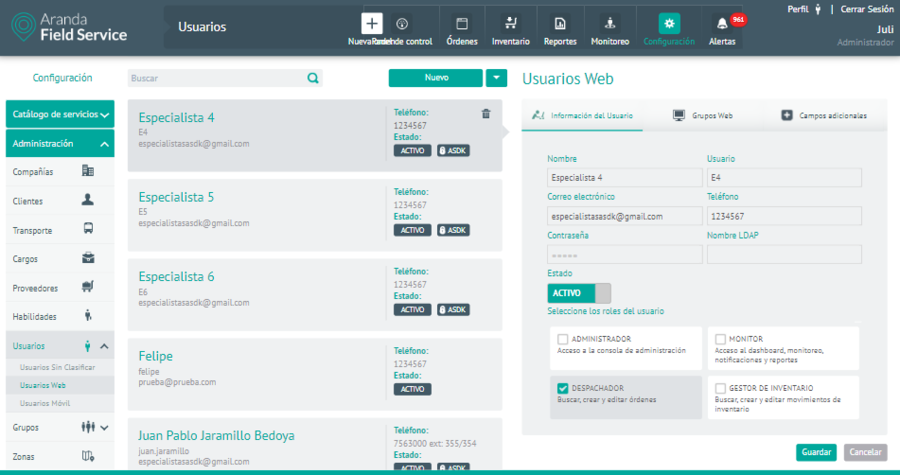
To view synchronized users, go to the AFLS configuration console, in the section Administration from the main menu, select the Users and the category Web Users. In the information view, select a record of users synchronized with the ASDK, and in the Detail view you can display the user information fields:
- Username
- User: user code in the ASDK.
- Email: contact email of the specialist.
- Telephone: Specialist’s telephone number.
- Password: Specialist Password
- State: It defines whether the specialist’s status is active or not.
- Role: Dispatcher role is assigned
For the importation of specialists to be successful, you must have at least the following information filled out in ASDK:
-
Specialists
- Name
- Alias
- Street address Google
- Telephone
- Company
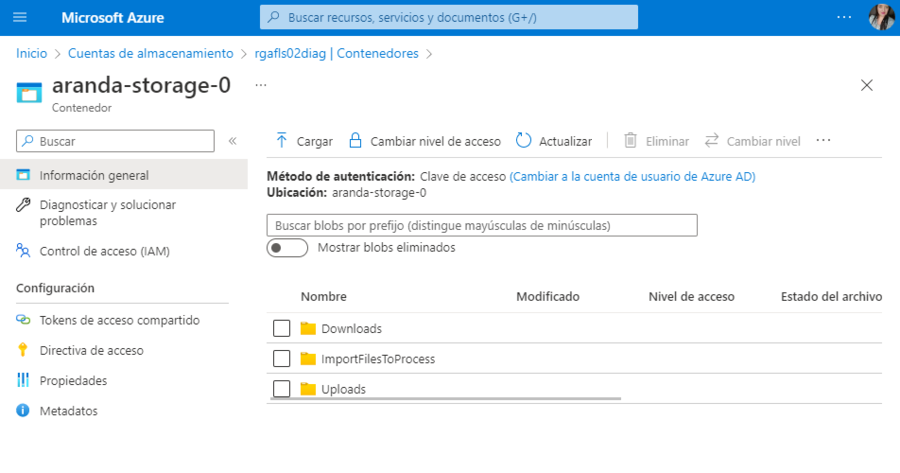
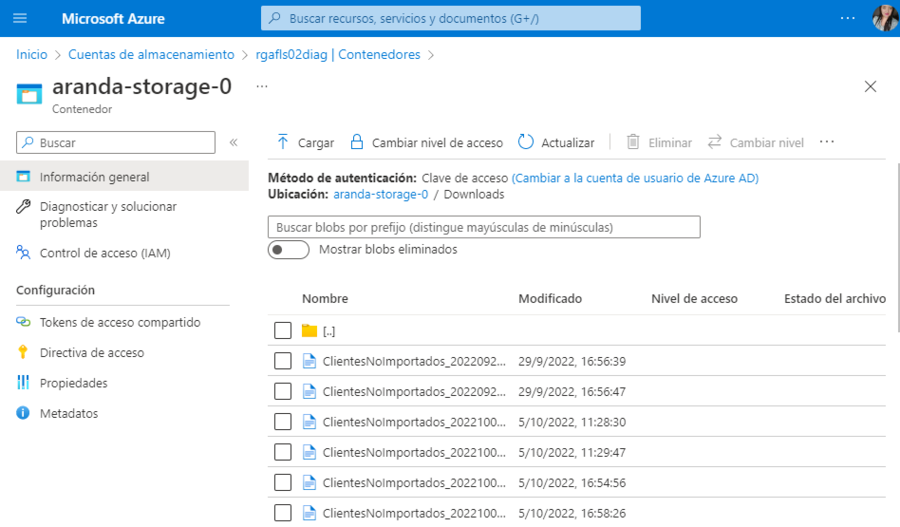
Storage Data Configuration
In case you are unable to import a client or a company, there is a log for each one that allows you to identify which fields you require or which have invalid information that did not allow the import of them, this log is found in the path where we have configured the Profile > storage, within the Downloads folder.