
In this module, you can manage inventory by running already configured product receipts, outputs, and transfers from AFLS administration. You can also import inputs and outputs through a file .csv.
Consult movements
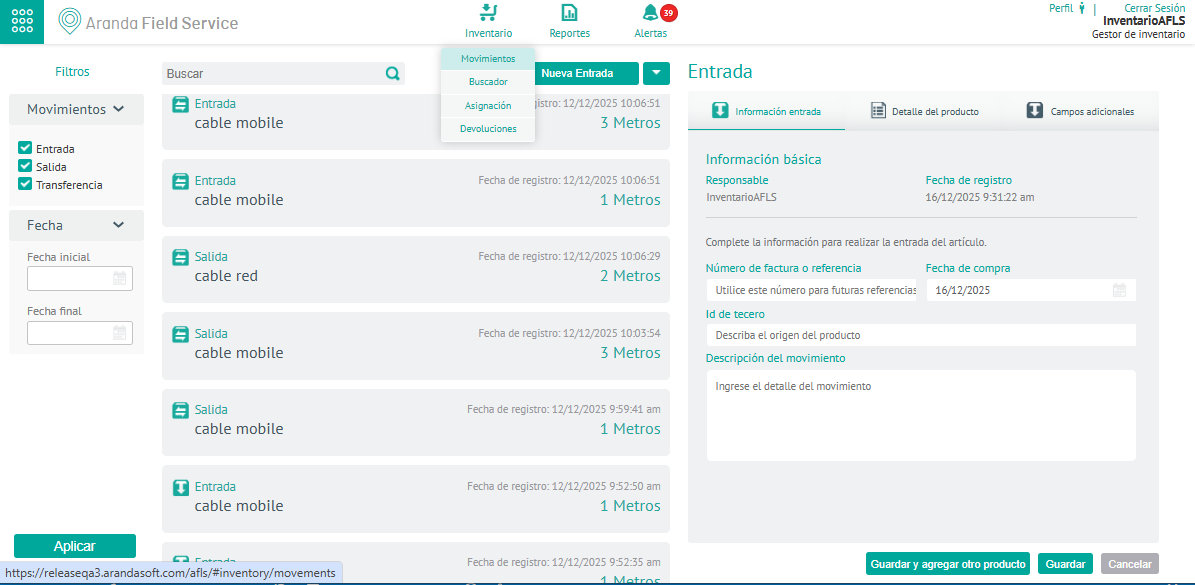
1. To check the inventory movements made, with the role of inventory manager, enter the AFLS web console, in the section Inventories from the main menu, select the Movements.
2. In the information view, you can view the records of movements made (inputs, outputs, transfers).
Filters
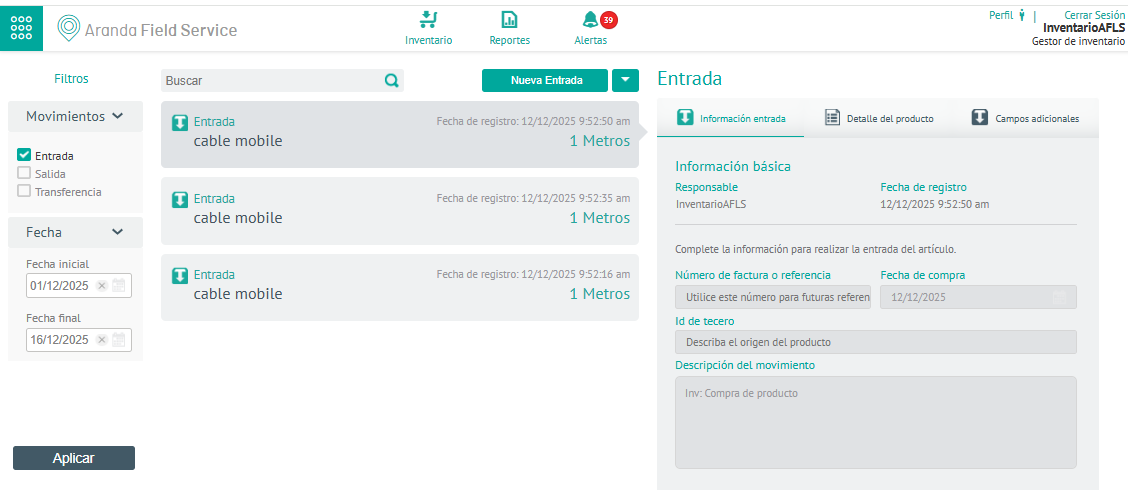
3. In the information view of inventory movements, you can use the filters by transaction type and date, to display receipts, outputs, and transfers made. Click the Apply.
Tickets
An entry corresponds to the arrival of a new item at an inventory location.
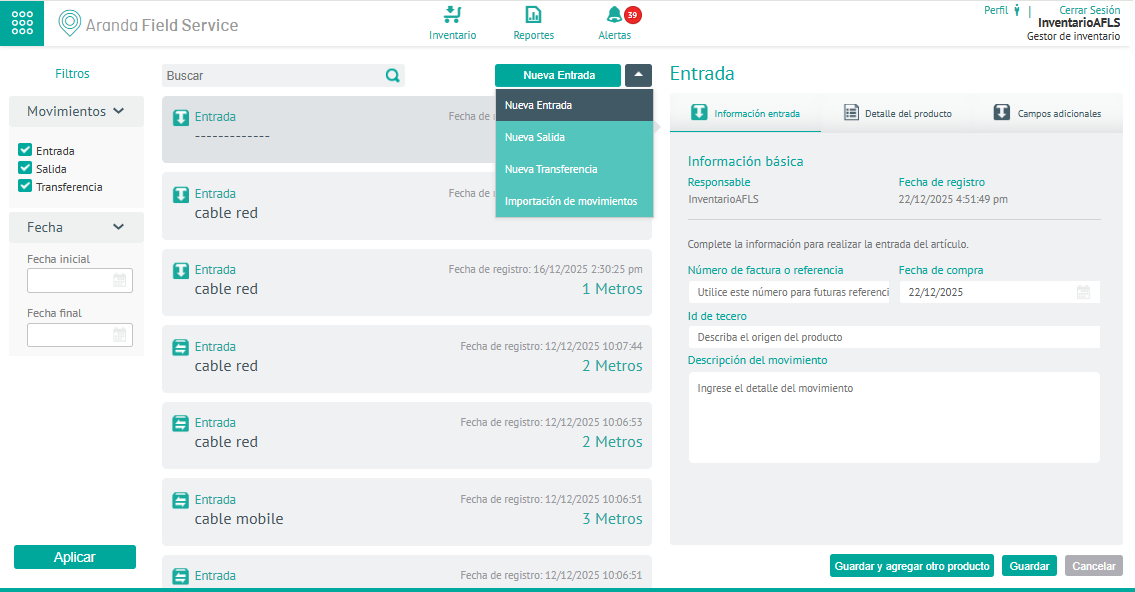
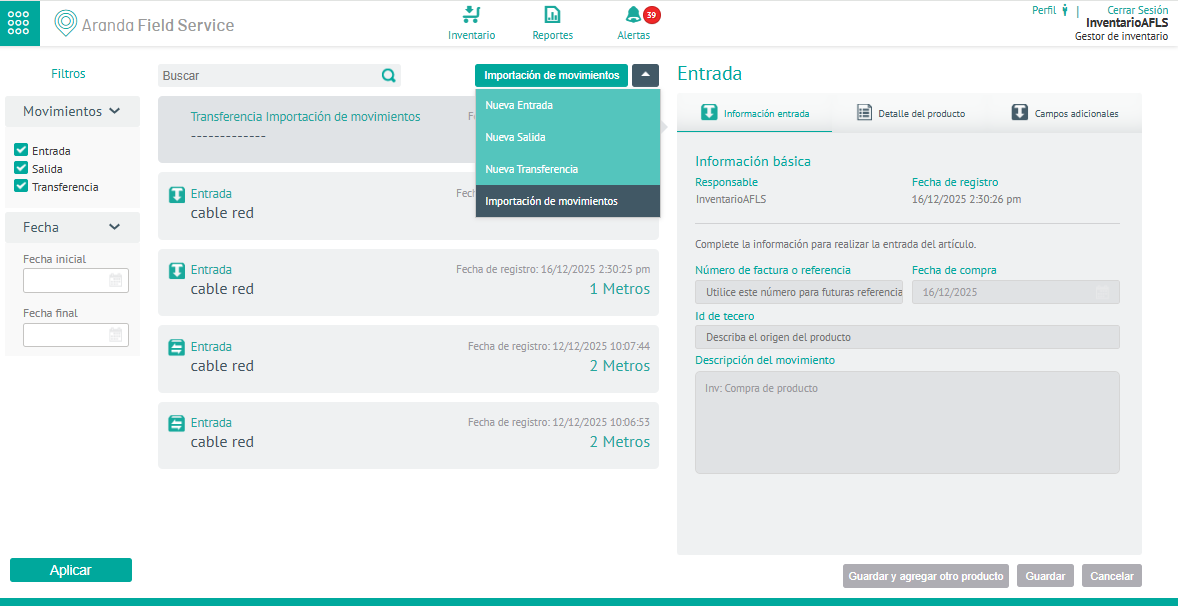
1. To create an inventory entry entry, with the Inventory Manager role log in to the AFLS web console, in the Inventory Entry Information view, select the New Entry.
2. In the Entries Detail View, select the Ticket Information, the Responsible (logged-in user) and Registration Date fields are pre-filled; you will be able to enter item entry information such as invoice or reference number, purchase date, ID of the third party or supplier (NIT, cédula or other) and the Description of the movement.
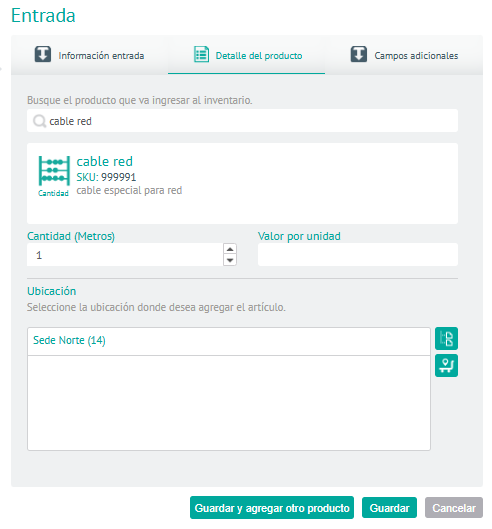
3. In the Entry Detail View, select the Product Detail, in the search field, enter inventory name (resource or spare) and complete the following fields: either product, type, quantity, or single type.
| Field | Description |
|---|---|
| Quantity (Units): | Quantity of product in its respective unit of measurement (m, cm, kg) |
| Serial Number: | Unique Product Identifier |
| Unit value: | Product purchase value per unit |
| Location: | place where the product is entered |
4. In the Entry Detail View, select the Additional Fields; If the selected product has additional fields configured, the respective information can be displayed and saved in this tab.
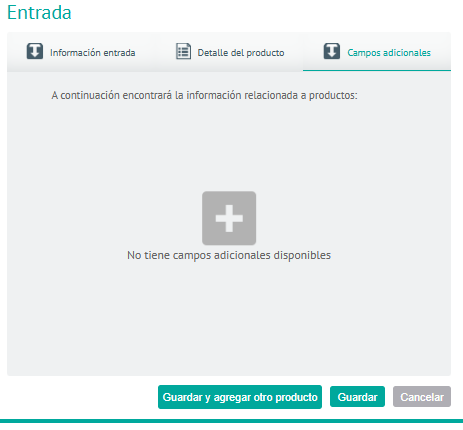
5. When you finish setting up the Ticket, click Save to confirm the changes made.
Exit
An issue corresponds to the departure (or withdrawal) of an item from an inventory location.
1. To create an outbound movement, with the Inventory Manager role, log in to the AFLS web console, in the Inventory Movement Information view, select the New Departure.
2. In the Outputs Detail View, select the Departure Information, the Responsible (logged-in user) and Registration Date fields are pre-filled; you will be able to enter item outbound information such as invoice or reference number, third party or vendor ID (NIT, cédula or other), Transaction Description or relate outbound movement to existing work orders.
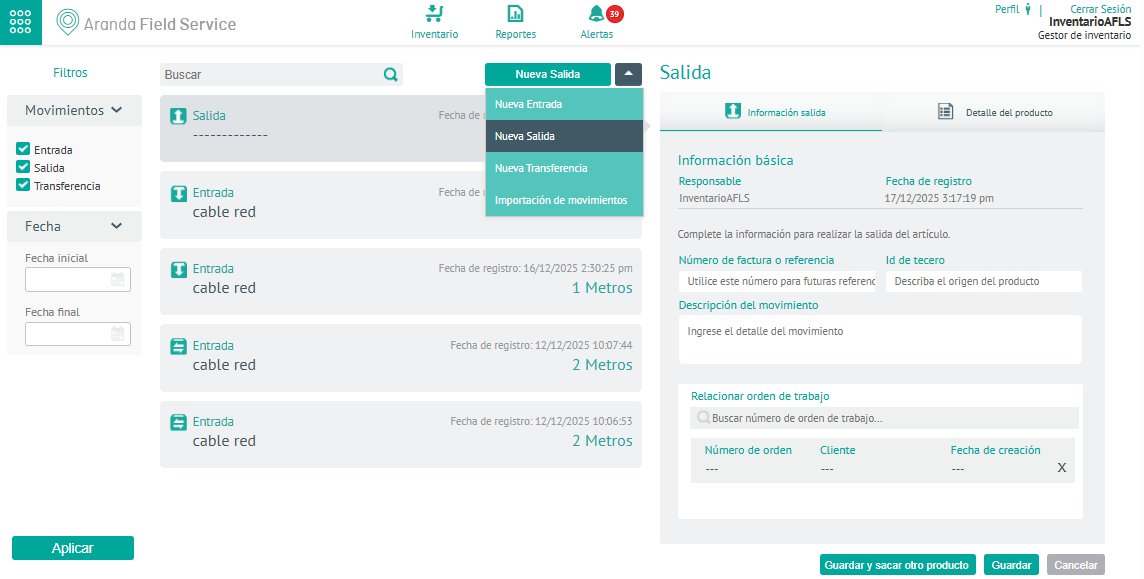
⚐ Note: To relate work orders to an inventory outbound entry, the related order must be in the Executed.
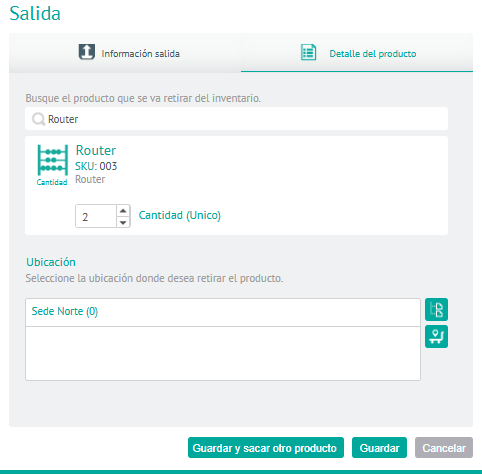
3. In the Output Detail View, select the Product Detail, in the search field, enter inventory name (resource or spare part) and complete the following fields of the product type quantity to be removed:
| Field | Description |
|---|---|
| Quantity (Units): | Quantity of product to be removed from inventory. |
| Serial Number: | Unique identifier of the product. |
| Location: | Place where the product is released. |
4. When you finish setting up the Output, click Save to confirm the changes made.
Transfer
A transfer is the movement of a product from one location to another.
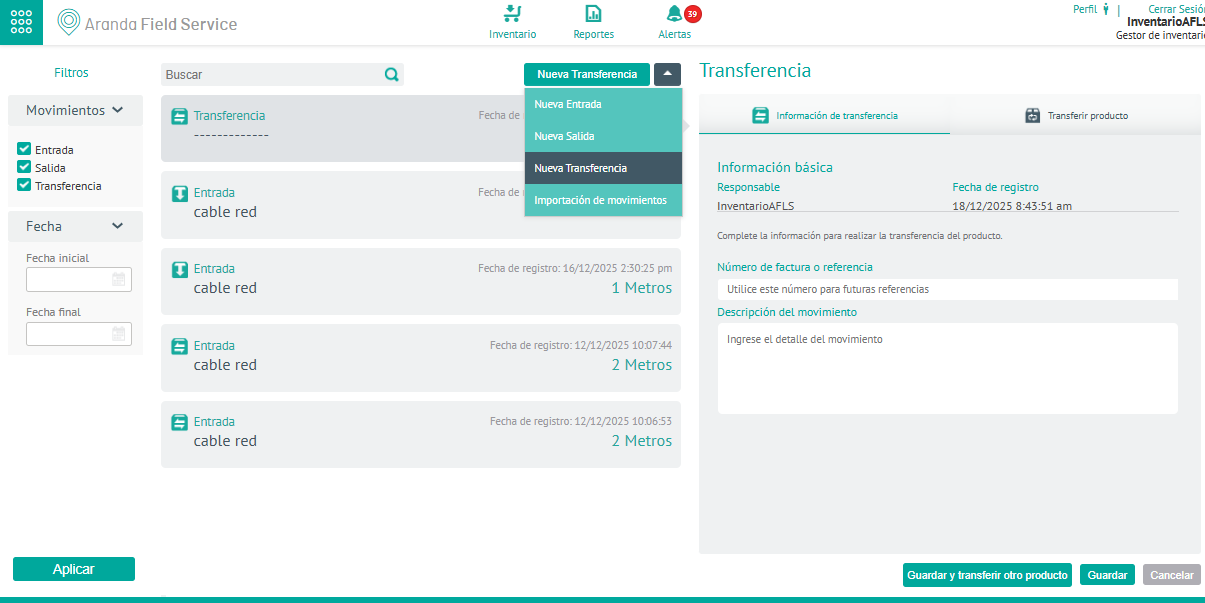
1. To create an inventory transfer, with the Inventory Manager role, log in to the AFLS web console, in the Inventory Movement Information View, select the New Transfer.
2. In the Transfer Detail View, select the Transfer Information, the Responsible (logged-in user) and Registration Date fields are pre-filled; you will be able to enter information of the item to be transferred such as invoice number or reference and Description of the movement.
3. In the Transfer Detail View, select the Transfer Product, in the search field, enter inventory name (resource or spare part) and complete the following fields of the product type quantity and unique type to transfer:
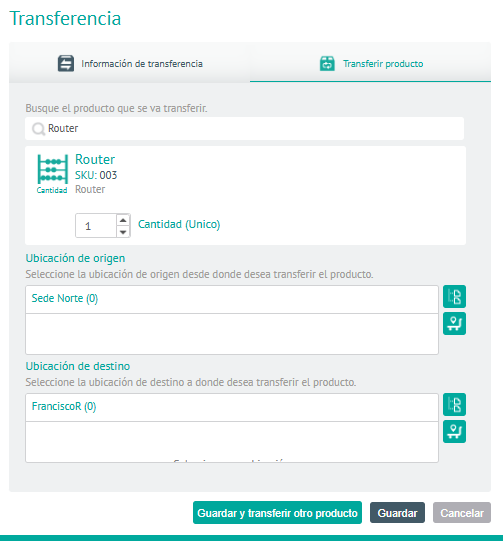
| Field | Description |
|---|---|
| Quantity (Units): | Quantity of product in its respective unit of measurement (m, cm, kg) |
| Serial Number: | Unique identifier of the product. |
| Location of origin: | Place where the product will come from. |
| Destination Location: | Place where the product will be entered. |
4. When you finish setting up the Transfer, click Save to confirm the changes made.
Import of Movements
In the import process you can import transactions from a file .csv, (comma-separated values) with which you can create inventory inputs and outputs.
1. To import inventory ledger entries, with the Inventory Manager role, log in to the AFLS web console, in the Inventory Ledger Entries Information view, select the Import of Movements.
2. In the window work area File Import You will be able to access the records of the movements and upload the information to be imported by selecting the option Drag or upload the file you are importing. The Windows Explorer window where the file must be searched and selected is displayed .csv.
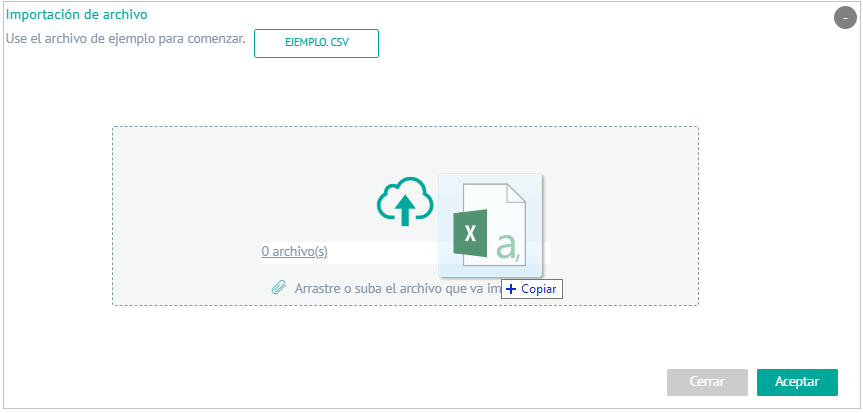
You can also download a template to import by selecting the EXAMPLE. CSV.
The inventory ledger entries import file maintains the following structure:
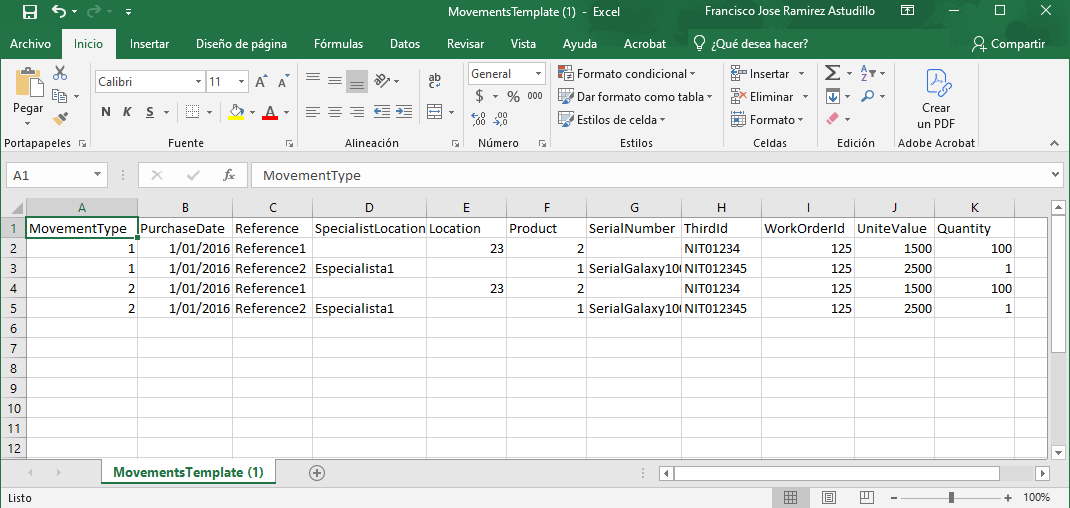
| Field | Description |
|---|---|
| MovementType: | Movement Type: 1.Entrance 2.Output |
| PurchaseDate: | Date of purchase (DD/MM/YYYY format) |
| Reference: | Product Reference |
| SpecialistLocation: | Specialist’s username (must be empty if the location is a fixed location). |
| Location: | Location ID. It must go empty if the movement is about a specialist. |
| Product: | Product ID. |
| SerialNumber: | Product serial number (only for single type product). |
| ThirdId: | Unique identifier of the provider: NIT, ID or other. Non-required field. |
| WorkOrderId: | Work order ticket number. The order must be in the Executed status. Non-required field. |
| UniteValue: | Value per unit of the product. |
| Quantity: | Quantity of product. Only applies to quantity type products. |
3. After selecting and uploading the Transaction Import file, click Accept in the import view, to confirm the changes made and the system will schedule the processing of the file.
4. To check the result of the load, whether successful or not, it will be possible to view the graphical configuration interface Bulk Uploads in Event Management.
⚐ Note: If you fail to successfully import movements, the application will allow you to view, modify and retry the upload of the records or download the file to visualize the reason for the non-import.