Creating a Work Order
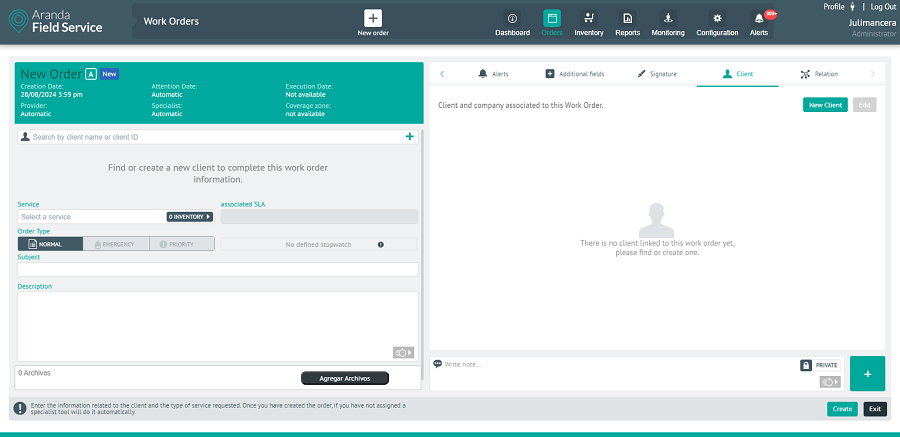
1. To generate a work order, click the New order at the top of the Dispatch Console and complete the following fields:
- Search by customer name or code: To perform the search, add the value by which you want to search and select the customer; doing so enables the basic data of the order.
- The Basic Facts correspond to the name of the appointment requester, telephone, email, address and address detail. If the customer has this data, it will be uploaded automatically. At this point you can edit the address and its detail, if required.
- The address will be presented graphically on the map.
⚐ Note: if you have a map provider other than Google, it is necessary to specify the addresses in greater detail, including the neighborhood, the town and the municipality for the calibration to be more accurate.
2. Select the service that the customer requires. If the service is type Standard The basic data as filled in by the dispatcher is kept in the form.
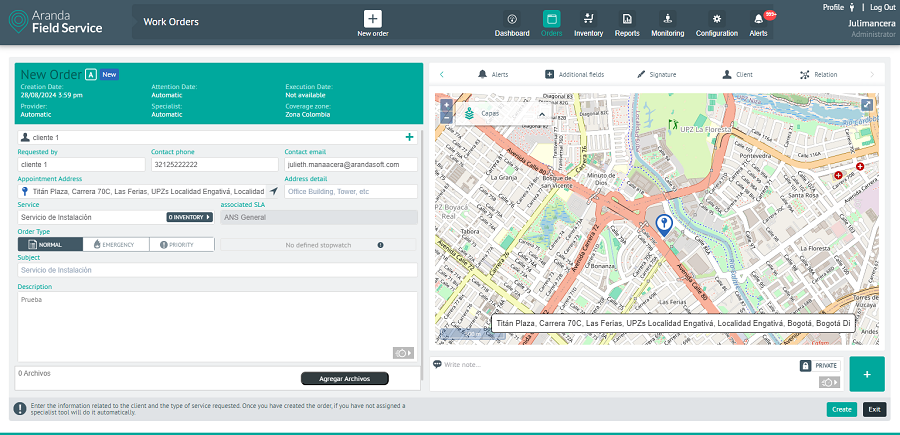
Order creation screen with standard type service
3. If the service is type Displacement Two new fields will be displayed: Destination address and Destination Address Detail, to enter the information of the point to which the customer is going.
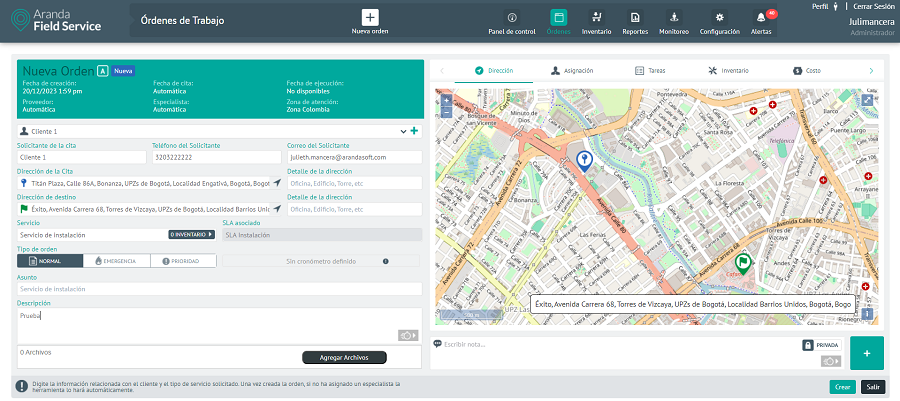
Order creation screen with scrolling service
- The Destination Address allows the dispatcher to define an offset from point A to point B and display it on the map.
- In the field of service A label is displayed that shows the amount of inventory configured by default in the service.
- The SLA configured for the selected service is displayed, which will depend on the configuration of the service for the customer, the customer’s company, or by default in the service.
⚐ Note: if an SLA is expired, the creation of orders for the service will not be allowed, it is necessary to change the dates in order to view it.
- In Order Type you will be able to select whether the order is Normalof Emergency or Priority. The order type can only be changed if this option has been configured in the service.
- The Affair It will be the one that has been entered into the service, but it can be changed if required.
- In Description You can detail the tasks to be executed in the work order or extend the features of the service.
- You can attach files to the work order to add information needed for service evolution.
3. The dispatcher may add notes and notices at any time that help the field specialist in the development of the work order. These notes will be visible in the Work Order Comments category in the Field Specialist’s mobile app.
4. Once all the information necessary to dispatch a work order has been entered, AFLS will arrange for the appropriate vendor and specialist.
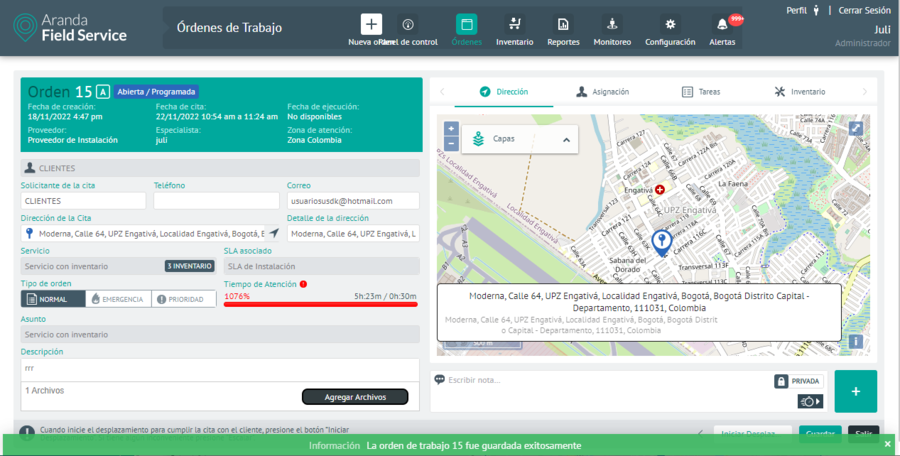
5. The new order will be created with the date of creation of the time it was generated and after assigning the supplier and the specialist, a solution date will be set according to the SLA of the service.
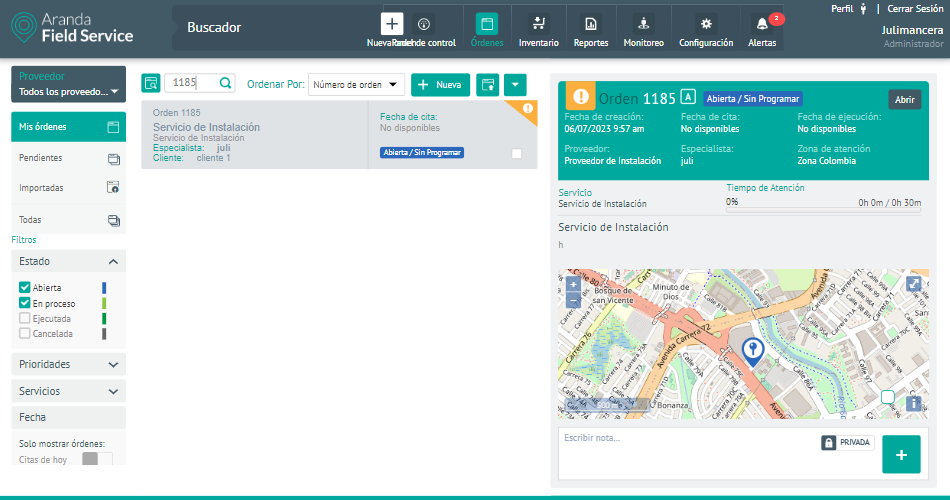
6. Once the work order has been created and the managers and resources have been assigned, the specialist will have the pertinent information to attend to the order on the scheduled date, the monitor will be able to carry out the follow-up and control, and the dispatcher will be able to consult, edit, reassign and close the order.
Creating an Emergency or Priority Order
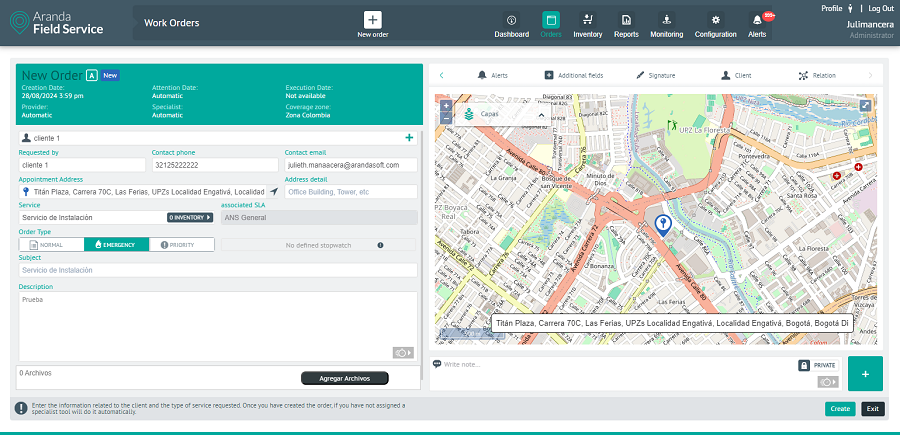
Emergency or priority orders are those that cannot wait to be automatically assigned:
Emergency: The specialist should stop the work he is doing and go immediately to solve the emergency. The work order you leave behind will be reassigned to another specialist.
Priority: the order must be complied with as soon as possible; It is assigned to the nearest specialist, who must finish the current work and then proceed to the priority order.
When the dispatcher user selects the order type as Emergency or Priority, the mapping engine will take into consideration the distance and skills of the specialists and notify the most appropriate one to execute the order quickly.
In order to have visibility into these types of orders, AFLS assigns them markings that allow dispatchers and monitors to see which ones are of the highest quality. Emergency and which of Priority.

Order marked as Emergency
Order marked as Priority
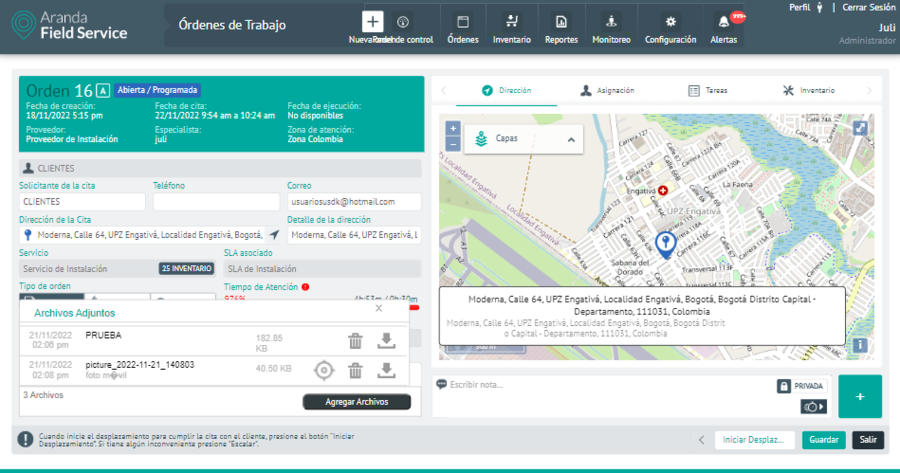
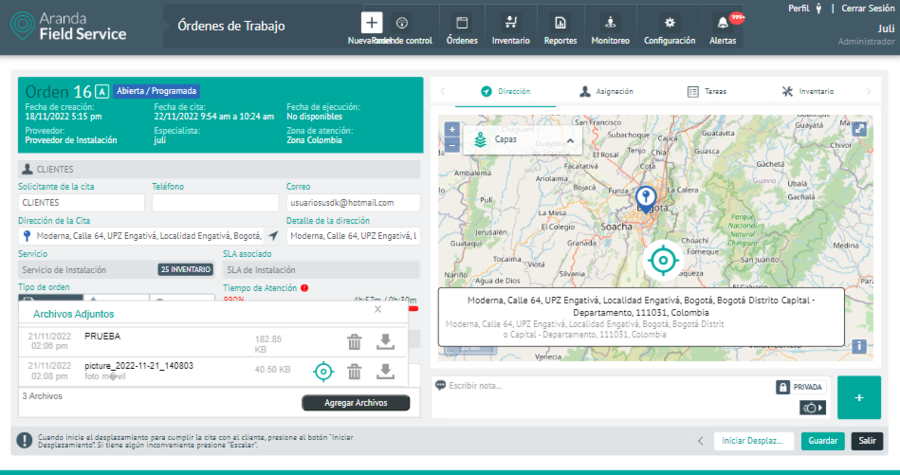
Attachments
In this option you can attach, delete or download the files attached to the order, you can also view the georeferencing point for the files uploaded from the mobile application as long as they do not exceed 10 MB.
⚐ Note: The file types that can be added to the work order can be .doc, .xls, .ppt, .PNG, .JPG, .PDF formats, and no larger than 10 MB in size.
- Delete button
 : Allows you to delete the attachments of the order, it is necessary to press the Save button for the file to be effectively deleted.
 - Download button
 : Allows you to download and view a copy of the attachment.
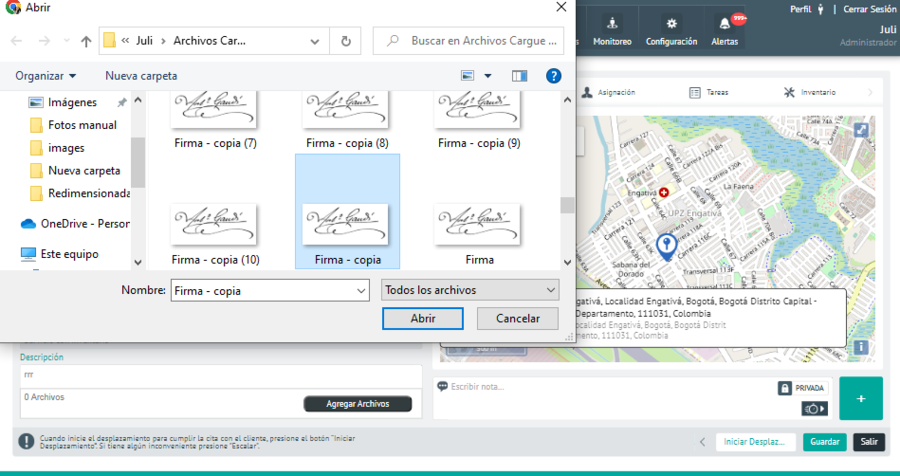
 - Add Files Button: Allows you to view a pop-up window where you can select the desirable file to attach to the order, once the file selection is made it is necessary to press the button Save. Attachments from the web application will not be georeferenced, therefore the button is not displayed.
 Enabled.
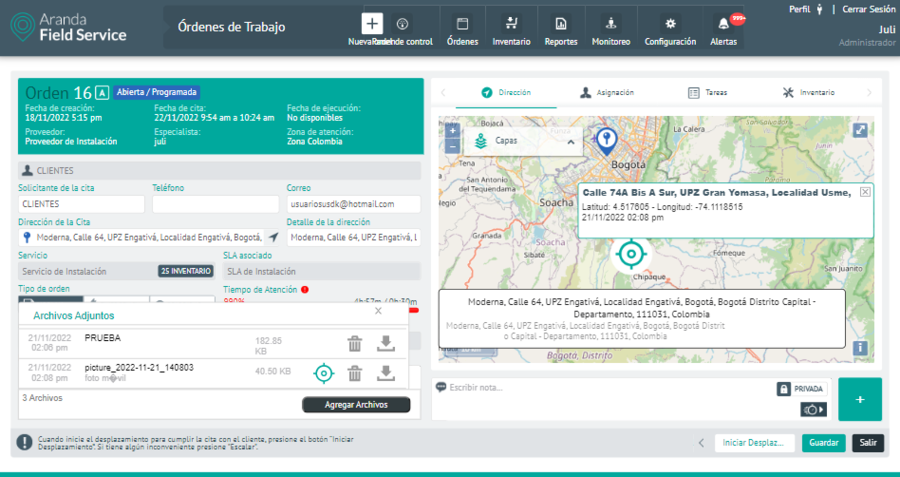
- Georeferencing button : It allows you to view the geographical point where the photo, video or audio was taken from the mobile application.
Assigning a Specialist to the Work Order
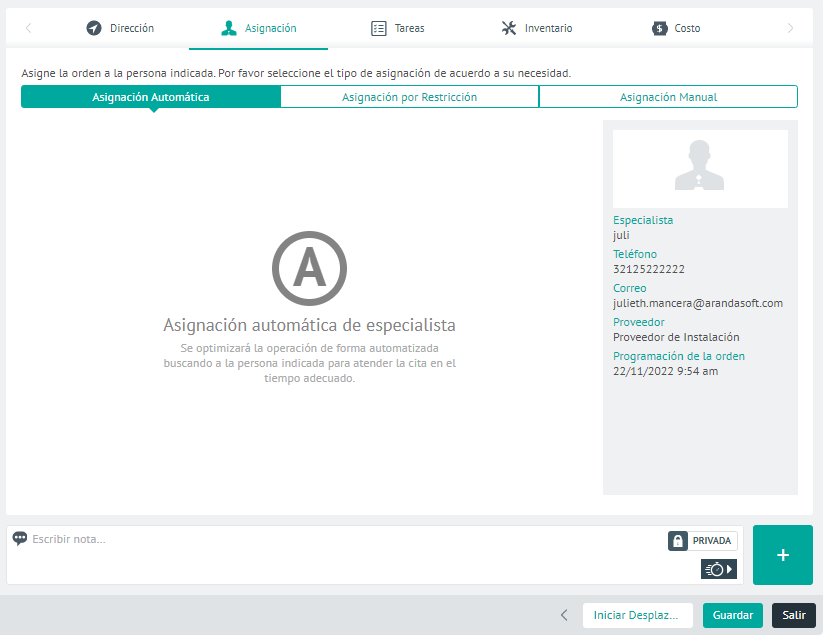
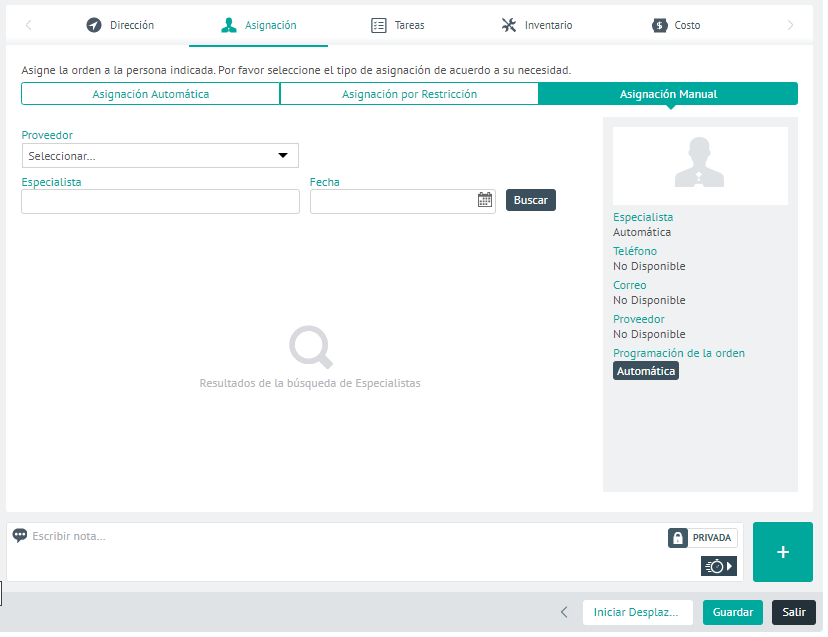
Once the order has been created, when you open it, in the Allocation You will find three possible types of specialist assignments:
- Automatic Assignment: It is performed by the mapping engine taking into account the configuration of the created order and that of the field specialists who can serve the order.
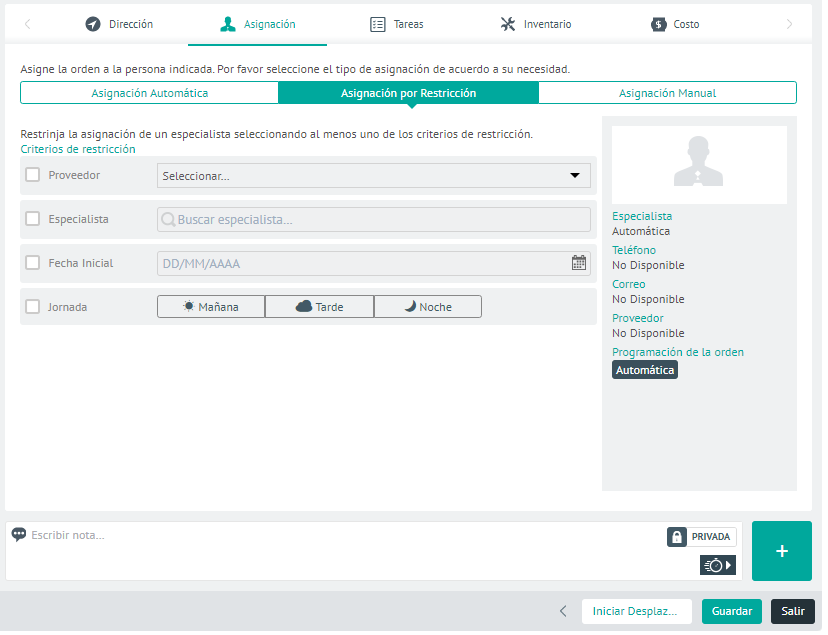
- Allowance by Restriction: Allows you to restrict the assignment by selecting at least one of the following restriction criteria: Supplier, Specialist, Starting Date and Day.
The countryside Day it will depend on the configuration of the business variables.
- Manual Assignment: It is carried out directly by the dispatcher, taking into account the availability of the specialist by the provider and date of care filters.
Tasks
Tasks allow for more detailed management of a work order, and more precise monitoring of each procedure. The tasks are designed for specialists to manage them from their devices in a simple and clear way.
How do tasks work within a work order?
When you create an order, tasks are loaded when you select a service that requires them; These tasks are listed consecutively in the order that has been configured from the service.
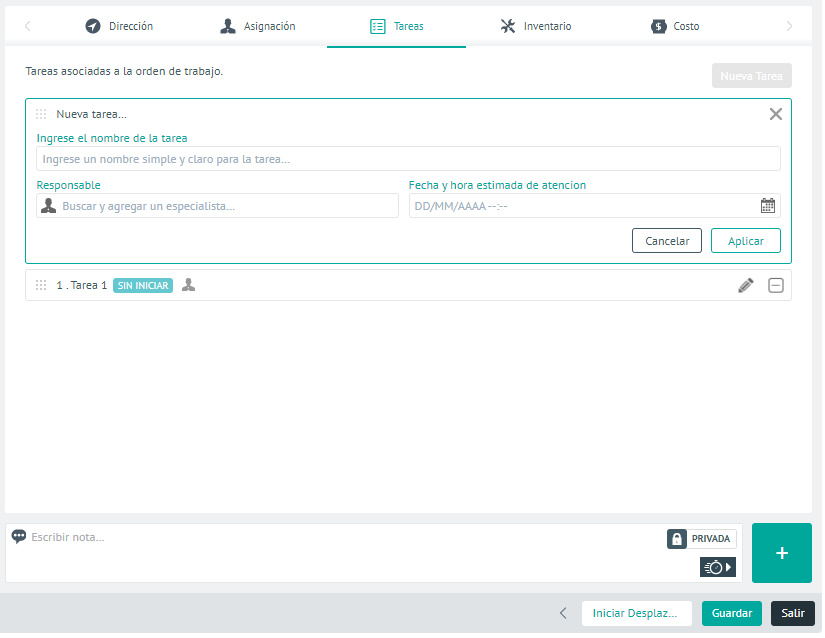
New Task Display
The tab Tasks It has the following features:
- You can add new tasks within an order by clicking on the New Task.
-
The following fields can be parameterized for new tasks:
- Task Name: Enter a name that indicates what the task is about. Ex: Installation of device.
- Responsible: Select the field specialist who will be responsible for executing the task. The specialist depends on the provider.
- Estimated date and time of service: Please enter an approximate but not required date and time for the field specialist.
- Tasks can go through 3 states: WITHOUT STARTING, LET’S GO and FINISHED. A switch-type control will allow you to change the state from the web console.
- When a work order has no supplier, but you do have a service with tasks, these can be reorganized, disassociated or renamed, however, it is not possible to assign assignees or set dates and times.
- To allow Assign automatically associated tasks on a work order must enable the Automatically assign tasks to the work order specialist.. This configuration allows associating the manager, date and estimated time of attention to the tasks based on the appointment date and the specialist assigned to the work order when the assignment engine is executed.
⚐ Note: The time interval for calculating the time of the tasks is taken taking into account the number of minutes configured in the database, the setting information WorkOrderTaskConflictMinutes by default it is 5 minutes. (It is recommended that the setting configuration be done in multiples of 5)
Tasks that already come from the service, and newly created tasks, can be edited depending on the state they are in, like this:
When it is WITHOUT STARTING
- It allows you to assign a person in charge and the estimated date and time of attention.
- Allows you to change the status, if it is the current task.
- Allows you to move it to change the order, only if the previous one is WITHOUT STARTING.
- Allows it to be disassociated from the work order, if it is in a state WITHOUT STARTING.
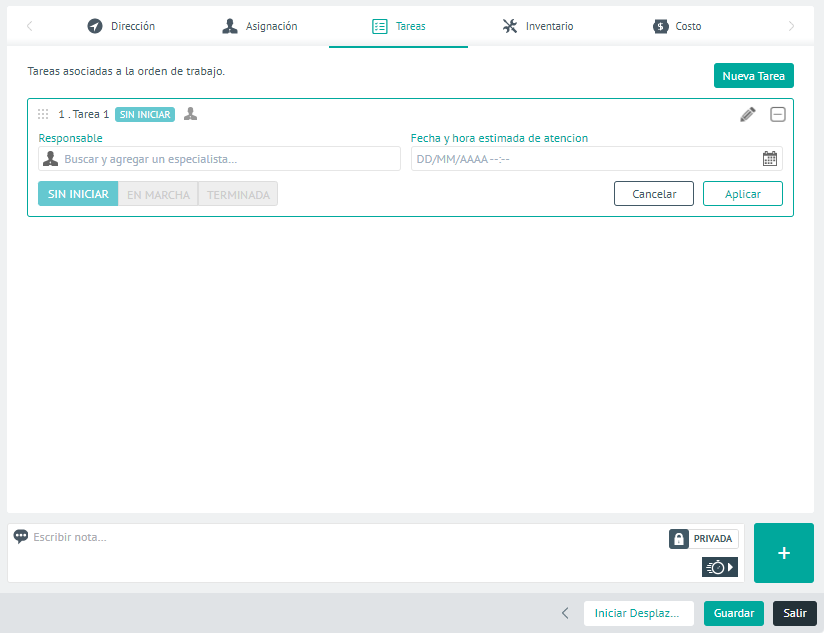
Task display WITHOUT STARTING.
When it is LET’S GO
- It only allows you to change the state to FINISHED.
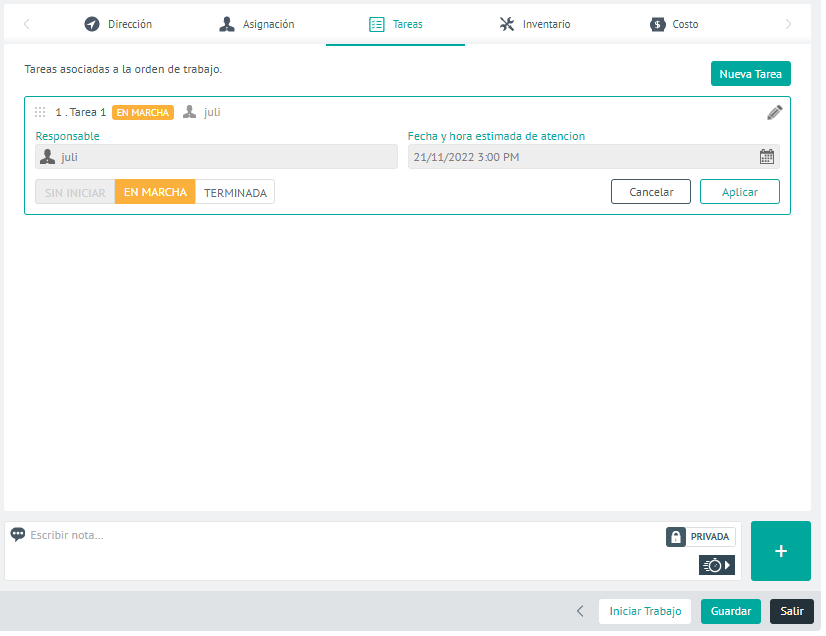
Task Display IN PROGRESS
When it is FINISHED
- It does not allow adjustments.
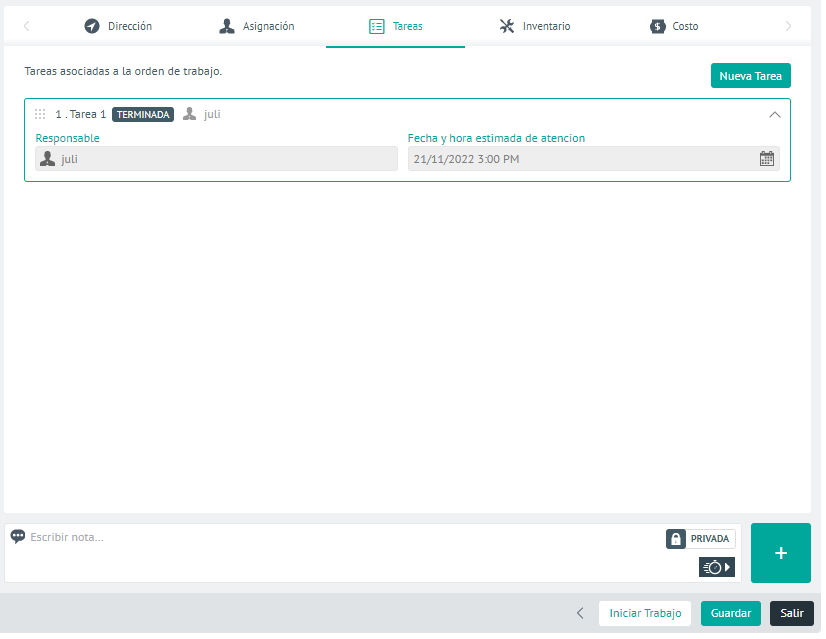
Task DONE display
⚐ Note: The adjustments made to this task list (Add, Rearrange, or Detach), do not affect the tasks originally configured in the service.
Assigning Products to the Work Order (Inventory)
The inventory or products required for the execution of the service will be automatically loaded with the basic resources configured by the administrator for that service. The dispatcher can modify the quantity of spare parts associated with the order according to the needs of the service.
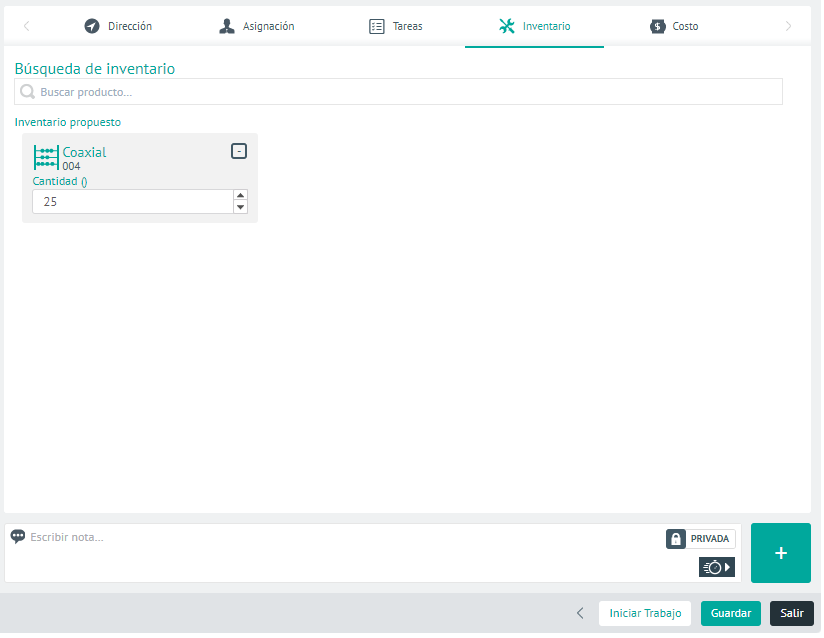
Pantalla de asociación de repuestos para la orden
Work Order Costs
The system automatically calculates the total cost of operation of a service by adding the following costs:
- Base cost of the service: is the cost configured by the administrator at the time of service creation.
- Inventory Cost: is the cost of spare parts or products configured by the administrator for service.
- Transportation Cost: It will not have a recorded value until the field specialist finishes the activities and closes the work order. The cost of transport corresponds to the value configured per kilometre according to the means of transport, multiplied by the number of kilometres travelled.
- Specialist Cost: it will be updated when the person in charge attends to the work order. The cost of the specialist per hour is set by the administrator and this value is multiplied by the number of hours recorded by the specialist in the care of the assigned order.
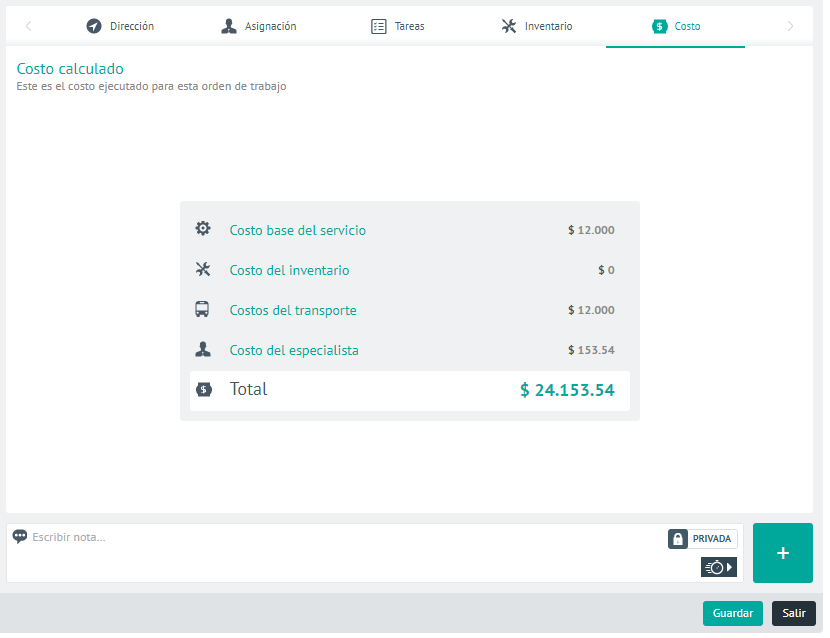
Costs generated by the work order.
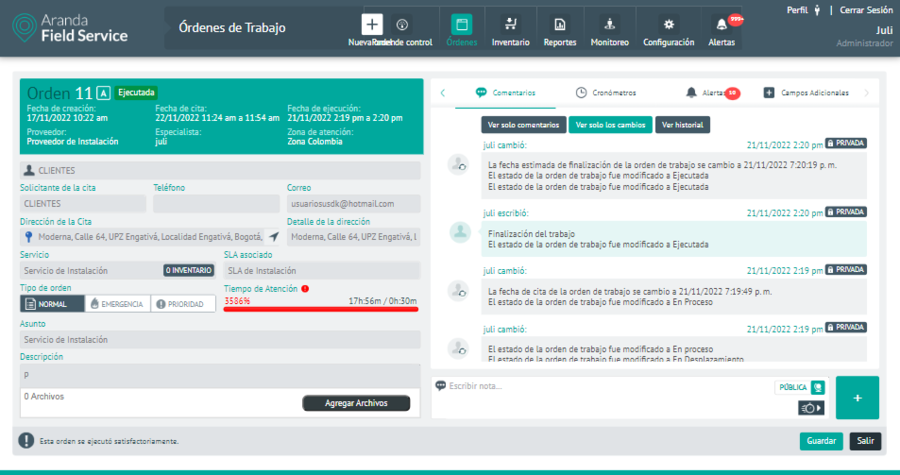
Work Order Notes and Comments
On the Feedback Notes, comments, and changes made by the dispatcher, monitor, or specialist during the creation or editing of a work order are recorded, as well as messages that the end user enters as public notes from the AssistMe app, which will also be visible to the assigned field specialist.
Both the dispatcher and the specialist will be able to add relevant information for the attention of the order, such as changes to the registration request, inventory confirmation, follow-up to the field specialist, recommendations and suggestions.
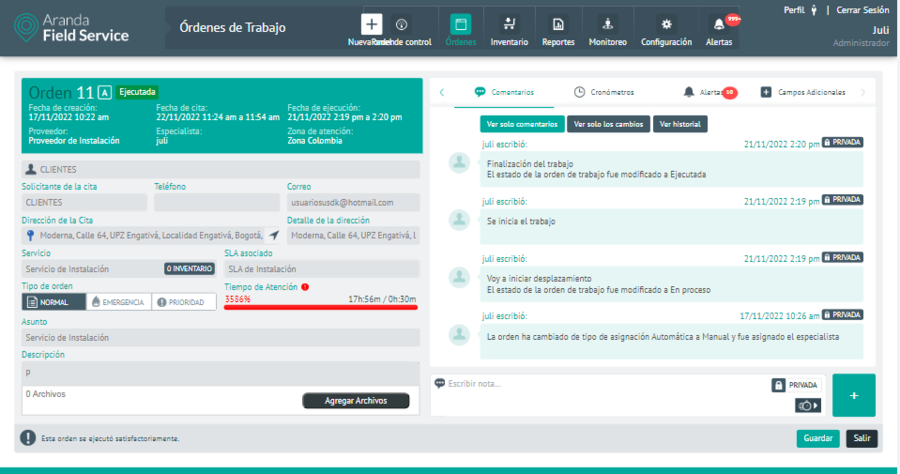
Comments, changes, and notes display screen
Public and Private Notes
Public or private notes are entered into the note field that appears in the work order listing or on the Edit/Create screens from the web console (dispatcher or monitor) or from the mobile app (field specialist).
By default, the notes field has the option PRIVATE (lock icon), i.e. it will only be visible to specialists.

PRIVATE Note Field
If you want to send a public note, (visible to all users including those in the AssistMe console), click on the switch button to change it to PUBLIC (globe icon).

PUBLIC Note Field
⚐ Note: when a dispatcher, monitor, or specialist creates a public note, it is emailed to the end user and is also visible in the AssistMe console.
Changes
Changes to the work order can be made by the dispatcher, monitor, or specialist and are recorded as follows:
Pantalla de visualización de cambios
Timers on the work order
The timers of the agreements associated with a work order allow you to visualize the progress and fulfillment of each stage of the service, whether they are agreements with customers or with the supplier:
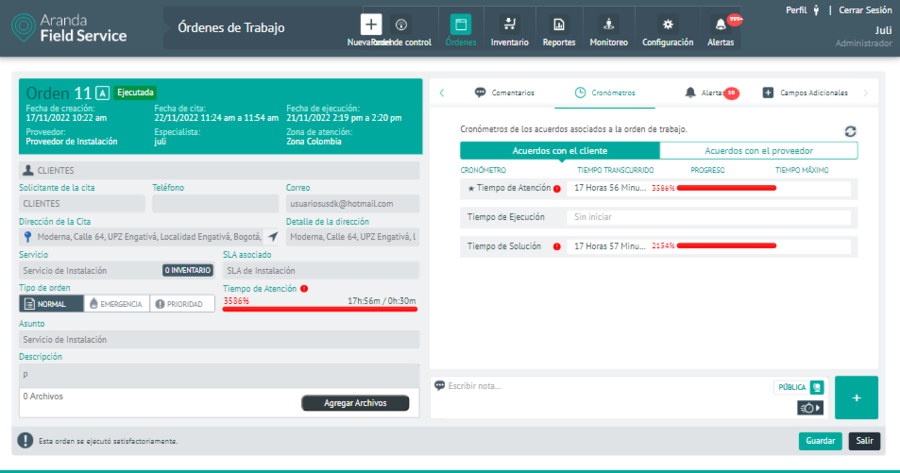
Customer agreements screen
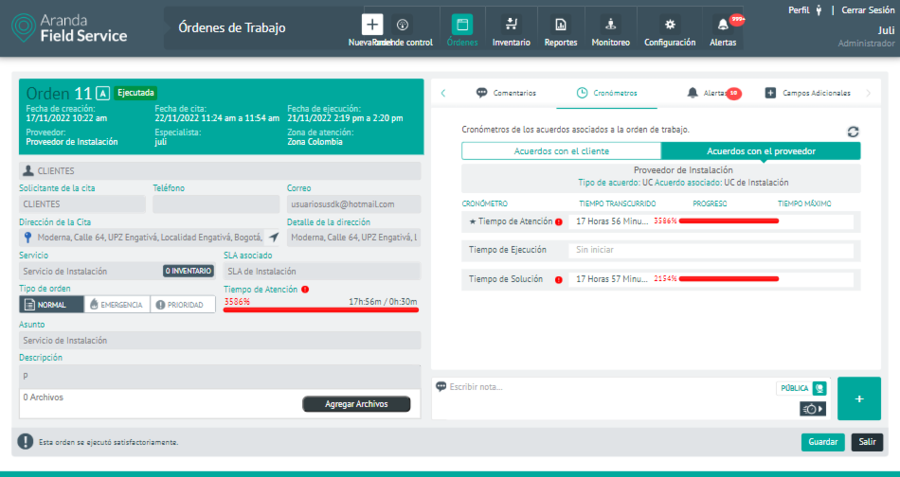
Pantalla de acuerdos con el proveedor
Generated Alerts for the Work Order
If the system finds any incompatibility in the automatic assignment of a work order, the corresponding alerts or notifications will be generated in the dispatch console. The possible reasons that activate these alerts are:
- Failure to comply with the established ANS, OLA and UC service times or agreements.
- Problems with order inventory.
- Mismatches between the dates of care, the solution dates scheduled in the order, and the available times of the specialists in the field.
The dispatcher must analyze and evaluate the registered alerts and determine whether to continue with the process of generating the order or not.
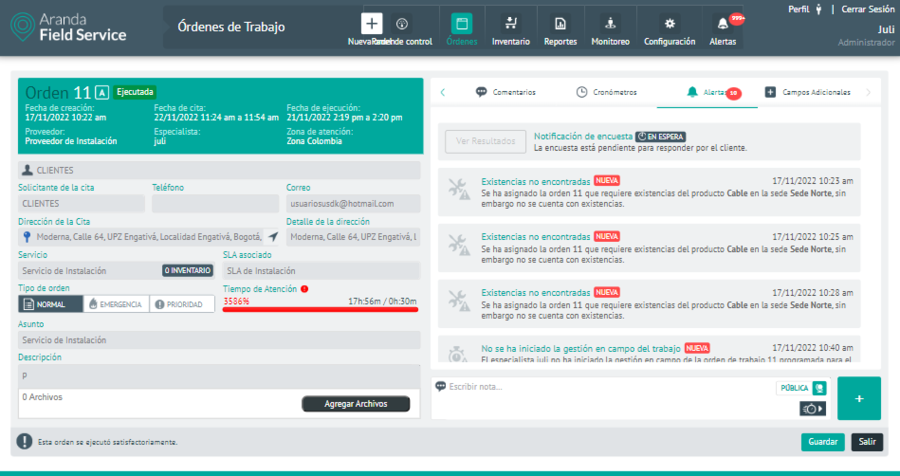
Display screen of Alerts generated for the order
This screen also reports the status of the customer satisfaction survey. When it appears in a state ANSWERED, you can view the results by clicking on the View Results.

Survey results check button
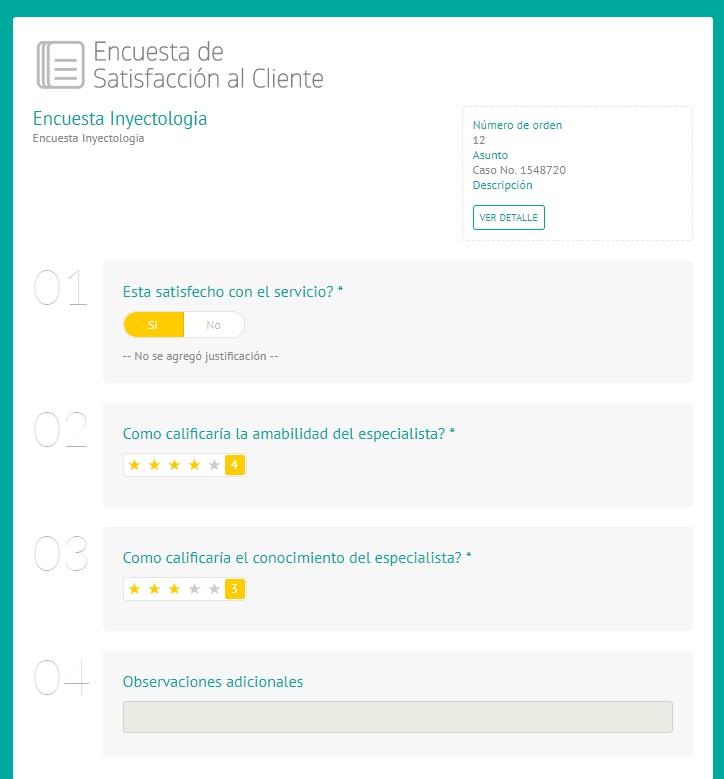
Pantalla de resultados de la encuesta
Additional Work Order Fields
In this tab, you can display the general additional fields for all orders and those configured for a specific service. This information is presented as follows:
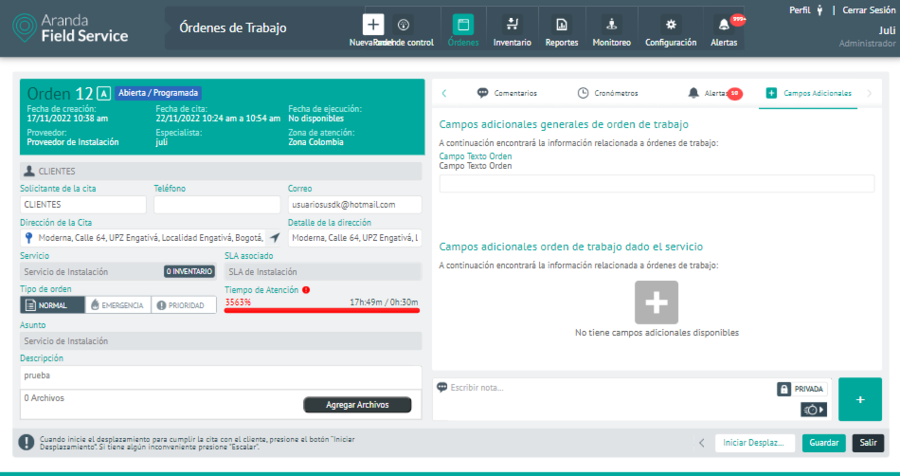
Display of the general and service additional fields.
General Work Order Additional Fields:
These general additional fields apply to all work orders that are created in AFLS and configured on the screen Configuration > Additional fields > Work Orders.
Additional Work Order Fields Given the Service
They can be filled out or viewed by the monitor or specialist depending on the permissions configured in the additional fields of the model and the status of the work order.
Work Order Signing
This tab allows you to compare the customer’s registered signature (from the settings) with the signature made by the customer at the time of taking the service (from the mobile phone):
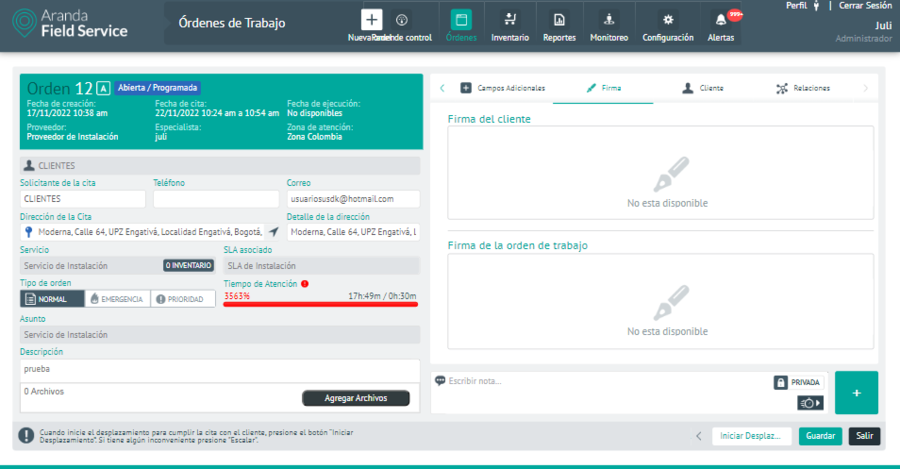
Signature display screen for the order
Customer Information
You can create or edit a customer’s information from the work order creation screen:
Options for creating new customer from order
The same basic data is requested as from the client settings:
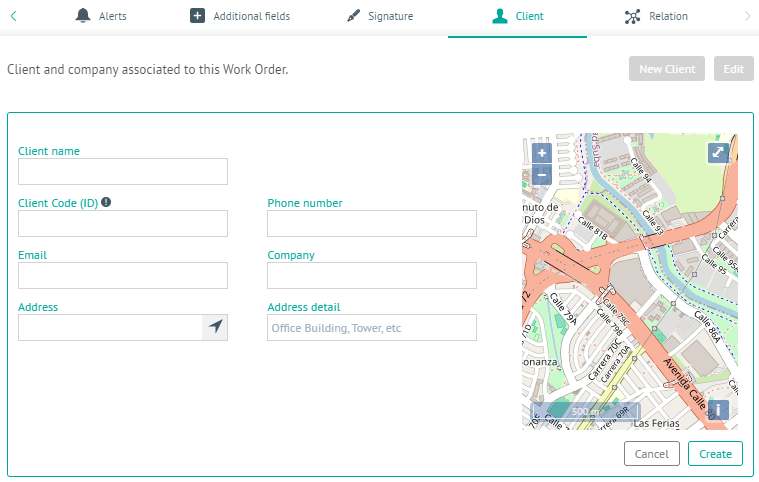
New customer screen from order
You can also edit customer information from the work order creation module:
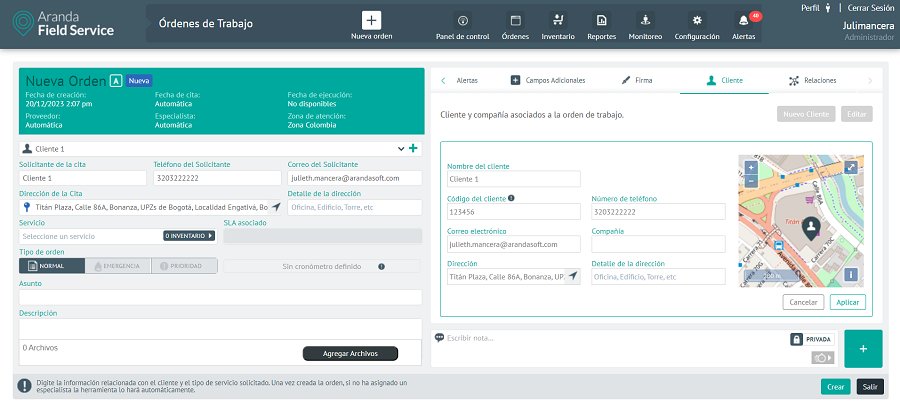
Edit Customer from Order Screen
If an order that has already been created is queried, the customer’s information will be displayed as follows:
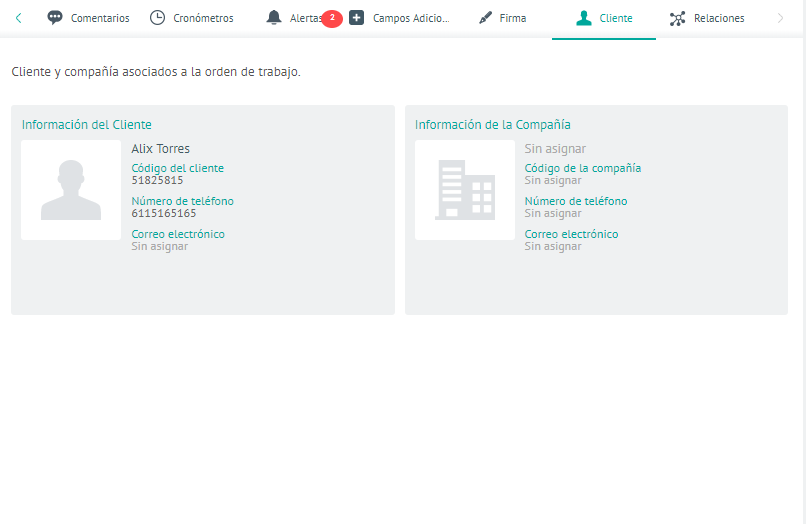
Customer Information Display
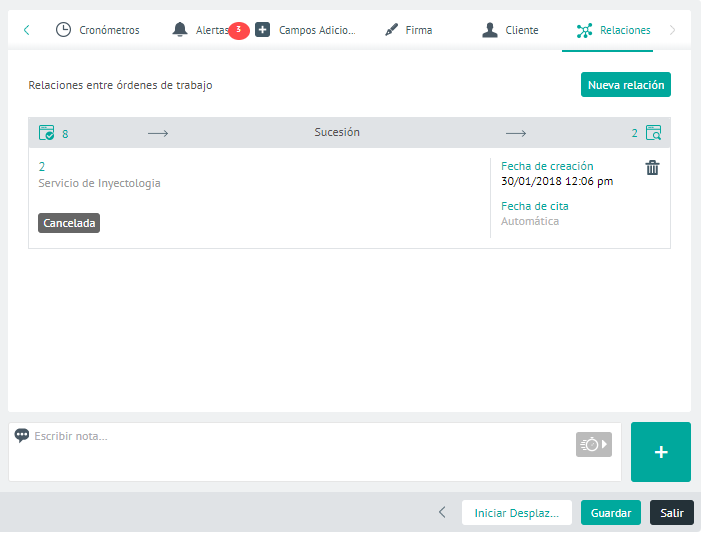
Work Order Relationships
On the Relations You will be able to link 2 or more work orders. To create a relationship, click the New relationship:
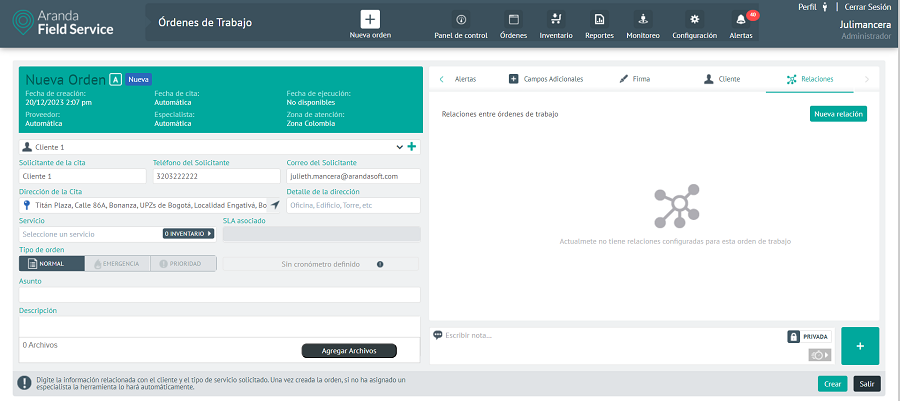
The following screen will appear where you must select whether the relationship will be succession or link:
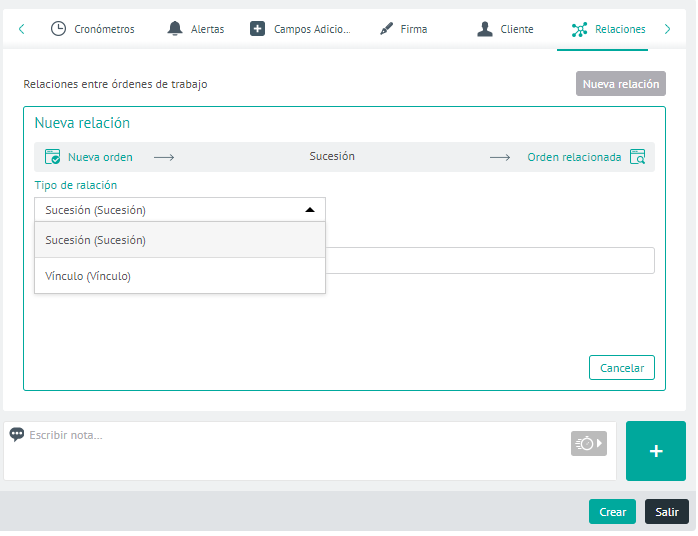
- Succession: It means that it is necessary to attend to another work order before attending to the order on which the relationship is being made.
- Link: It means that orders are related, no matter the order in which they are served.
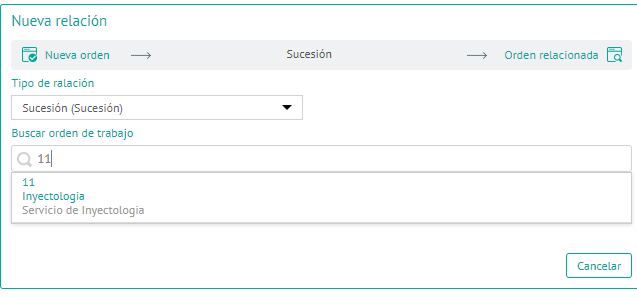
Then find the order on which you are going to generate the relationship:
Once created, the relationship is displayed as follows: