
The dispatcher can bulk upload work orders from a file .csv (comma-separated values) with UTF-8 encoding that complies with the structure required by the system (described below), to generate work orders in AFLS from third-party or first-party applications.
⚐ Note: In order for users to view this option, a permission must be activated with the Dispatcher The option must be enabled Allow the user to perform bulk actions, which allows the Dispatcher to activate the permissions in the Orders module to perform bulk uploads and select the bulk actions option.
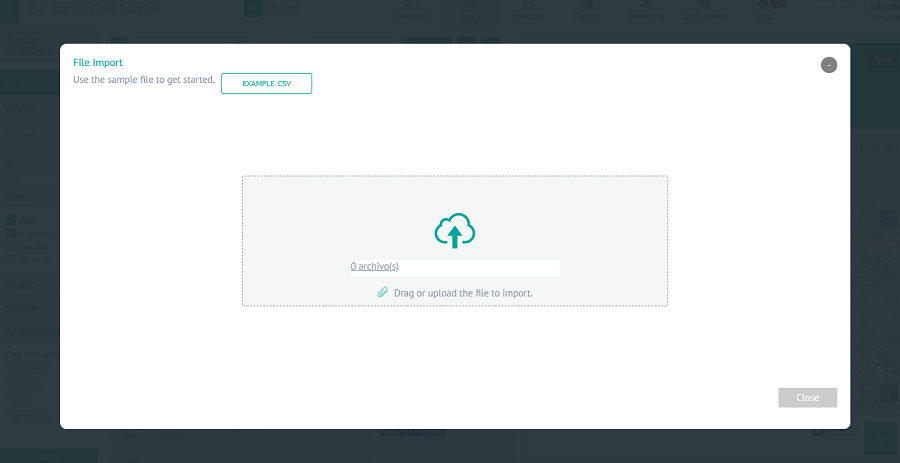
To import orders in bulk, enter by Ordersicon, and click the Import next to the New:

Bulk Order Import Option
In the Import View you can upload a file of the orders you want to add or by selecting the option EXAMPLE. CSV You will be able to download a template to import.
File of orders to import selected
Required Structure for the Work Order File to Be Imported
Fields Workorder_Template.csv
| Field | Description |
|---|---|
| ContactName | Username that the order client has configured. |
| ServiceID | ID of the service to be associated with the work order. |
| Subject | Subject matter that the work order will have. |
| Description | Description of the work order. |
| SpareParts | ID of the spare part that will be associated with the order, followed by the quantity (separated by space). |
| ContactEmail | Email of the work order contact. |
| ContactPhone | Work order contact phone. |
| Latitude-Longitude | latitude and longitude of the address (separated by comma). |
| Address | Work order address. |
| AddAddress | Address detail. |
| Specialist | Name of the specialist assigned to the order. |
| UniqueReference | Unique code of the customer for whom the work order is to be created. |
| AttentionStartDate | Initial date for restriction allowance. |
| WorkDayId | Schedule ID for restriction assignment. |
The required fields required to perform the process are: ContactName, ServiceID, Subject, Description, Address, and UniqueReference.
The optional fields in this file are SpareParts, ContactEmail, ContactPhone, Latitude-Longitude, AddAddress, and Specialist.
- If the user does not associate any spare parts (SpareParts), the system will take the default spare parts that the service has (if it has them associated).
- If the user associates a spare part ID, it is necessary to indicate the number of spare parts to be associated; the spare part ID is put first and then the quantity. Example: 1 1 (ID 1 and quantity 1).
- If the user configures latitude and longitude, the Address field does not need to be configured. If the user configures the Address field, you do not need to configure latitude and longitude.
- The start date for constraint assignment cannot be less than the current date and the format must be DD/MM/YYYY
- The IDs for the constraint assignment day are as follows: (1: Morning, 2: Afternoon, and 3: Night)
⚐ Note: Unused fields should be left blank.
In the Import View select the Drag or upload the file you are importing to access order records and upload the information to be imported. The Windows Explorer window where the file must be searched and selected is displayed .csv.
After selecting and uploading the order import file, click Accept in the import view, to confirm the changes made and the system will schedule the processing of the file.
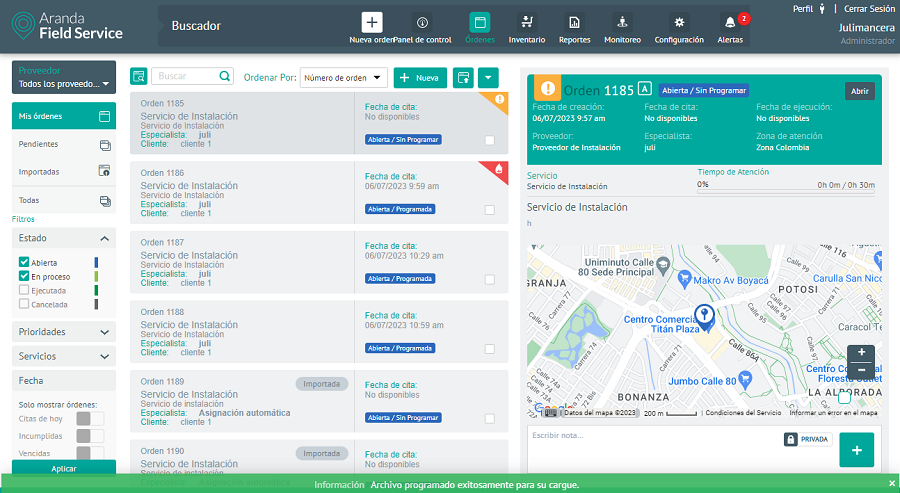
Message Schedule Successful Import
When an order is successfully imported, a comment will appear in the detailed information for that order in the Feedback indicating that it is an imported order.
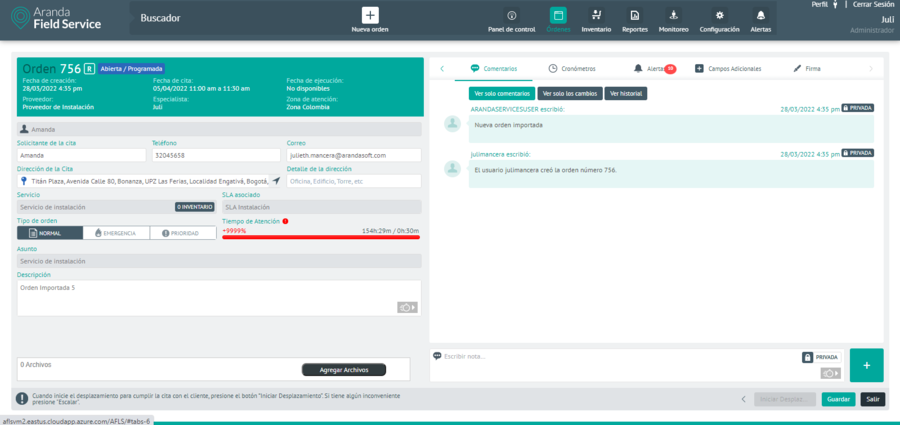
Comment generated on the order when it is imported.
To review the result of the upload, whether successful or not, it can be viewed through the graphical configuration interface > Event Management > Bulk Uploads.
Please note:
- By default, orders are imported in the Open state.
- In the list of work orders, it will be possible to identify which ones have been imported.
- The imported orders will follow the consecutive of the list of existing orders in the application, that is, if you have 98 orders created to date and 10 are imported, the consecutive one that the import will take will be from 99 to 109.
- If you fail to successfully import orders, the application will allow you to view, modify and retry uploading the records or download the file to visualize the reason for the non-import.
⚐ Note: After import, in order for orders to be automatically assigned by the mapping engine, they must have a vendor. The assignment of the provider is performed by the UNASSIGNER_ORDERS_PROVIDER task that by default runs every hour (this time can be changed, depending on how required by each client).
Importing Work Orders with Additional Fields
For the import of orders, the following recommendations should be taken into account (some are on the import screen):
1. Verify that the column titles in the header are not empty.
2. Additional fields must have the name of the additional field in the column title. (Table AFW_ADDITIONAL_FIELD name field)
3. Additional fields set in the application as read-only should not be added in the file header.
4. Verify that all additional fields set as required in the application are filled in the file (note general and model additional fields).
5. Only add orders with services associated with the same model.
6. For additional date-type fields, fill out the DD/MM/YYYY format.
7. Verify that there are no empty records.
8. Within the information of the import fields, semicolons (;) should not be used, because this is the separator that is used between columns for the process.
9. The additional fields included in the header must be filled in, otherwise the record must be left empty, respecting the semicolon separator (;)
10. The user performing the import with additional model fields must have permissions to the UNSCHEDULED status in the workflow for the role.
Here’s an example:

⚐ Note: The processing time of the file depends on the memory and processor resources of the computer. In addition, the complexity of the business in terms of status flow configurations, additional fields, and permissions, can make field verification take longer; For this reason, it is recommended that imports contemplate the same service so that the model to which it belongs and its additional fields are consistent and allow for more optimal processing.