
Cloud Infrastructures – Configuration of Subscriptions
The module Cloud Infrastructures in ADM allows you to configure your cloud service subscriptions Microsoft Azure (IaaS), to synchronize the information of the VMs registered in each subscription and compare them with the devices discovered in ADM. This way, you can identify the virtual machines that have the ADM agent and those that are not.
Prerequisites
Before setting up a subscription, make sure you meet the following requirements:
- Access to the ADM console with the necessary permits for the Configuration and visualization of Cloud Infrastructures.
- In deployments on-premises, internet connectivity is required to consume Azure services.
-
One Service principal in Azure (application) with assigned permissions on the resources to be synchronized.
This entity is used to securely authenticate to Azure services and must have, at a minimum, the Reader, which can be granted at the level of: - Subscription
- Resource Group
- Specific resource
The service principal must include the following information:
- Application ID (Client)
- Client Secret
- Tenant ID (Organization)
⚐ Note:
When permission is assigned at the Resource Group or Specific Resource, it is important to consider that a Virtual Machine in Azure depends on other associated resources, such as Discs, Network Interfaces (NICs) and Virtual Networks (VNet). If the service principal does not have permissions on these associated resources, the VM information will be synchronized in a partial and it will not be possible to obtain all of its data.
Configuring permissions in the ADM console
To manage subscriptions and view Synced devices, the user must have specific permissions:
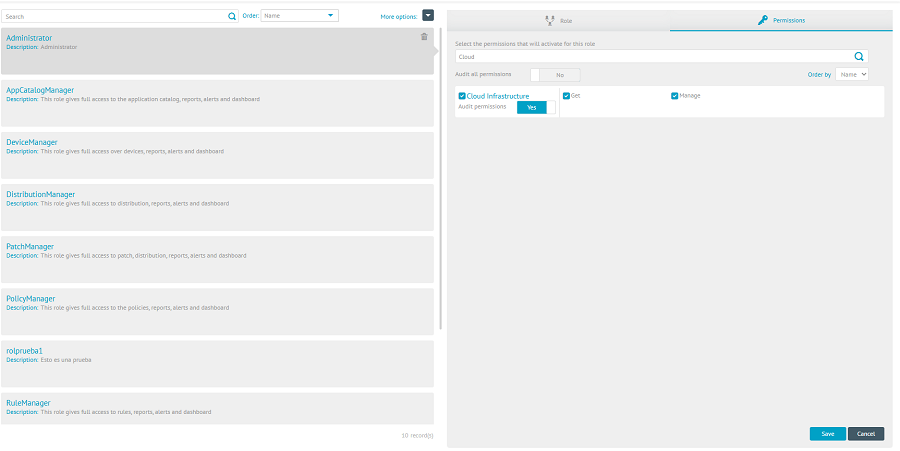
1. Enter the screen Configuration and select the menu Roles and permissions, located in the General.
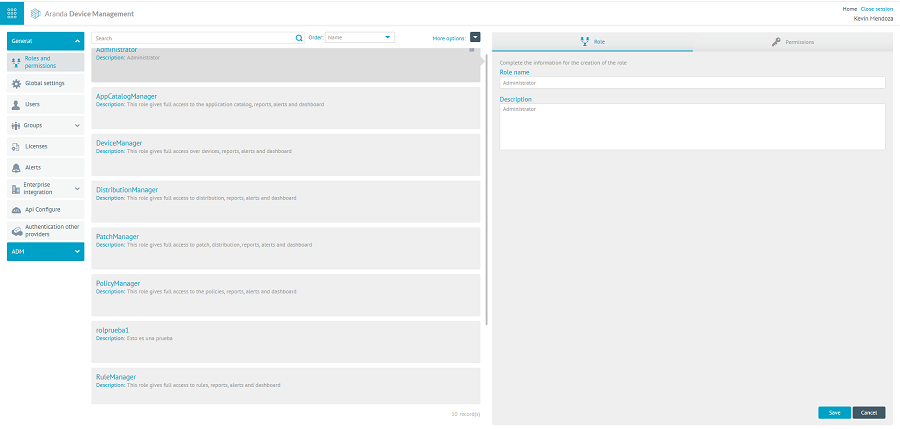
2. On the permissions tab, find the Cloud Infrastructure and enable the following options:
- View Screens: It allows access to the screens of devices and subscriptions of Cloud Infrastructures.
- Manage Display: Allows you to create, edit, sync, and delete subscription configurations. This permission requires that it is also enabled View Screens.
3. Click the Save to apply the changes.
⚐ Note: Permits Cloud Infrastructure are enabled by default for roles Administrator and DeviceManager.
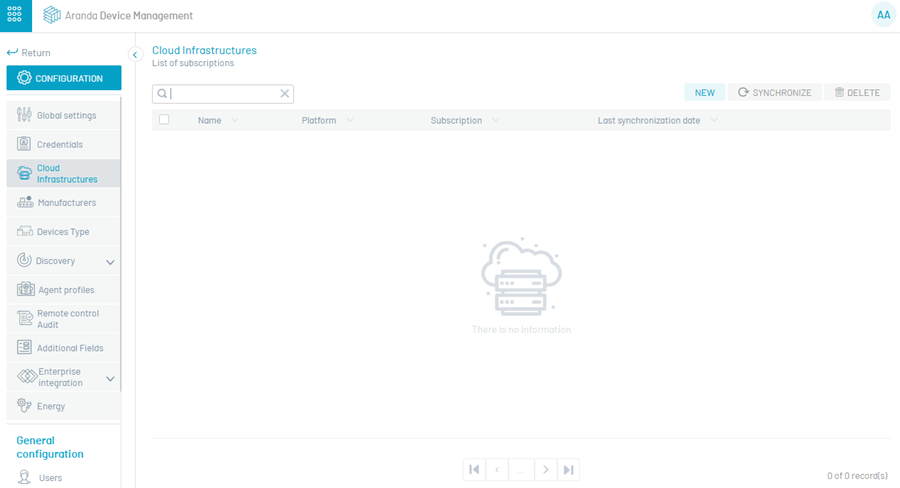
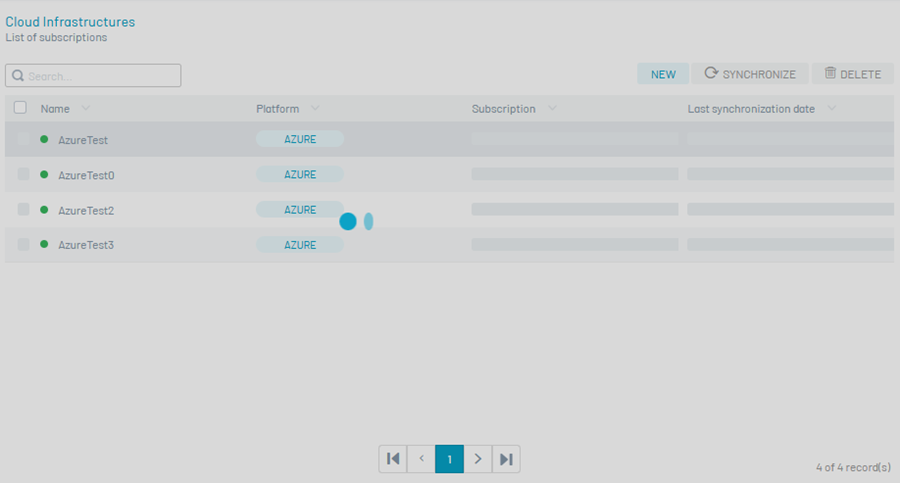
View Subscription List
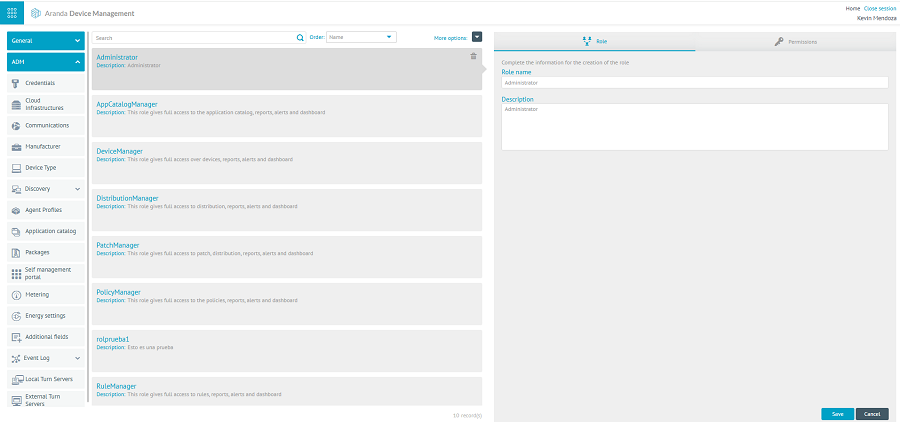
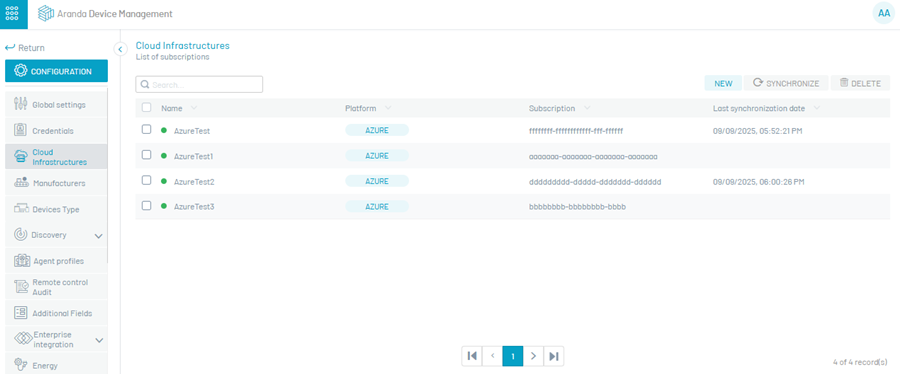
1. Go to the screen Configuration and select the menu Cloud Infrastructures, in the ADM.
2. On the main screen of Cloud Infrastructures You can perform the following operations:
- View a Summary of each subscription (name, platform, subscription ID, and last sync date).
- Select records individually.
- Searching the list above the fields name or Subscription ID.
- Sort columns ascending or descending.
- Switch pages using the Pager located at the bottom.
- Check in the lower right corner for the Total Records.
- Create a new one Subscription Settings.
⚐ Note: To edit, sync, or delete, select a record in the listing.
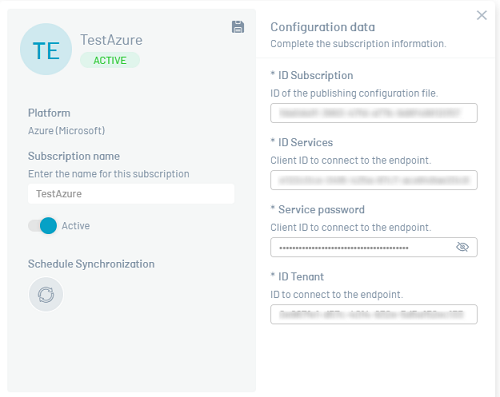
Create a new subscription configuration
1. On the screen Cloud Infrastructures, click the NEW.
2. Fill in the required fields according to the table below:
| Field | Obligatory | Description |
|---|---|---|
| Subscription Name | Yes | Custom name to identify the subscription in ADM (minimum 6 and maximum 50 characters). |
| Subscription ID | Yes | Unique identifier for your subscription in Azure (20 to 50 characters). |
| Service ID | Yes | Service principal ID in Azure (20 to 50 characters). |
| Service password | Yes | Secret key associated with the service entity (minimum 6 and maximum 50 characters). |
| ID Tenant | Yes | Tenant ID in Azure (20 to 50 characters). |
| Active/Inactive | Yes | Subscription configuration status. |
| Schedule Sync | No | Allows access to the modal Schedule Sync to define the update periodicity. |
⚐ Notes:
- The fields Subscription ID and Subscription Name they must be unique; In case of duplicates, an alert message will be displayed.
- The Schedule Sync It will only be available if the subscription settings are in the Active.
3. Click the Save to finish the creation. The system will display the message: “The subscription was successfully created”.
Edit a subscription setting
1. Select the subscription from the listing.
2. Click on the Edit

3. A modal will open where you can modify only the following fields:
- Subscription Name
- Service ID
- Service password
- Subscription Status
- Schedule Sync (available only if the state is in Active)
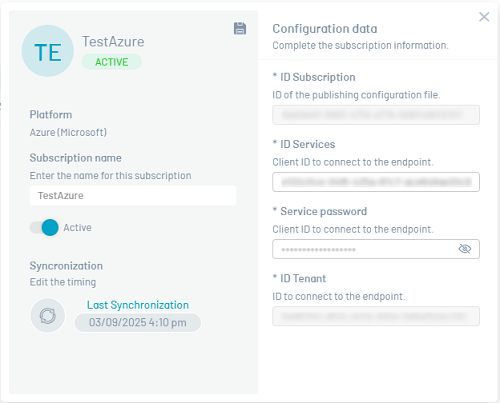
4. Click the Save to apply the changes. The system will display the message: “Subscription was successfully updated”.
⚐ Notes:
- The system does not allow you to upgrade subscriptions with a Subscription Name duplicate.
- If the subscription was created without a sync schedule, manually enable the status in the modal to configure it.
Delete a subscription setting
Deleting a subscription will also clear the data from the synced VMs associated with it.
1. Select the subscription from the listing or open the detail modal and click the ELIMINATE.
2. The system will display a confirmation modal.
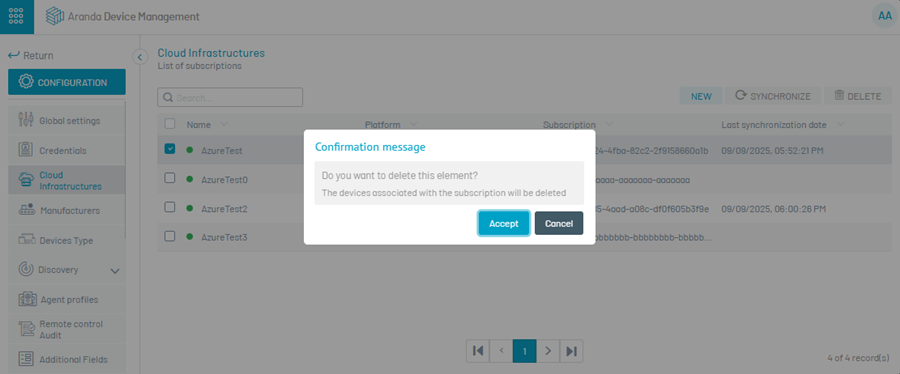
3. Click Accept to confirm the deletion or in Cancel to skip the action.
4. If the deletion is confirmed, the system will display the message: “Subscription has been successfully deleted”.
⚐ Notes:
- This action is irreversible: the associated synchronization data will also be deleted.
- Only deleting subscriptions is allowed one by one. Multiple deletion is not available.
- If the subscription is in a state Inactive, it can also be deleted.
Schedule Sync
Synchronization scheduling can be done at the time of creating a new subscription or later from the editing of the configuration.
1. Click the Synchronize  to access the modal Schedule Sync.
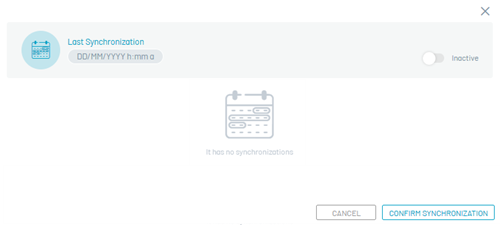
2. The system offers two synchronization modes:
- Run now: It performs an immediate synchronization, executed only once.
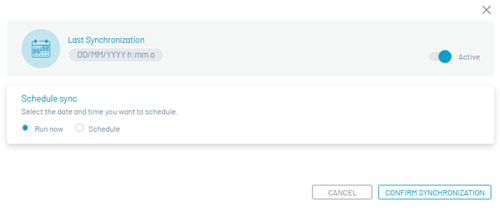
- Program: Run an immediate sync and continue to sync automatically and indefinitely at intervals of 12 hours, 1 day or 7 days.
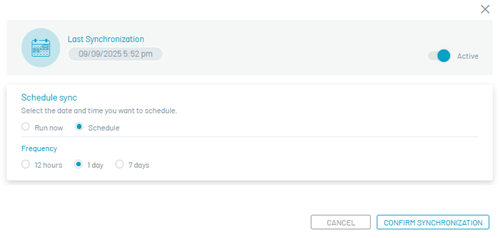
3. To apply the schedule, click CONFIRM SYNCHRONIZATION.
⚐ Notes:
- If you don’t want to apply changes, click CANCEL to close the modal.
- The schedule will only run when the subscription configuration is in the Active. If you change to Inactive, scheduling will be disabled.
On-demand synchronization
1. Select the active subscription settings in the listing.
2. Click the SYNCHRONIZE.
3. During the process, the screen will remain inactive. When finished, the message will be displayed: “Sync set up correctly”.
4. The countryside Last Sync Date It will automatically update in the table.
⚐ Notes:
- On-demand synchronization is not recommended when the subscription has a high number of virtual machines assigned. In these cases, it is recommended to use the scheduled sync option.
- Only subscriptions are allowed to be synced one by one. Multi-sync is not available.
- If the subscription is in a state Inactive, the SYNCHRONIZE it is not enabled.
- If a subscription doesn’t show a last sync date, it has never been synced.
- In the event of a synchronization error, the system will generate the corresponding alert.
Purpose of synchronization
Synchronization (scheduled or on-demand) queries information from VMs registered in your Azure subscription and stores it in your ADM database.
With this information, the system:
- Compares VMs discovered in the cloud with ADM-registered devices.
- Identifies VMs that have the ADM agent installed and those that are not.
- It allows administrators to make decisions about the installation, updating of the agent in cloud environments.
⚐ Note: The green indicator in the console shows the machines detected with agent at the time of the last synchronization. However, if the agent was uninstalled later, the console will only reflect it on the next scheduled or on-demand sync.