
In this module, configure the statuses through which a case can pass throughout its lifecycle; This cycle begins at the time of registering the case, and ends at the time of closing it. Statuses are configured by model and case type.
Status Management in ASMS
State Management (creation, bulk upload, import of formats) can be carried out from the ASMS web console (current version) or through the State View (new version).
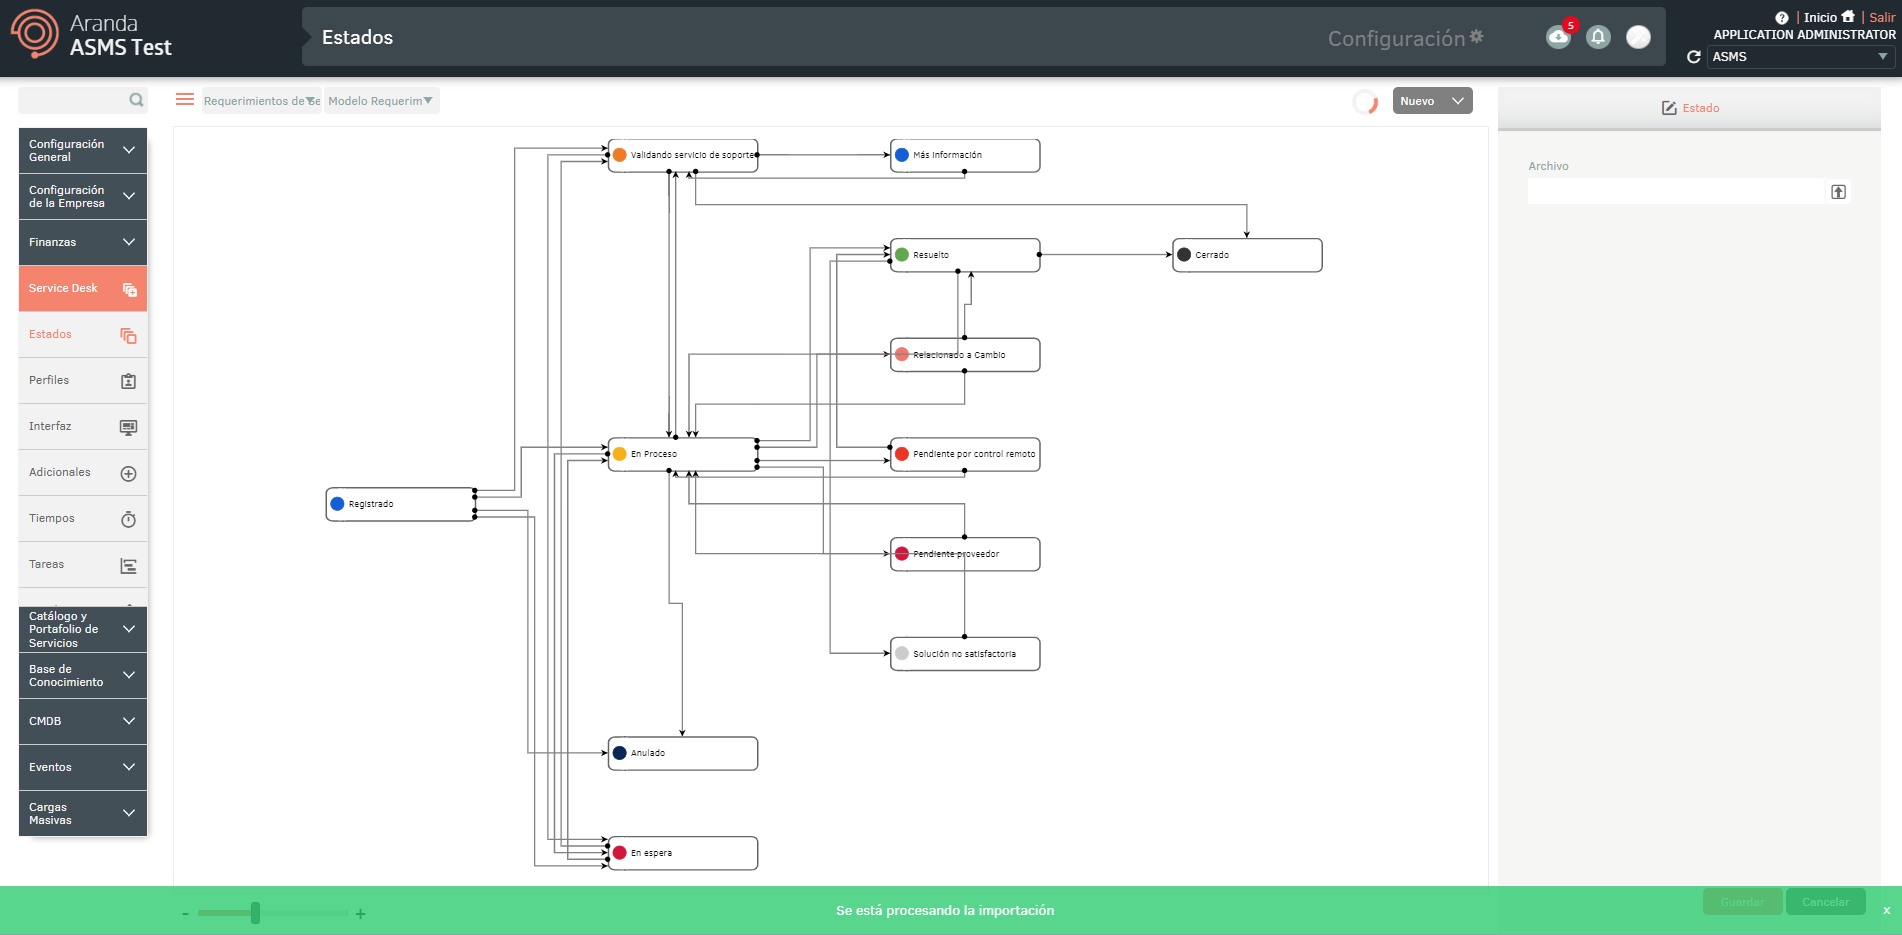
1. To configure the statuses and transitions that cases can go through, log in to the ASMS Management Console in the Service Management from the main menu, select the States.
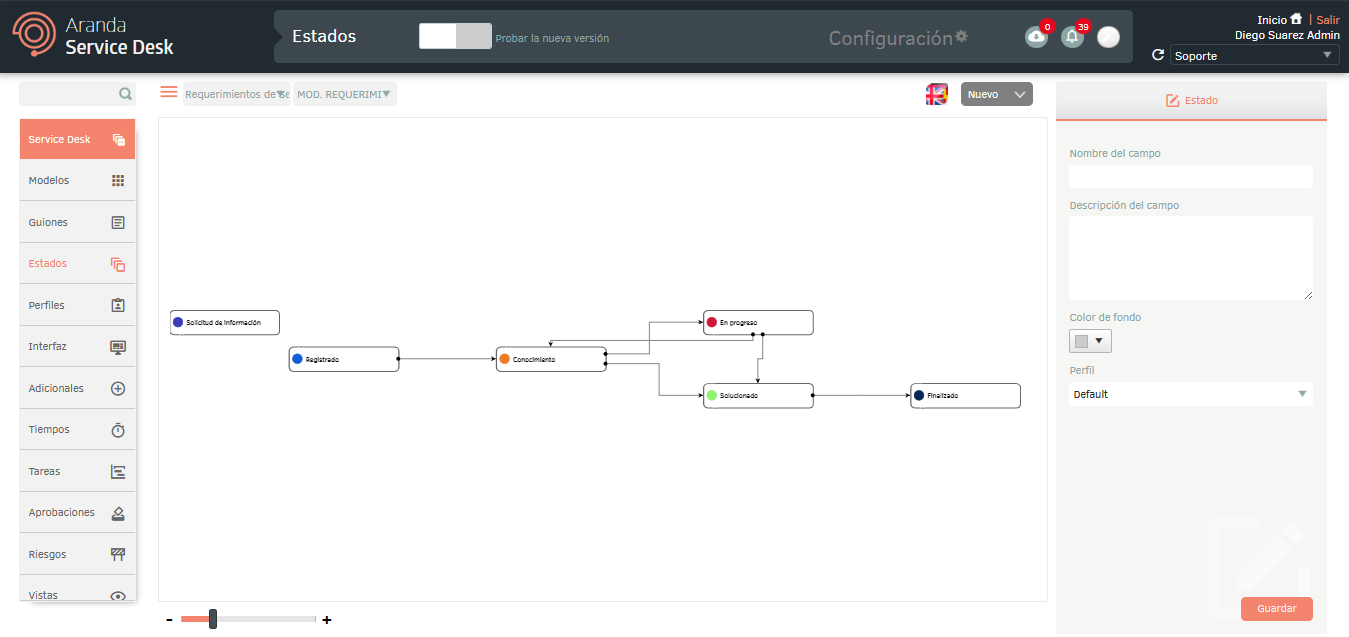
2. To access the status view in the Current version, from the information view of the ASMS console you will be able to access the Status Management Options.
3. To access the status view in the New version, in the ASMS console header menu, select the Try new version. Doing so enables the New View of States, to perform state management.
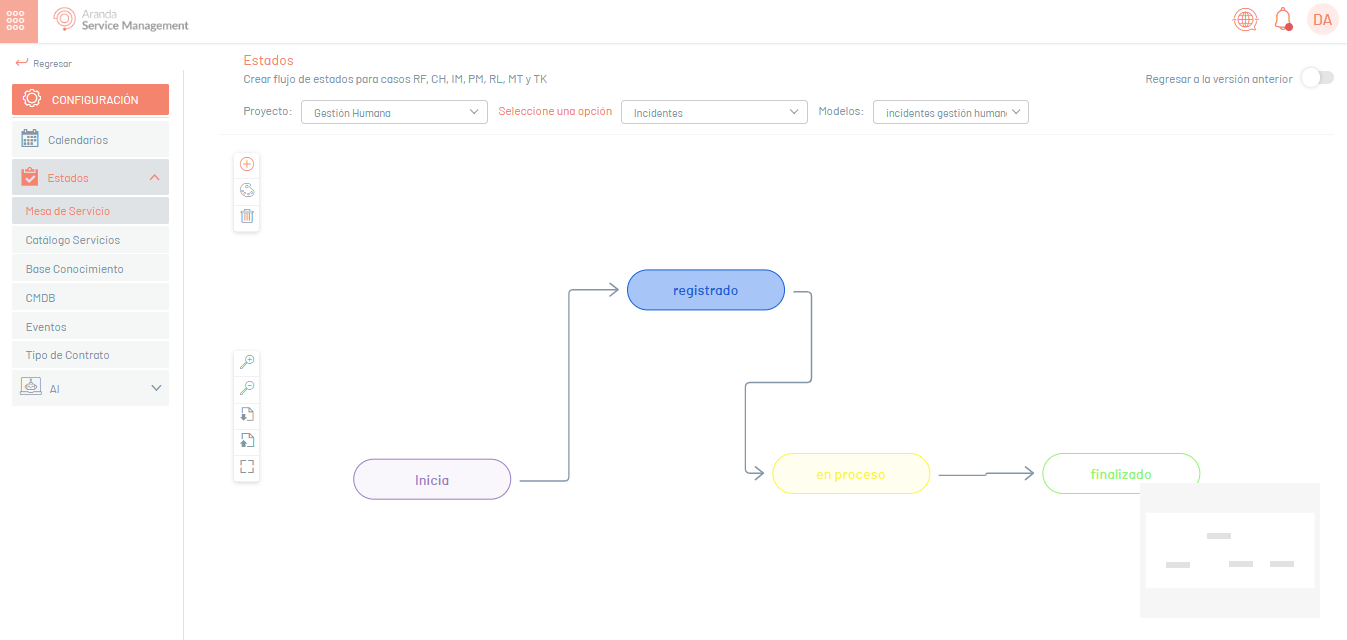
⚐ Note: To return to the current interface, click on the Return to previous version.
Creating States /Service Management
1. To create a case status, log in to the ASMS Admin Console in the Service Management from the main menu, select the States. In the information view, select the New and define the type of case and model; in the Detail View you will be able to fill in the basic information of the status of the case.
| Fields | Description |
|---|---|
| Field Name | Enter the name of the state. |
| Course Description | Enter a description of the state. |
| Background color | Select a background color for the state. |
| Profile | Select a profile for the state. |
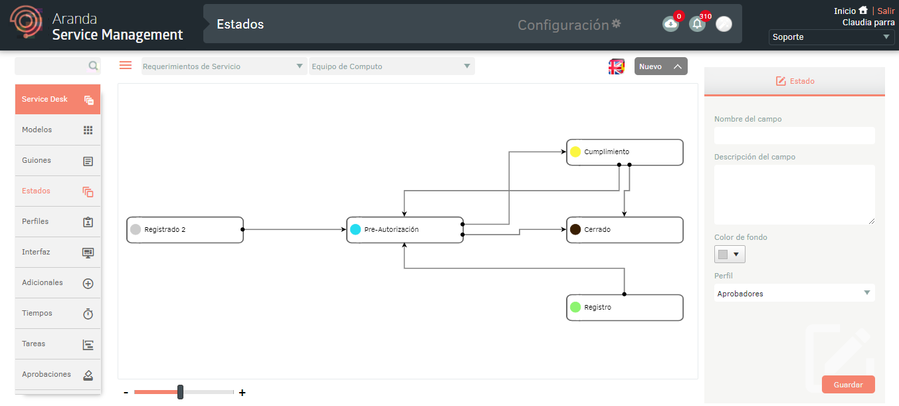
2. When you finish setting up the basic status information, click Save to confirm changes made; in the Detail View of the ASMS console, the created status will be visible with the assigned color, and a message confirming the creation of the status will appear at the bottom of the screen. It is recommended to create all the states first and then the transitions from one state to another.
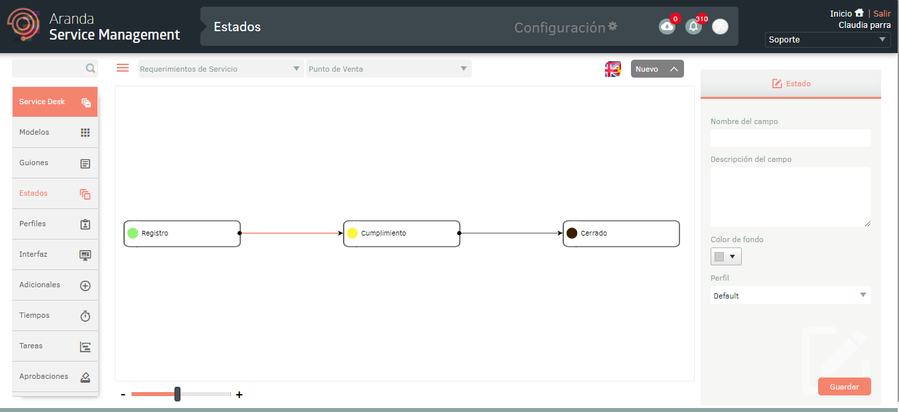
3. To create a transition, select any of the points that are activated within the state and extend it to the next desired state. The transition is represented by an arrow that joins two states.
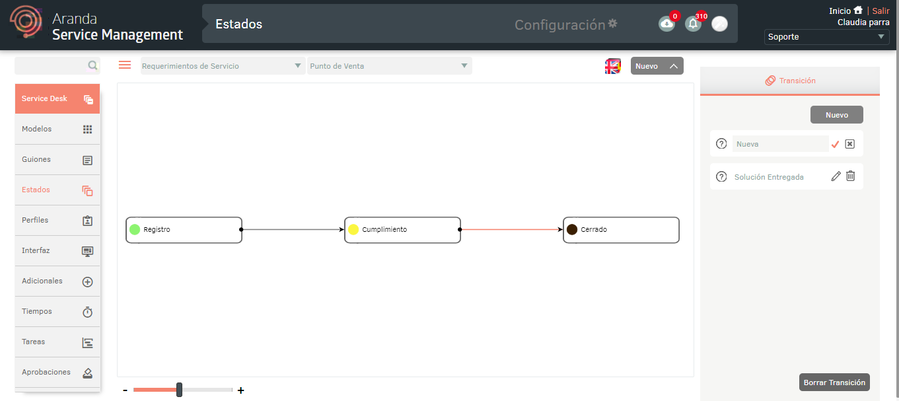
4. To delete a transition, select it (by clicking on the arrow and dragging a bit) and click on the Clear Transition.
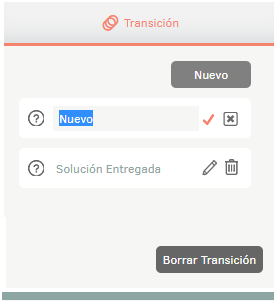
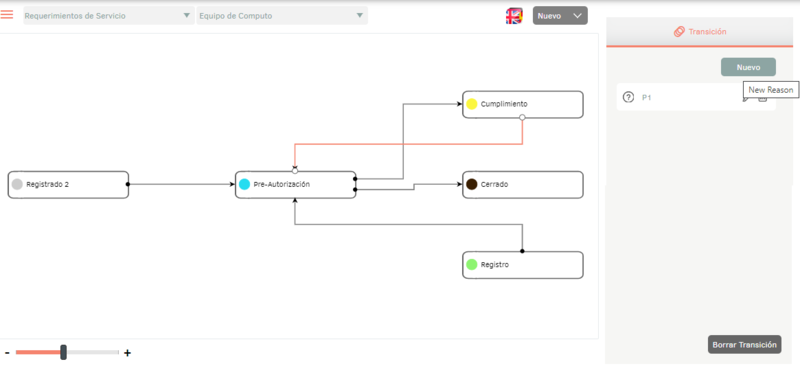
5. After you have created all the transitions between the states, you must create the reasons for each transition. To do this, select the transition (by clicking on the arrow and dragging a little) and at the top right of the screen click on the New button, there type the name of the reason and click on the confirmation icon.
State behavior
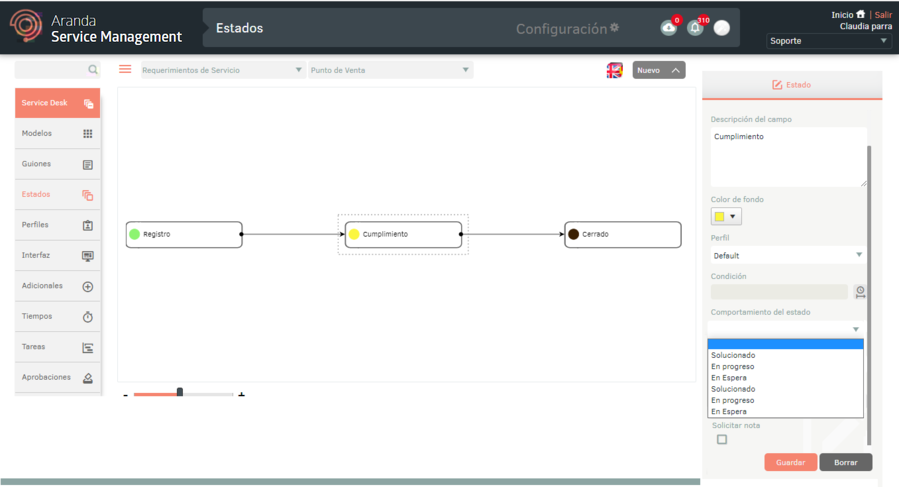
6. This option allows you to assign behaviors to each of the states. To do this, select a state (by clicking on the state and dragging a bit) and at the bottom right define the behavior of the state.
⚐ Note:
-
- In the initial states, the state behavior option will NOT be displayed because it is the first state of the flow.
- In the initial states, the state behavior option will NOT be displayed because it is the first state of the flow.
-
- In the final states you can choose the Voided behavior for cases such as changes, incidents, service requirements. For release cases, you can choose the Incomplete Closed behavior. If you do not choose any behavior in the final states, the tool interprets it as a closed state.
7. For intermediate states, the following behaviors are per management module:
Behaviors for Service Requirements and Incidents
| Behaviour | Description |
|---|---|
| Solved | Resolved state, the solution field is required in the state. |
| In progress | The case is being handled by the specialist. |
| Look forward | The case is waiting for some action on the part of the user. |
| Scheduled | It returns the case to a previous state, from a scheduling date given by a specialist. |
| Closed by default | If a case with a related article is created when creating a case, the case goes to the state with this behavior. |
Behaviors for Problems
| Behaviour | Description |
|---|---|
| Solved | Resolved state, the solution field is required in the state. |
| Evaluation | The error is being evaluated. |
| Root Cause Analysis | The cause of the error is being analyzed. |
| Correction in process | The solution is being carried out. |
| Scheduled | It returns the case to a previous state, from a scheduling date given by a specialist. |
Behaviors for Change
| Behaviour | Description |
|---|---|
| Evaluation | The feasibility of the change is evaluated. |
| Approved | The change was approved. |
| Scheduled | Dates have been set for the change. |
| Construction | Change is being implemented. |
| Revision | The change is in pre-production testing. |
| Scheduled | It returns the case to a previous state, from a scheduling date given by a specialist. |
Behaviors for Releases
| Behaviour | Description |
|---|---|
| Approved | The release was approved. |
| Planning | Release planning is underway. |
| Scheduled | It returns the case to a previous state, from a scheduling date given by a specialist. |
In addition to the related behaviors, the following differentiated behavior should be taken into account:
- Scheduled Behavior: This behavior applies to states other than initial, end, and whose previous state is not initial. You can configure two consecutive states with the Scheduled behavior, but in the specialist console the validation will be carried out that the previous state does not have the Scheduled behavior, if so, the behavior configuration for the new state is ignored.
Enable Required Note
It is possible to request a mandatory note in different states on the same form.
This action allows you to display in the ASMS specialist console, when the case enters the state where the mandatory note was configured, a window to enter the status change note.
⚐ Note: The mandatory note only applies to the Specialist Console (ASMSSpecialist) and for case types (Service Requirements, Releases, Changes, Problems and Incidents).
Condiciones en estados
This functionality allows you to configure conditions on each of the states and thus define a flow by conditions.
⚐ Note: Conditions are enabled only for intermediate states.
8. To set up a condition, select an intermediate state (by clicking on the state and dragging a bit) and on the right side of the screen click on the Edit initial condition icon.
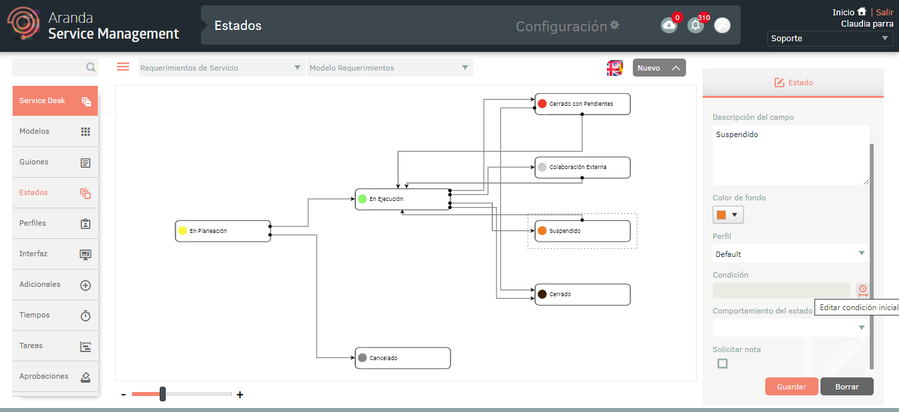
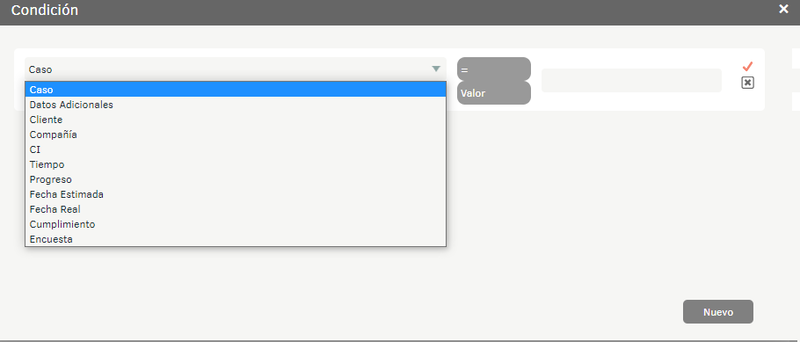
9. In the Condition window, click the Newicon, configure the conditions, and click the confirmation icon.
Example: The In Process status will only be enabled on the condition that the additional field Has Insurance? set to Yes.
10 . Once the conditions are set, close the Condition window and click the Save.
Bulk Uploading of Status/Service Management
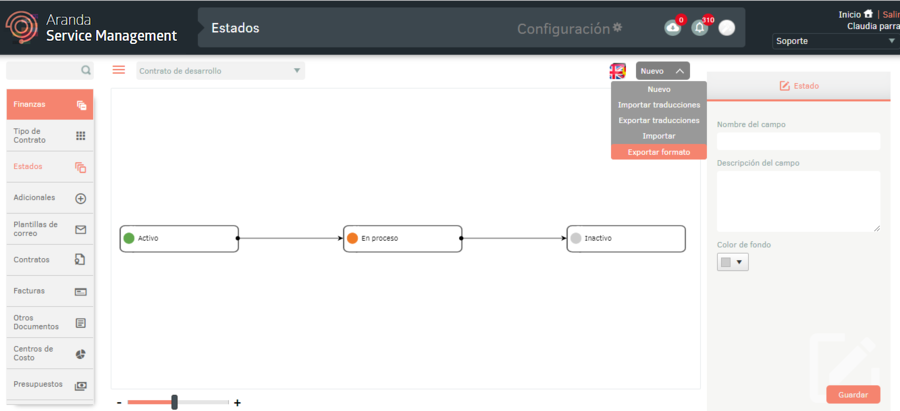
1. To perform the bulk upload of contract statuses, enter the ASMS administration console, in the section Service Management from the main menu, select the States. Select the case type and model, and in the information view, select the New/Export Format; This option will allow you to export the information with or without data for updating and/or creating statuses.
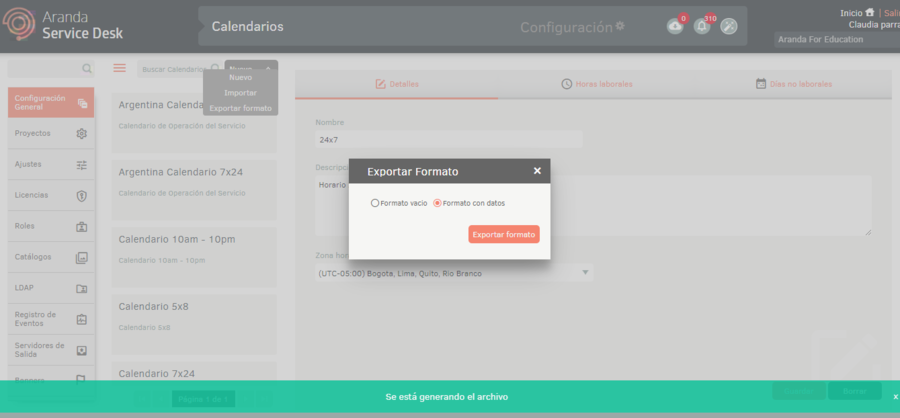
2. The window is enabled Export format where you must select whether you need to export the empty or data-filled format. Click Export Format.
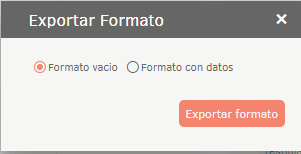
3. If you download the empty format, a file in Excel format is automatically generated. If you downloaded the form with data, the file is scheduled for download, generating an informative message at the bottom of the screen.
4. From the Admin console header menu, select the Notifications option.
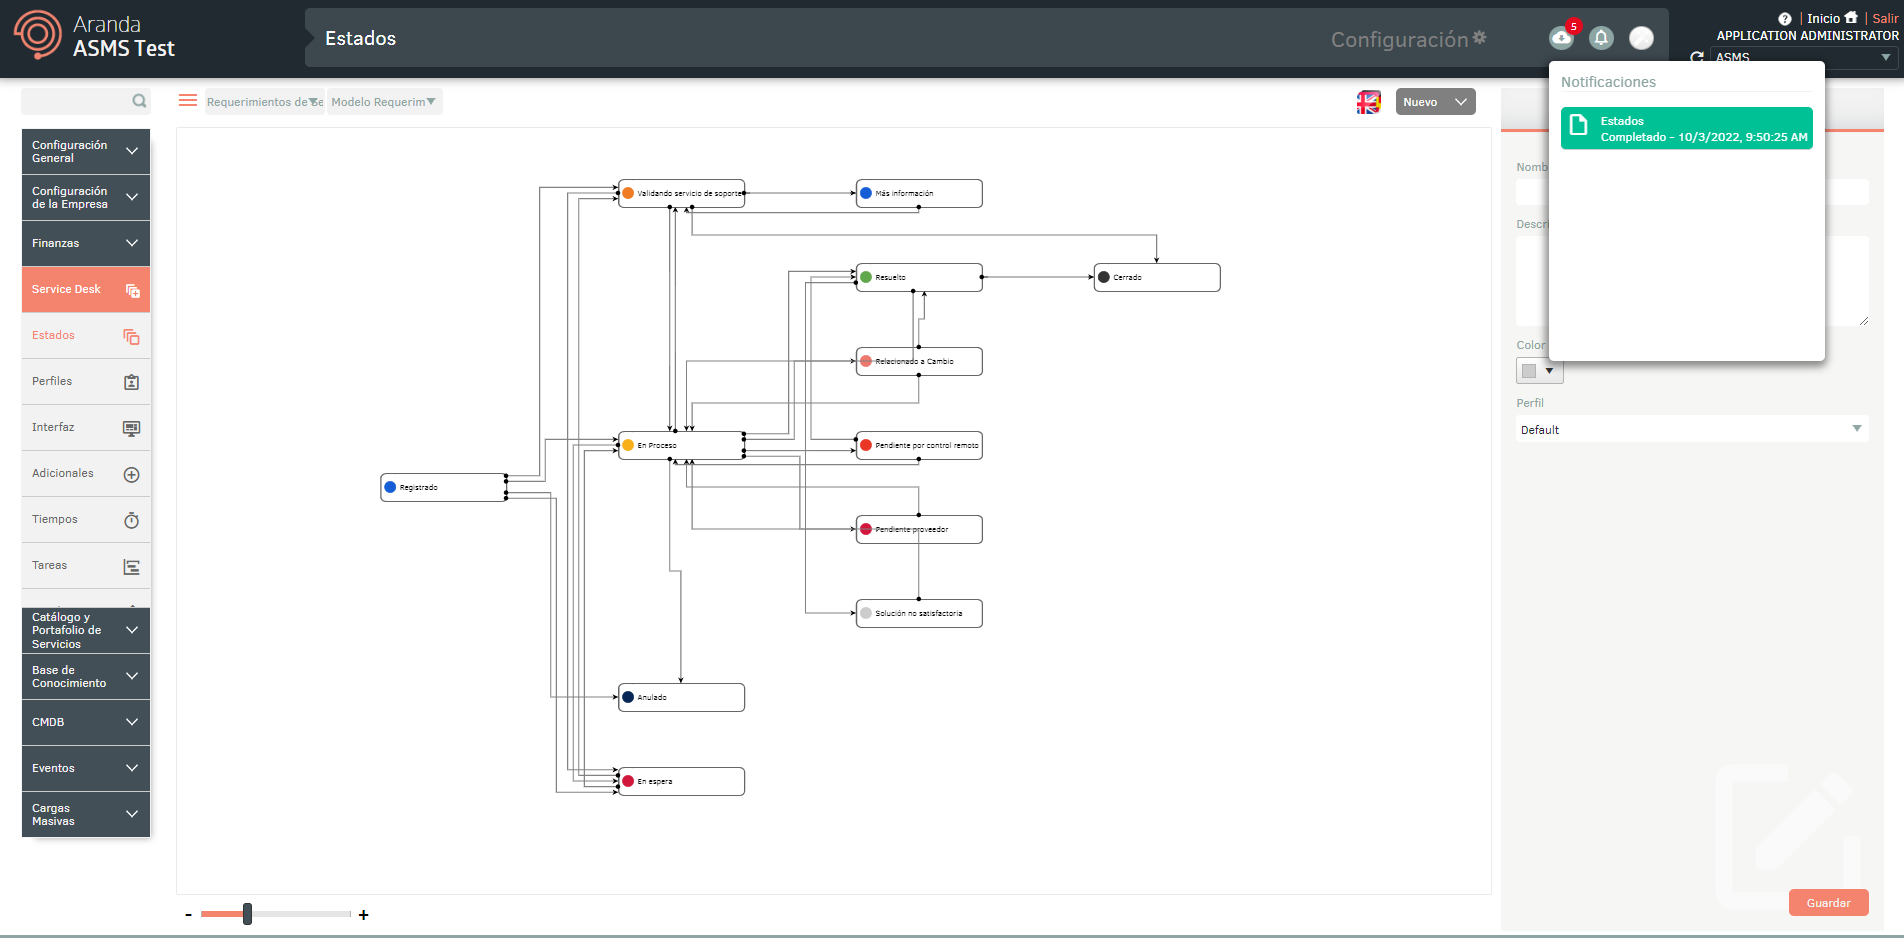
⚐ Note: In the Notifications option you will be able to view the generated format in Pending status (Orange color) and once the export process is finished, it will change to Completed status (Green color) with the download date.
5. Click on the notification to download the file.
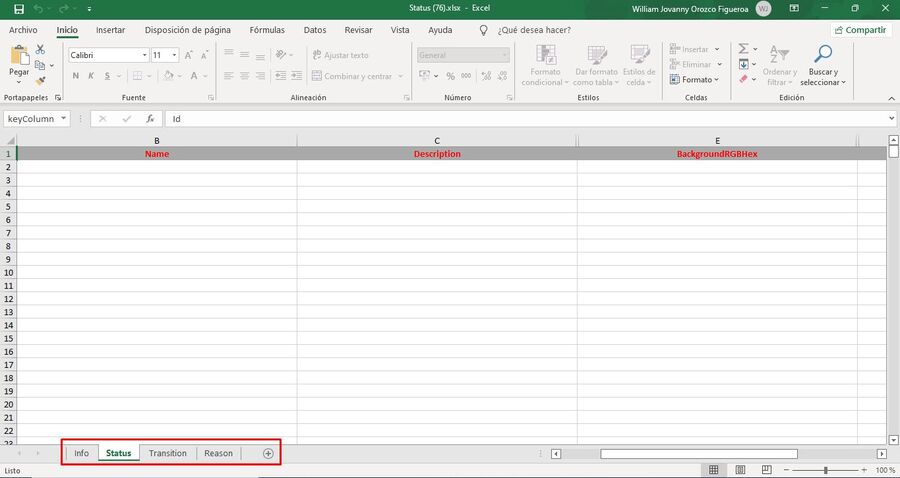
The downloaded file includes all the fields of the states, you will also find the fields necessary for the creation and/or updating of the states.
The Info tab describes in detail the obligation and information to be filled in on each field.
Import Format for States
1. Once the form has been completed, enter the ASMS administration console, in the section Service Management from the main menu, select the States. Select the case type and model and in the information view, select the New/Import.
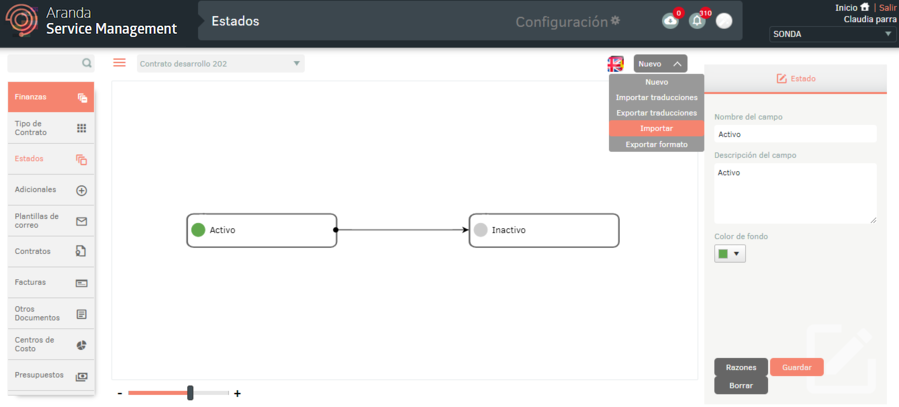
2. In the window Import, upload the file, and click the Save.

3. Clicking the save button to start importing or updating Statuses will schedule the file for import, prompted at the bottom of the screen and added to the notification panel.
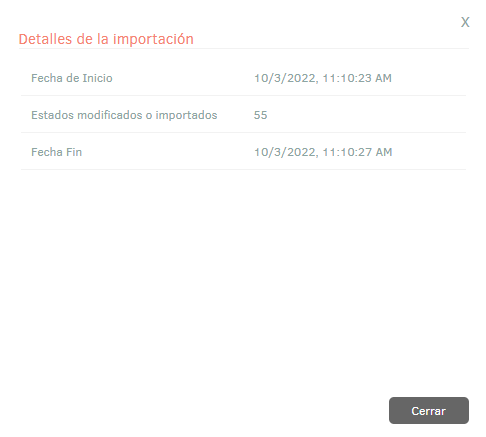
4. When the import is complete, the corresponding notification will change from orange to green, indicating that it has been completed.

5. When you click on the notification, a window will be displayed where you can view the details of the import.
6. If during the import the file generated an error in one or more of its records, when viewing the import details it will be possible to download a file with the details of the records that generated error.
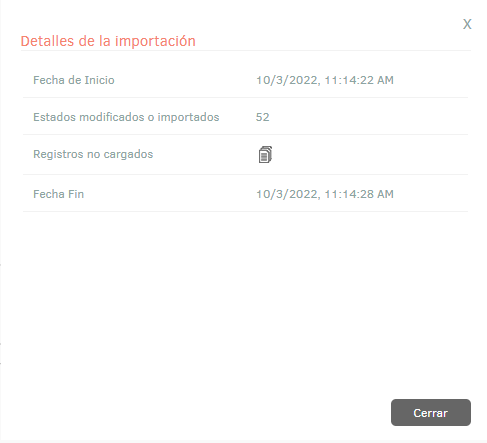
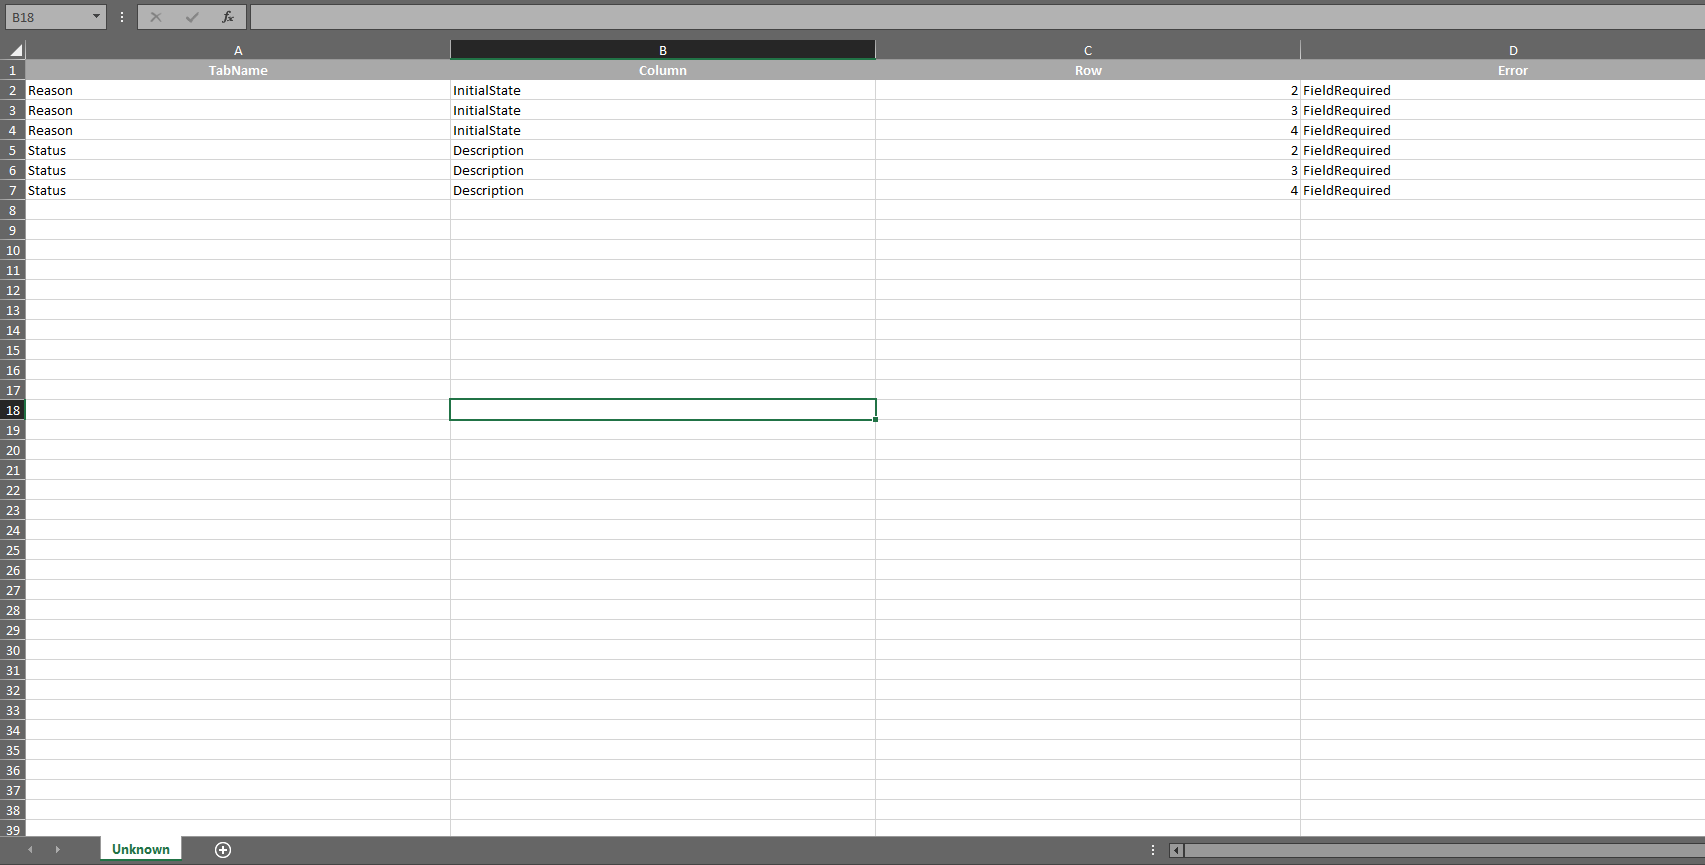
7. In the import details window, by selecting the unloaded records icon, you will be able to download an Excel file with the details of the errors generated during the import.
Multilanguage
To configure the multilanguage option in Service Management states, you must consider the documentation for translations. View Multilanguage.