
In this module it is possible to integrate external authentication providers that are compatible with the SAML 2.0 protocol (Security Assertion Markup Language) and that can function as a single point of authentication or SSO (Single Sign-On), in addition to providing multi-factor authentication (this feature is provided directly by the provider).
Note that you need to have the users imported or pre-created in order for the console to authenticate them. This process can be done by importing users from LDAP, importing users through text files, or manually creating text files.
For the authentication of users, the email address will be used to identify them within the system, it is recommended that each user has a unique address.
1. To configure authentication providers, log in to the ASMS Management Console in the General Settings from the main menu, select the External Authentication. In the information view, select the New and in the detail view fill in the requested information.
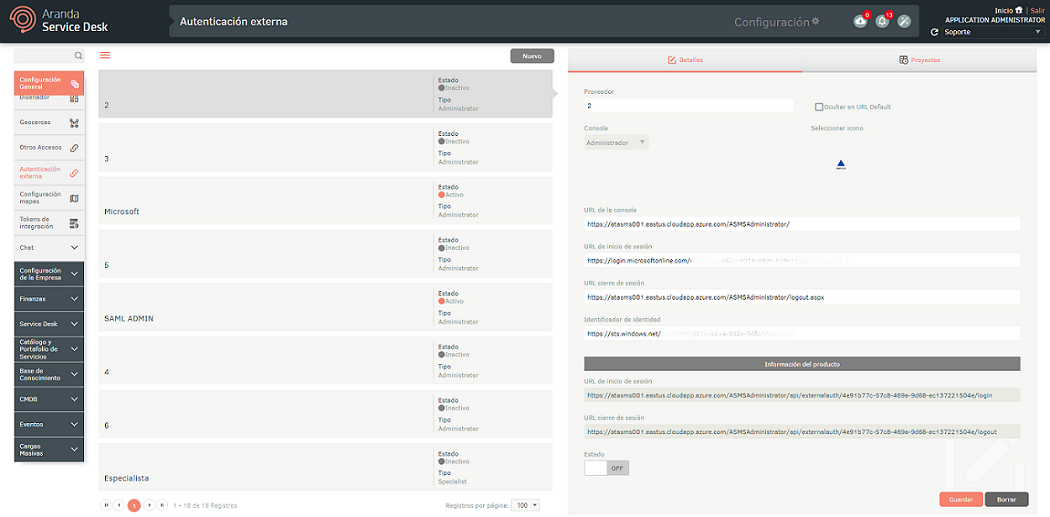
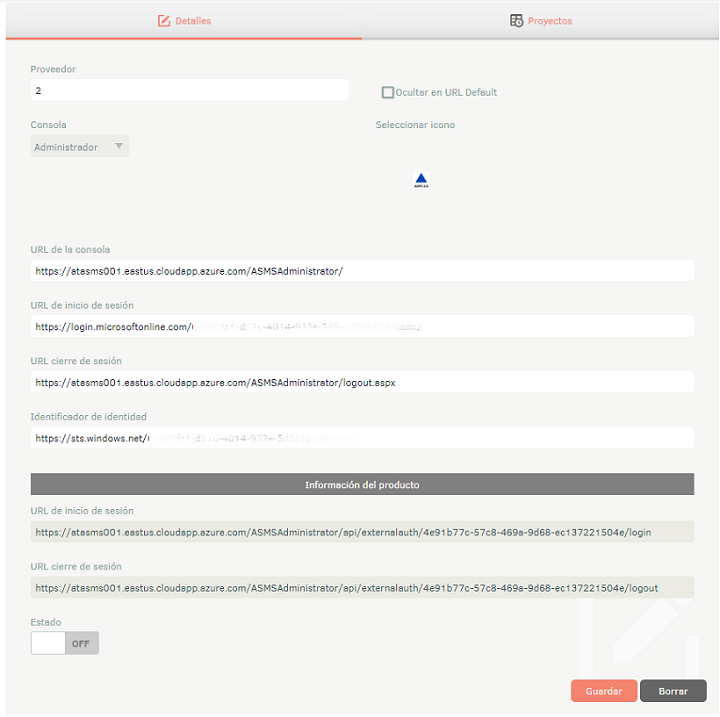
| Field | Description |
|---|---|
| Supplier | Name to be given to the provider; This name is the name that will appear on the authentication screen of the corresponding console. |
| Console | Type of console to be integrated. |
| Console URL | Public console URL. This value must be provided to your authentication provider as an Identifier (entity ID). Example: https://dominio.com/asmsadministrator |
| Login URL | Authentication provider login URL. This data must be obtained directly from the supplier. Get Google ↪ configuration data Get configuration data from Azure Active Directory ↪ |
| Logout URL | Validate the console for which the configuration is required, and for each console note the following structure: Administration: Admin console url /logout.aspx Specialist: Url of the specialist console /logout Customer: Client console url /logout Mobile Specialist: Url of the specialist console /logout Mobile Client: Url of the client console /logout. Example: https://login.microsoftonline.com/xxxxxx-xxxx-xxxx-xxxx-xxxxxxxxx/saml2 |
| Identity Identifier | Identity ID of the authentication provider. This data must be obtained directly from the supplier. Get Google ↪ configuration data Get configuration data from Azure Active Directory ↪ |
| Product Information | The following data must be provided to your authentication provider to configure the trust relationship between the two parties: - Login URL * - Logout URL * 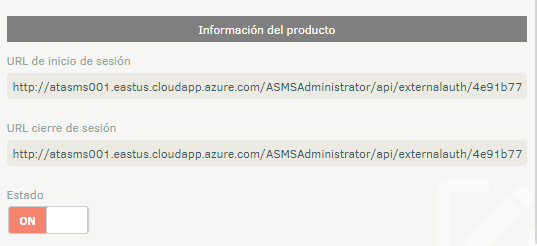 These addresses are generated from the Console URL, you must save the settings so that they are permanent, because if you do not do so and perform the process again, they may change. |
| State | Enable integration using the selector in ON |
2. When you finish setting up the vendor information, click Save to confirm the changes made
3. Depending on your authentication provider, you must follow the corresponding steps:
ADFS
Get supplier data
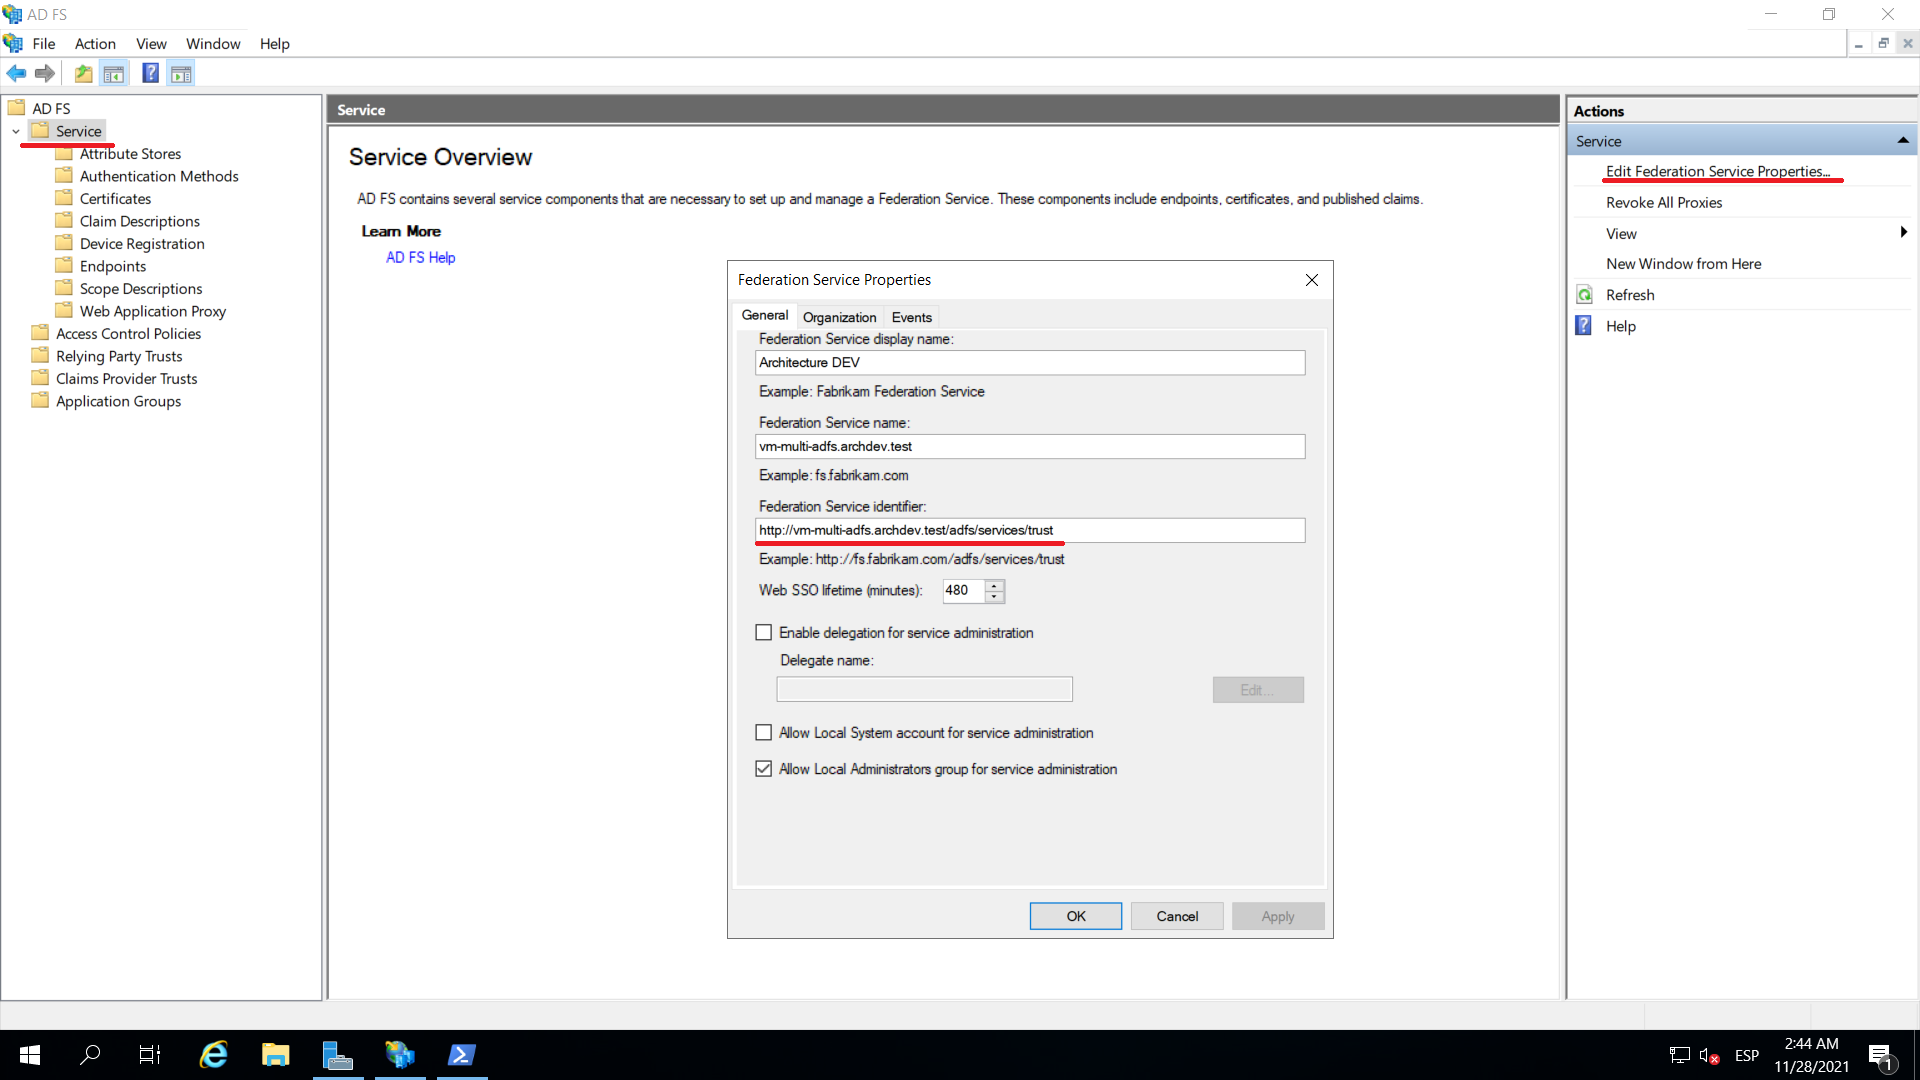
1. Identity Identifier: In a default installation its value corresponds to https://dominio/adfs/services/trust
This identifier can be obtained directly from the ADFS server by opening the console AD FS Management, from the main menu select the Service and in the Actions menu select the Edit Federation Service Properties to the right.
2. Login URL: In a default installation its value corresponds to **https://dominio/adfs/ls/
It is possible to obtain it directly from the ADFS server by opening the console AD FS Management, from the main menu select the Service and Endpoints.
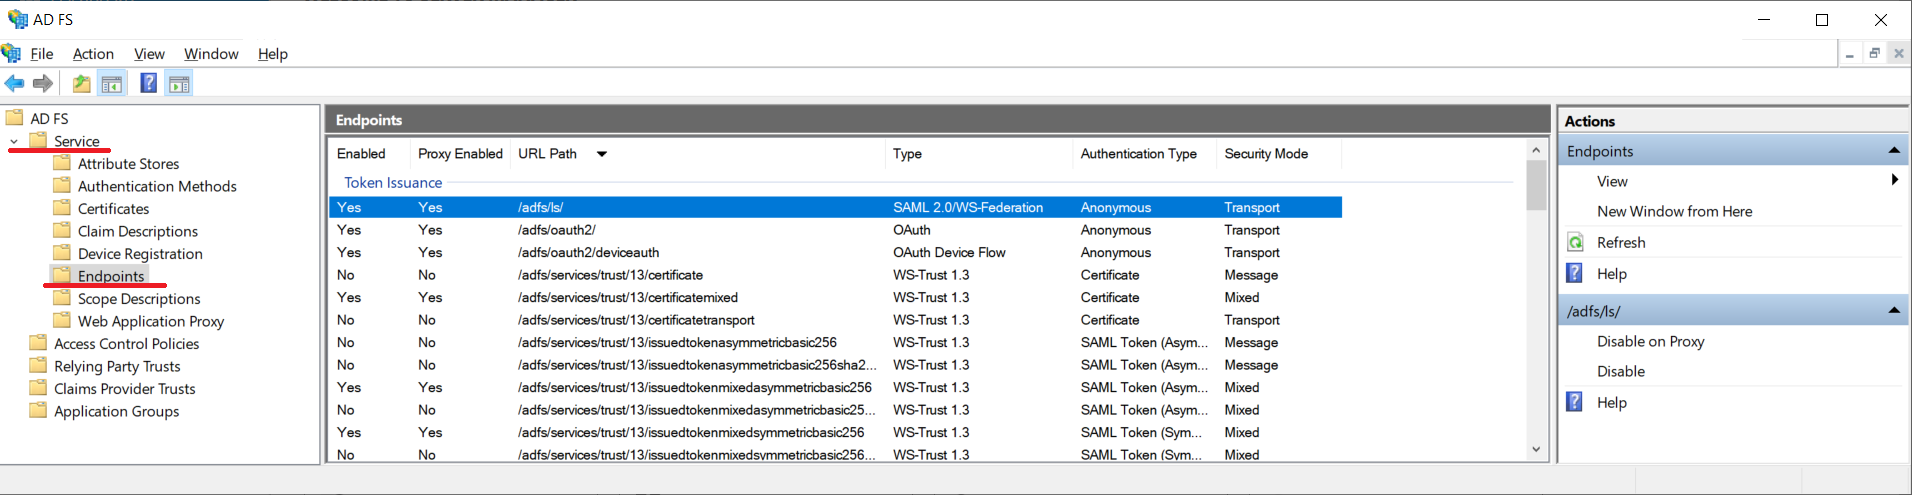
3. Logout URL: In a default installation its value corresponds to https://dominio/adfs/ls/?wa=wsignout1.0
You can perform the same procedure to obtain the Login URL and add the value ?wa=wsignout1.0
This data must be entered when creating an external authentication provider in the ASMS Management Console. View External Authentication Settings.
Configuring the trust relationship
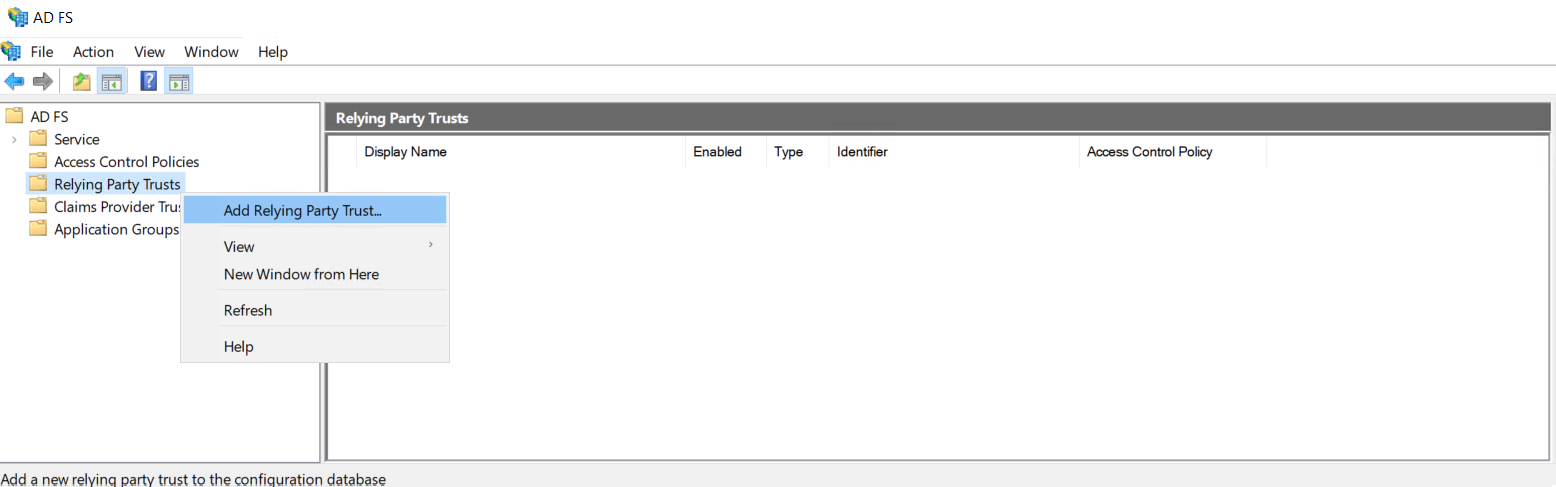
1. Start the console AD FS Management from the server where the ADFS is installed, right-click on the Relying Party TrustsSelect Add Relying Party Trust…
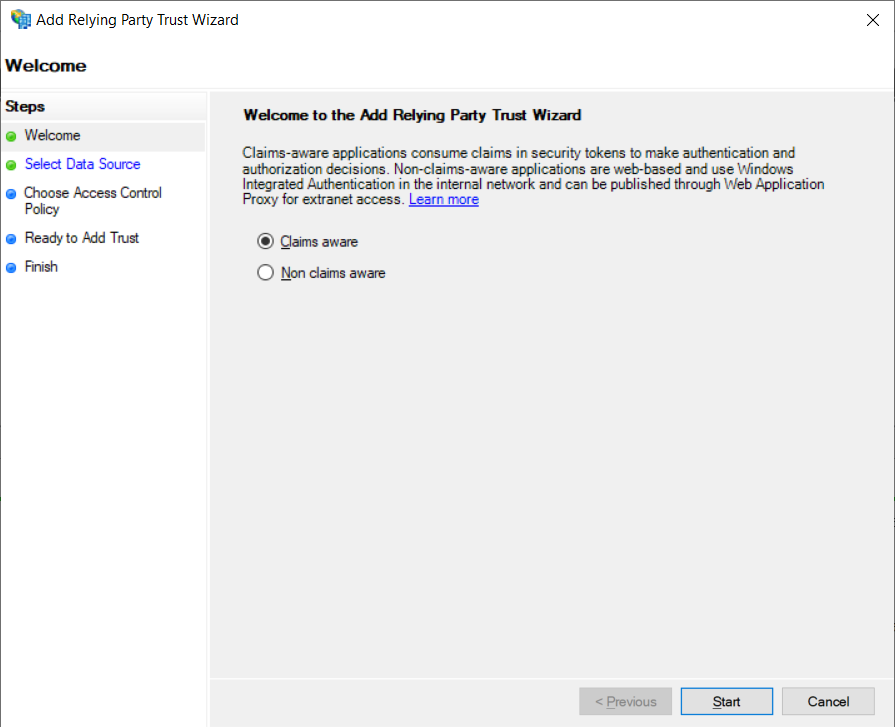
2. Select Claims aware and click Start.
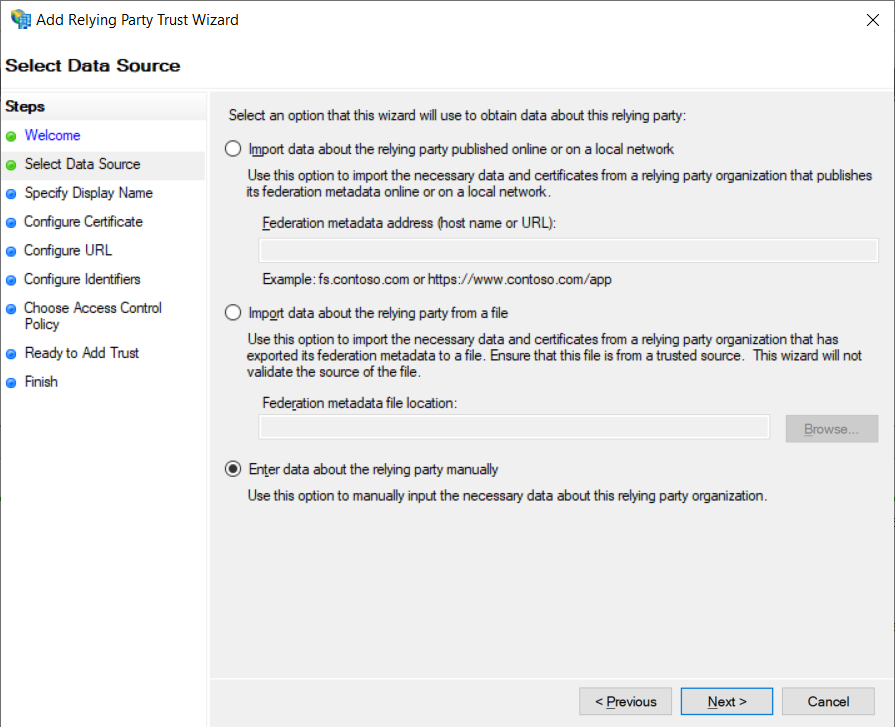
2. Select Enter data about relying party manually, then in Next.
3. Enter a descriptive name and record the additional information. Click Next.
4. You can click Next In El Paso Configure certificate to leave the defaults.
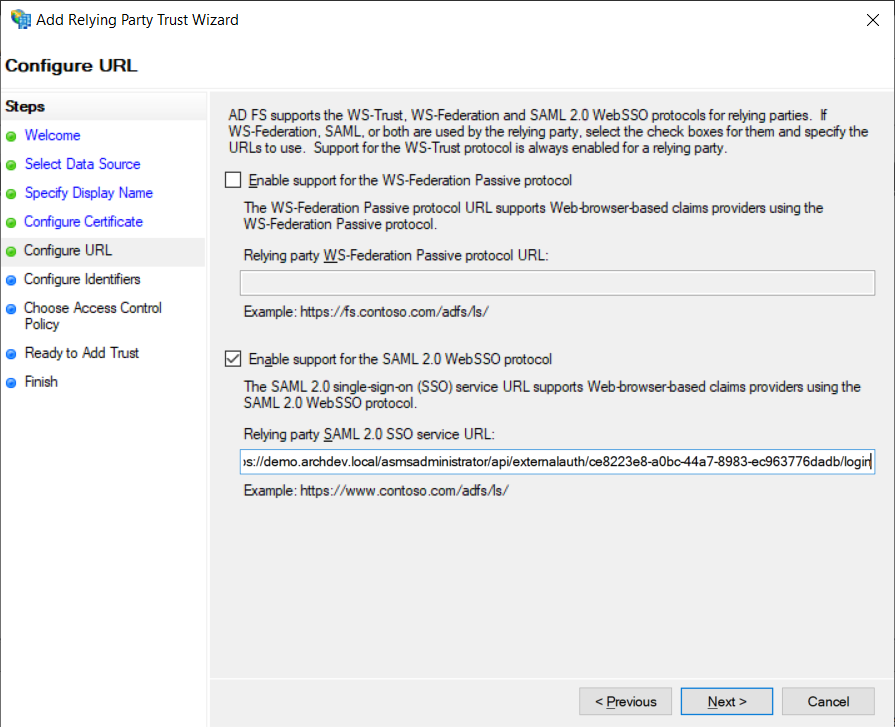
5. Select Enable support for the SAML 2.0 WebSSO protocol and enter the Login URL in the console, click Next
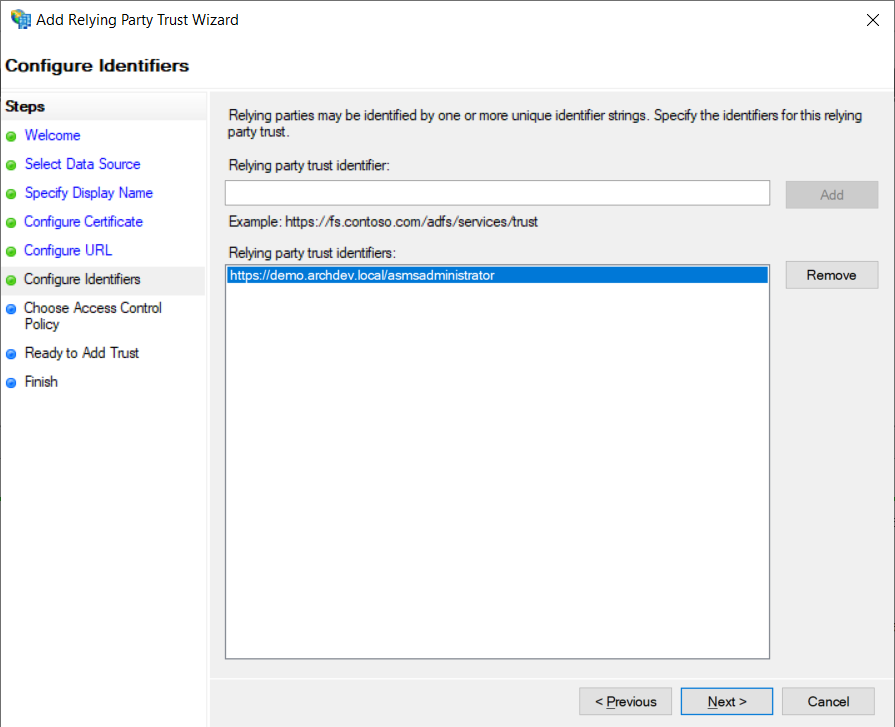
6. Enter the Console URL, click Add and later in Next.
7. Select the type of access policy to be applied, based on your security requirements, click Next.
8. You can view the configuration summary, click Next.
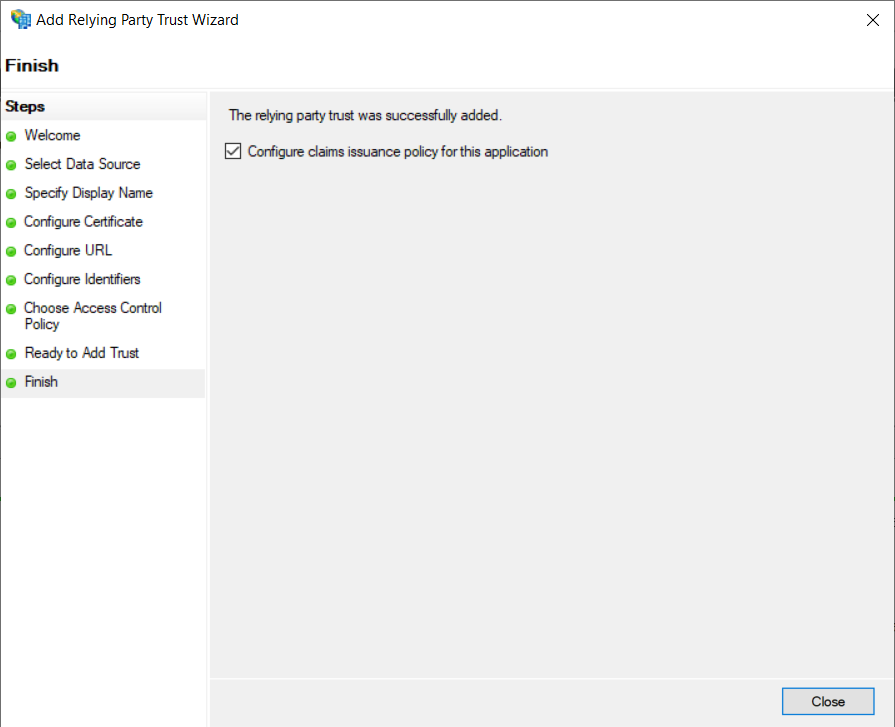
9. Verify that the option is selected configure claims issuance policy for this application to configure policies for the issuance of claims that they should be used for integration; Click Close to complete the wizard.
10. You will then find a new window to configure the policies, click Add Rule.

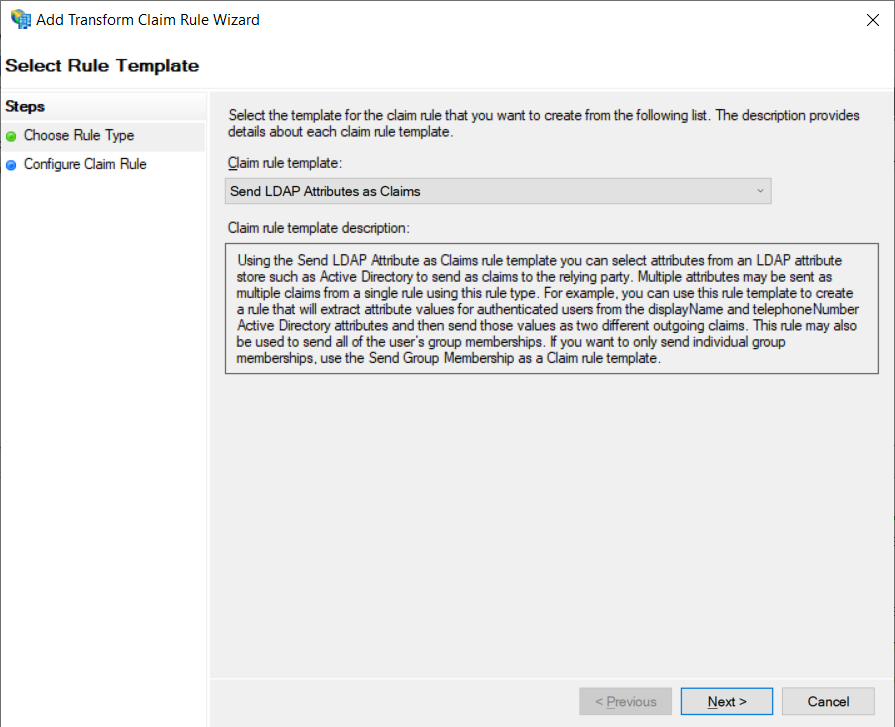
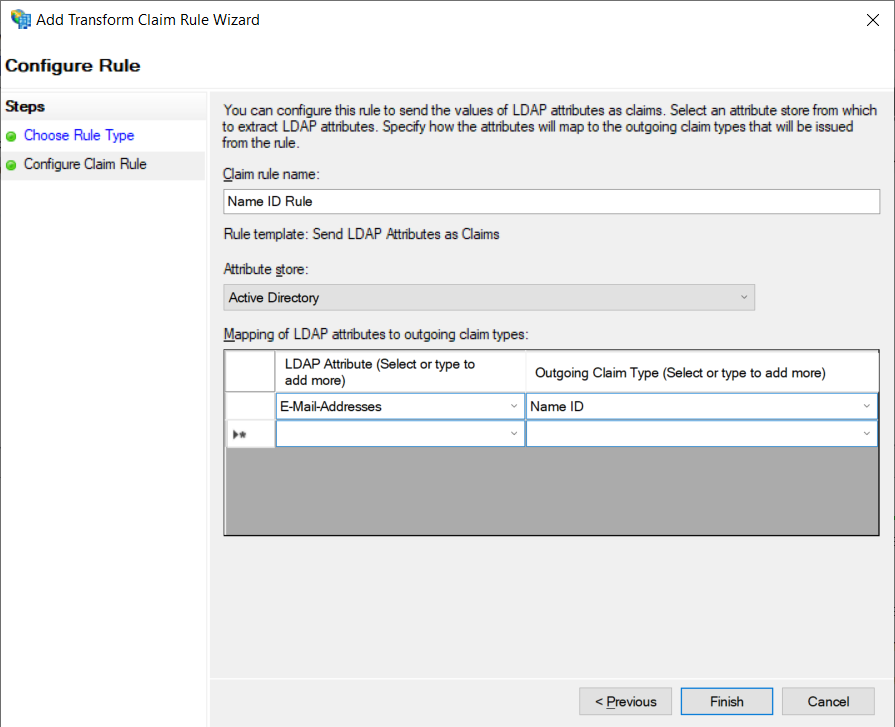
11. Select the template Send LDAP attributes as Claims , click Next.
12. Enter a name to the rule, select Active Directory in the Attribute storeSelect E-Mail-Addresses on the left side of the table and Name ID on the right side; Finish the rule creation by clicking the Finish.
13. To complete the Policy Editing Wizard, click the OK.
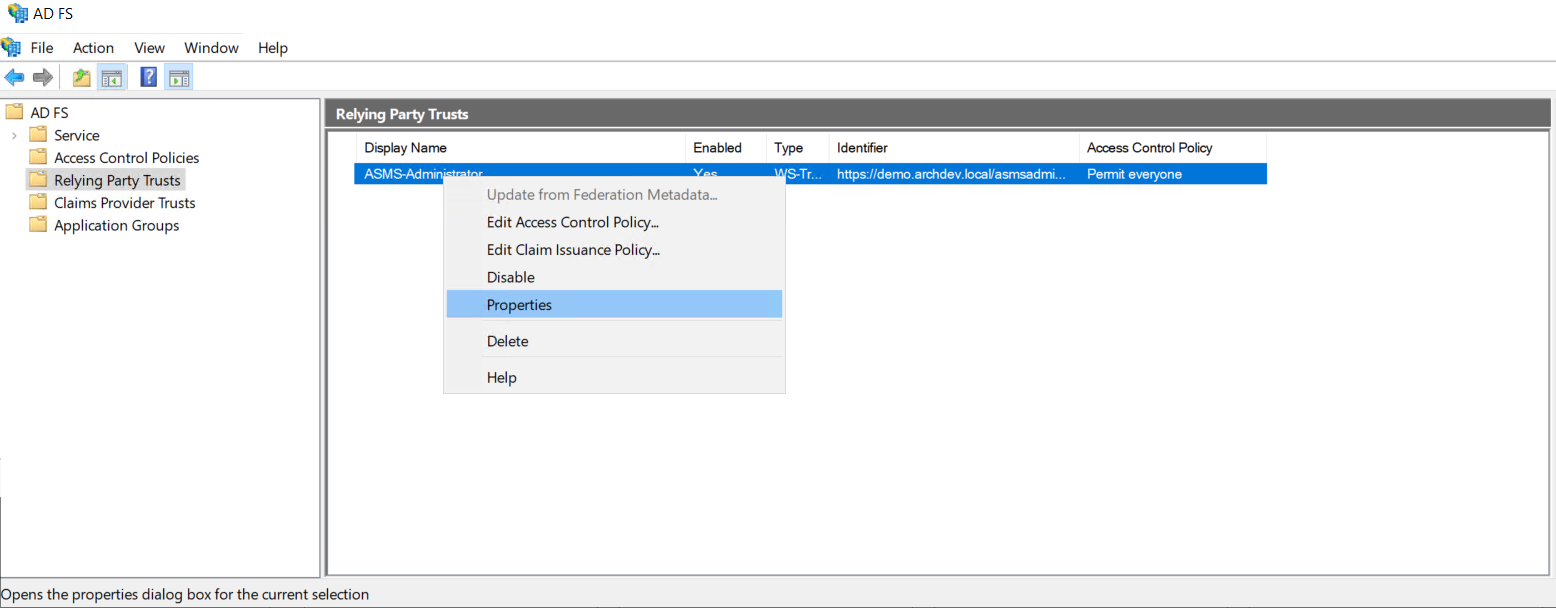
14. To add the console logout address, edit the provider created in the ADFS, right-click on the provider name in the Properties option. You can also do this by choosing the name of the provider and left-clicking on it.
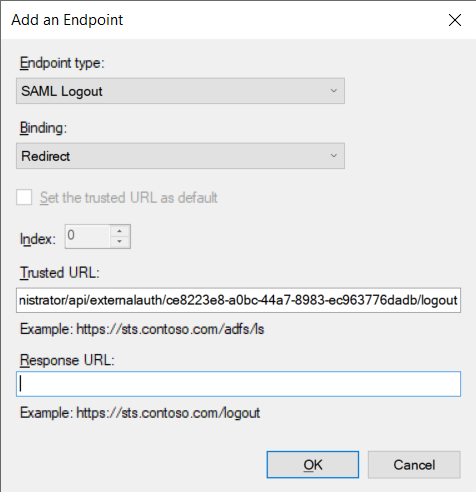
15. Select the tab option Endpoints and click the Add SAML… .

16. Select SAML Logout in the Endpoint Typelater Redirect in the Binding and finally enter the address Logout URL of the corresponding console.
17. Haga clic en el botón OK y cierre la ventana de propiedades, haga clic de nuevo en el botón OK.
Azure Active Directory
Get supplier data
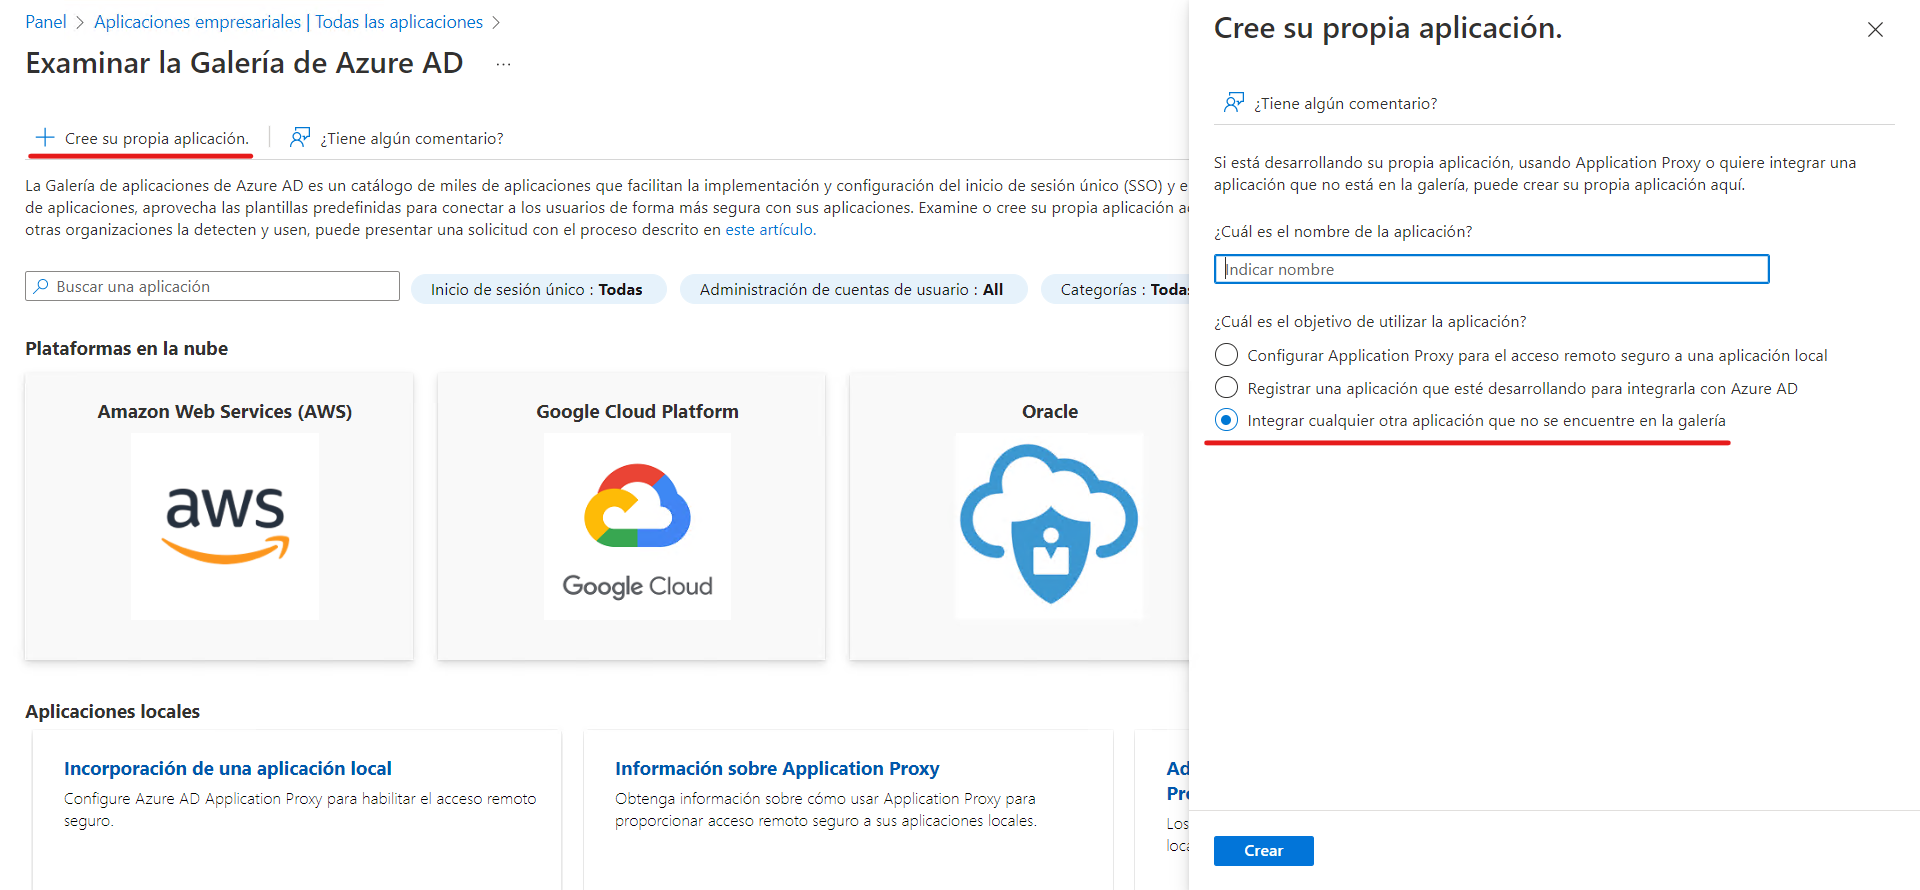
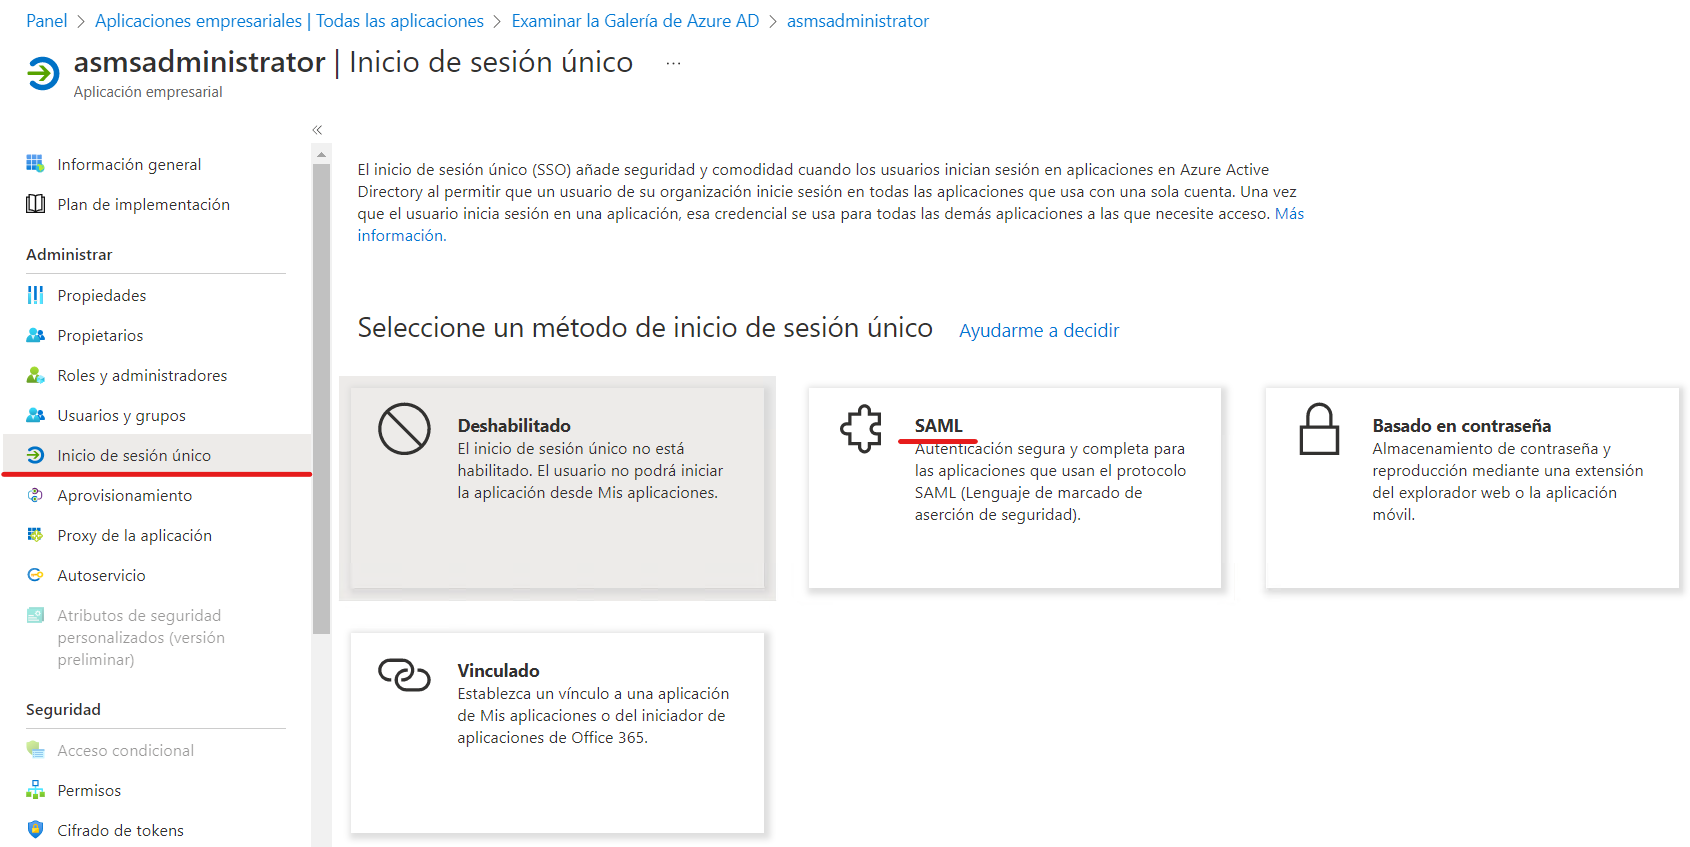
First, create an enterprise application through the Azure portal.

Select the option Create your own app and in the window that you enable, enter a name for the app and verify that the option is enabled Integrate any other apps that aren’t in the gallery; then click the Create. Wait a moment while the app is created.
After the app has been created, select the Single sign-on, then select SAML how Single sign-on method.
On the page Configuring Single Sign-On with SAMLicon, click the Basic SAML Configuration to edit the settings.
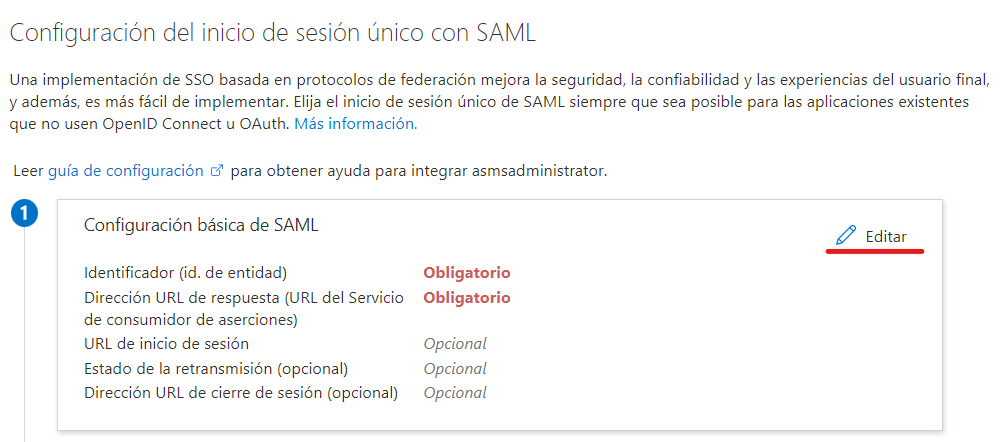
In the Basic SAML Configuration, follow these steps:
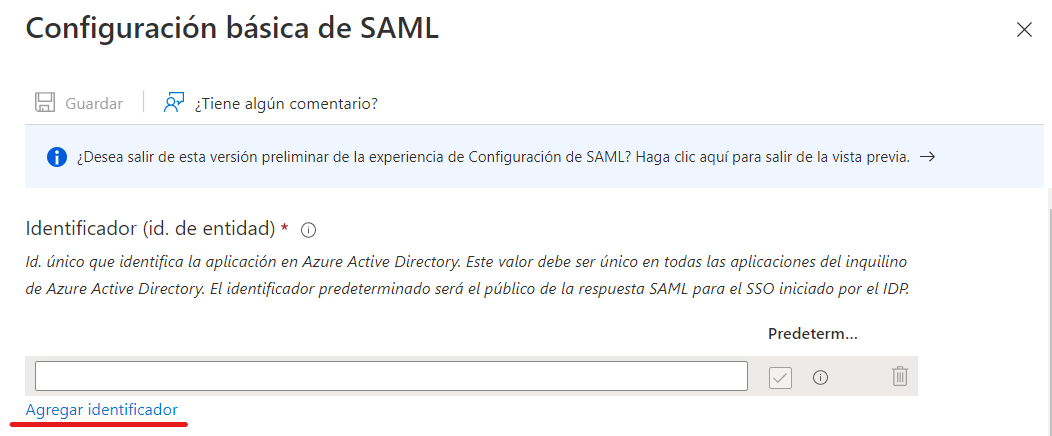
Add an identifier and type the Console URL ASMS.
Example
https://dominio.com/asmsadministrator/
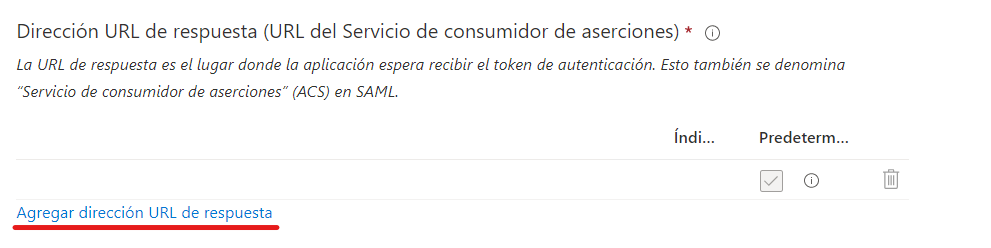
Subsequently, add a Reply URL and type in the text box the Login URL of the ASMS console.
Example
https://dominio.com/asmsadministrator/api/externalauth/XXXXXX-XXXX-XXXX-XXXX-XXXXXXXXXX/login
Finish the setup by selecting the Save.
You can now copy the following values:
Login URL that corresponds to the field Login URL in the ASMS Management Console’s external authentication settings.
Azure AD ID that corresponds to the field Identity Identifier in the ASMS Management Console’s external authentication settings.
For the Logout URL field, use the following address:
https://login.microsoftonline.com/common/wsfederation?wa=wsignout1.0

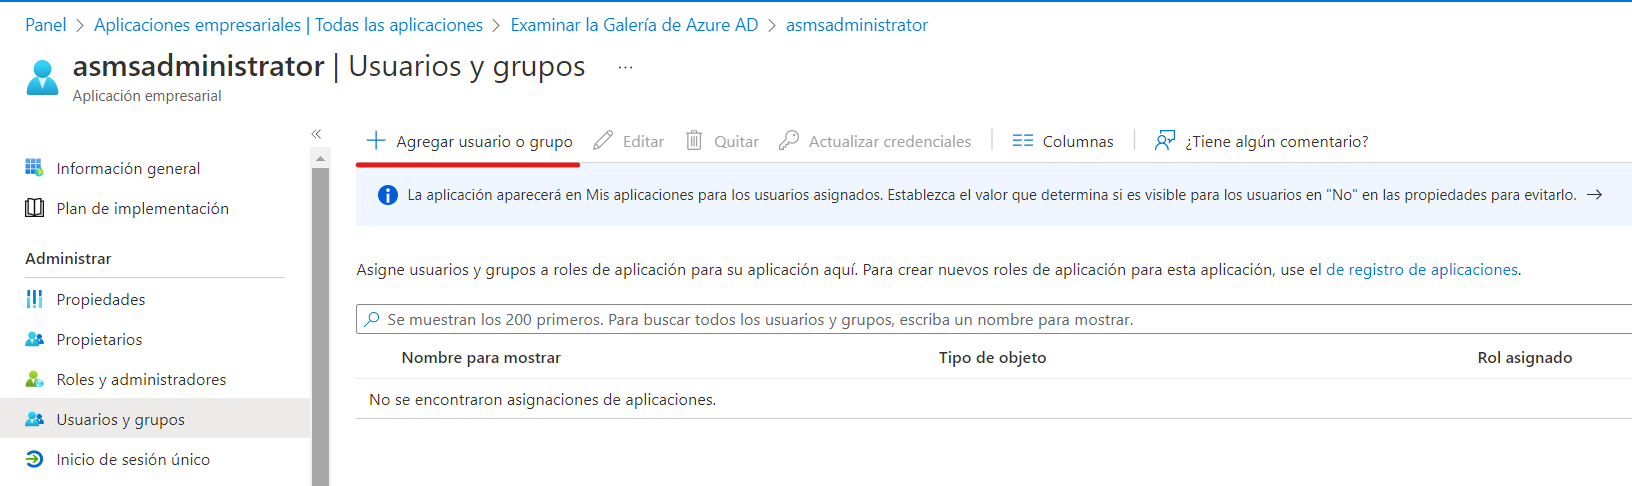
Remember to grant permissions to users who can access the app through the Users and groups.
Login validation
* The user who logs in must be previously configured so that they can enter the corresponding console.
In the login window of the console that has been configured, you will find a button with the name of the configured provider at the bottom of the window.
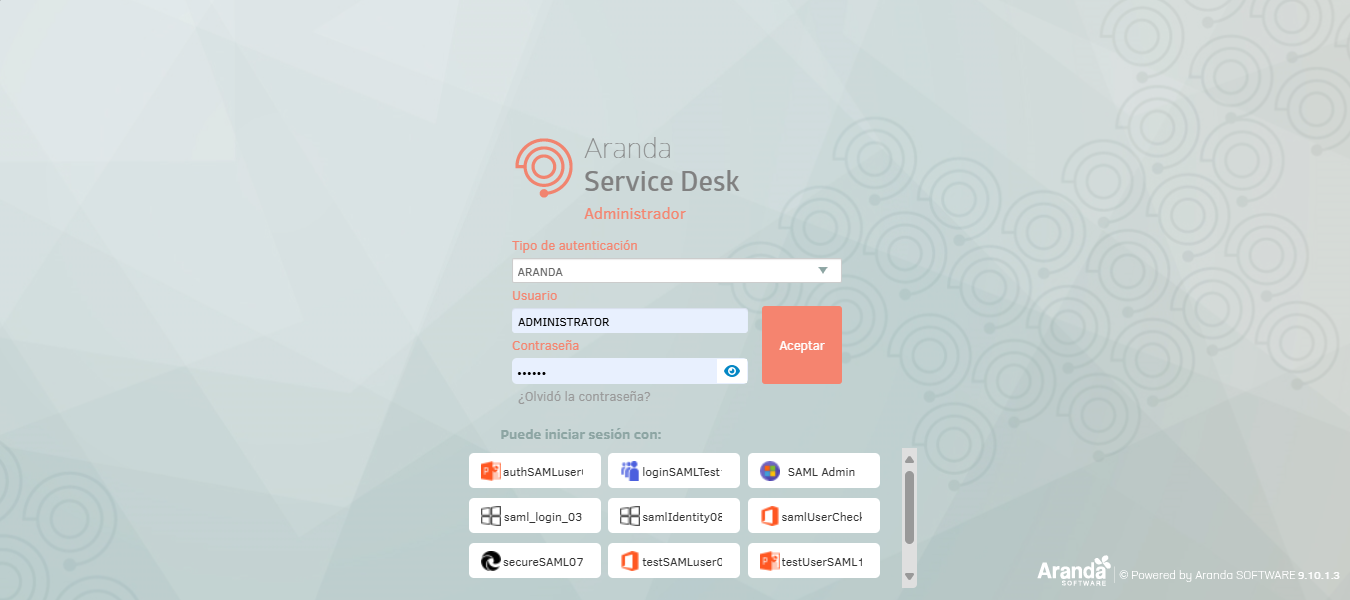
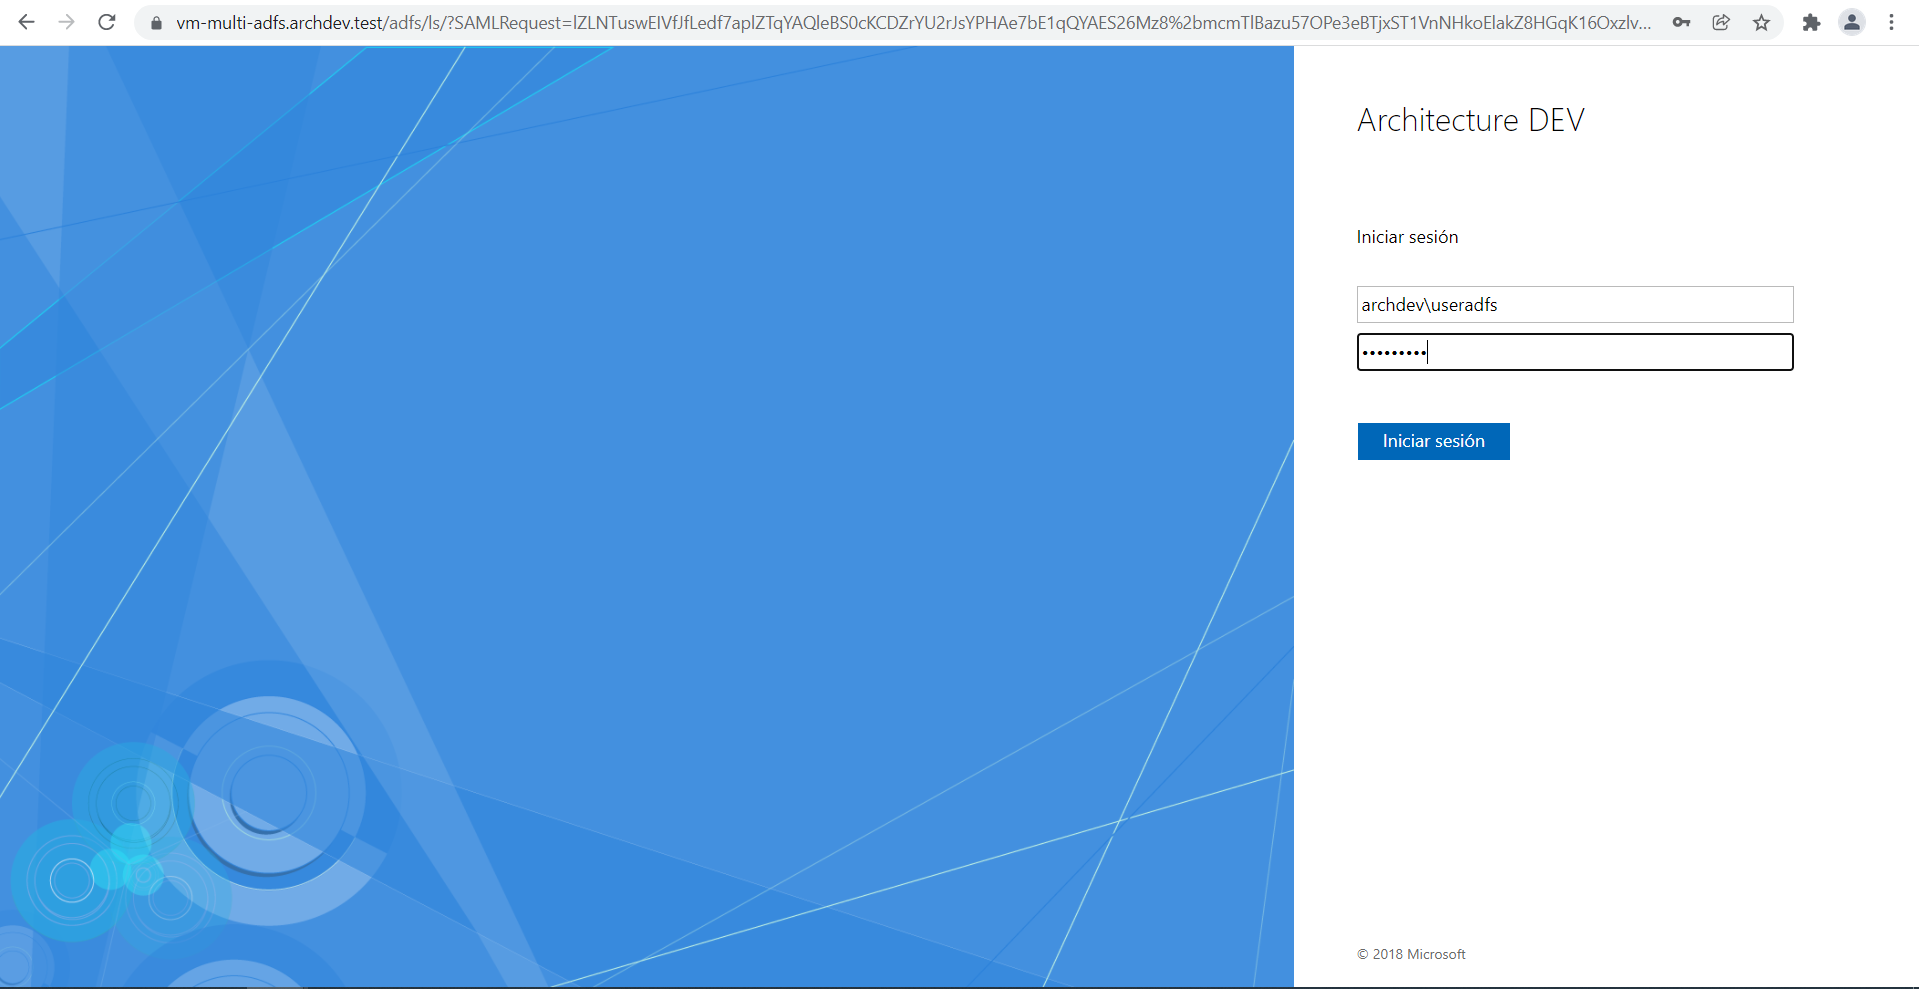
Clicking on the button redirects you to the authentication provider, here you can enter the corresponding login data.
At the end of the authentication process, you will be automatically redirected to the console and you will be able to see the authenticated user reflected.
