The Lightweight Directory Access Protocol allows access to an ordered directory service to search for information in a network environment. LDAP is also considered a database for querying.
Configuring LDAP Provider Type
1. You can configure the authentication type and import users from the company’s Active Directory, synchronizing the data from the Enterprise Directory for users and groups. To configure LDAP, log in to the ASMS Management Console, in the General Settings from the main menu, select the LDAP. In the information view, select the New and complete the basic information requested on the Details and Business Directory tabs.
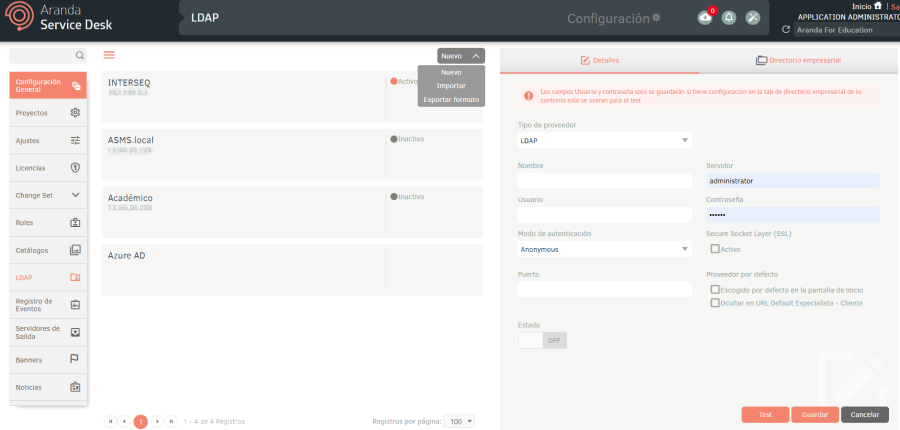
2. In the LDAP Detail View in the ASMS Management Console, select the Details, where you can fill in the following information:
| Fields | Description |
|---|---|
| Supplier Type | Select LDAP Provider Type |
| Name | Enter the name with which the directory will be identified. |
| Server | Enter the name and/or IP where the domain is located. |
| User | Enter the name of a user with read permissions to query the active directory (a user whose password never expires is recommended). |
| Password | Enter the password of the previously entered user. |
| Authentication Mode | Select the authentication mode set in your active directory to allow connections. |
| Secure Socket Layer (SSL) | Check the box if you use encryption-based internet security protocol for the connection to the server. |
| Port | Enter the port to establish communication with the LDAP server |
| Default Provider | Check the box if you want the authentication type to appear by default when you log in to ASMS sites. |
| Use DN Resolution (Required by OpenLDAP) | Check the box if you are configuring user synchronization with an active directory using OpenLDAP. |
| State | Define whether LDAP is to be displayed in the authentication type of the Specialist, Administration, and Client consoles. |
3. Once you have filled out the form, click on the Test button to verify that the connection to the active directory is successful. A confirmation message will appear at the bottom of the screen.
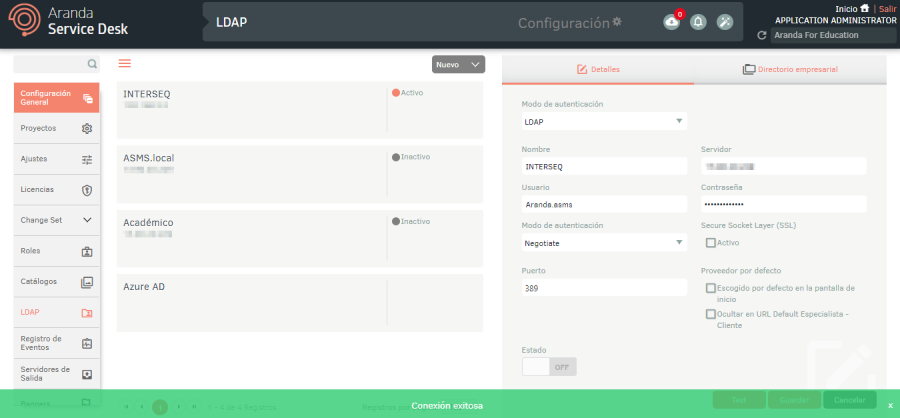
⚐ Note: If the users are previously created and only require the LDAP to be created for authentication, it is not necessary to fill in any data in the Business Directory. Remember that when you click Save The username and password filled in will not be stored.
4. If you want to synchronize users in the Active Directory, select the Business Directory, here you can fill in the attributes in each of the fields with the information you want to synchronize and the user and group filters.
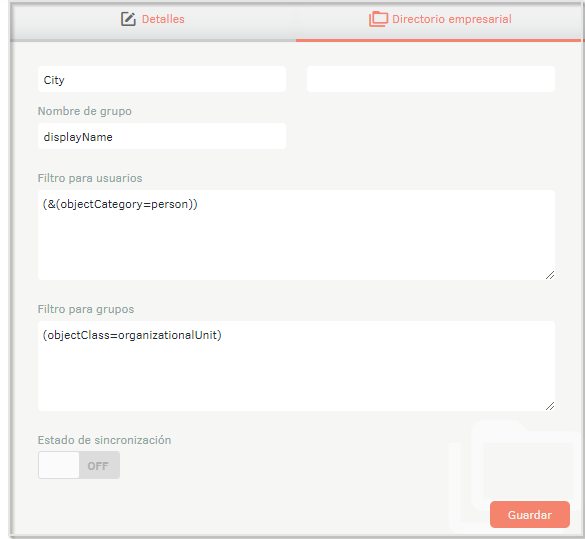
⚐ Note:
- Fields in the Enterprise Directory section must comply with LDAP syntax filters to synchronize information.
- For active directories configured with OpenLDAP, fill in the Default Name Context.
5. Clicking Save enables the Synchronization, where you can fill in the following information:
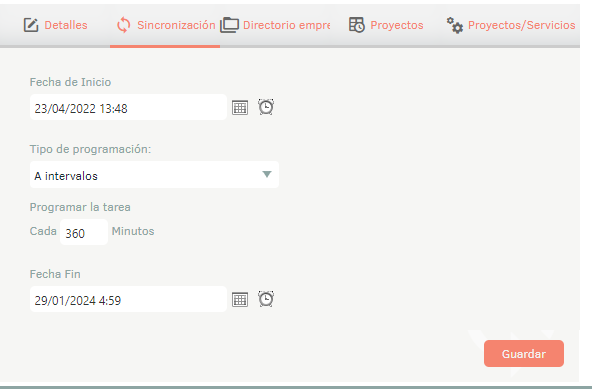
⚐ Note: In Cloud environments, the minimum standard synchronization time is 5 hours. It is recommended to allocate a longer time to ensure optimal operation of the tool.
| Fields | Description |
|---|---|
| Start Date | Set the date and time you want the sync to start. |
| Programming Type | Choose the desired frequency of synchronization, the options are: Once: Syncs only once on the defined start date. At intervals: Synchronizes at user-defined minute intervals. Daily: Synchronizes at user-defined intervals of days. Weekly: Syncs at user-defined intervals of weeks. Monthly: Synchronizes at user-defined intervals of months. End Date: Set the date and time when user synchronization will be suspended. |
6. When you finish setting up the tab information Synchronization, select the Business Directory and turn on syncing.

Configuring Microsoft Entra ID Provider Type
7. To set up user synchronization with Microsoft Entra ID, go to the ASMS Management Console in the
of General Settings from the main menu, select the LDAP. In the information view, select the New
and fill in the basic information requested on the Details, Synchronization, and Enterprise Directory tabs.
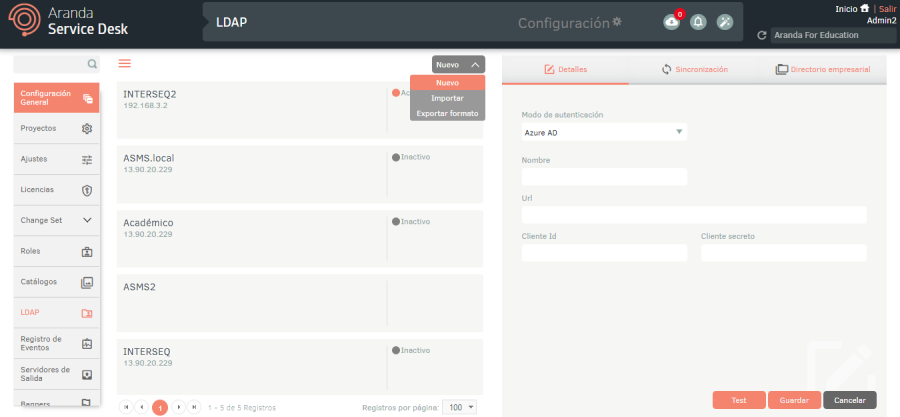
8. In the LDAP Detail View in the ASMS Management Console, select the Details, where you can fill in the following information:
| Fields | Description |
|---|---|
| Supplier Type | Select Azure AD provider type |
| Name | Enter the name with which the directory will be identified. |
| URL | Fill in the authorization URL Example (https://login.microsoftonline.com/ + Tenant/Directory ID) |
| Client Id | Fill in the customer ID |
| Secret Client | Fill out the client’s secret. |
| Notes | Description |
|---|---|
| 1 | To obtain the following data (URL, client id, and secret client), the following capabilities must be configured in Azure beforehand, described in the Microsoft Entra ID Sync Guide |
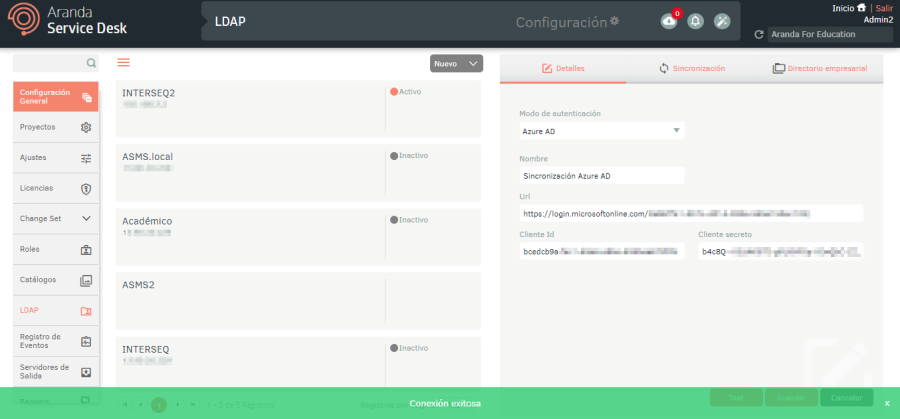
9. Once you have filled out the form, click on the Test button to verify that the connection to the active directory is successful. A confirmation message will appear at the bottom of the screen.
10. In the LDAP Detail View in the ASMS Management Console, select the Synchronization, where you can fill in the following information:
| Fields | Description |
|---|---|
| Start Date | Set the date and time you want the sync to start. |
| Programming Type | Choose the desired frequency of synchronization, the options are: Once: Syncs only once on the defined start date. At intervals: Synchronizes at user-defined minute intervals. Daily: Synchronizes at user-defined intervals of days. Weekly: Syncs at user-defined intervals of weeks. Monthly: Synchronizes at user-defined intervals of months. End Date: Set the date and time when user synchronization will be suspended. |
11. Select the Business Directory, here you can fill out the attributes in each of the fields with the information you want to sync and the filters of users and groups.
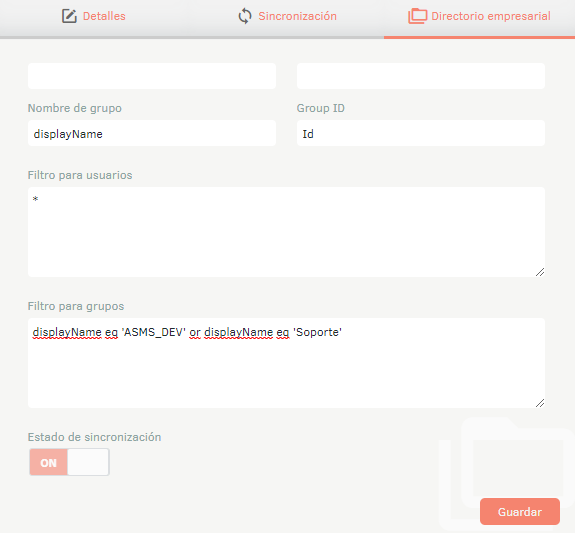
⚐ Note: The fields to be mapped are case-sensitive, and the correct use of this type of letters is recommended when filling out the information.
For information about user filters and attributes for field mapping, you can consult Microsoft’s documentation at the following links:
| Filter | Example |
|---|---|
| Filter to sync all users | * |
| Filter to synchronize users from a specific group. | displayName eq ‘ASMS_DEV’ |
Note: The countryside Department of the LDAP will be synchronized in the Department number on your console.
12. When you finish configuring the LDAP information, click Save to confirm changes made; in the Detail View of the ASMS console, the Projects and Projects/Services.
⚐ Note: The configuration of a Microsoft Entra ID provider LDAP only applies to user synchronization; that is, this configuration will not be displayed in the authentication type from the administration, specialist and client consoles of Aranda Service Management.
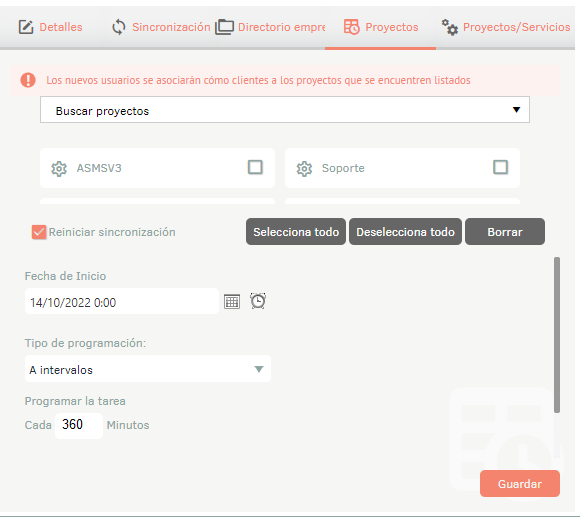
13. In the LDAP Detail View in the ASMS Management Console, select the Projects, where you can set up automatic association of synced users to one or more projects as customers. See 3.5.1 Customers. Fill in the fields as follows:
14.In the search field, enter the name of the project, select it, and click Add.
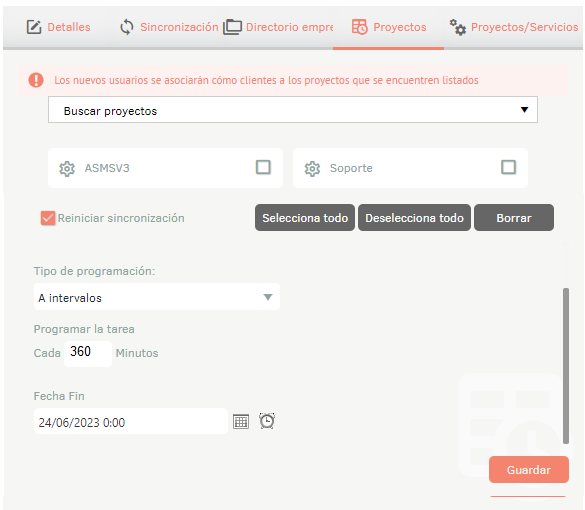
| Fields | Description |
|---|---|
| Start Date | Set the date and time you want the association to start. |
| Programming Type | The scheduling options are: |
Once: The user association runs only once on the defined start date.
At intervals: The association runs at user-defined minute intervals.
Daily: The association runs at user-defined intervals of days.
Weekly: The association runs at user-defined intervals of weeks.
Monthly- The association runs at user-defined intervals of months.
End date- Define the date and time when the association of users to the project will be suspended.
Mass Association of Services
15. In the LDAP Detail View in the ASMS Management Console, select the Projects/services, where you can perform bulk association of services to users through LDAP synchronization.
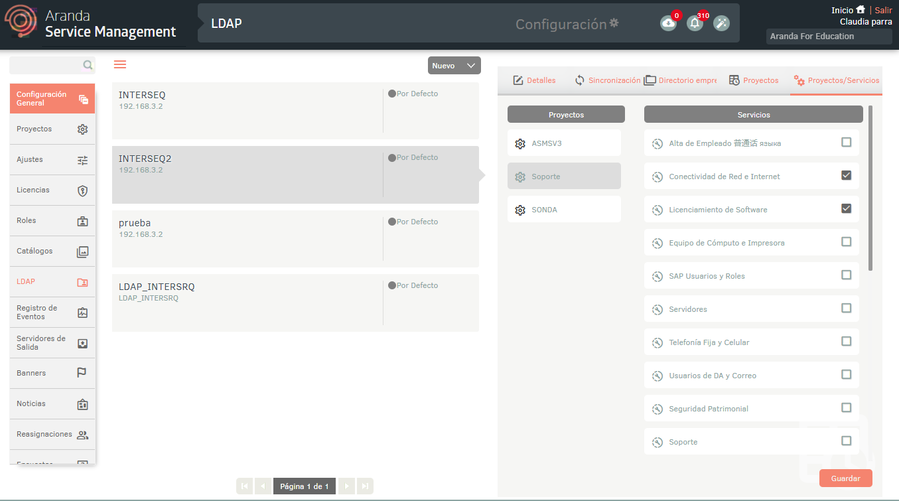
⚐ Note: for projects to be listed in this tab, they must first be associated in the Projects tab.
16. When you hover over a project, in the Services section you can display the services associated with the project.
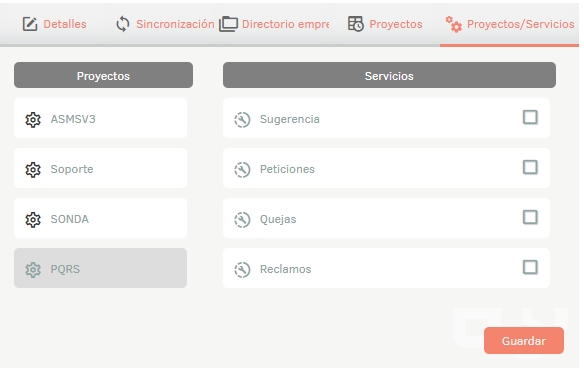
17. Mark the services that users will associate with when the synchronization runs.
18. If you require the sync to be retroactive, on the Projects Check the Restart Sync check box.
The association of users to projects and services is carried out according to the programming made in this tab.
⚐ Note: The minimum synchronization time is 6 hours. It is recommended to allocate a longer time to ensure optimal operation of the tool.
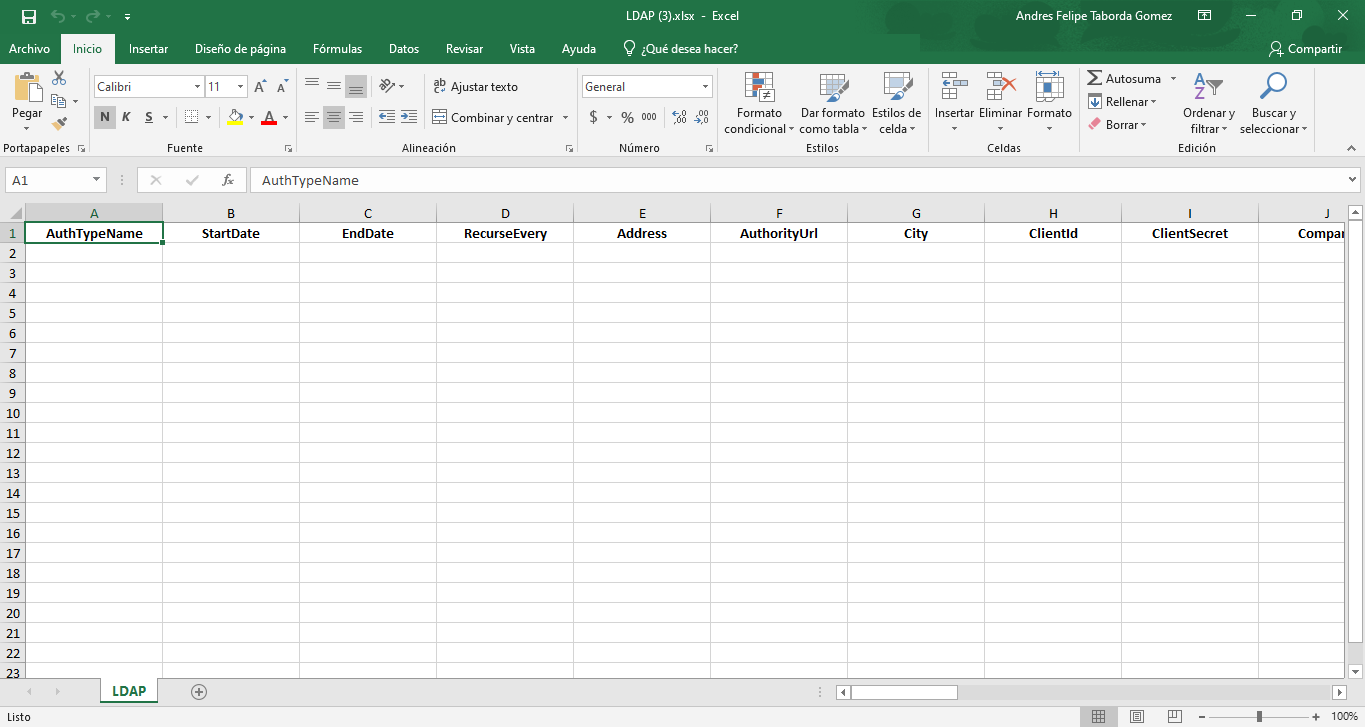
Export Format
The export of this module will bring the Excel template without information and in it you can fill in the respective information for the import.